Create an event
Create an event
An event groups the people who earn a certificate (a course, workshop, conference or award) and says which design their certificates use. This page shows how to create one.
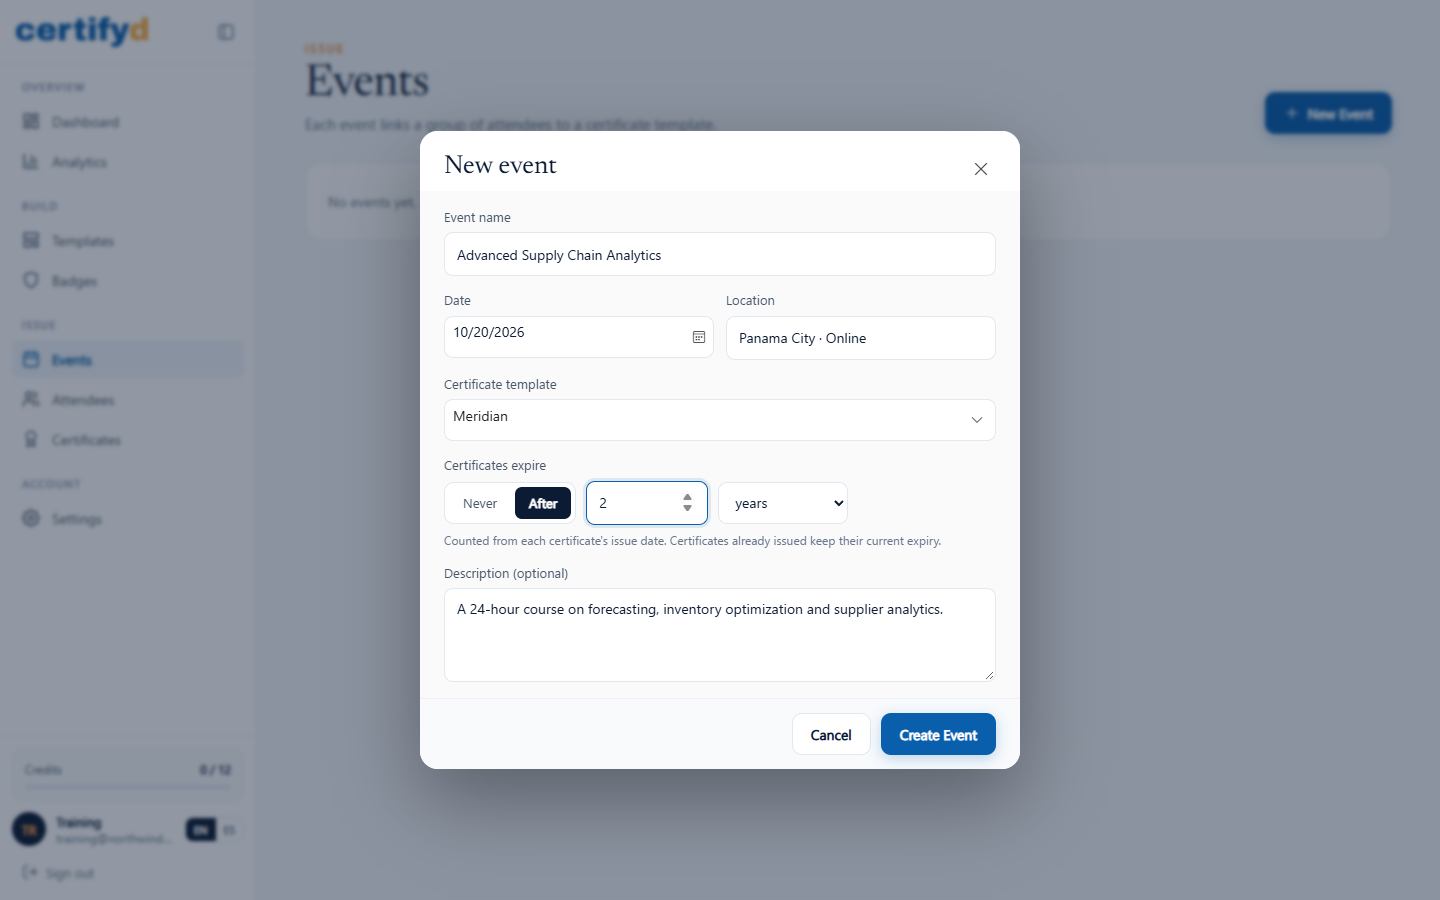
- Open Events and choose New Event.
- Fill in the details:
- Event name: printed on certificates as the course or event title.
- Date and Location.
- Certificate template: the design to use.
- Certificates expire: choose Never, or After a number of months or years. The expiry is counted from each certificate's issue date and printed as "Valid until" on designs that show it.
- Description (optional): shown on the recipient's verification page.
- Choose Create Event.
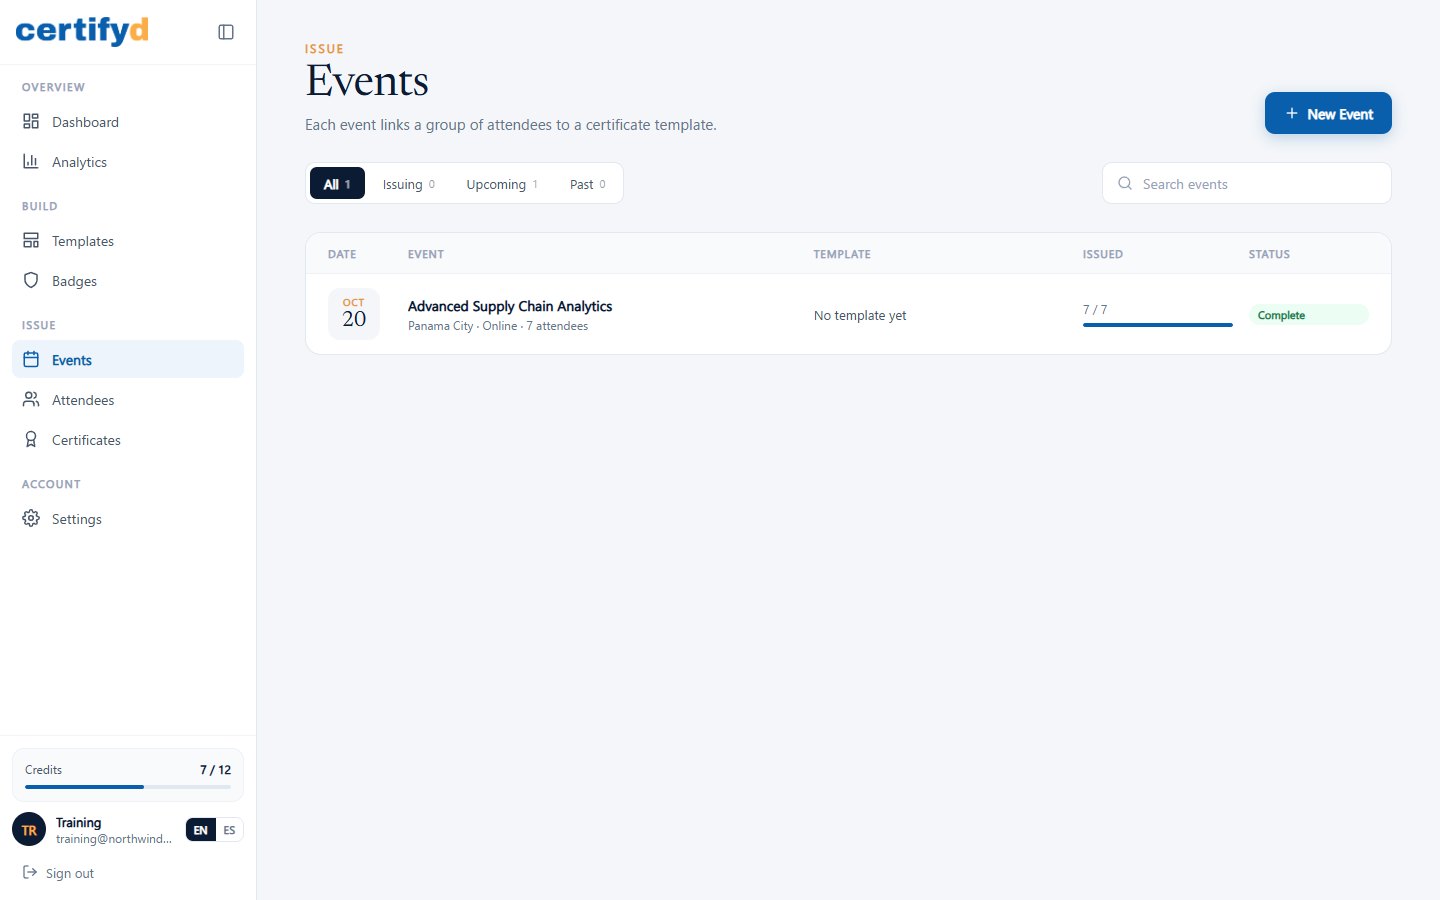
Your events are listed on the Events page with their date, template, how many certificates have been issued, and a status (Upcoming, Issuing, Complete or Past).
The event page
Open an event to manage it. The top shows its date, location, attendee count, certificate validity and status. Tabs give you Attendees, Certificates, Registration and Settings, and the right side shows the template and progress (issued, delivered, viewed).
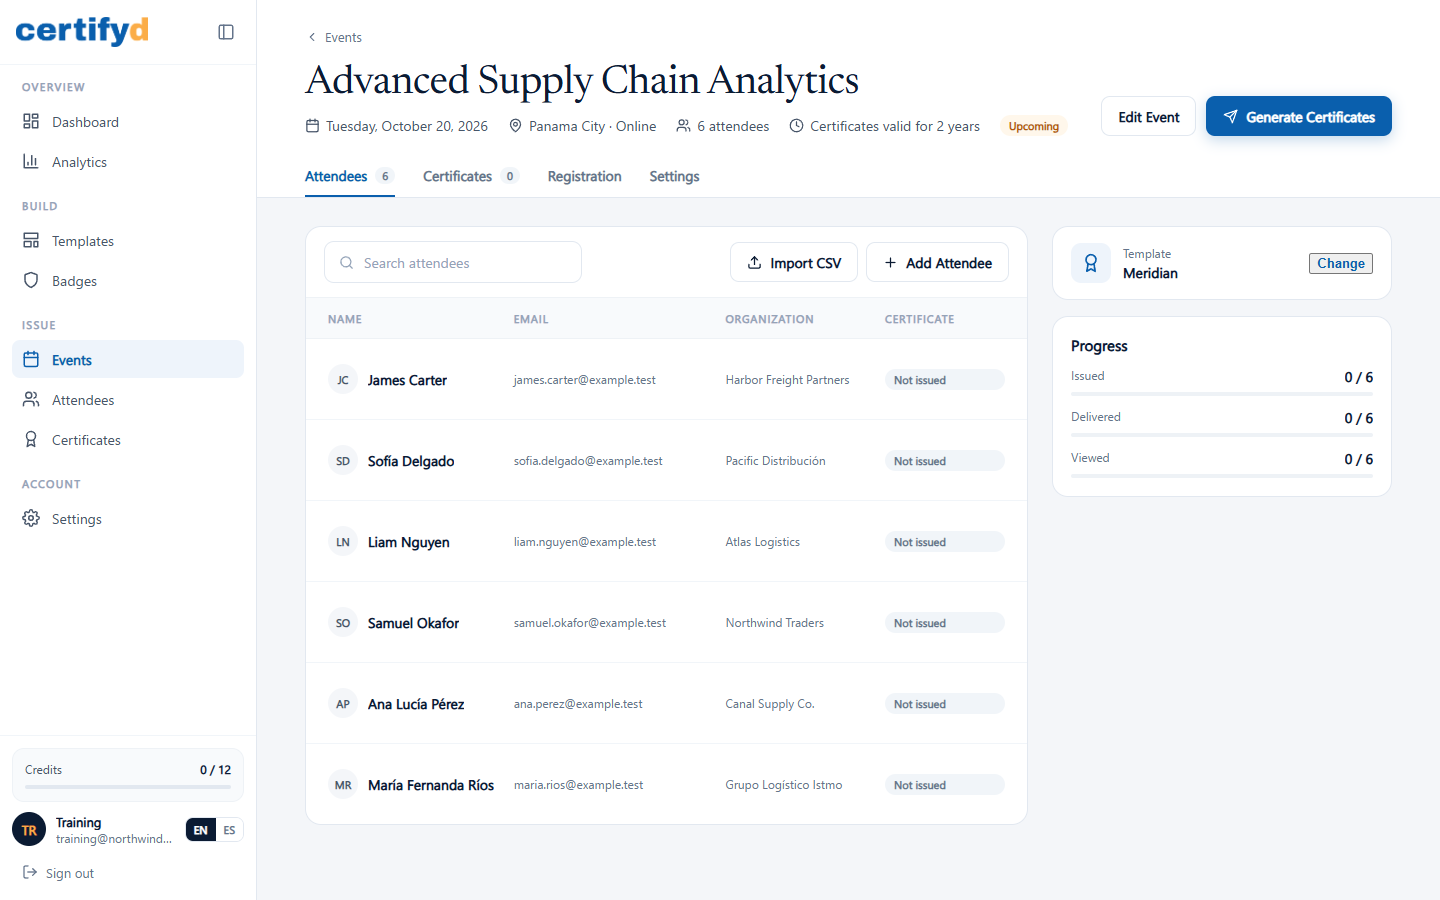
Choose Edit Event to change details. Changing the expiry only affects certificates you issue afterwards.
Next step
Was this page helpful?