Set up your branding
Set up your branding
Your branding is printed on every certificate and shown on verification pages and emails. Set it once in Settings › Branding; every certificate you issue afterwards uses it.
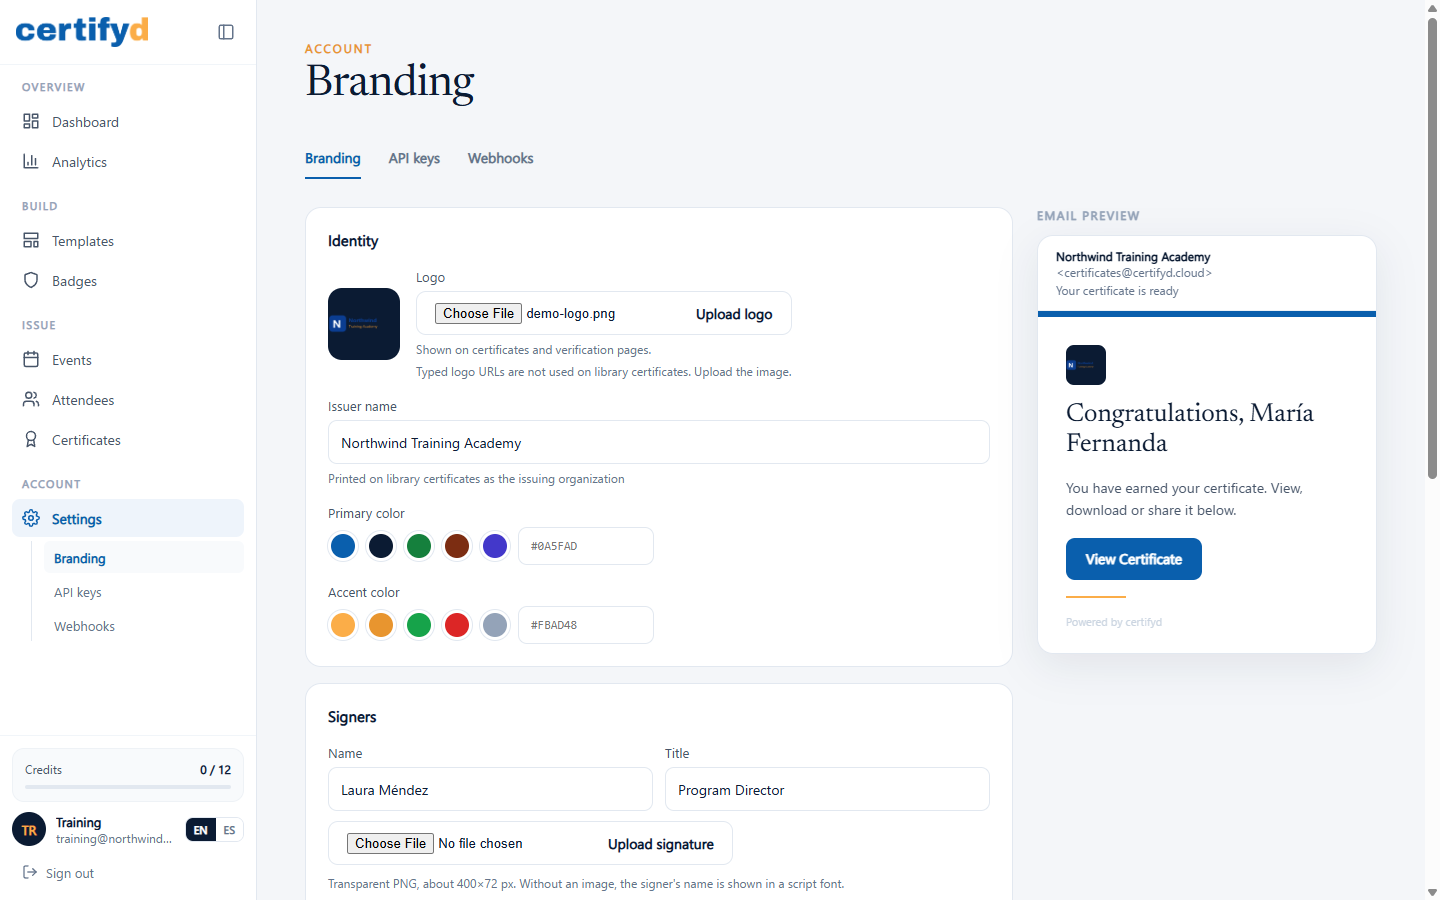
Identity
- Logo: choose Upload logo and pick a PNG or JPG. A transparent PNG looks best. The logo prints on certificates and verification pages.
- Issuer name: your organization's name as it should appear on certificates. It's optional if your logo already includes your name: with a logo and no name, the designs print just the logo.
- Primary and accent colors: the colors used by the designs and emails. Pick a swatch or type a hex code.
You need either a logo or an issuer name before you can issue certificates from the template library.
Signers
Add up to two signers with a Name and Title (for example, "Laura Méndez, Program Director"). Upload a signature image (a transparent PNG about 400 × 72 px) or leave it empty: without an image, the signer's name is printed in a handwriting-style font.
Email and domain
- From name and From email address: how certificate emails appear in the recipient's inbox.
- Footer text: a line added to the bottom of certificate emails.
- Hide "Powered by Certifyd": removes the Certifyd attribution, where your plan allows it.
The Email preview on the right updates as you type. Choose Save Branding when you're done.
Next step
Was this page helpful?