Conditional logic
Conditional logic
Applies to: anota, all plans Roles required: Editor or above (Viewers cannot open the editor) Regulatory references: none
Overview
Conditional logic makes a form react to the answers people give. With a few rules you can show a question only when it applies, make a field required in some cases, skip a page, work out a number, send a copy of the response to another address, or end with a different thank-you message or page. It's for anyone who builds forms in anota; no code is needed.
This page walks through each job, one task at a time, with the screen you should see at every step and the button or field to use outlined in green. The example is Café Aurora's Catering Order Request with logic, a three-page catering form: Your details, Delivery and Your event.
Key concepts
- Rule: one IF/THEN instruction. The form's rules are listed in Settings → Conditions, numbered Rule 1, Rule 2 and so on.
- Condition (IF): a test on one answer: a field, an operator (for example equals or is greater than) and, for most operators, a value.
- Match: whether a rule needs All conditions (AND) or Any condition (OR) to be true.
- Action (THEN): what the rule does when its conditions are met. A rule can have several actions.
- Hidden (shown by a rule): an option under Appearance in a field's properties. A field with this option stays off the public form until a Show field action reveals it. Headings, paragraphs and images have it too, so a note can appear only when it applies.
- Rule order: rules run from top to bottom, so a later rule can override an earlier one (see How rules are applied).
Task 1 — Open the Conditions panel
Prerequisites
- A role of Editor or above in the workspace (see Roles and permissions).
- The form open in the form editor.
Step-by-step
Click the Settings tab at the top of the editor, then click Conditions (Conditional logic) on the left. The number next to it is how many rules the form has.
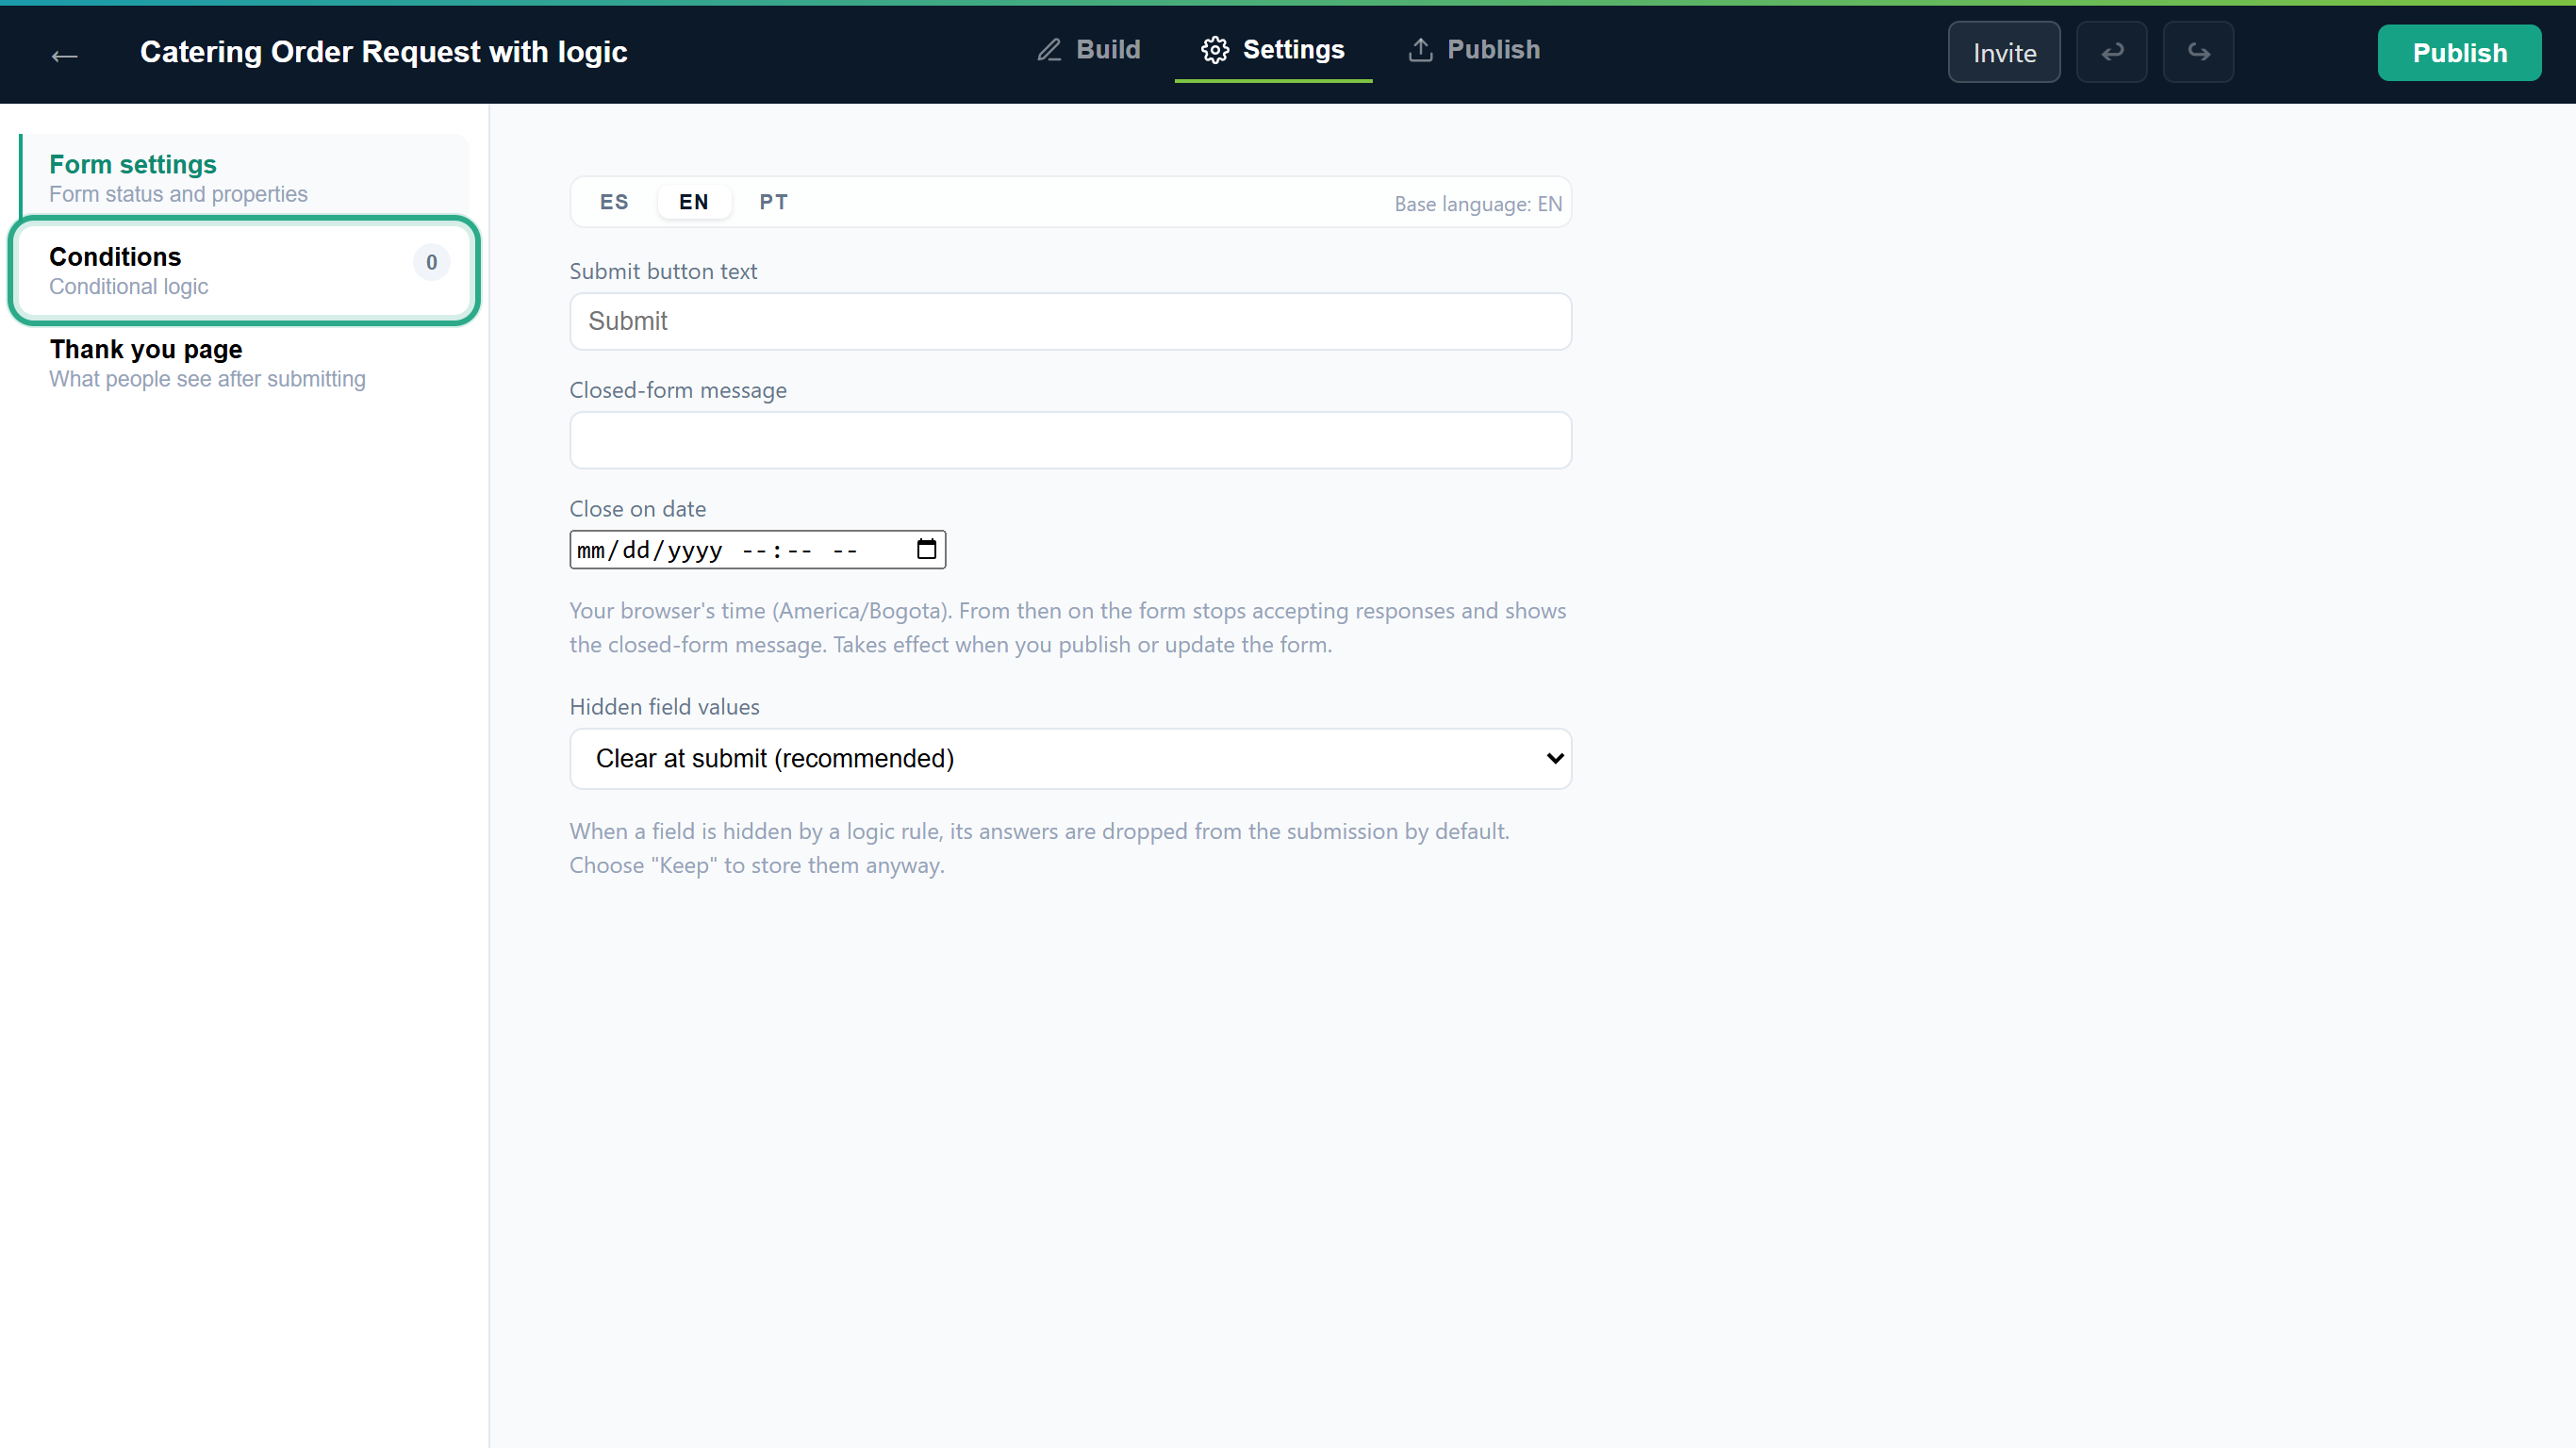 Conditions sits between Form settings and Thank you page.
A form without rules shows a greyed-out example (IF City equals Panamá THEN Show Branch) and the message No rules yet. Add one to show, hide, calculate, or route based on answers. Every rule starts with + Add rule. ← Back returns to the other settings.
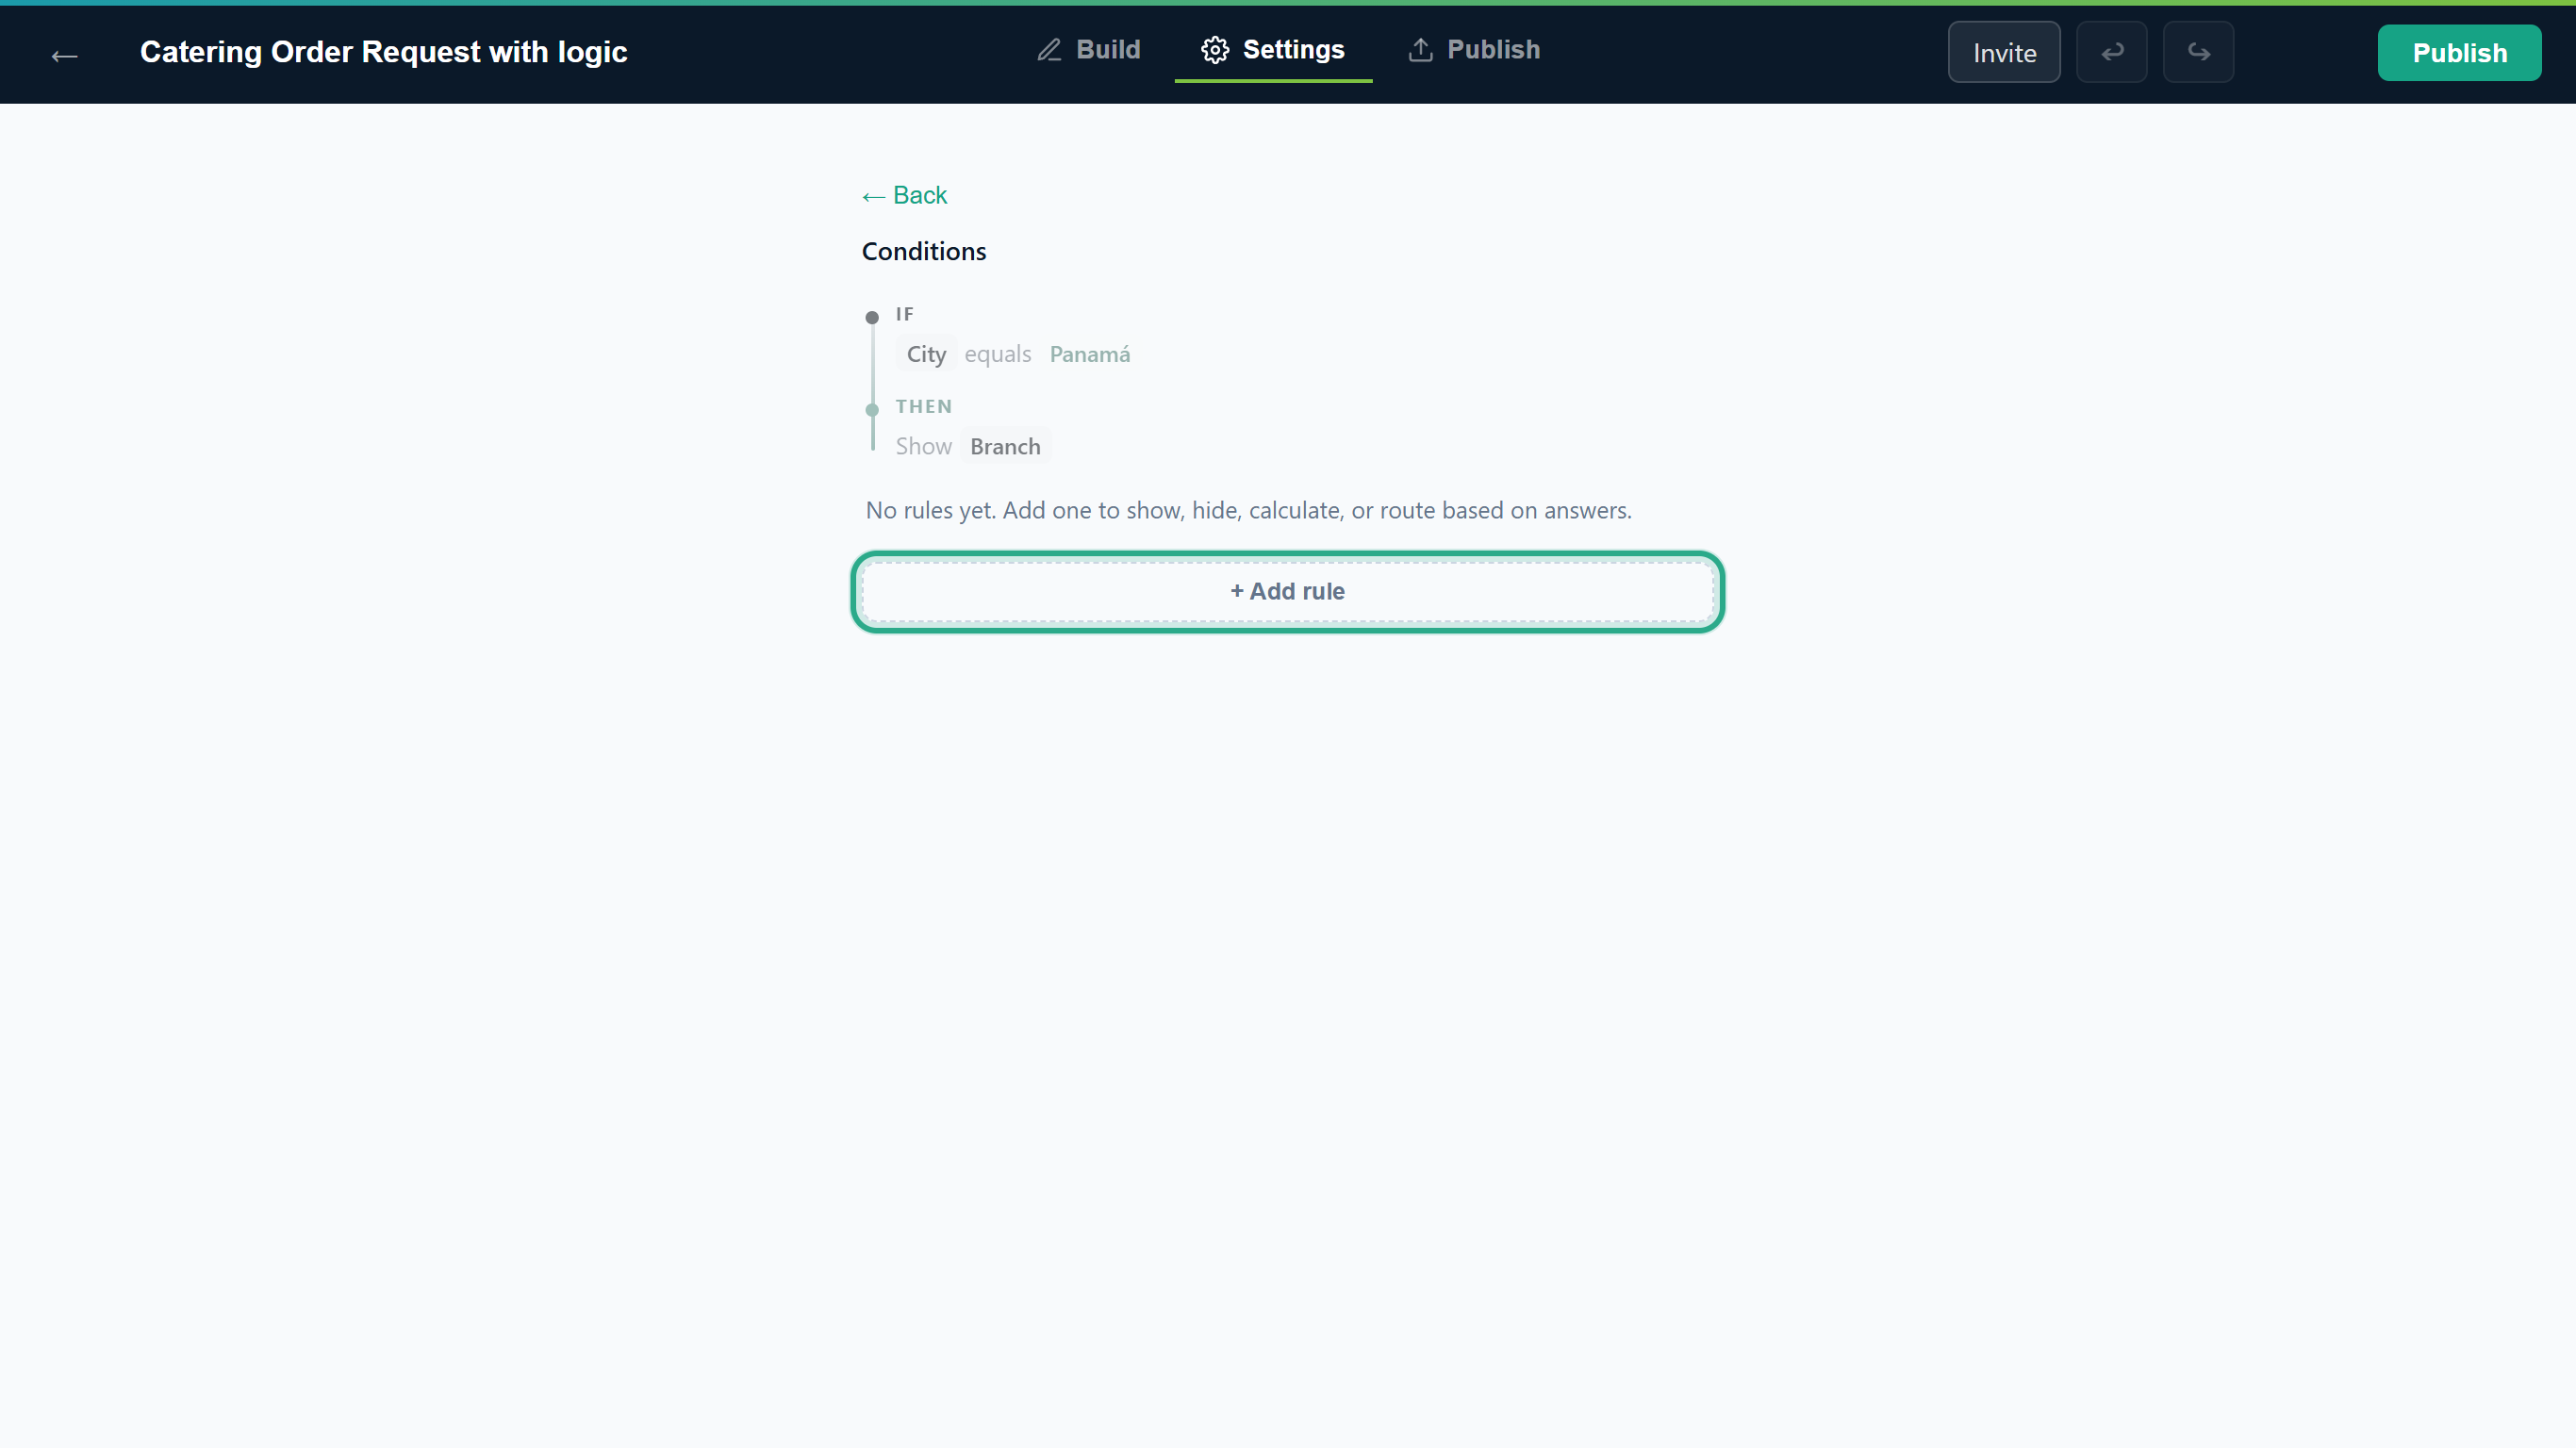 The empty Conditions panel. + Add rule creates your first rule.
Result
You know where rules live. The next tasks add real rules to the catering form.
Task 2 — Show a field only when it applies
Café Aurora needs to know about allergies only for the Full brunch package. The Dietary requirements field should appear when someone picks that package.
Prerequisites
- The form has the field you want to show (here a Long text field, Dietary requirements) and the field the rule checks (the Which package would you like? dropdown).
Step-by-step
On the Build tab, select Dietary requirements and, in Properties under Appearance, tick Hidden (shown by a rule). The field gets a hidden badge on the canvas. It stays visible in the editor, but people filling in the form won't see it until a rule shows it.
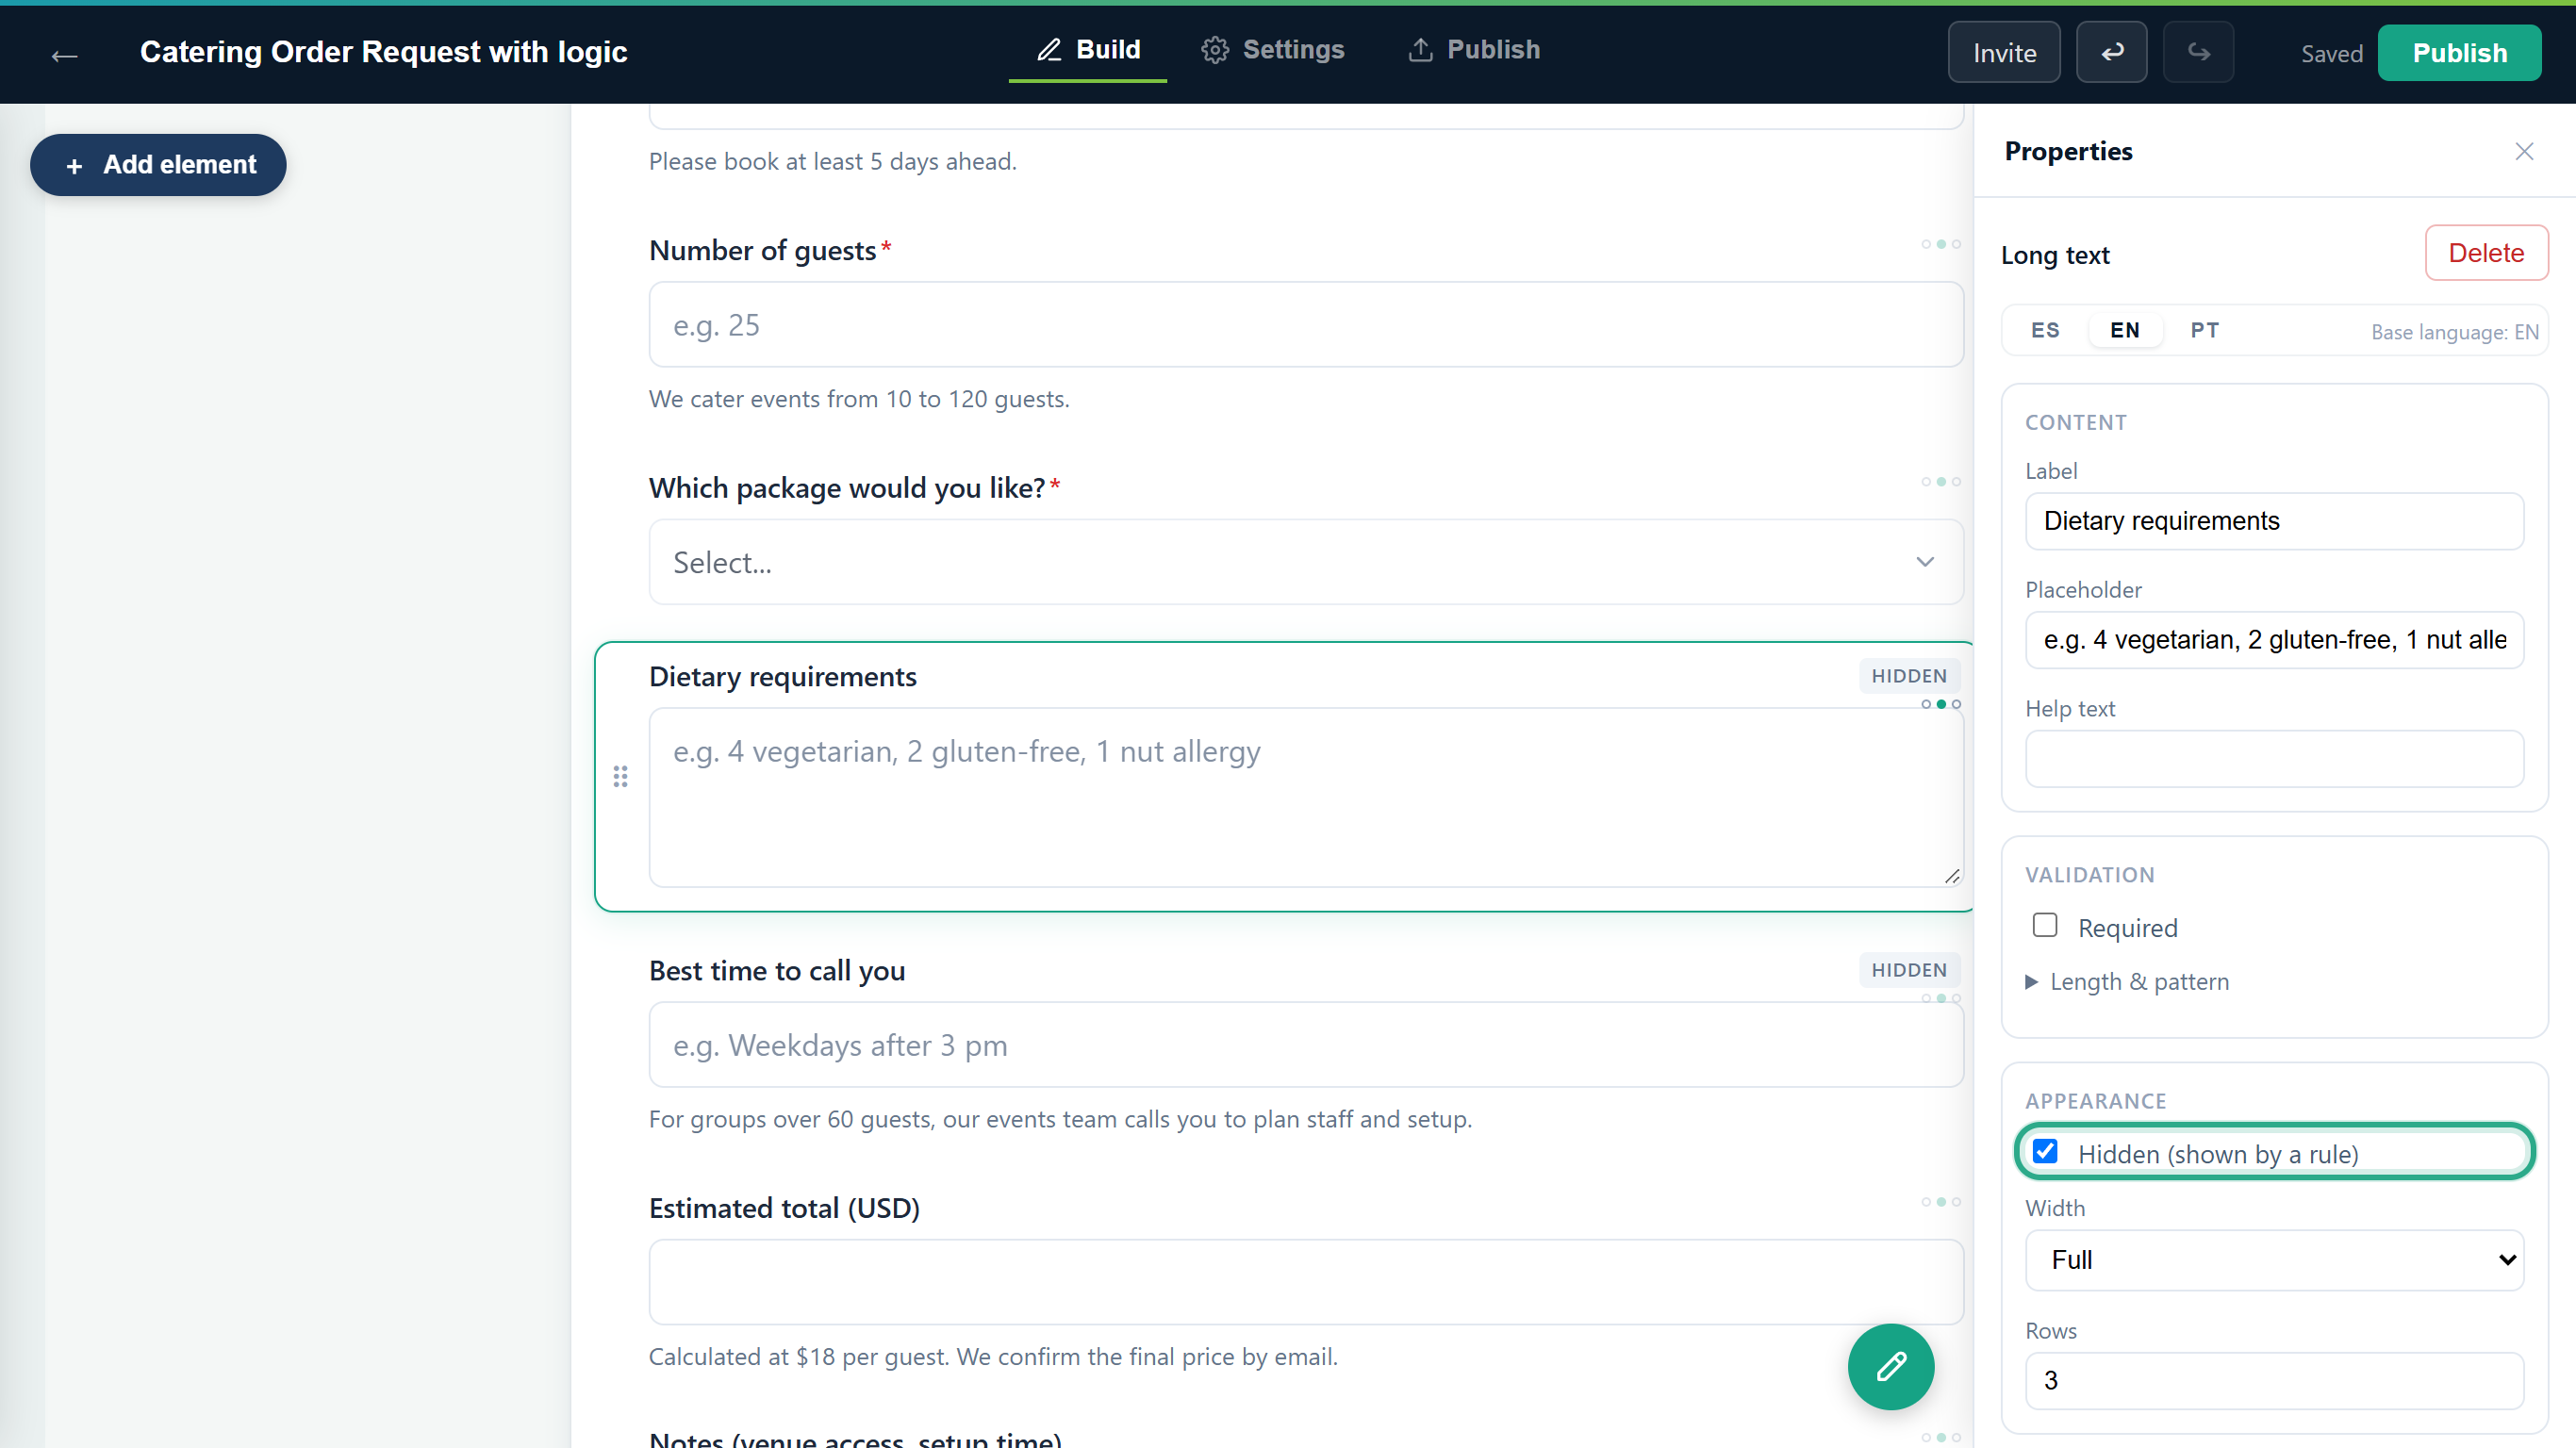 Without this option a Show field action has nothing to reveal.
Go back to Settings → Conditions and click + Add rule. The Edit rule screen opens with an empty IF section and an empty THEN section. Click + Add condition.
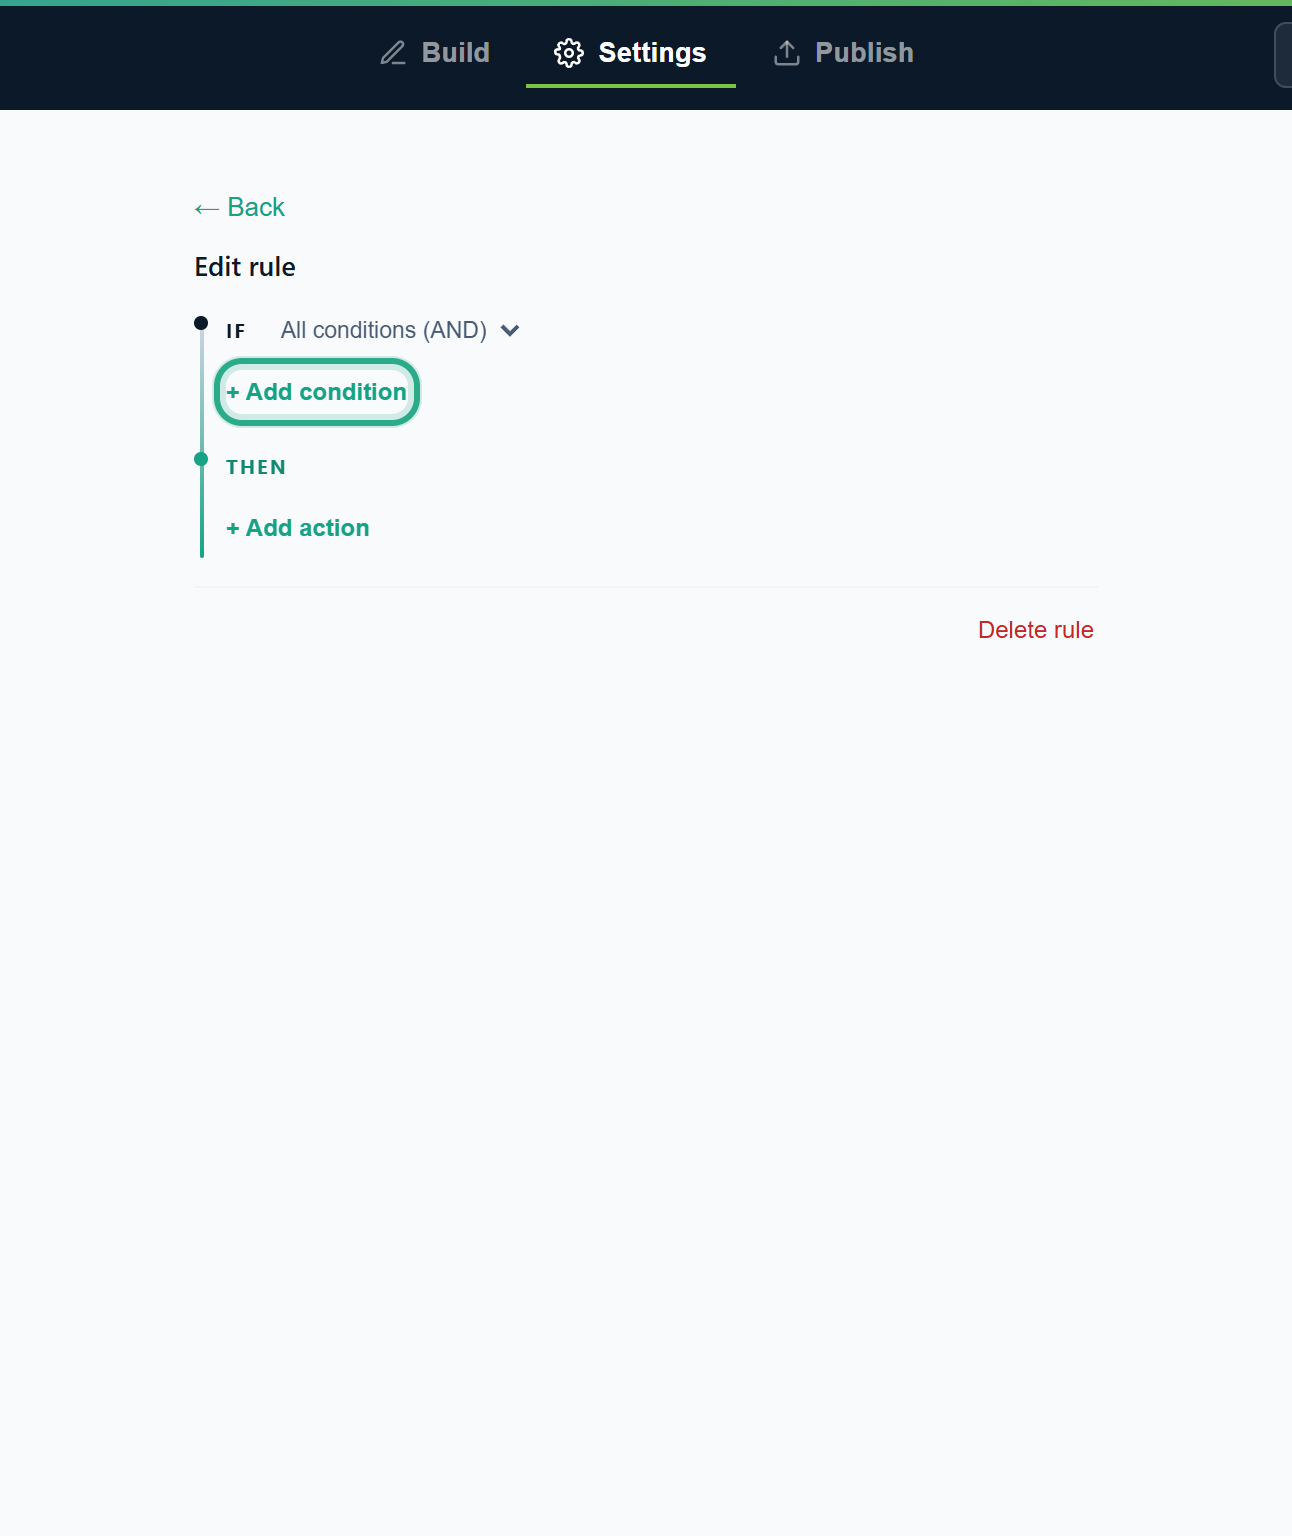 A new rule. Start with its condition.
In the condition, pick the field (Which package would you like?), the operator (equals) and the value (Full brunch). For Dropdown, Single choice and Multiple choice fields the value list shows the field's own options; for other fields you type the value. The operators depend on the field type (see the operator reference). ✕ removes the condition.
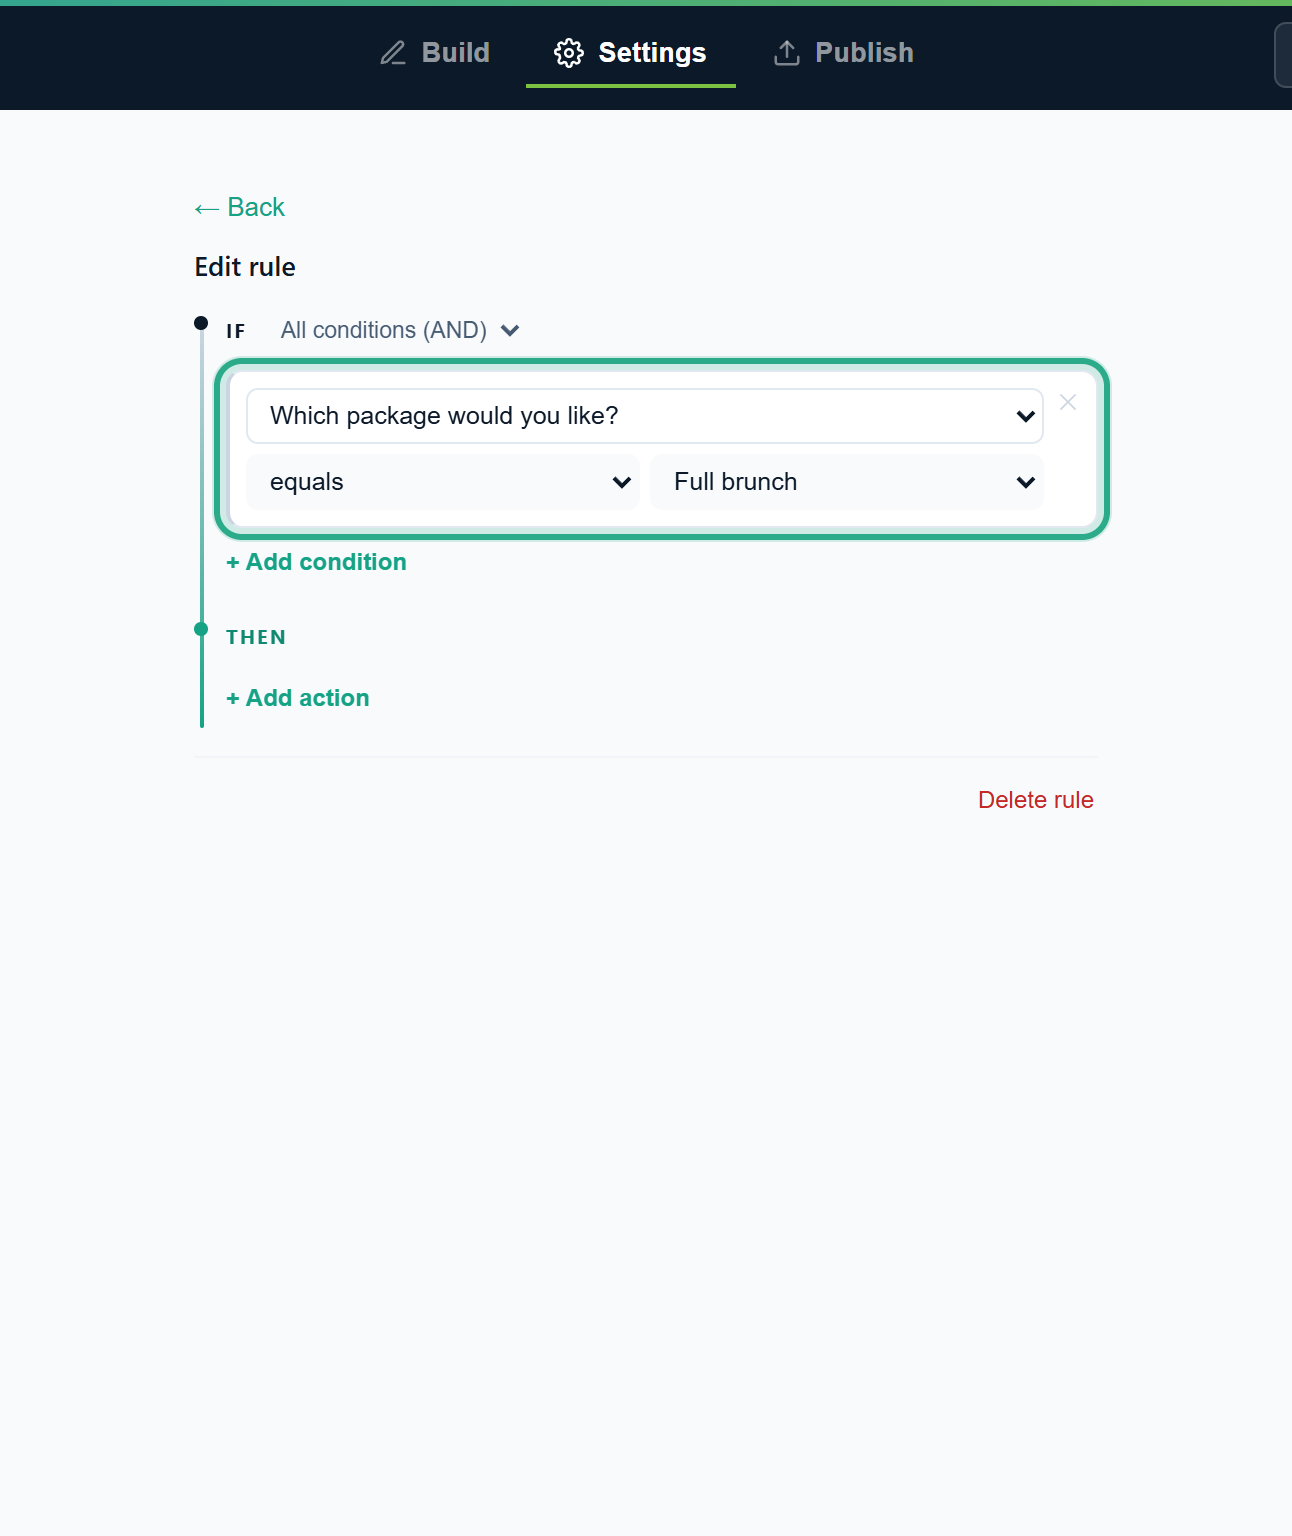 The rule applies when the package is Full brunch.
To test more than one answer, click + Add condition again. The list next to IF decides how they combine: All conditions (AND) means every condition must be true; Any condition (OR) means one is enough. With a single condition, leave it as it is.
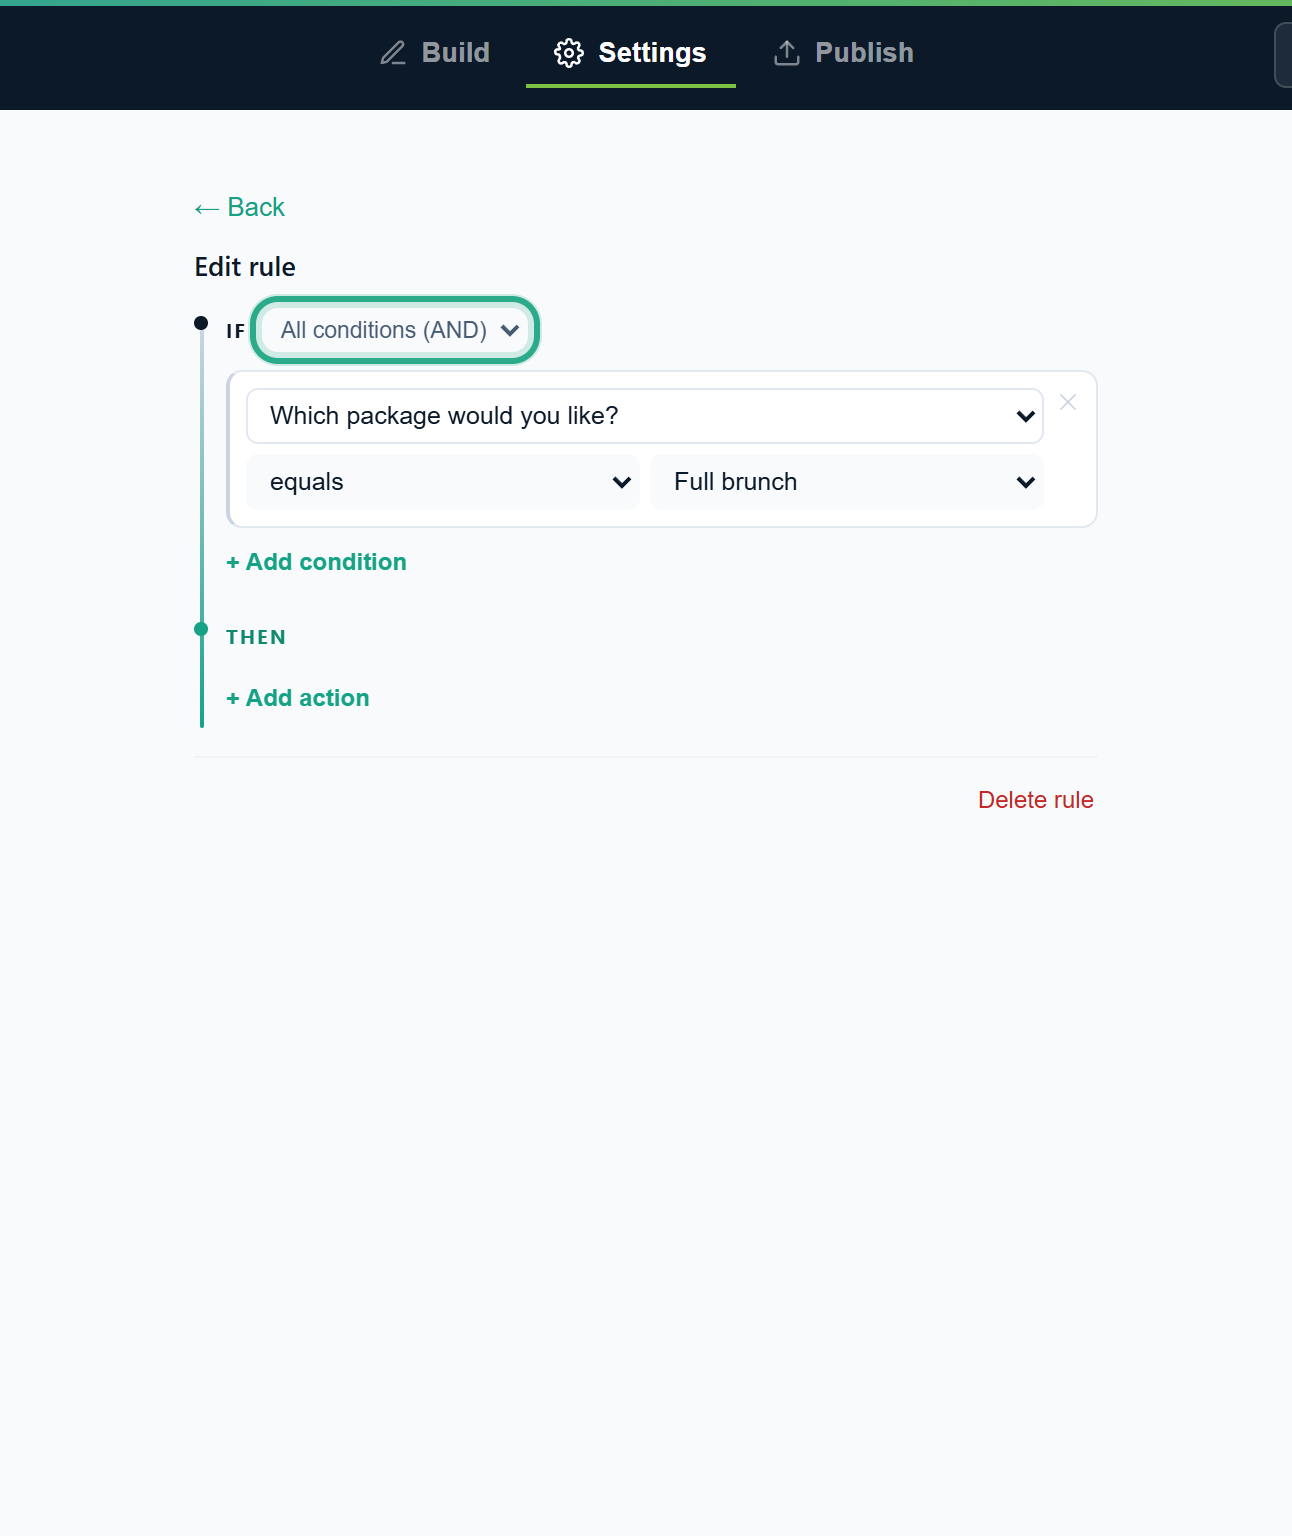 All conditions (AND) or Any condition (OR).
Under THEN, click + Add action, choose Show field in the first list and Dietary requirements in the second.
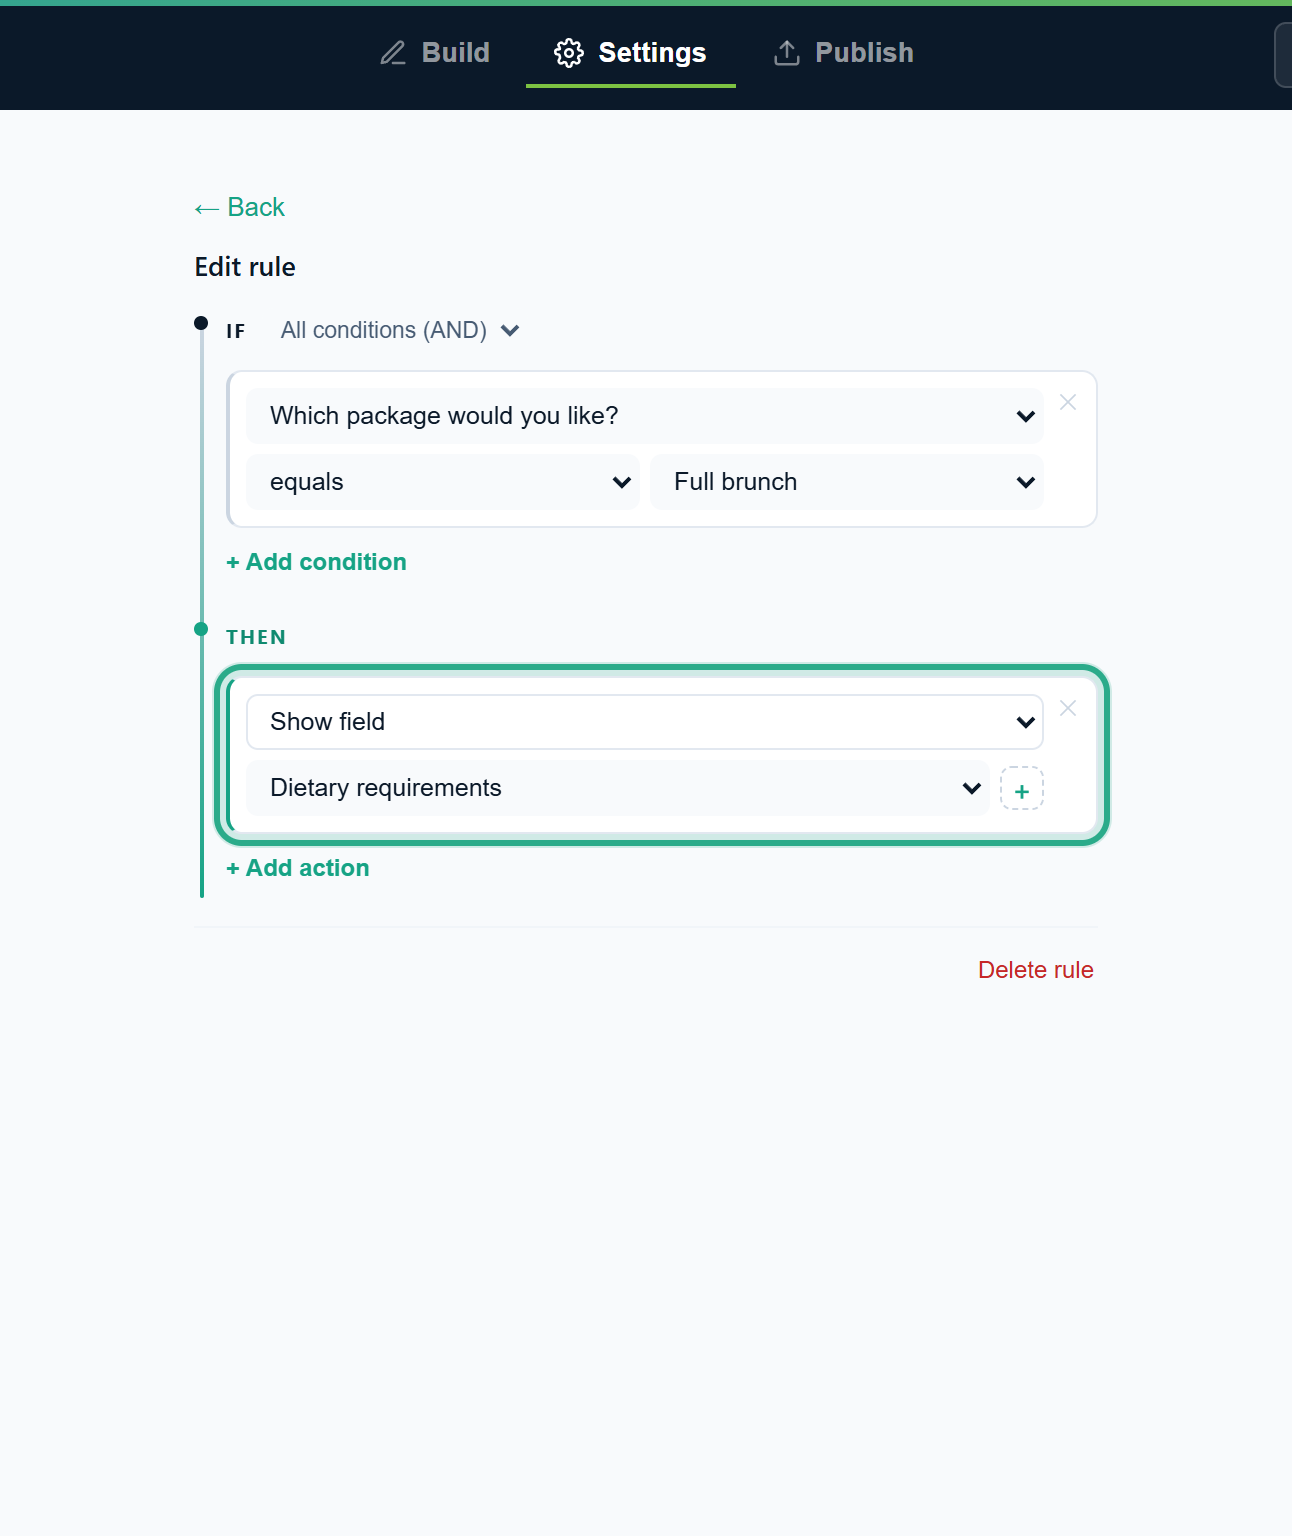 The action: show the hidden field.
Click ← Back. The rule appears in the list as Rule 1, with its IF and THEN in plain words. The editor saves your changes automatically.
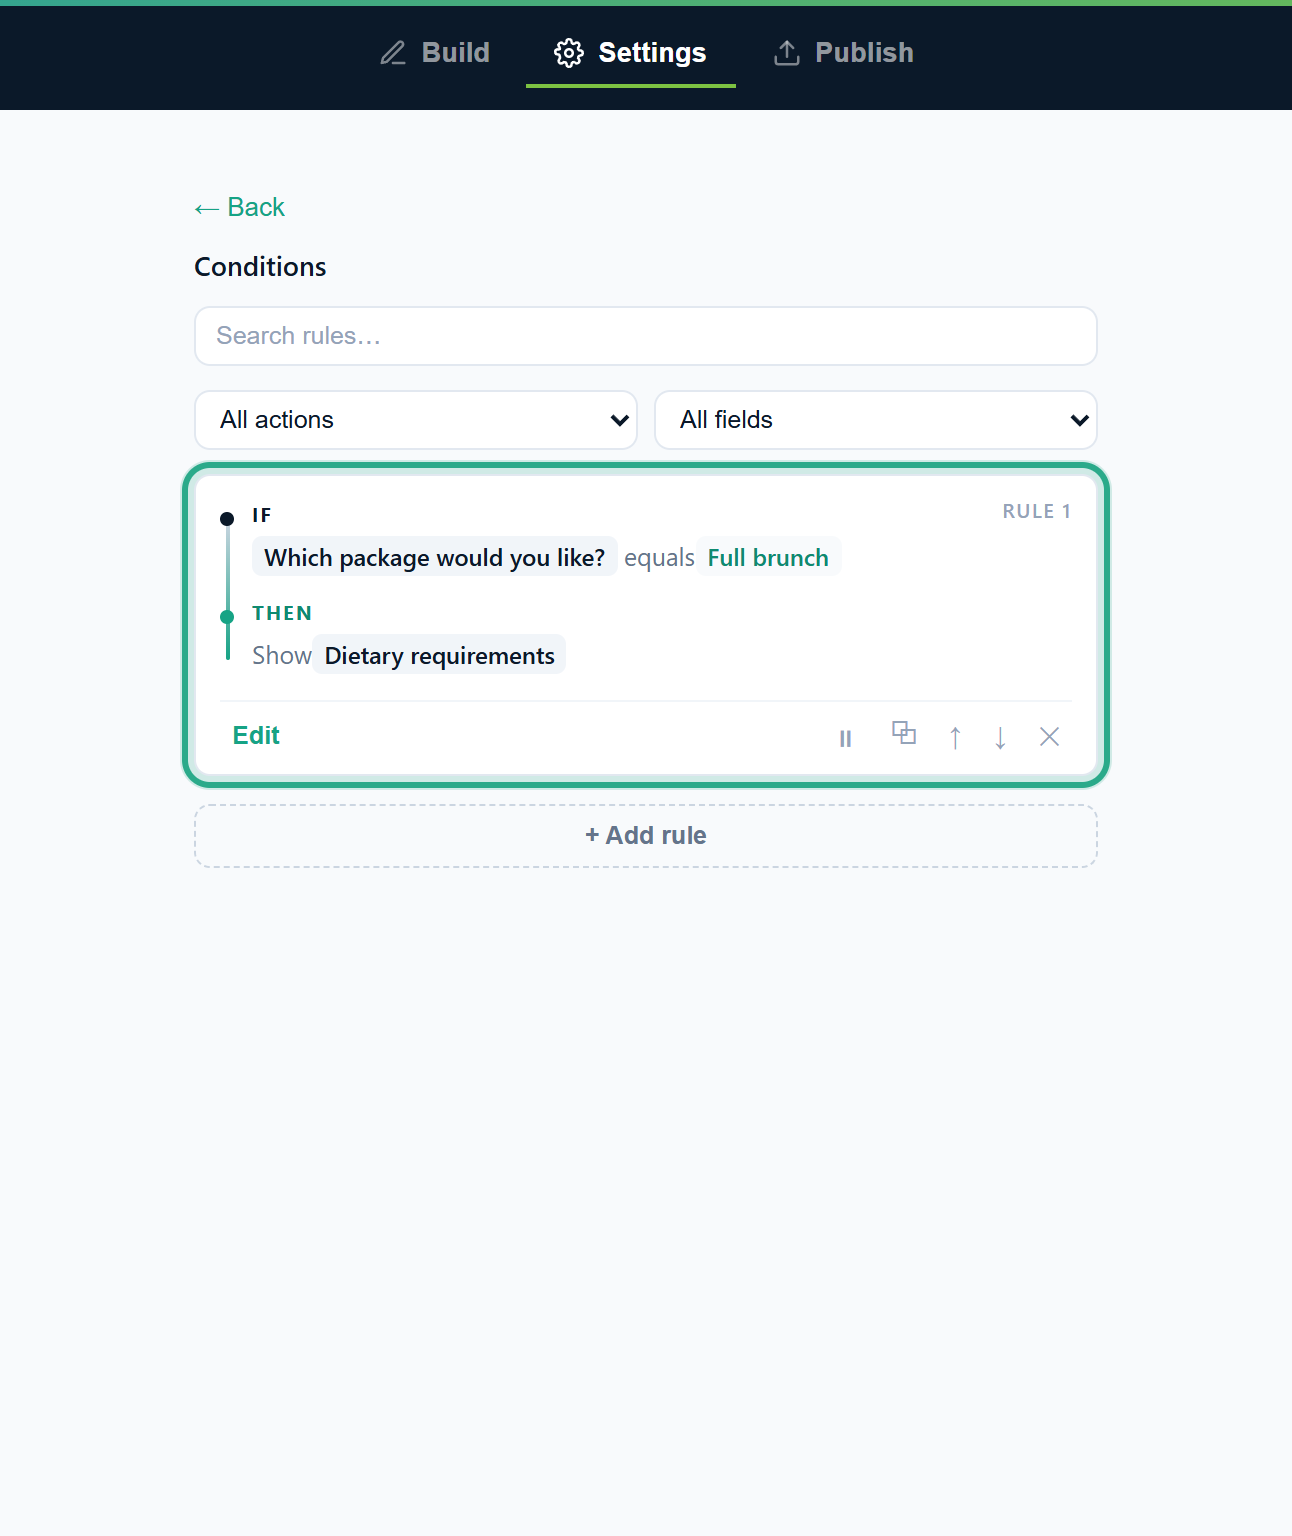 The finished rule. A rule with no condition or no action is discarded when you leave it.
Result
Dietary requirements stays hidden until someone chooses Full brunch, and appears right away when they do. If they change their mind, it hides again. Hide field works the other way round: it hides a field while the conditions are met.
Task 3 — Make a field required in some cases
Now that brunch customers see Dietary requirements, Café Aurora wants them to fill it in. A field can be required only while a rule matches.
Step-by-step
In the Conditions list, click Edit on Rule 1.
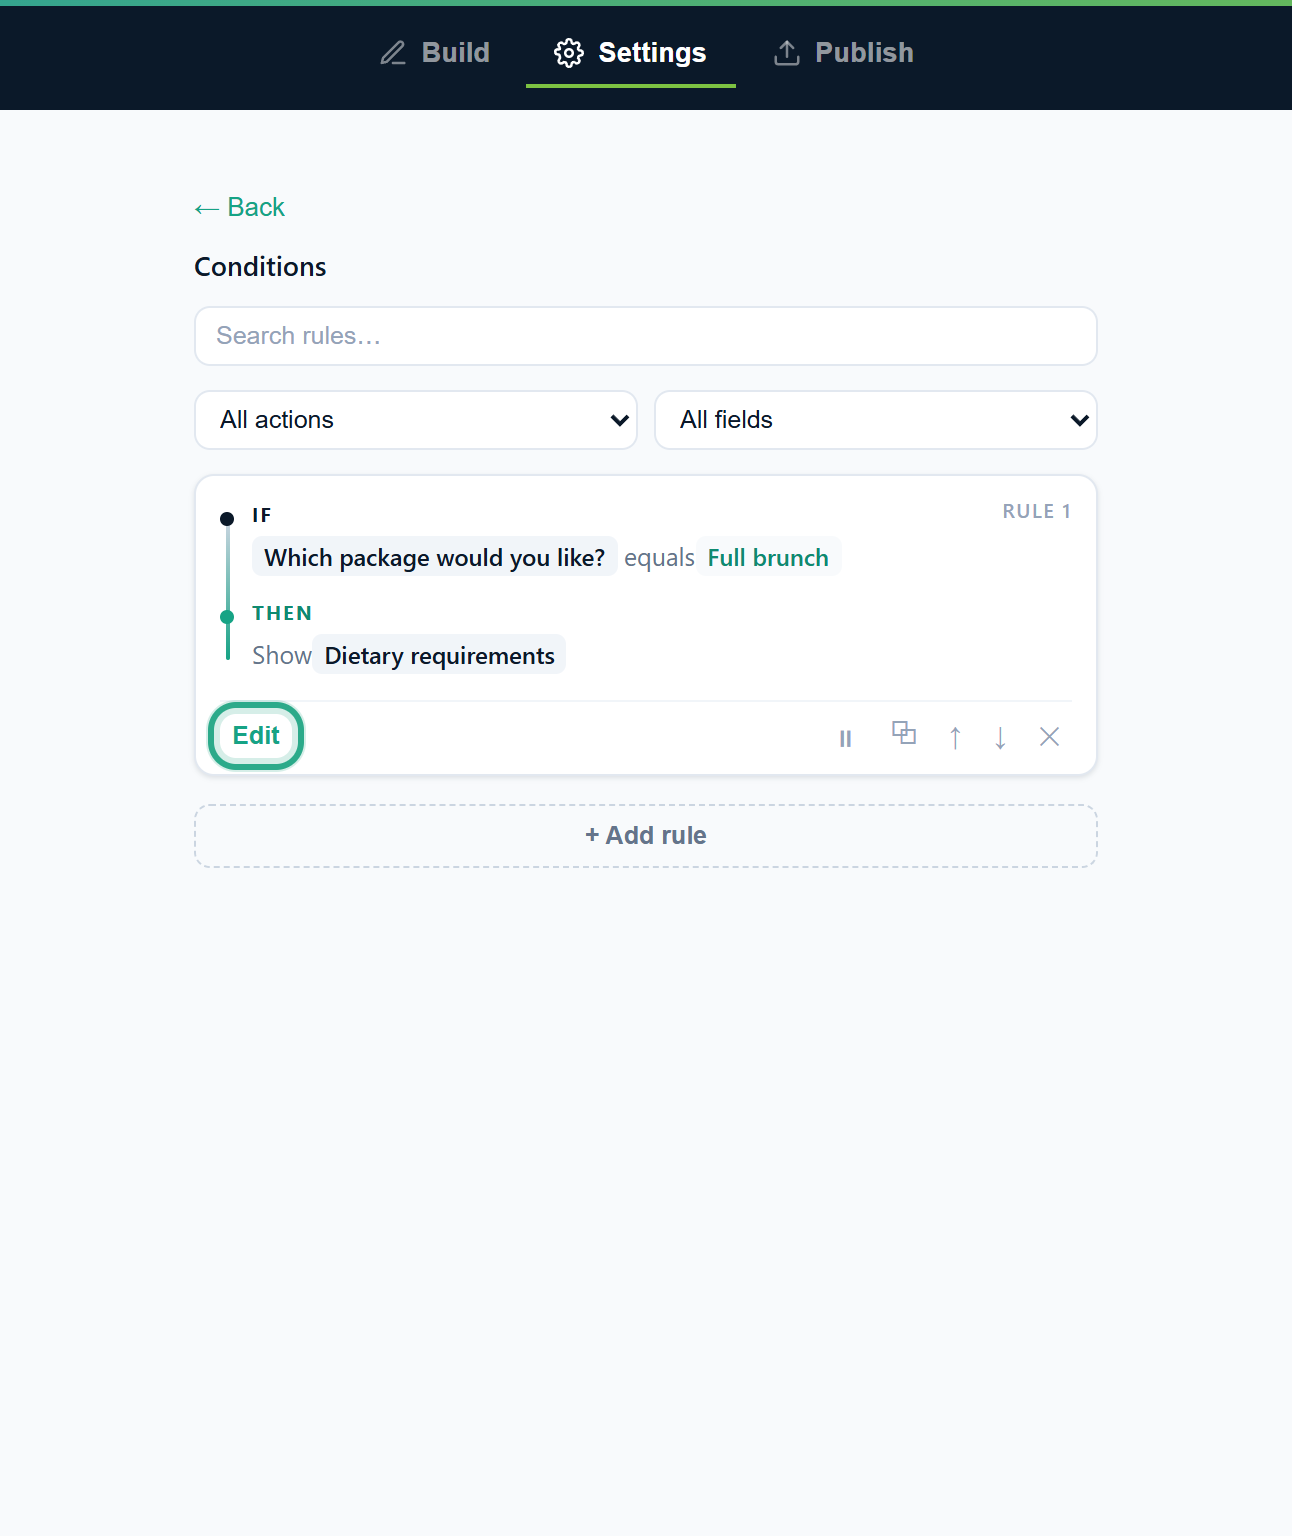 Edit reopens the rule.
Click + Add action, choose Require field and pick Dietary requirements. (Don't require field does the opposite: it makes a required field optional while the rule matches.)
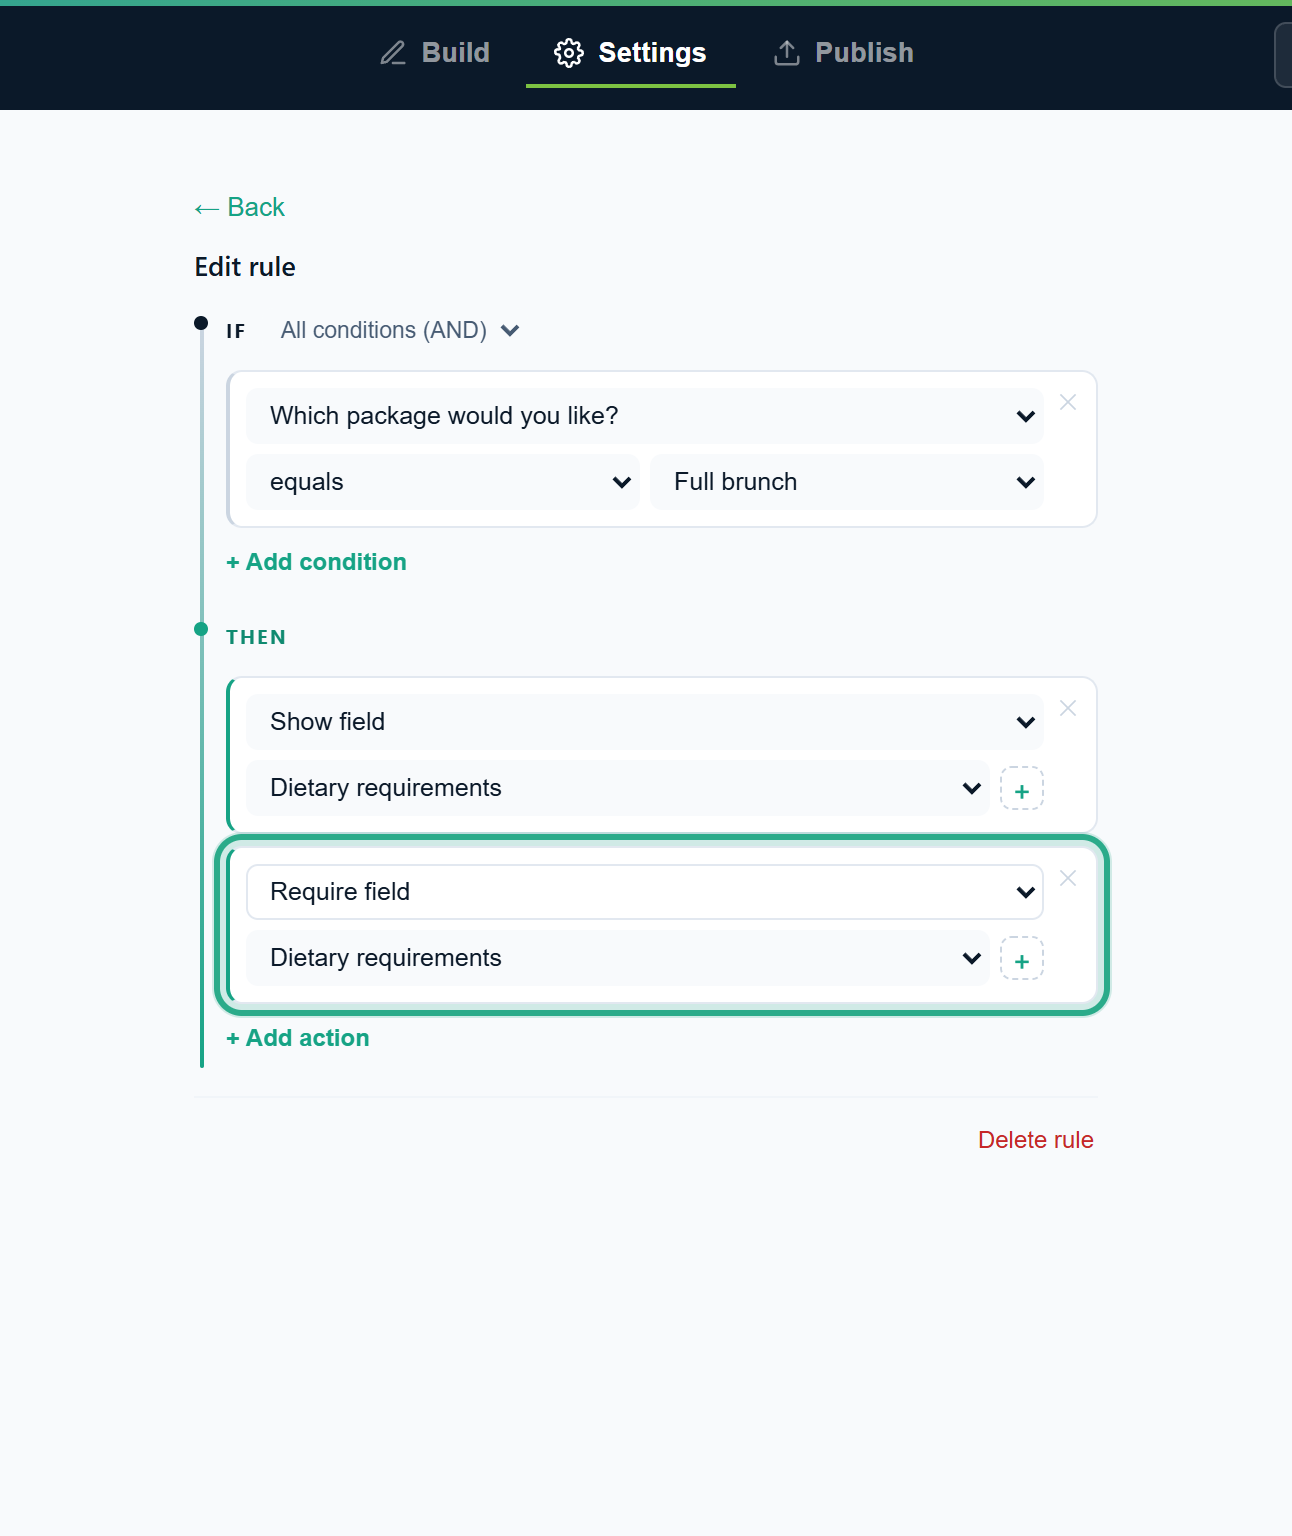 A rule can have several actions.
Tip: for Show field, Hide field, Require field, Don't require field, Enable field and Disable field, the + next to the field list (Add another target field) adds another action of the same type for the next field, so one rule can act on several fields.
Click ← Back. Rule 1 now reads Show Dietary requirements · Require Dietary requirements.
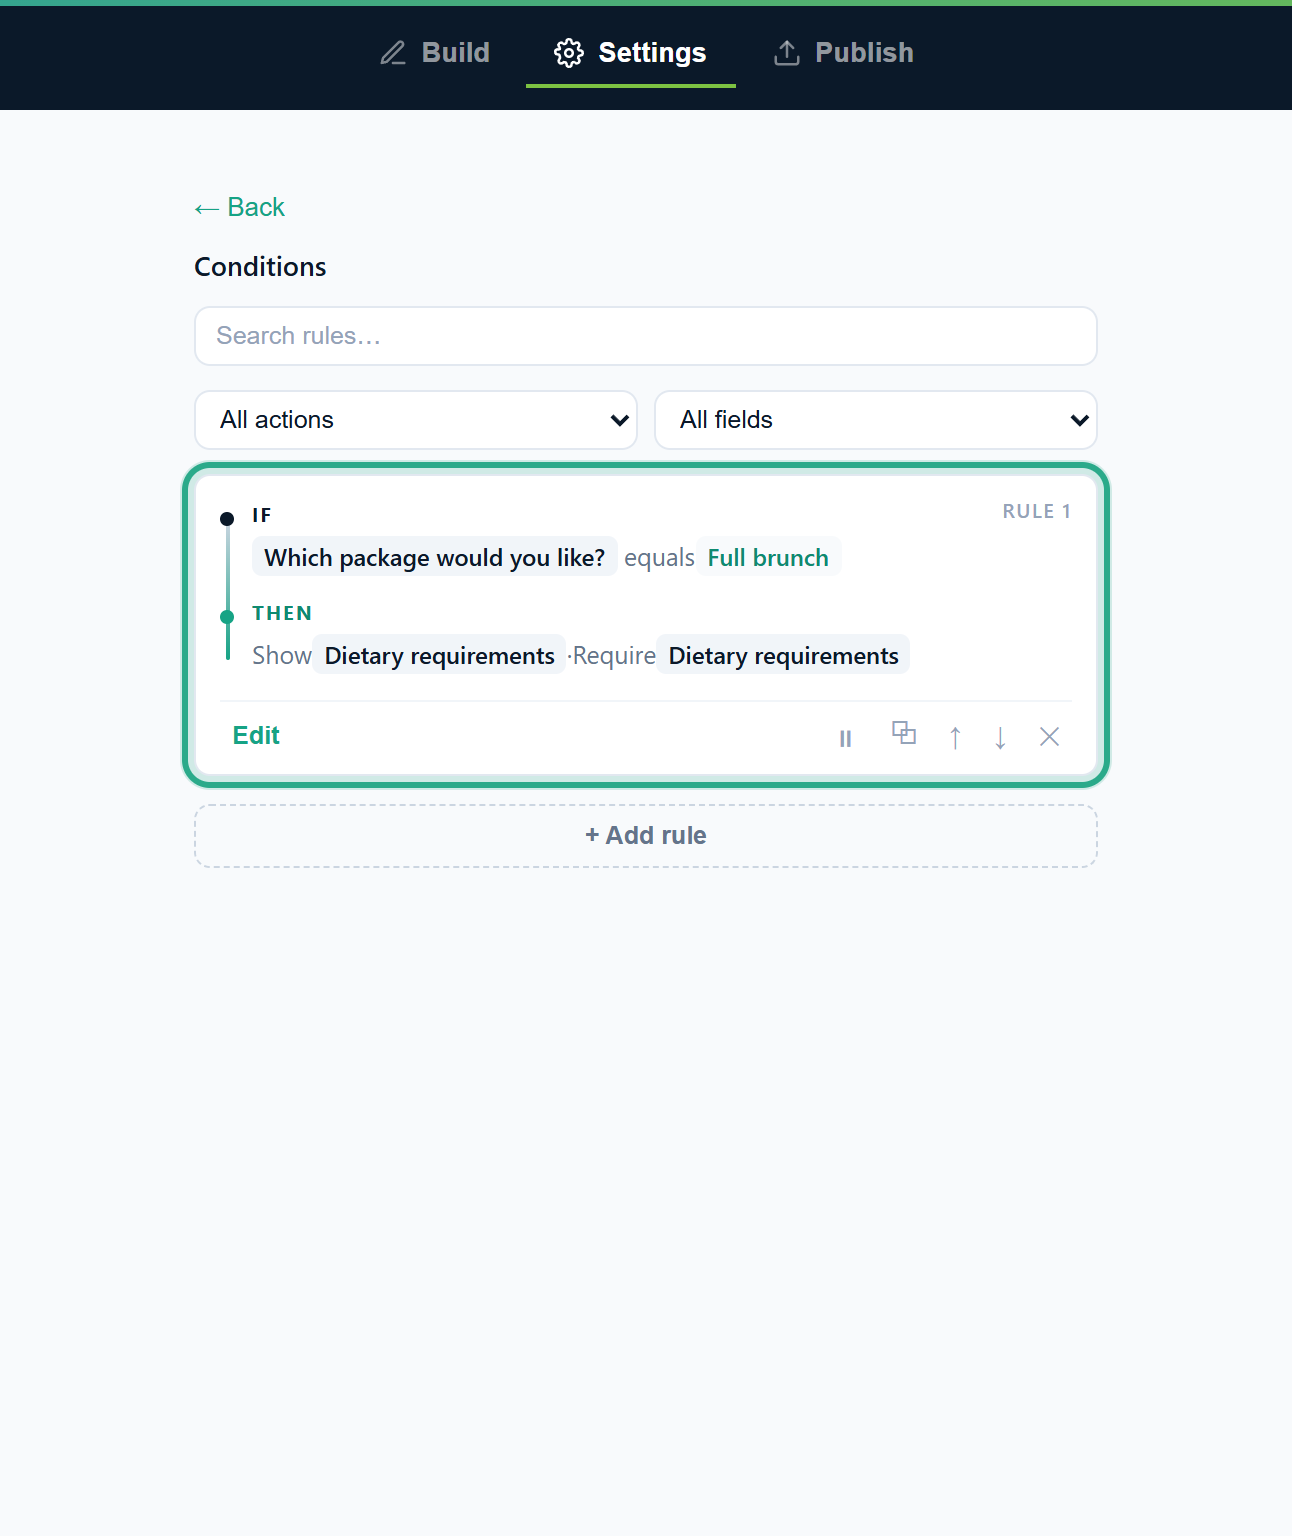 Both actions run whenever the package is Full brunch.
Result
For Full brunch orders, Dietary requirements appears with a red asterisk and the page can't be sent without it. For the other packages it stays hidden and isn't required.
Task 4 — Skip a page
Customers who pick up their order don't need the Delivery page. A Skip to page action sends them straight to Your event.
Step-by-step
Click + Add rule and + Add condition, and set How would you like to receive your order? equals We'll pick it up at the café. Then click + Add action, choose Skip to page and pick the page Your event. Pages are listed by their title (or Page 1, Page 2… when they have none).
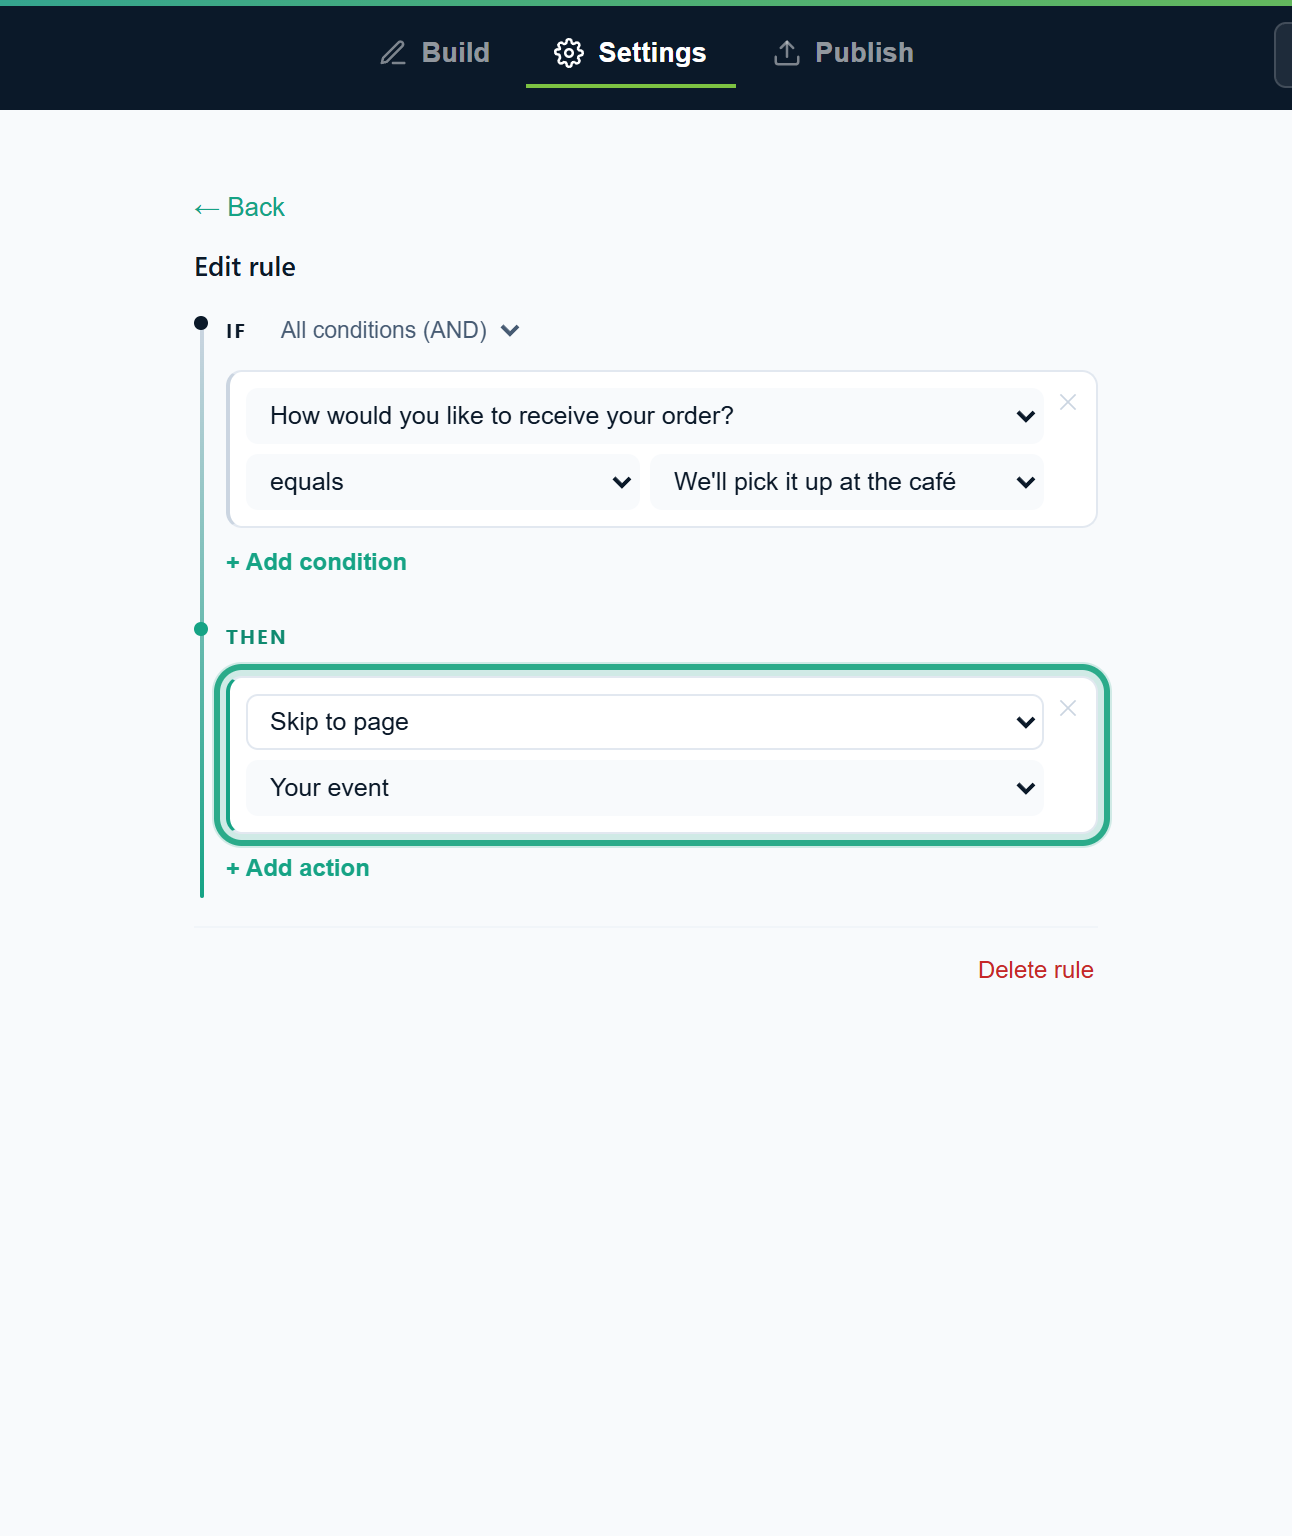 The skip happens when the person clicks Next on the page with this question.
Click ← Back to see Rule 2 in the list.
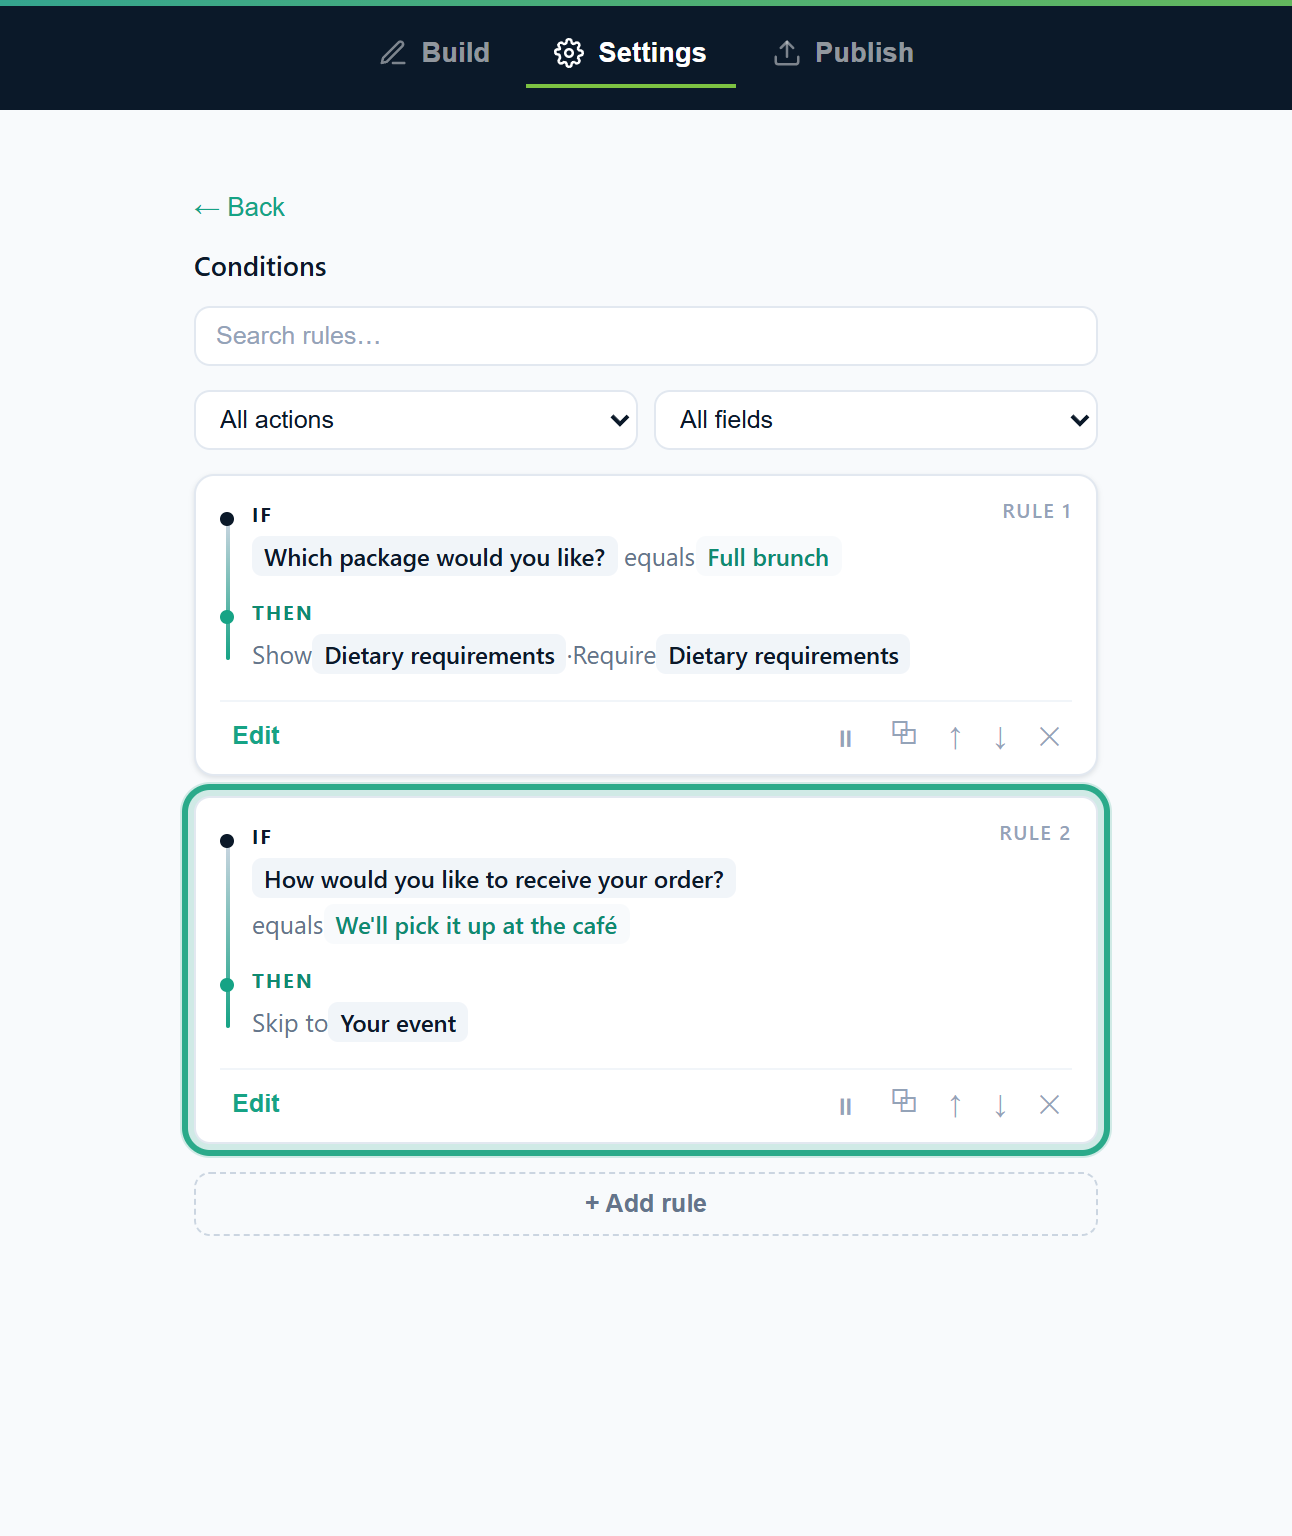 Rule 2 skips the Delivery page for pick-ups.
Result
People who choose pick-up go from Your details straight to Your event. Everyone else sees Delivery as usual. Fields on a skipped page are treated like hidden fields: they aren't required, so the required Venue address doesn't stop a pick-up order. Back retraces the pages the person actually saw, so from Your event a pick-up customer goes back to Your details, not to Delivery. A skip only goes forward: a rule pointing at the current page or an earlier one doesn't move the person back. In a Card layout form, each card is a page.
Task 5 — Calculate a number
Café Aurora shows an estimate while people fill in the form: $18 per guest. The form has a Number field, Estimated total (USD), that the rule fills in.
Prerequisites
- A Number or Quantity field to hold the result (here Estimated total (USD)). Only these two types can be calculated.
Step-by-step
Click + Add rule and + Add condition. Pick Number of guests and the operator is not empty. Operators like is empty and is not empty don't need a value, so the value box disappears.
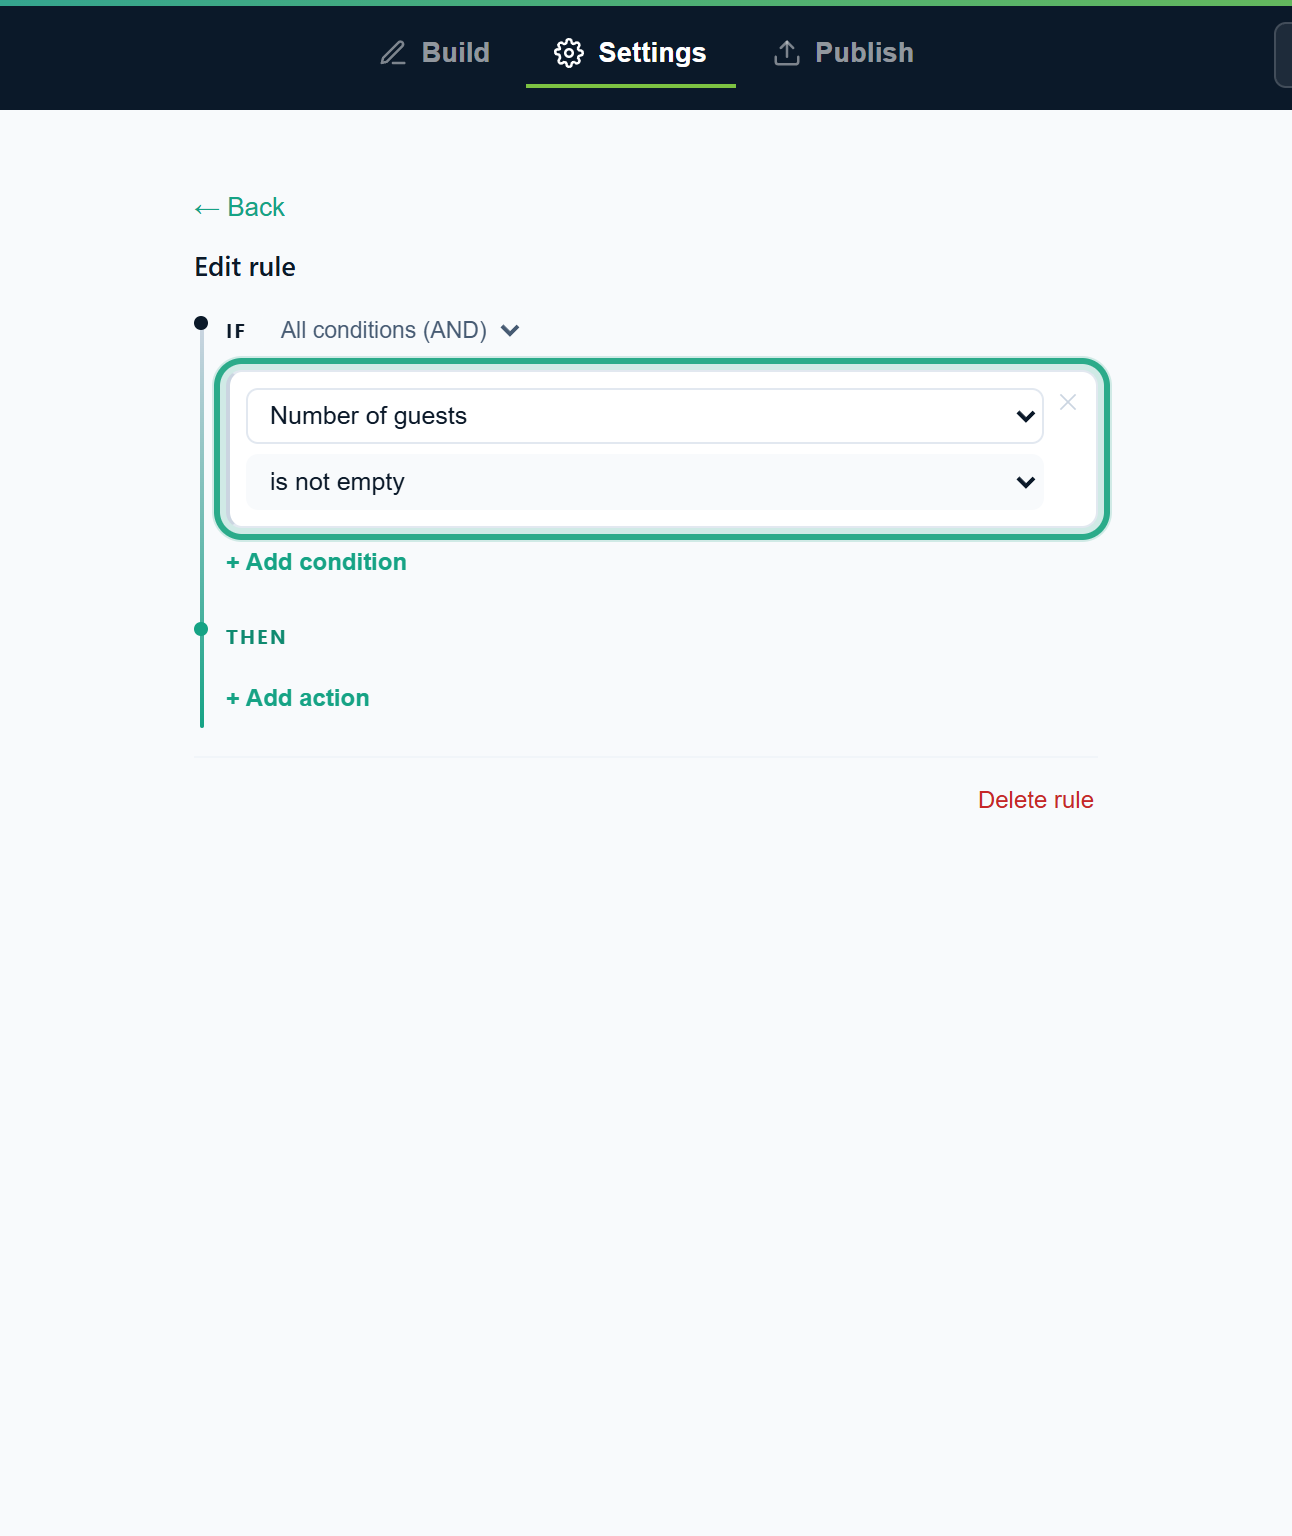 Calculate only once the number of guests has been entered.
Click + Add action and choose Calculate field. In the second list, pick the field that receives the result: Estimated total (USD). (The list starts on the form's first number field, so check it.)
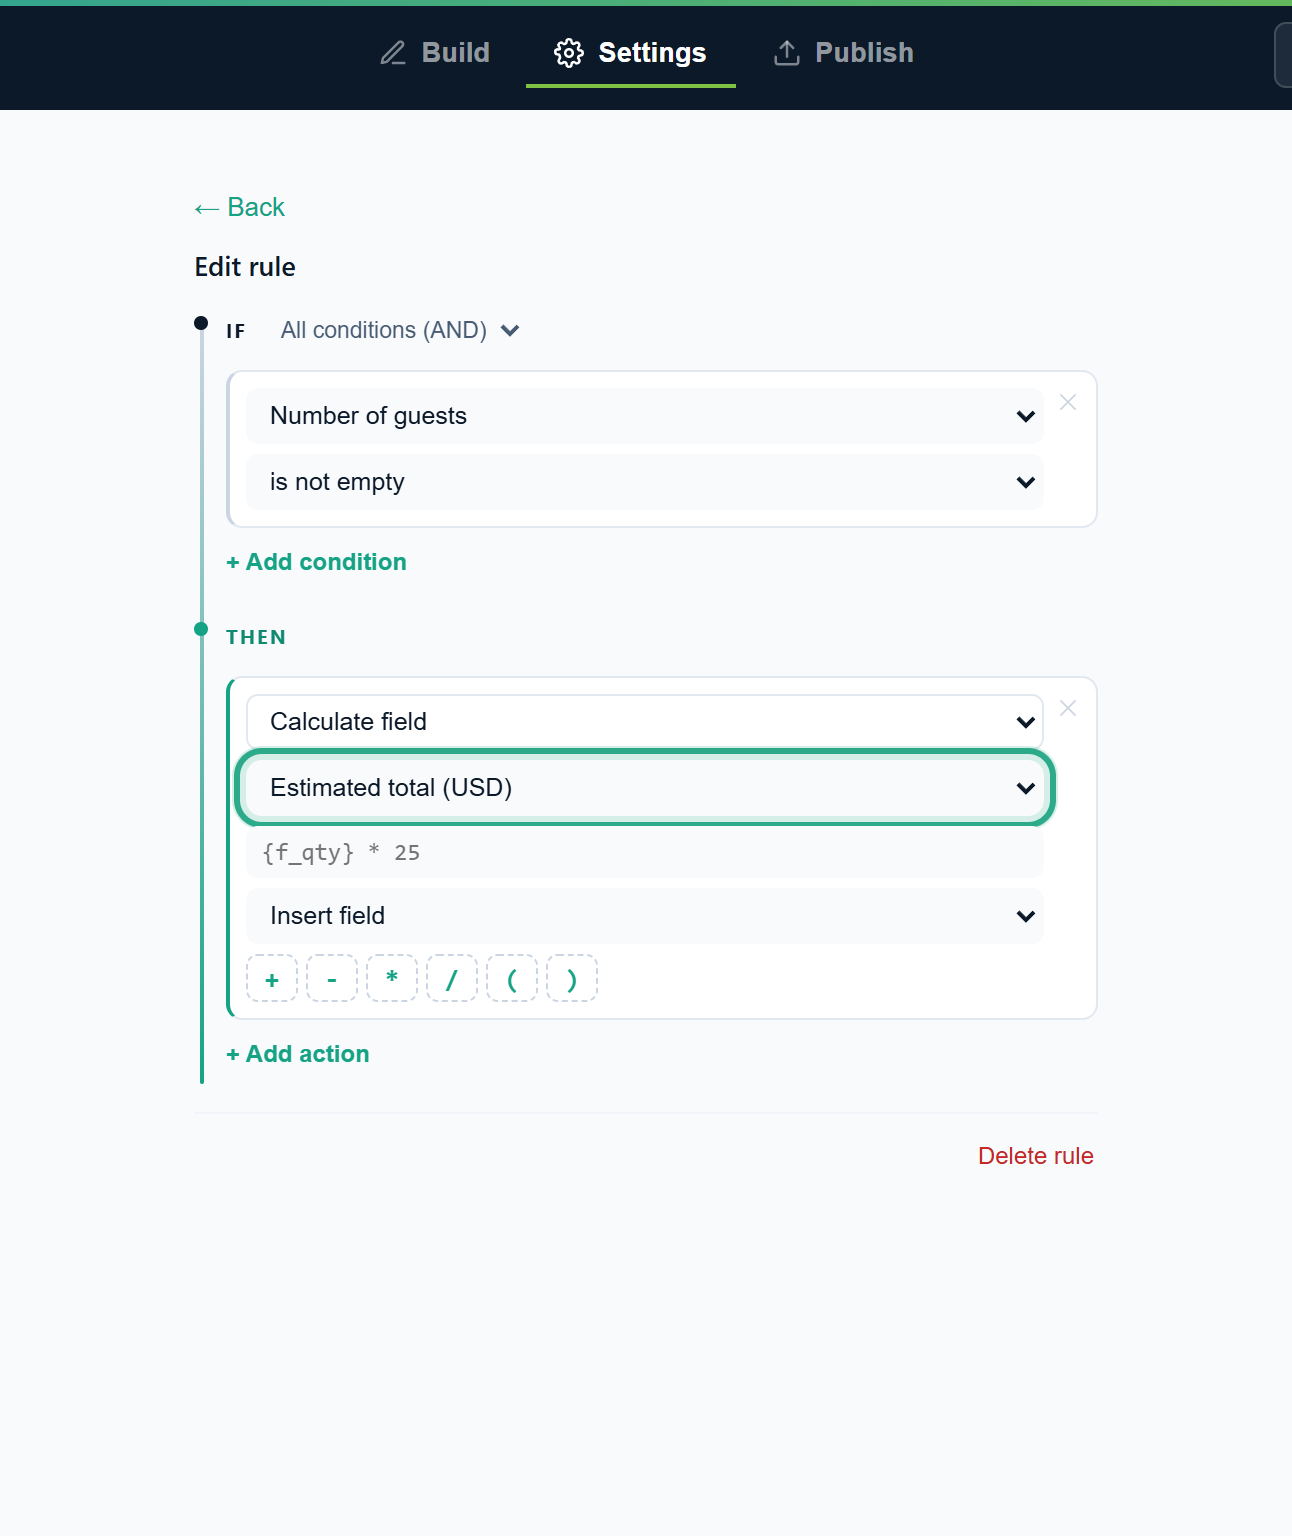 Choose where the result goes.
Build the formula in the box below. Insert field adds a number field as its code in curly braces, for example
{f_118fb0}for Number of guests. The operator buttons +, -, * (multiply), / (divide), ( and ) add their symbol to the end, and you can also type in the box. Here: insert Number of guests, click *, and type 18, giving{f_118fb0}*18. A valid formula shows a preview worked out with every field set to 10, here Preview (each field = 10): 180; a mistake shows Invalid formula.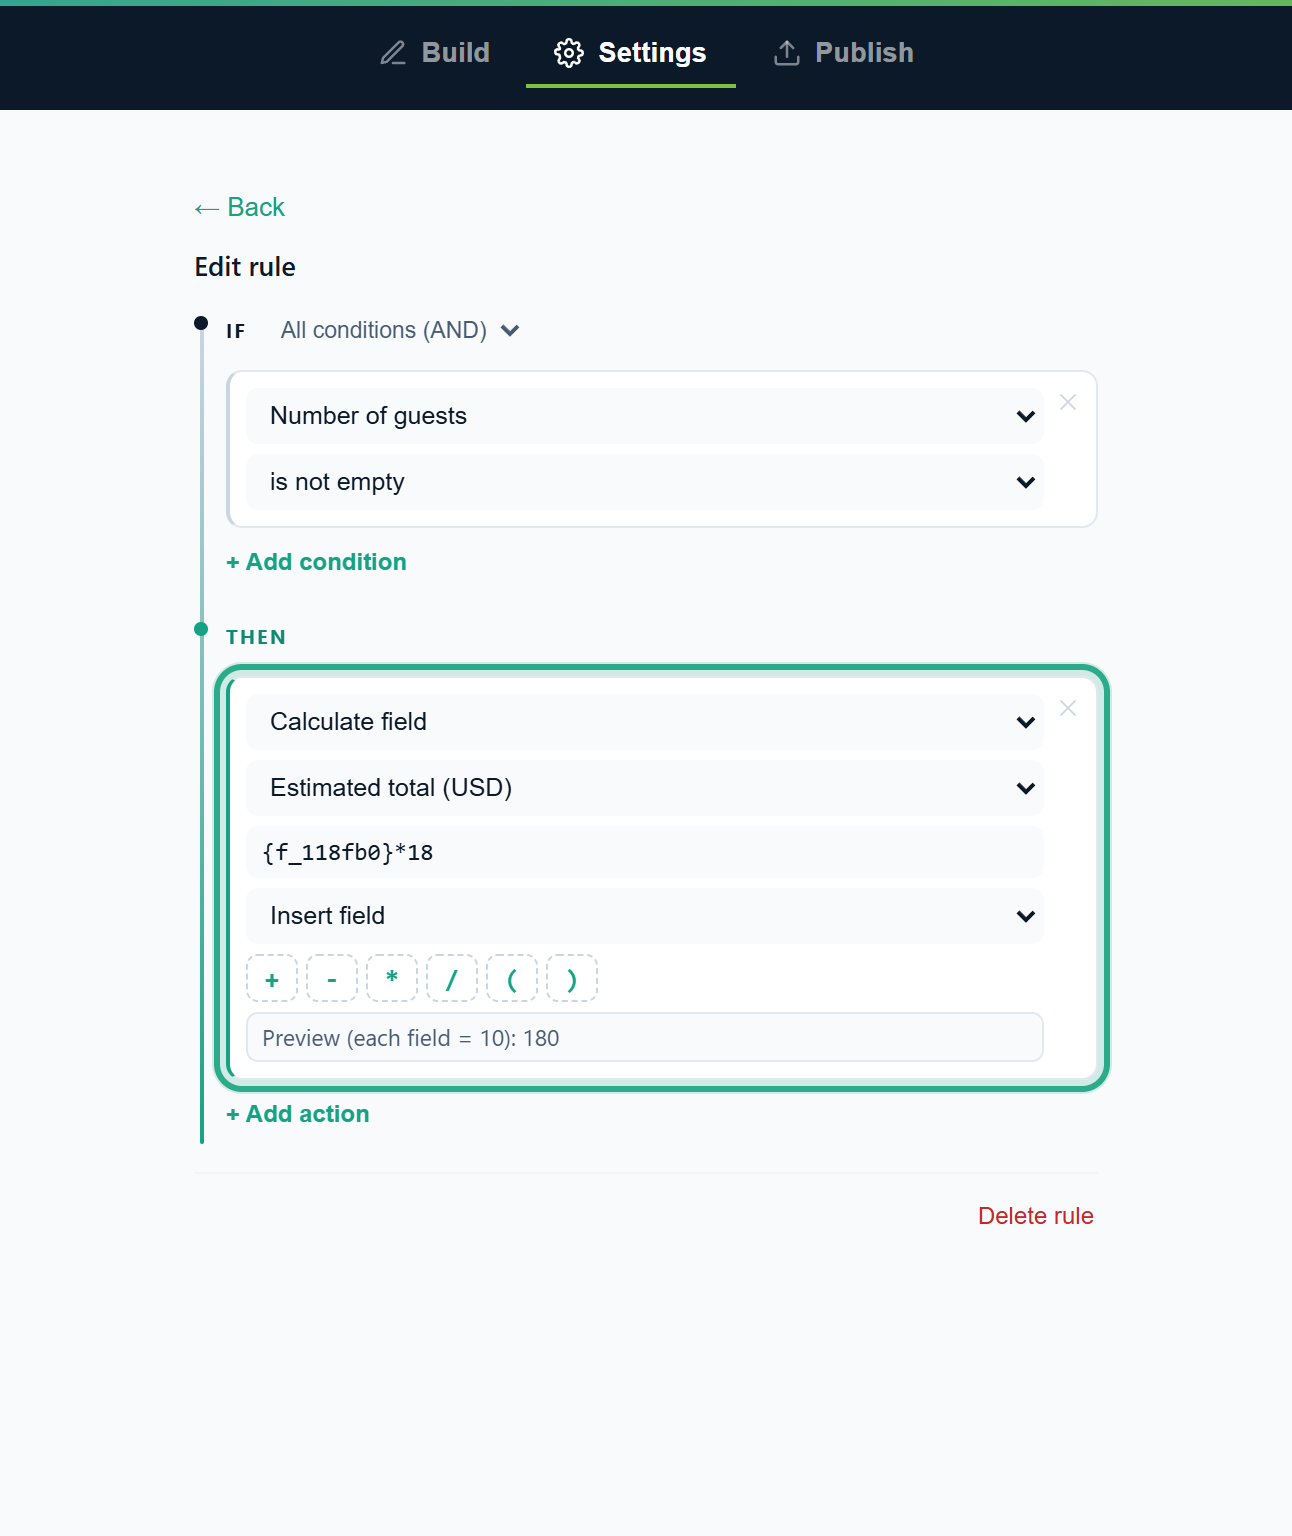 The preview checks the formula with sample values: 10 guests × 18 = 180.
Click ← Back. Rule 3 reads Calculate Estimated total (USD).
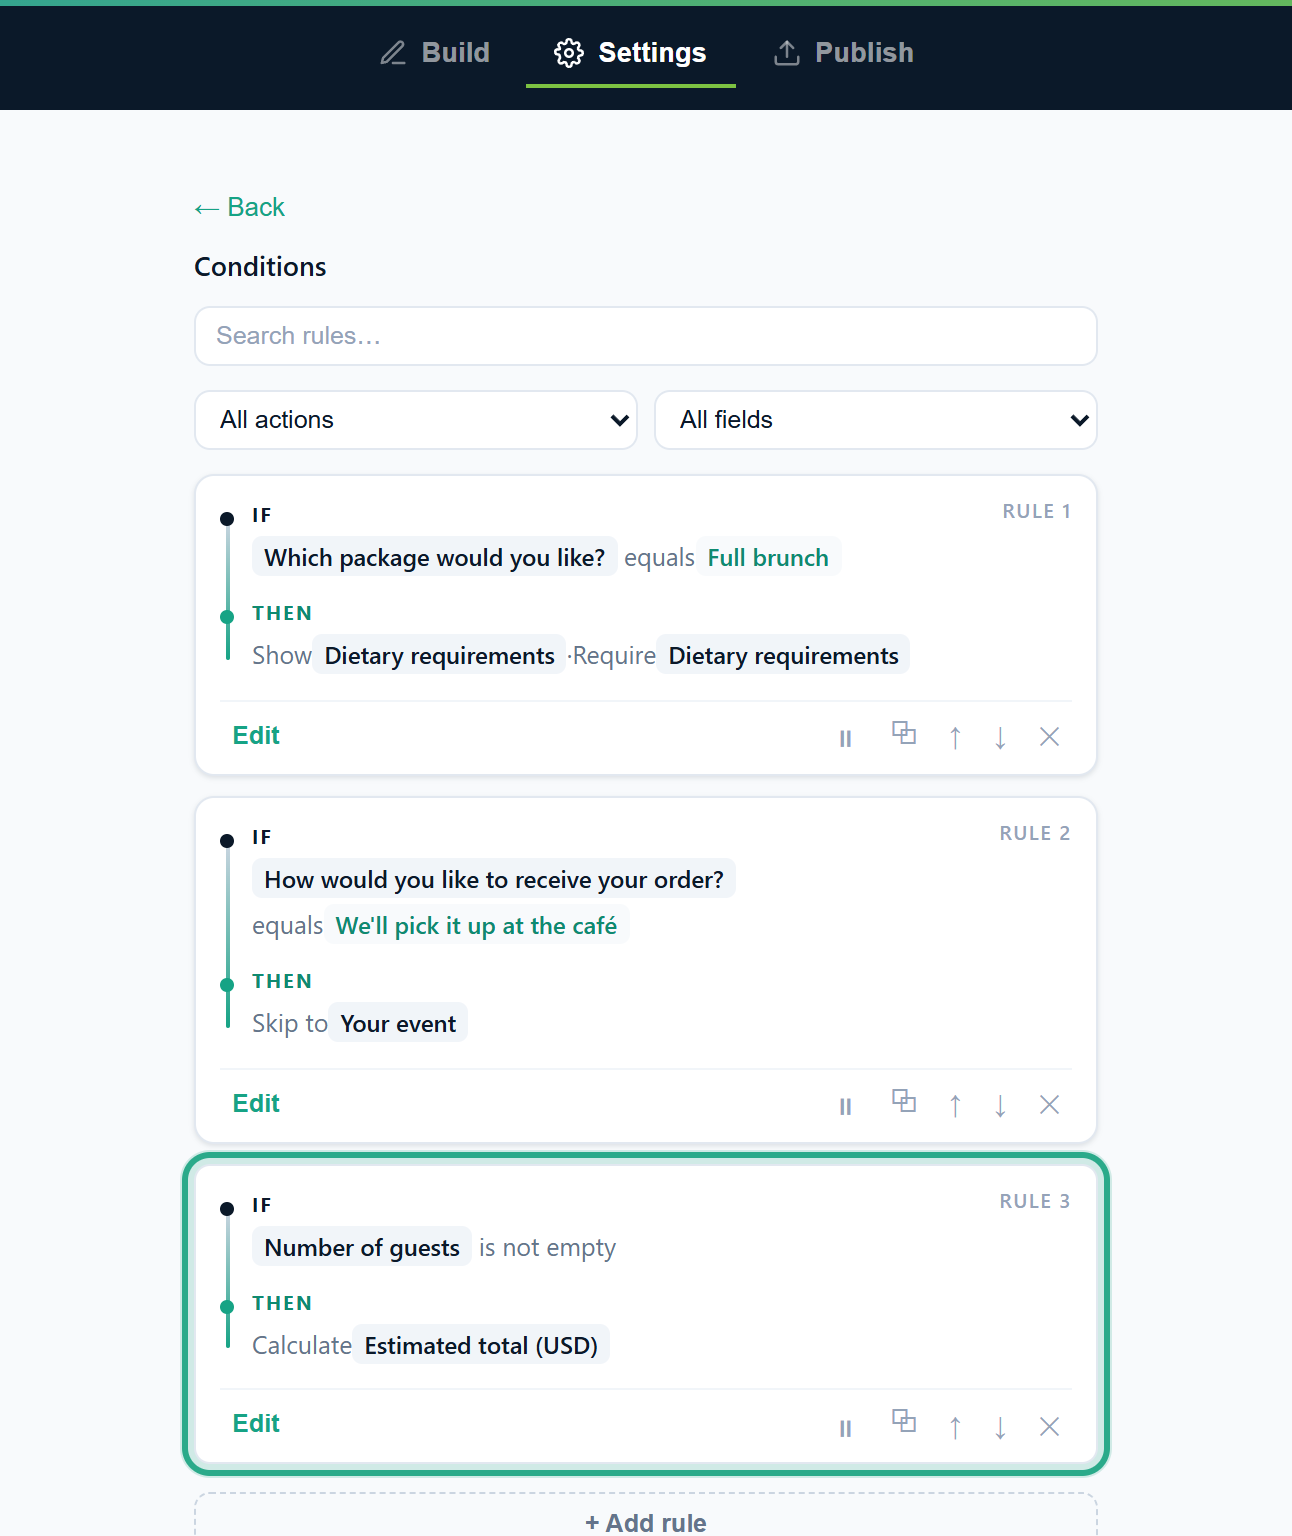 The formula itself is shown when you edit the rule.
Result
As soon as someone types the number of guests, Estimated total (USD) fills in with guests × 18, and it updates while they type. A calculated field is read-only for the person filling in the form, and anota works the value out again on its server when the response is submitted, so the saved number always follows the formula. It's an estimate inside the form: it doesn't charge anything. To take payments, use the Products field (see Products, orders and Stripe payments).
Task 6 — Email a copy for large events
Events with more than 60 guests go to Café Aurora's events team: the form asks when to call, and a copy of the response goes to events@example.com.
Prerequisites
- A field to reveal, marked Hidden (shown by a rule) (here Best time to call you, as in step 3).
Step-by-step
Click + Add rule and + Add condition. Pick Number of guests, the operator is greater than and type 60 in the value box. Number, Quantity, Rating and Scale fields offer is greater than and is less than.
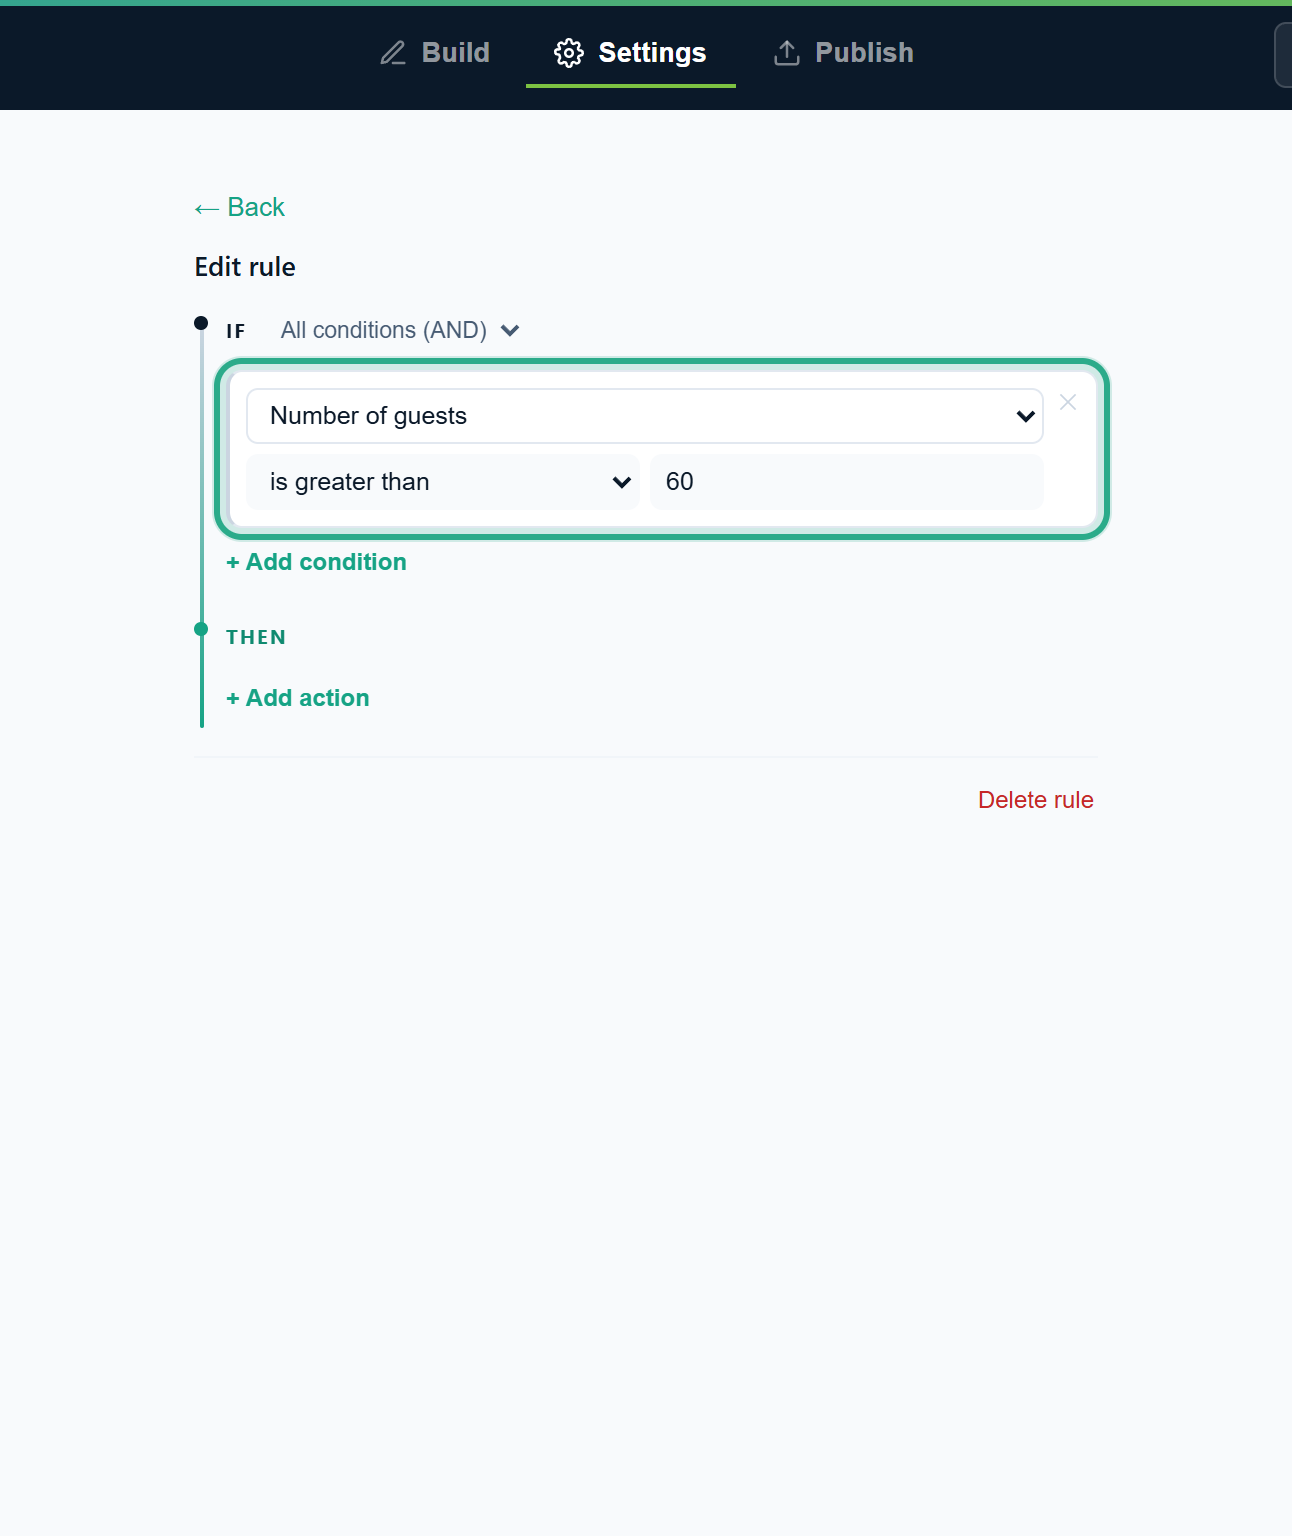 The rule applies from 61 guests up.
Add two actions: Show field → Best time to call you, and Route a copy by email with events@example.com in the email box.
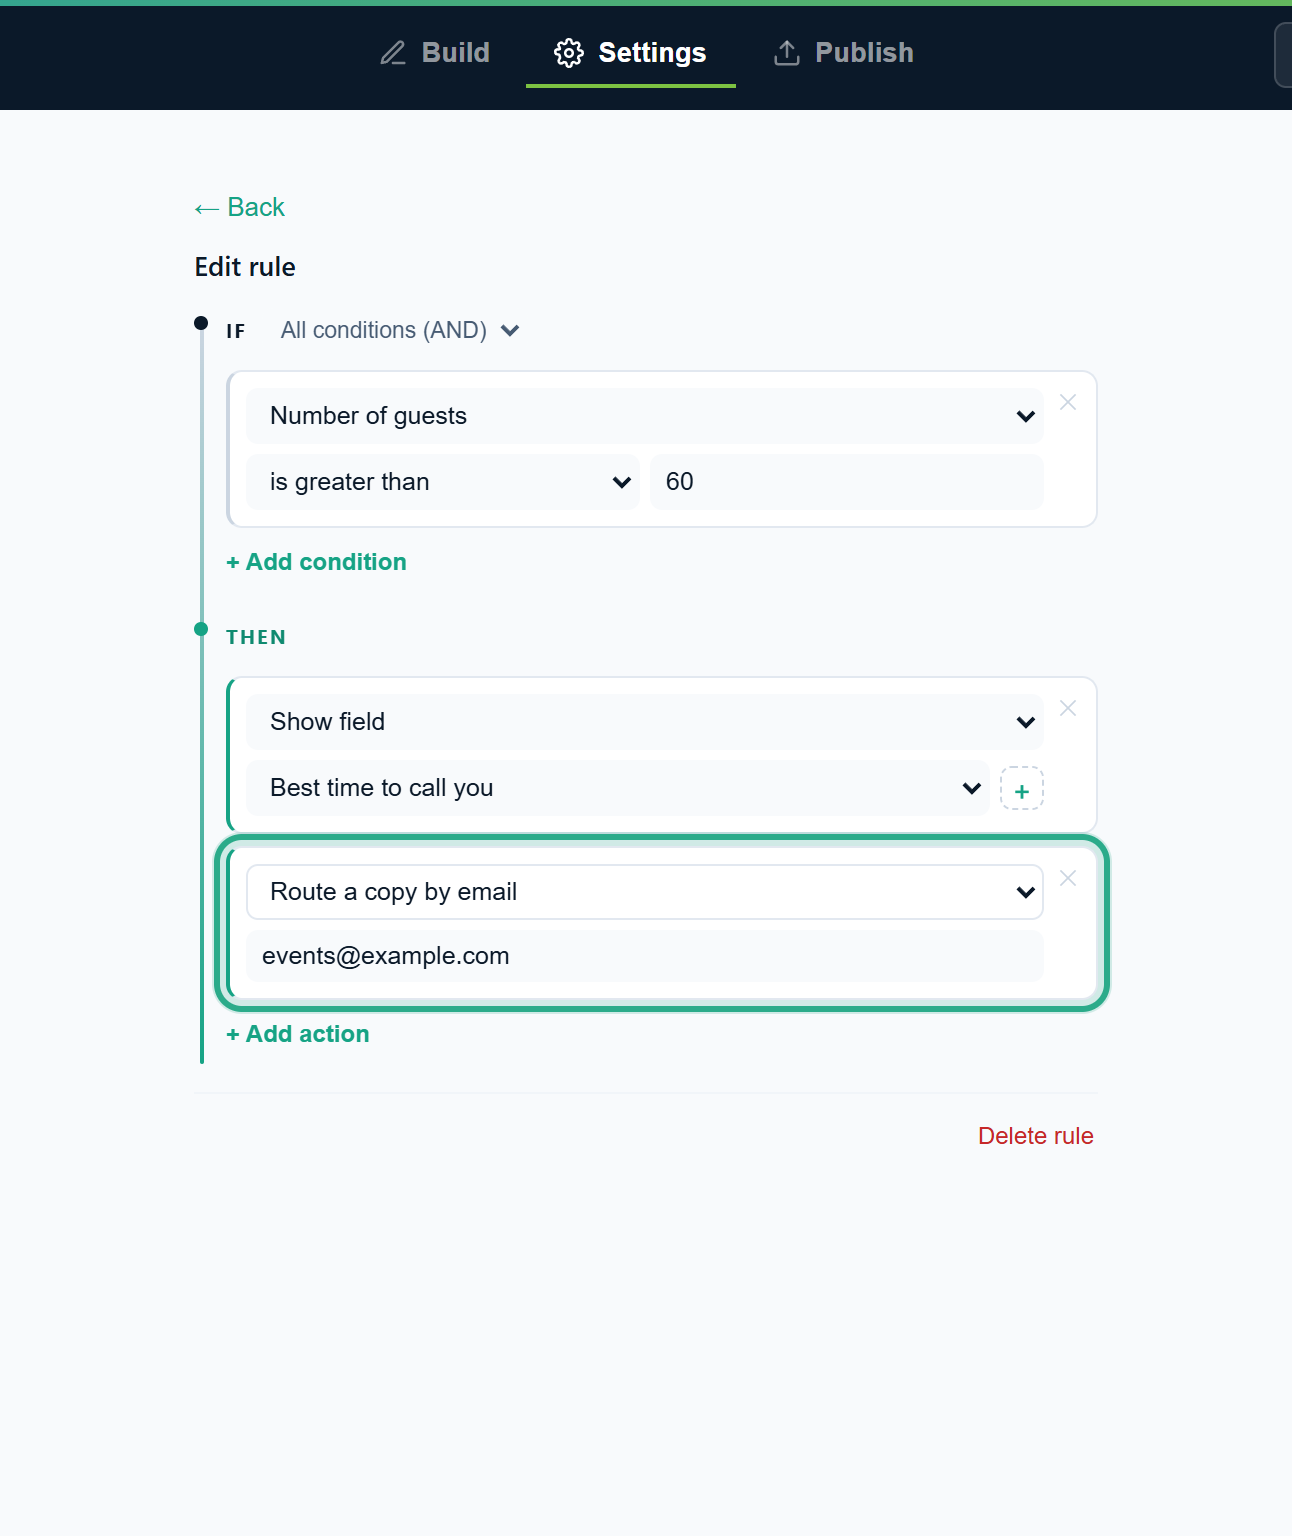 The copy goes to this address in addition to the form's usual notification recipients.
Click ← Back. Rule 4 reads Show Best time to call you · Route a copy to events@example.com.
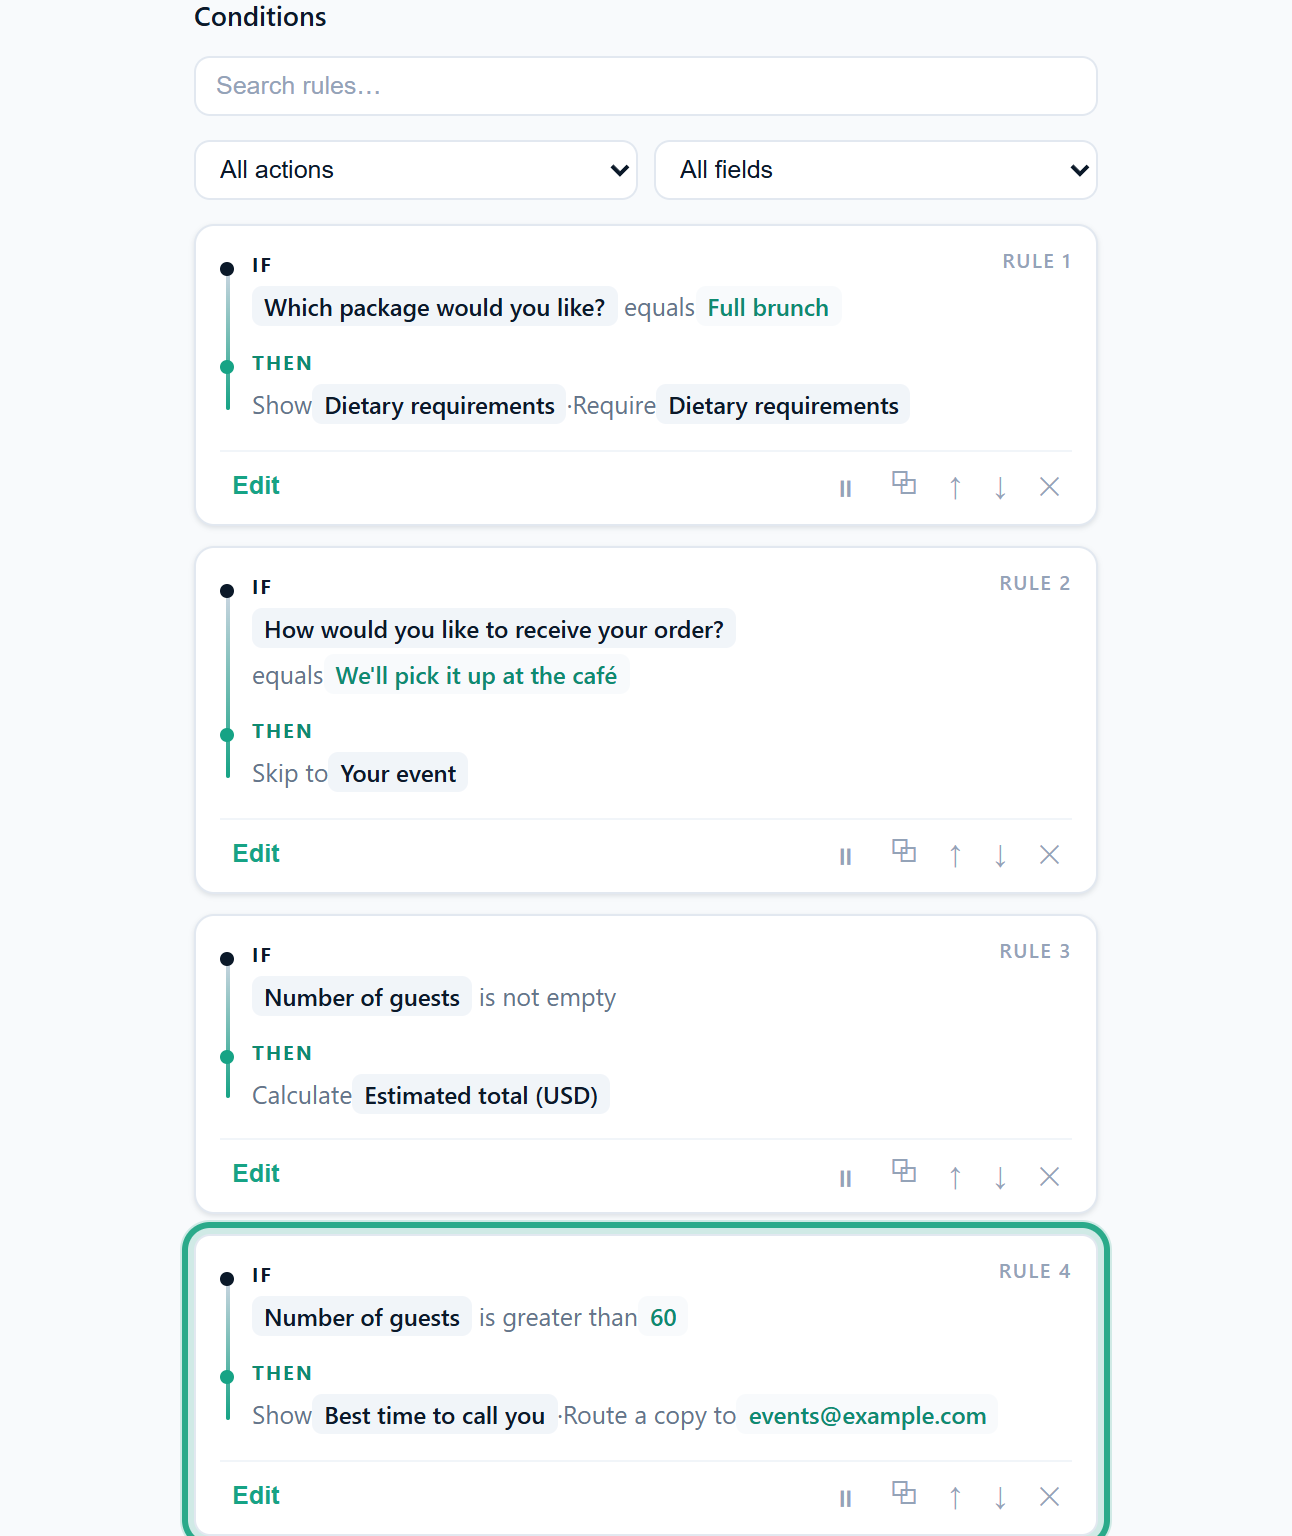 One rule, two actions.
Result
When a response with more than 60 guests is received, anota sends the notification to the usual recipients and also to events@example.com. The copy is sent after the response is saved, not while the person is filling in the form. For the usual recipients, see Email notifications.
Task 7 — Show a different thank-you message or redirect
After submitting, brunch customers should read that the chef will send them the menu. Very large events (over 100 guests) should land on a page about large events instead.
Step-by-step
Click + Add rule and set the condition Which package would you like? equals Full brunch. Add the action Show thank-you message and type the message: Thank you! Our chef will email you the brunch menu within two days.
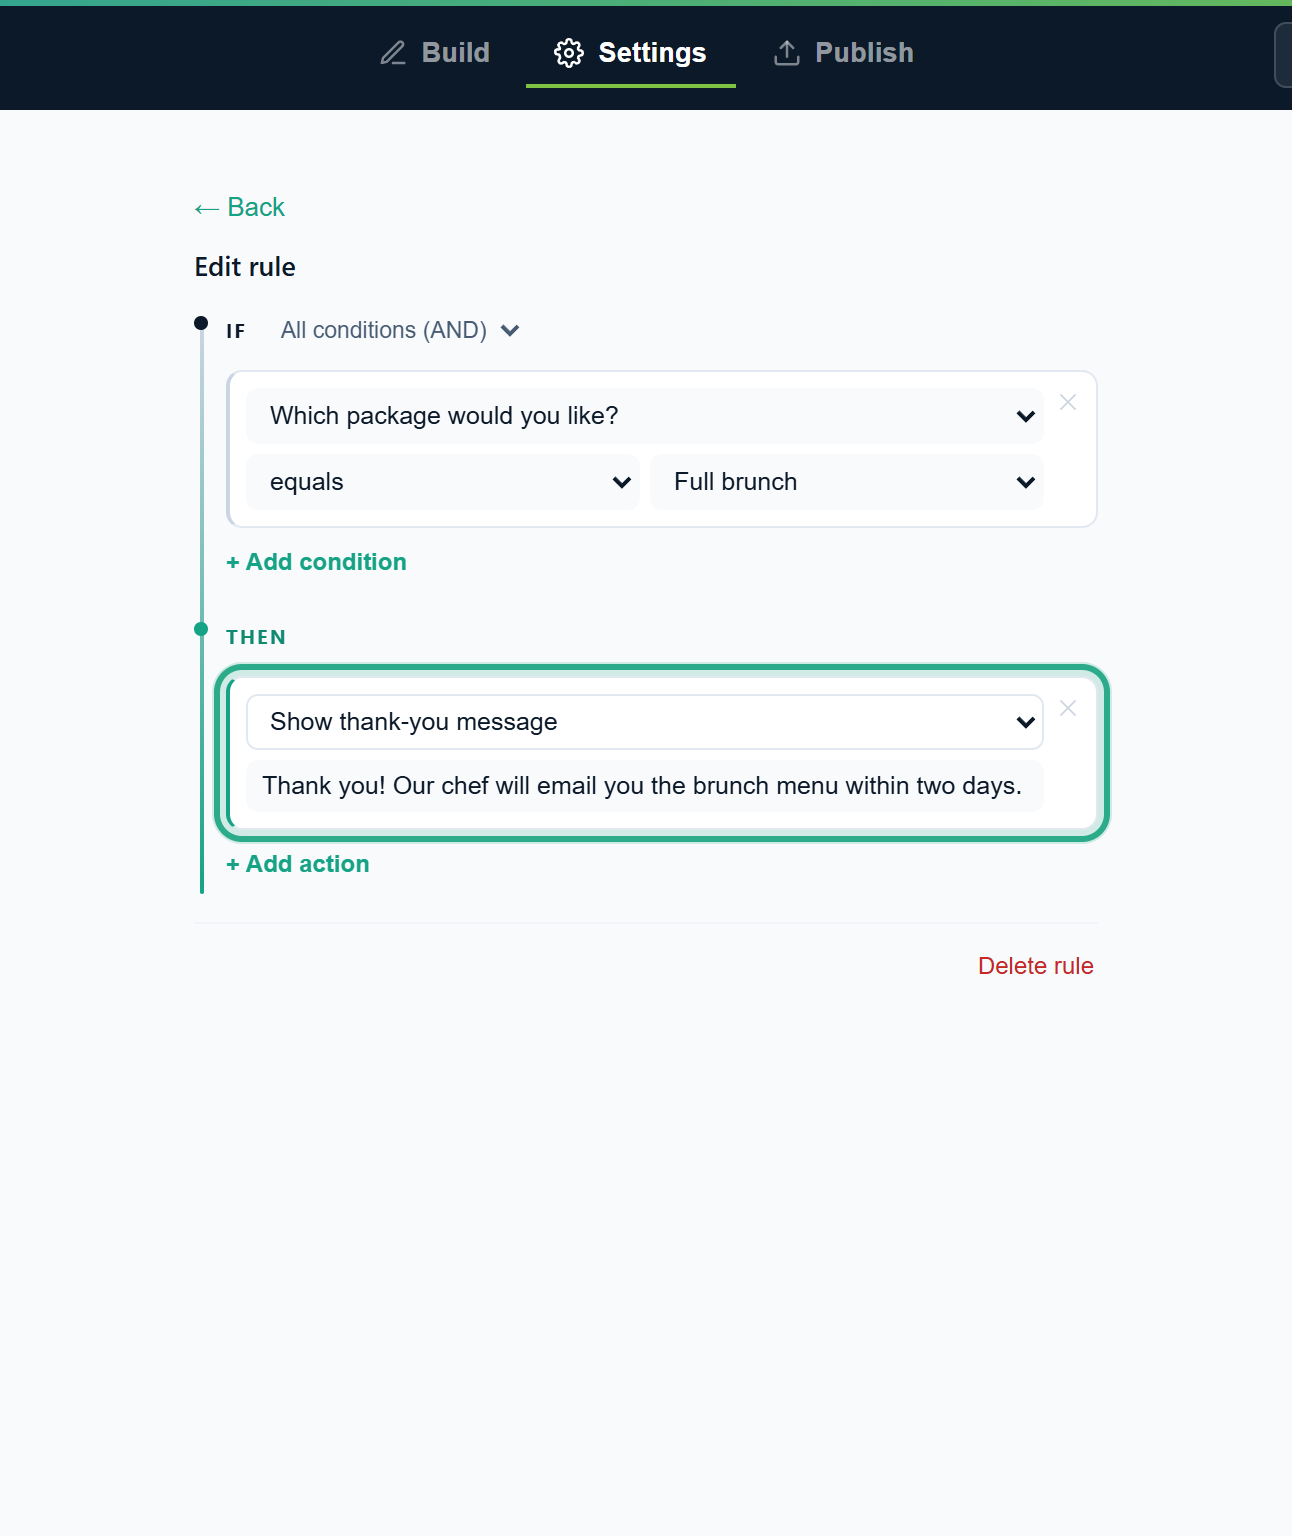 This message replaces the form's default thank-you message when the rule matches.
For a redirect, click + Add rule, set Number of guests is greater than 100, and add the action Redirect to URL with the address of the page, here
https://example.com/cafe-aurora/large-events.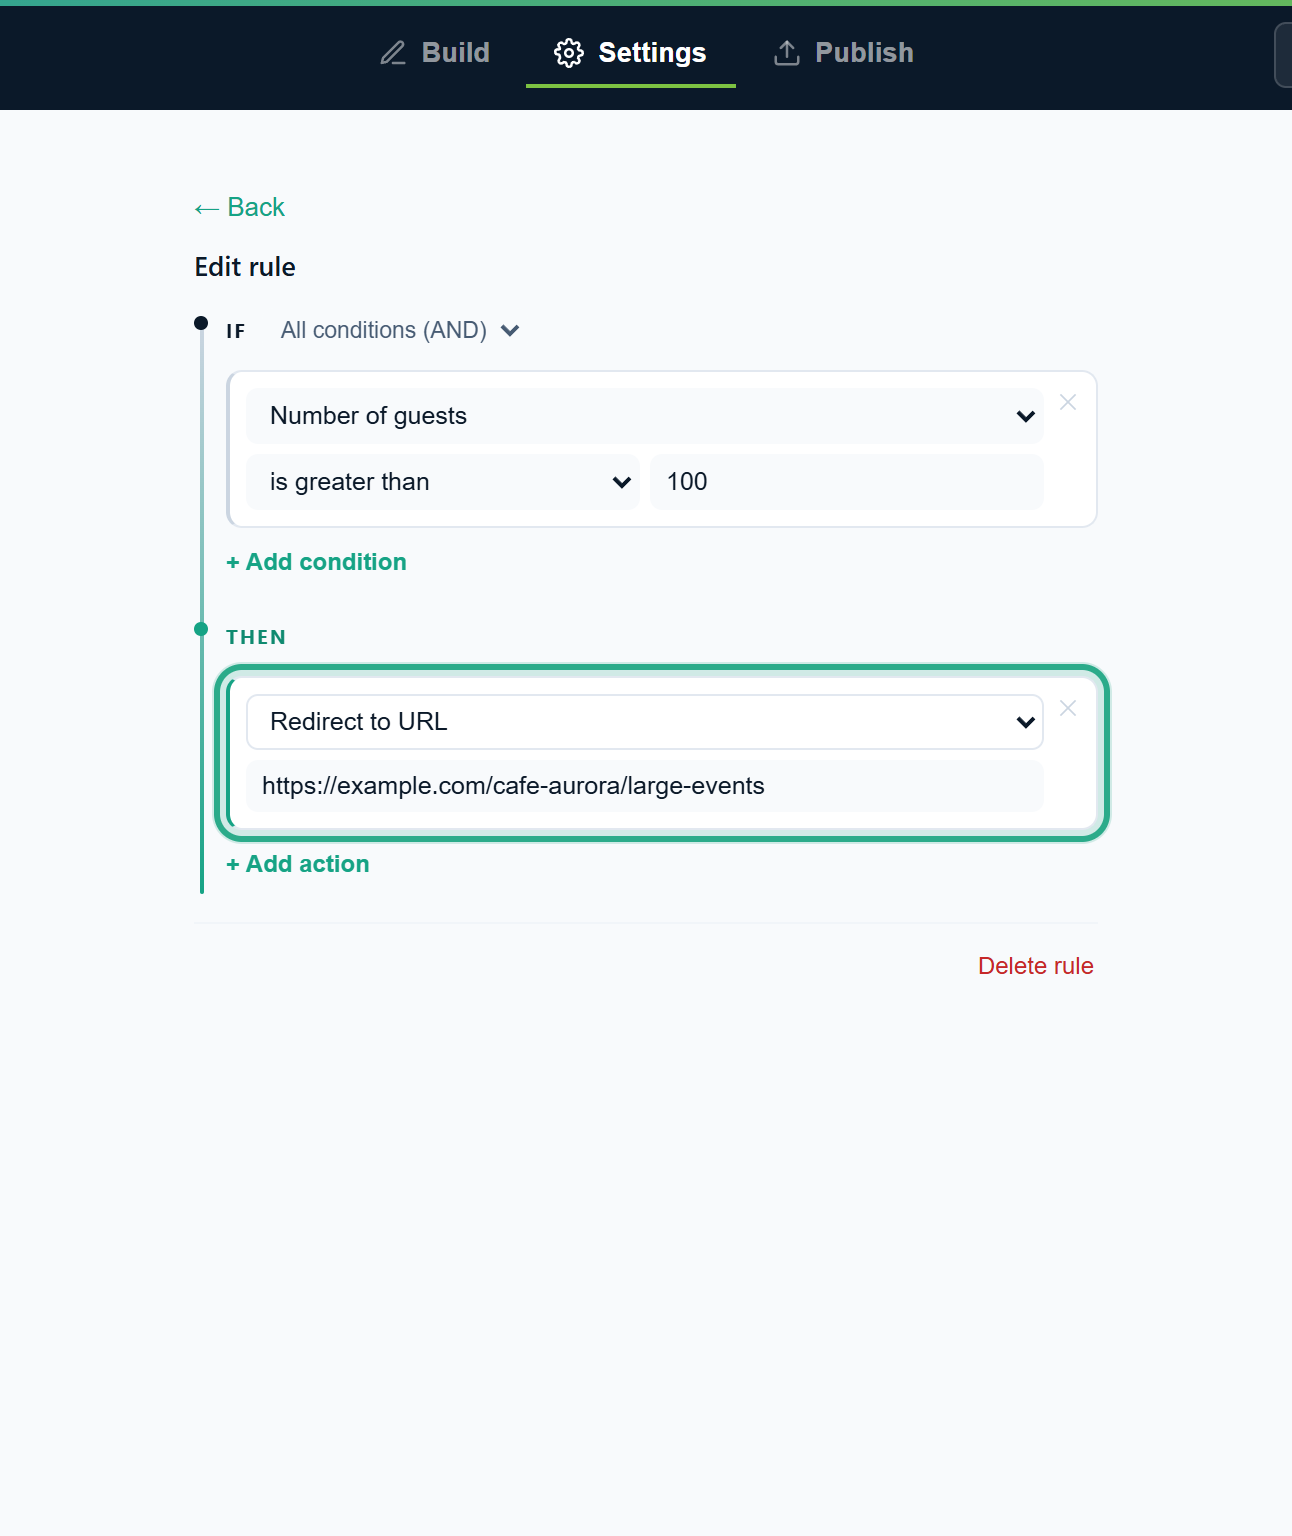 After submitting, the person is sent to this address instead of the thank-you screen.
The default message, shown when no such rule matches, is in Settings → Thank you page → Thank-you message. Go to Conditions → takes you back to the rules.
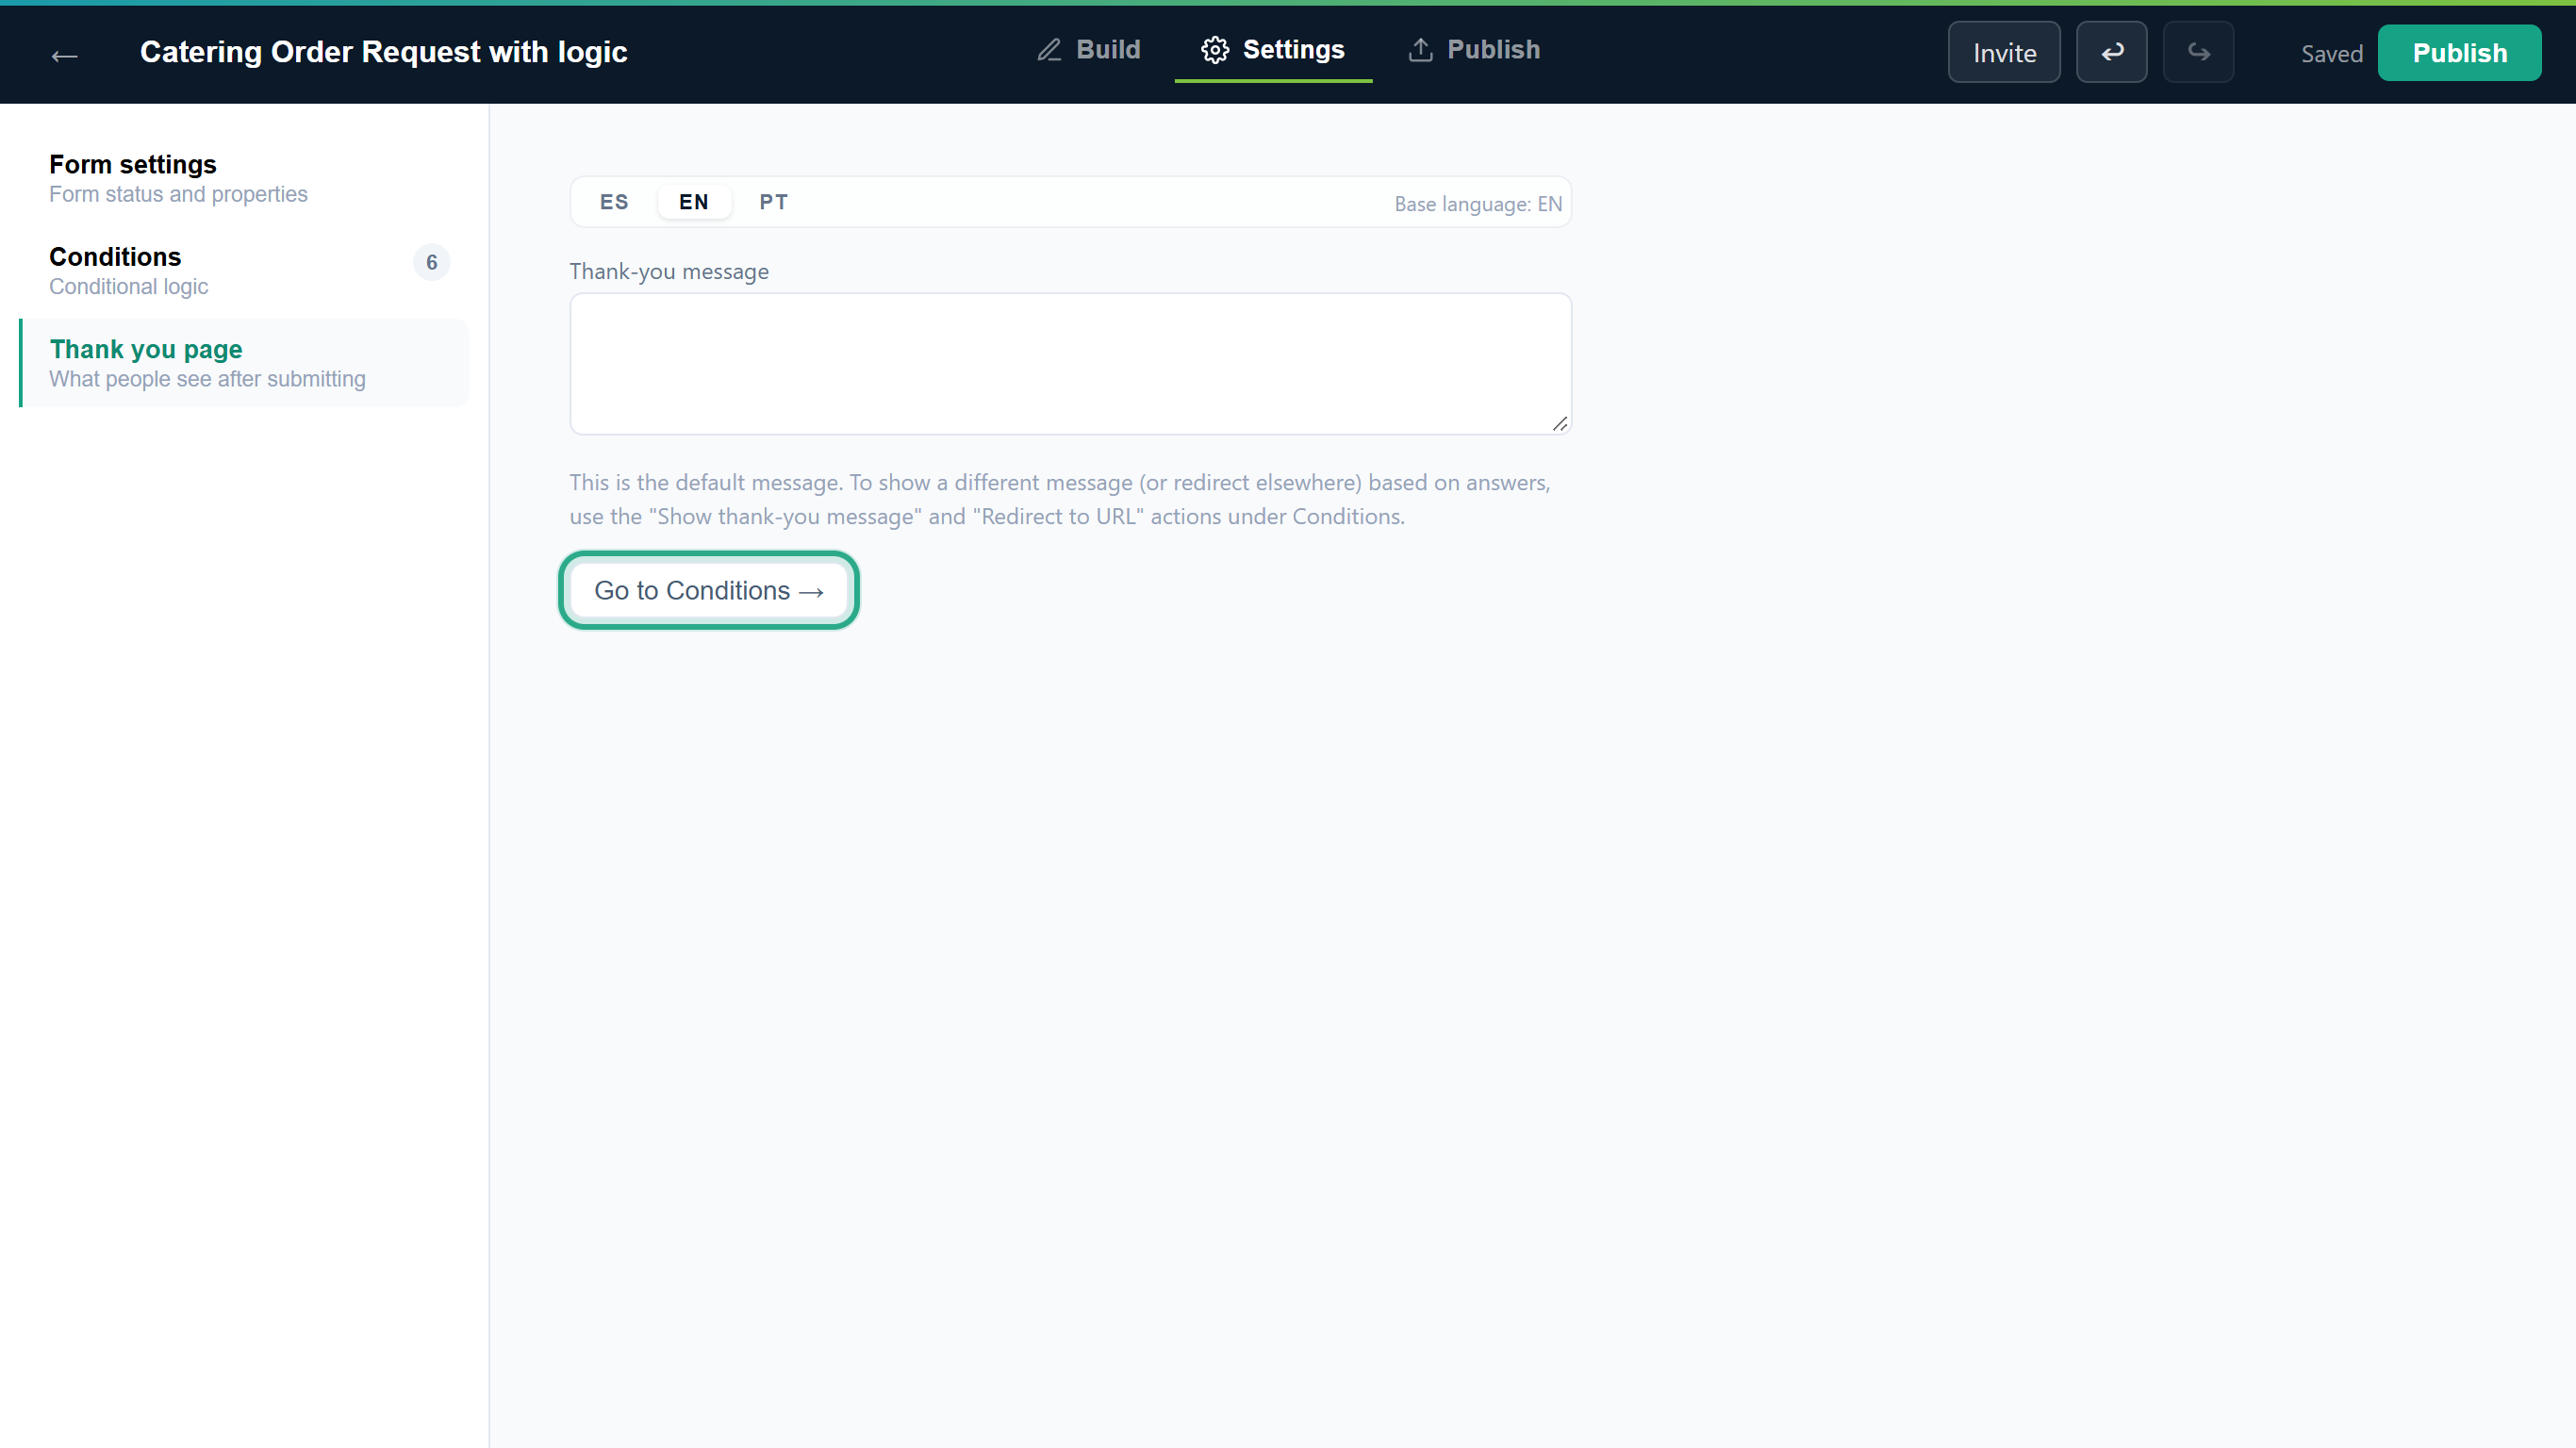 The default thank-you message, and a shortcut to the rules.
Result
Brunch customers see the chef's message; groups over 100 are redirected; everyone else gets the default thank-you message. For these two actions the first matching rule wins: if two thank-you rules (or two redirect rules) match, the one higher in the list is used. A matching Redirect to URL takes priority over Show thank-you message. The message you type in a rule is the same in every language of the form.
Task 8 — Find, edit, pause, duplicate and delete rules
Step-by-step
With at least one rule, the list has Search rules… and two filters: All actions (only the action types the form uses) and All fields (a field used in a rule's conditions or actions). Type a word from a rule, such as a field name or value, to narrow the list. Here guests keeps the three rules about the number of guests. Each card has Edit and, on the right, ⏸ (pause), ⧉ (duplicate), ↑ / ↓ (move) and ✕ (delete).
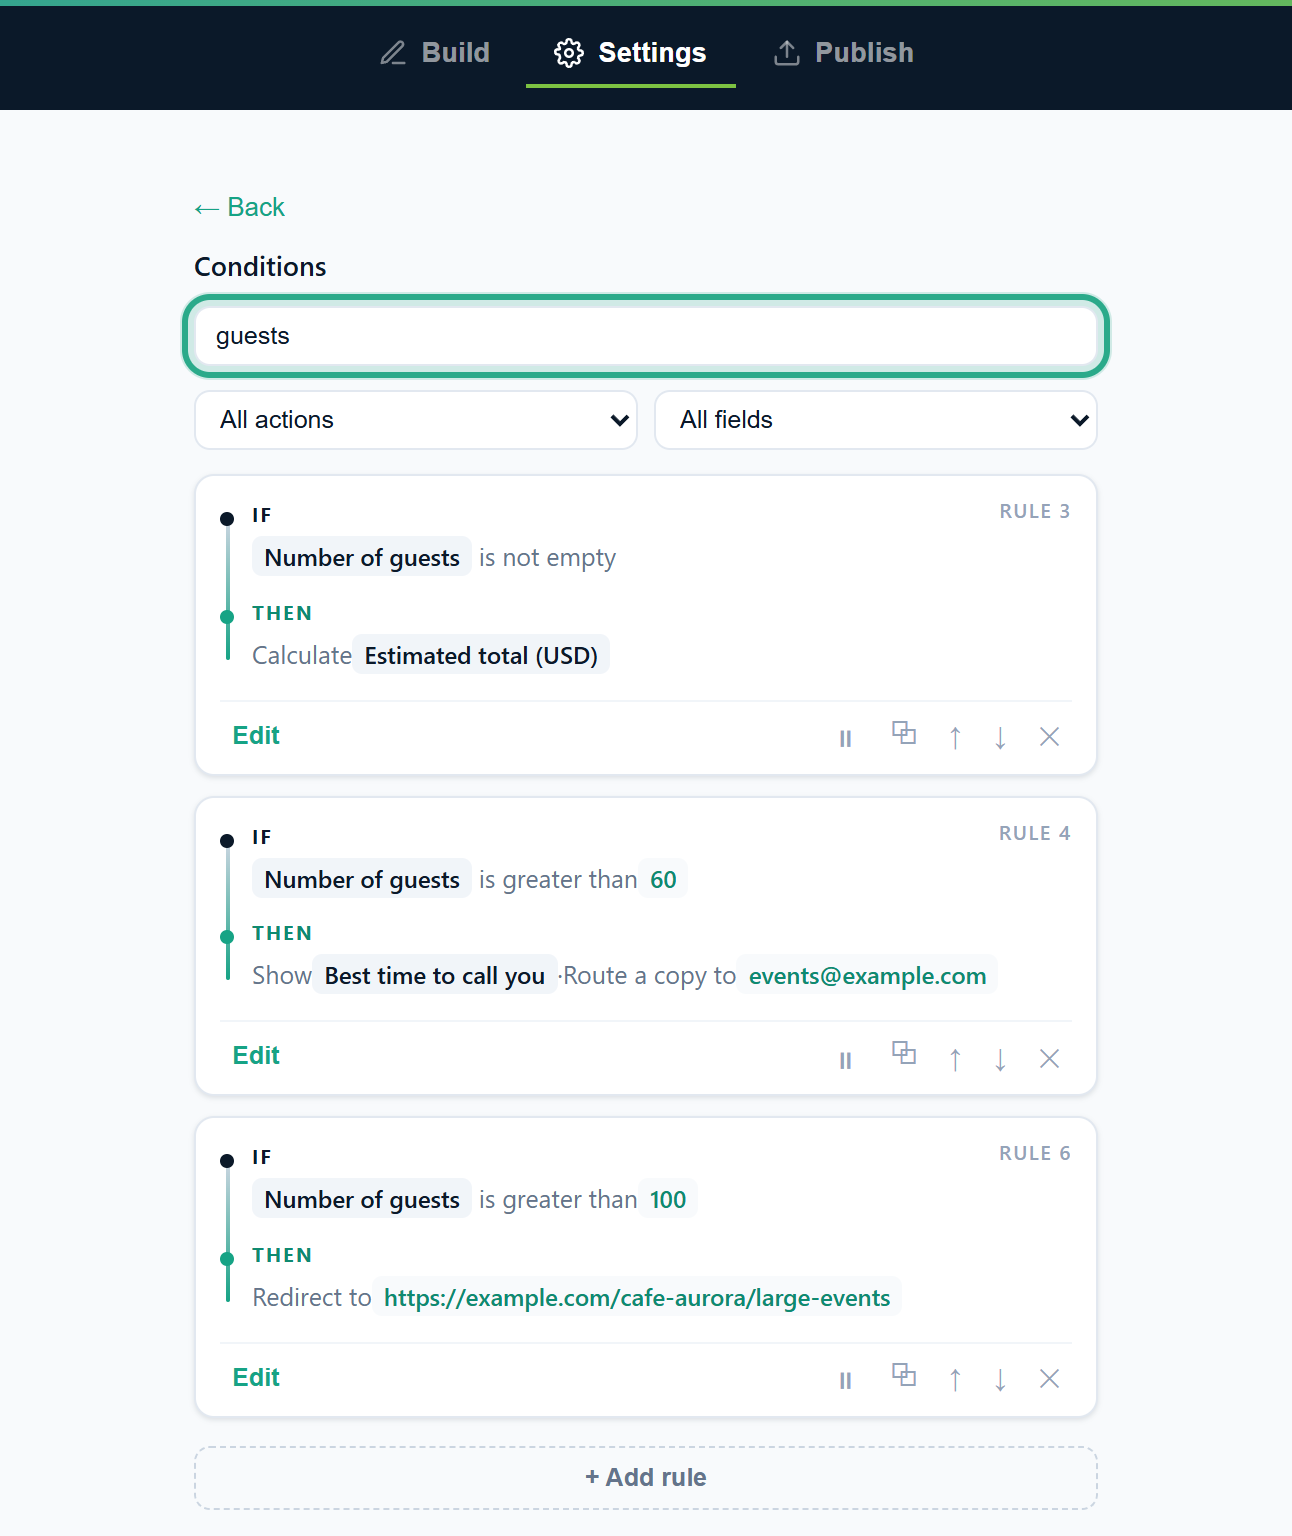 Search and filters combine; rule numbers keep their real order.
To switch a rule off without losing it, click ⏸ (Pause/Disable). The card is greyed out with a Disabled badge and the rule is ignored on the public form. Click ▶ (Resume/Enable) to turn it back on.
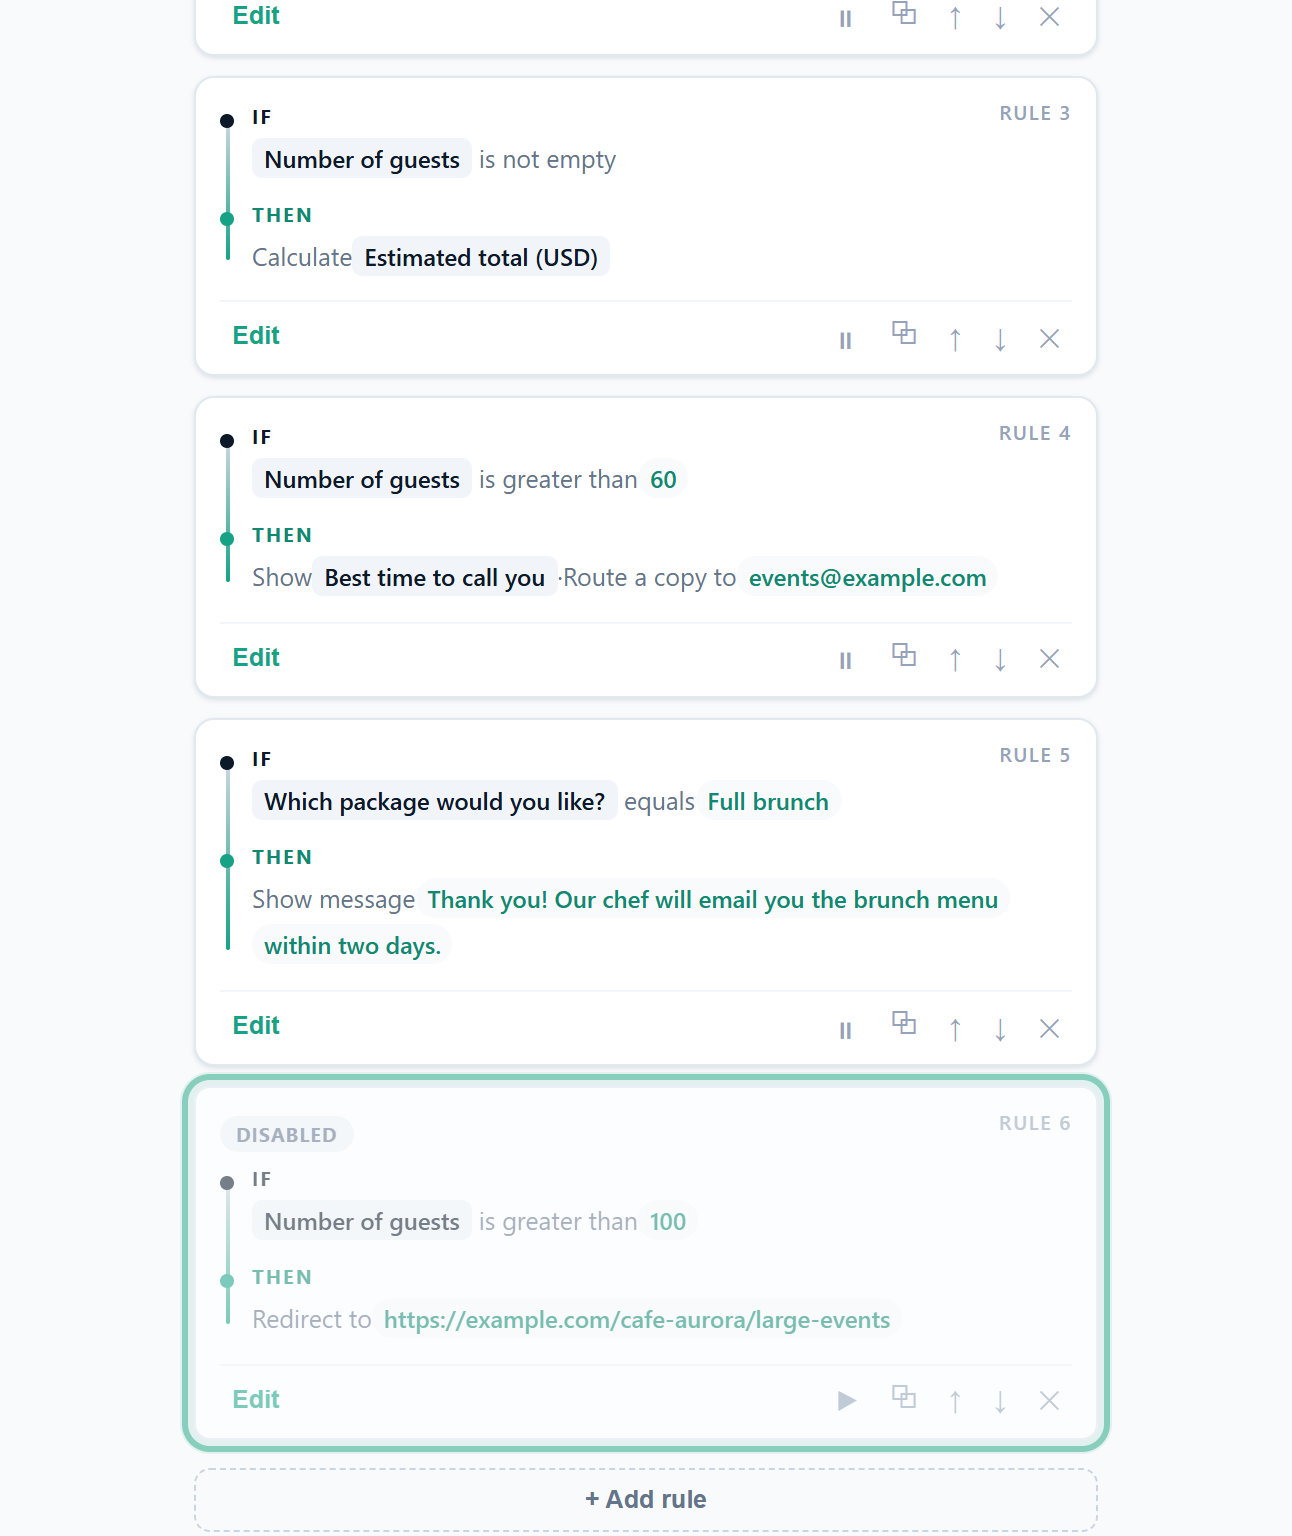 A paused rule keeps its conditions and actions.
To start a new rule from an existing one, click ⧉ (Duplicate). An exact copy appears right below the original; click Edit on it to change what you need.
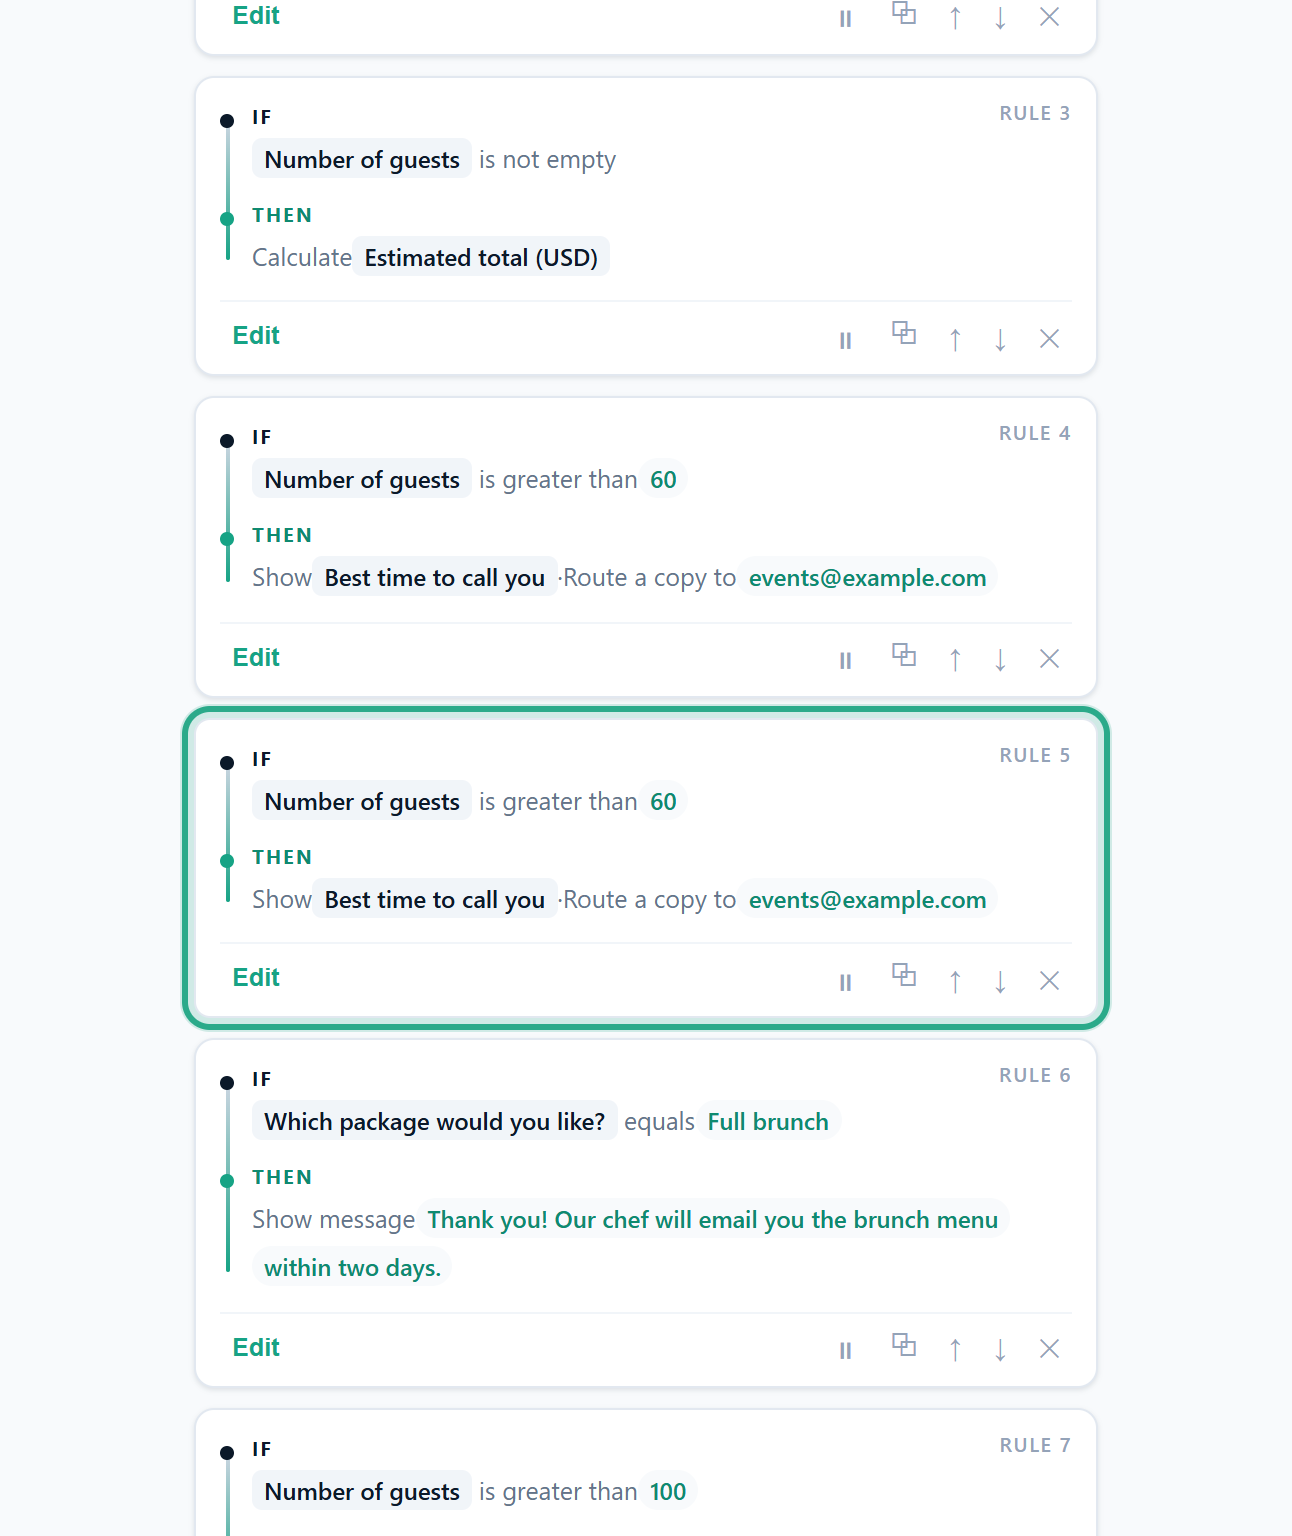 The copy is identical, paused state included.
To delete a rule, click ✕ (Delete) on its card, or Delete rule at the bottom of the Edit rule screen. Here the copy from step 26 goes. Changed your mind? ↩ Undo in the top bar brings it back; undo covers every change to rules.
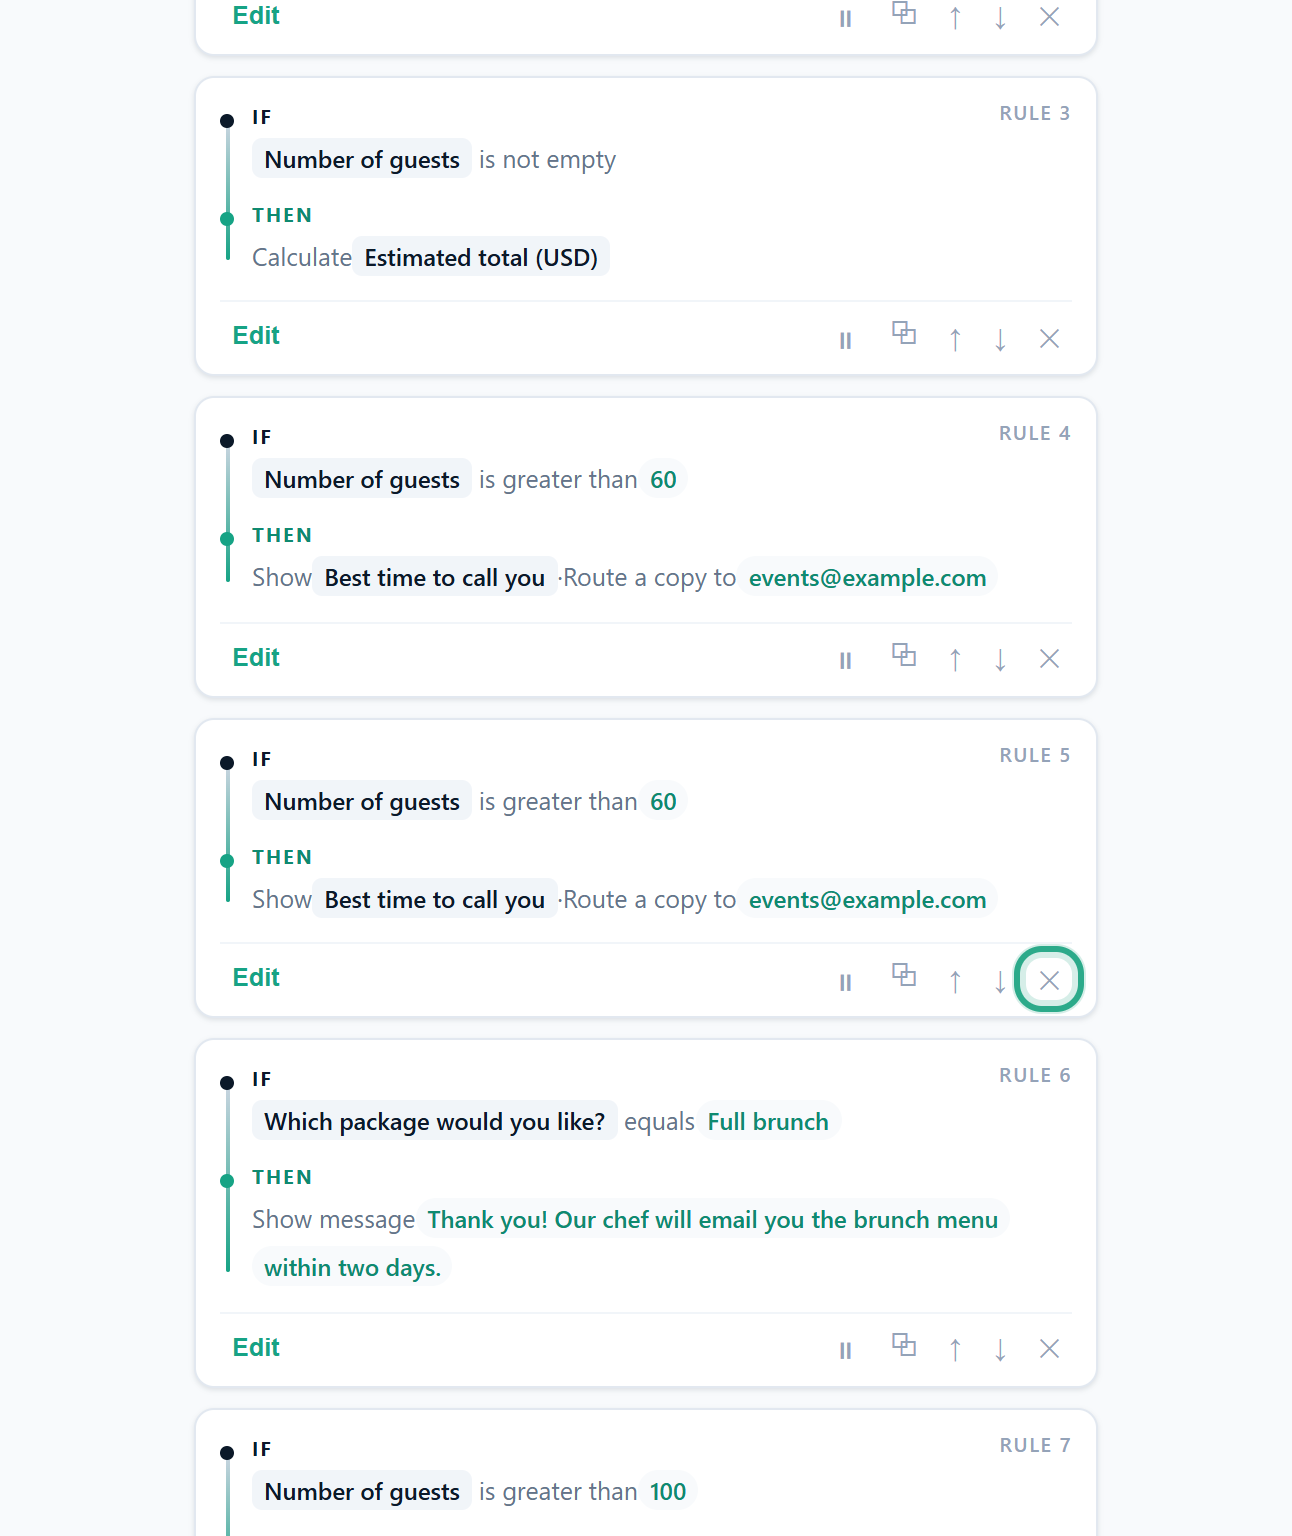 Deleting the copy we don't need.
Result
The list holds exactly the rules you want, in the order you want. Use ↑ and ↓ to reorder: order matters when two rules act on the same field (see How rules are applied).
Task 9 — Publish and see the rules on the public form
Step-by-step
Rules are part of the form, so they go live when you click Publish (or Update, for a form that is already live).
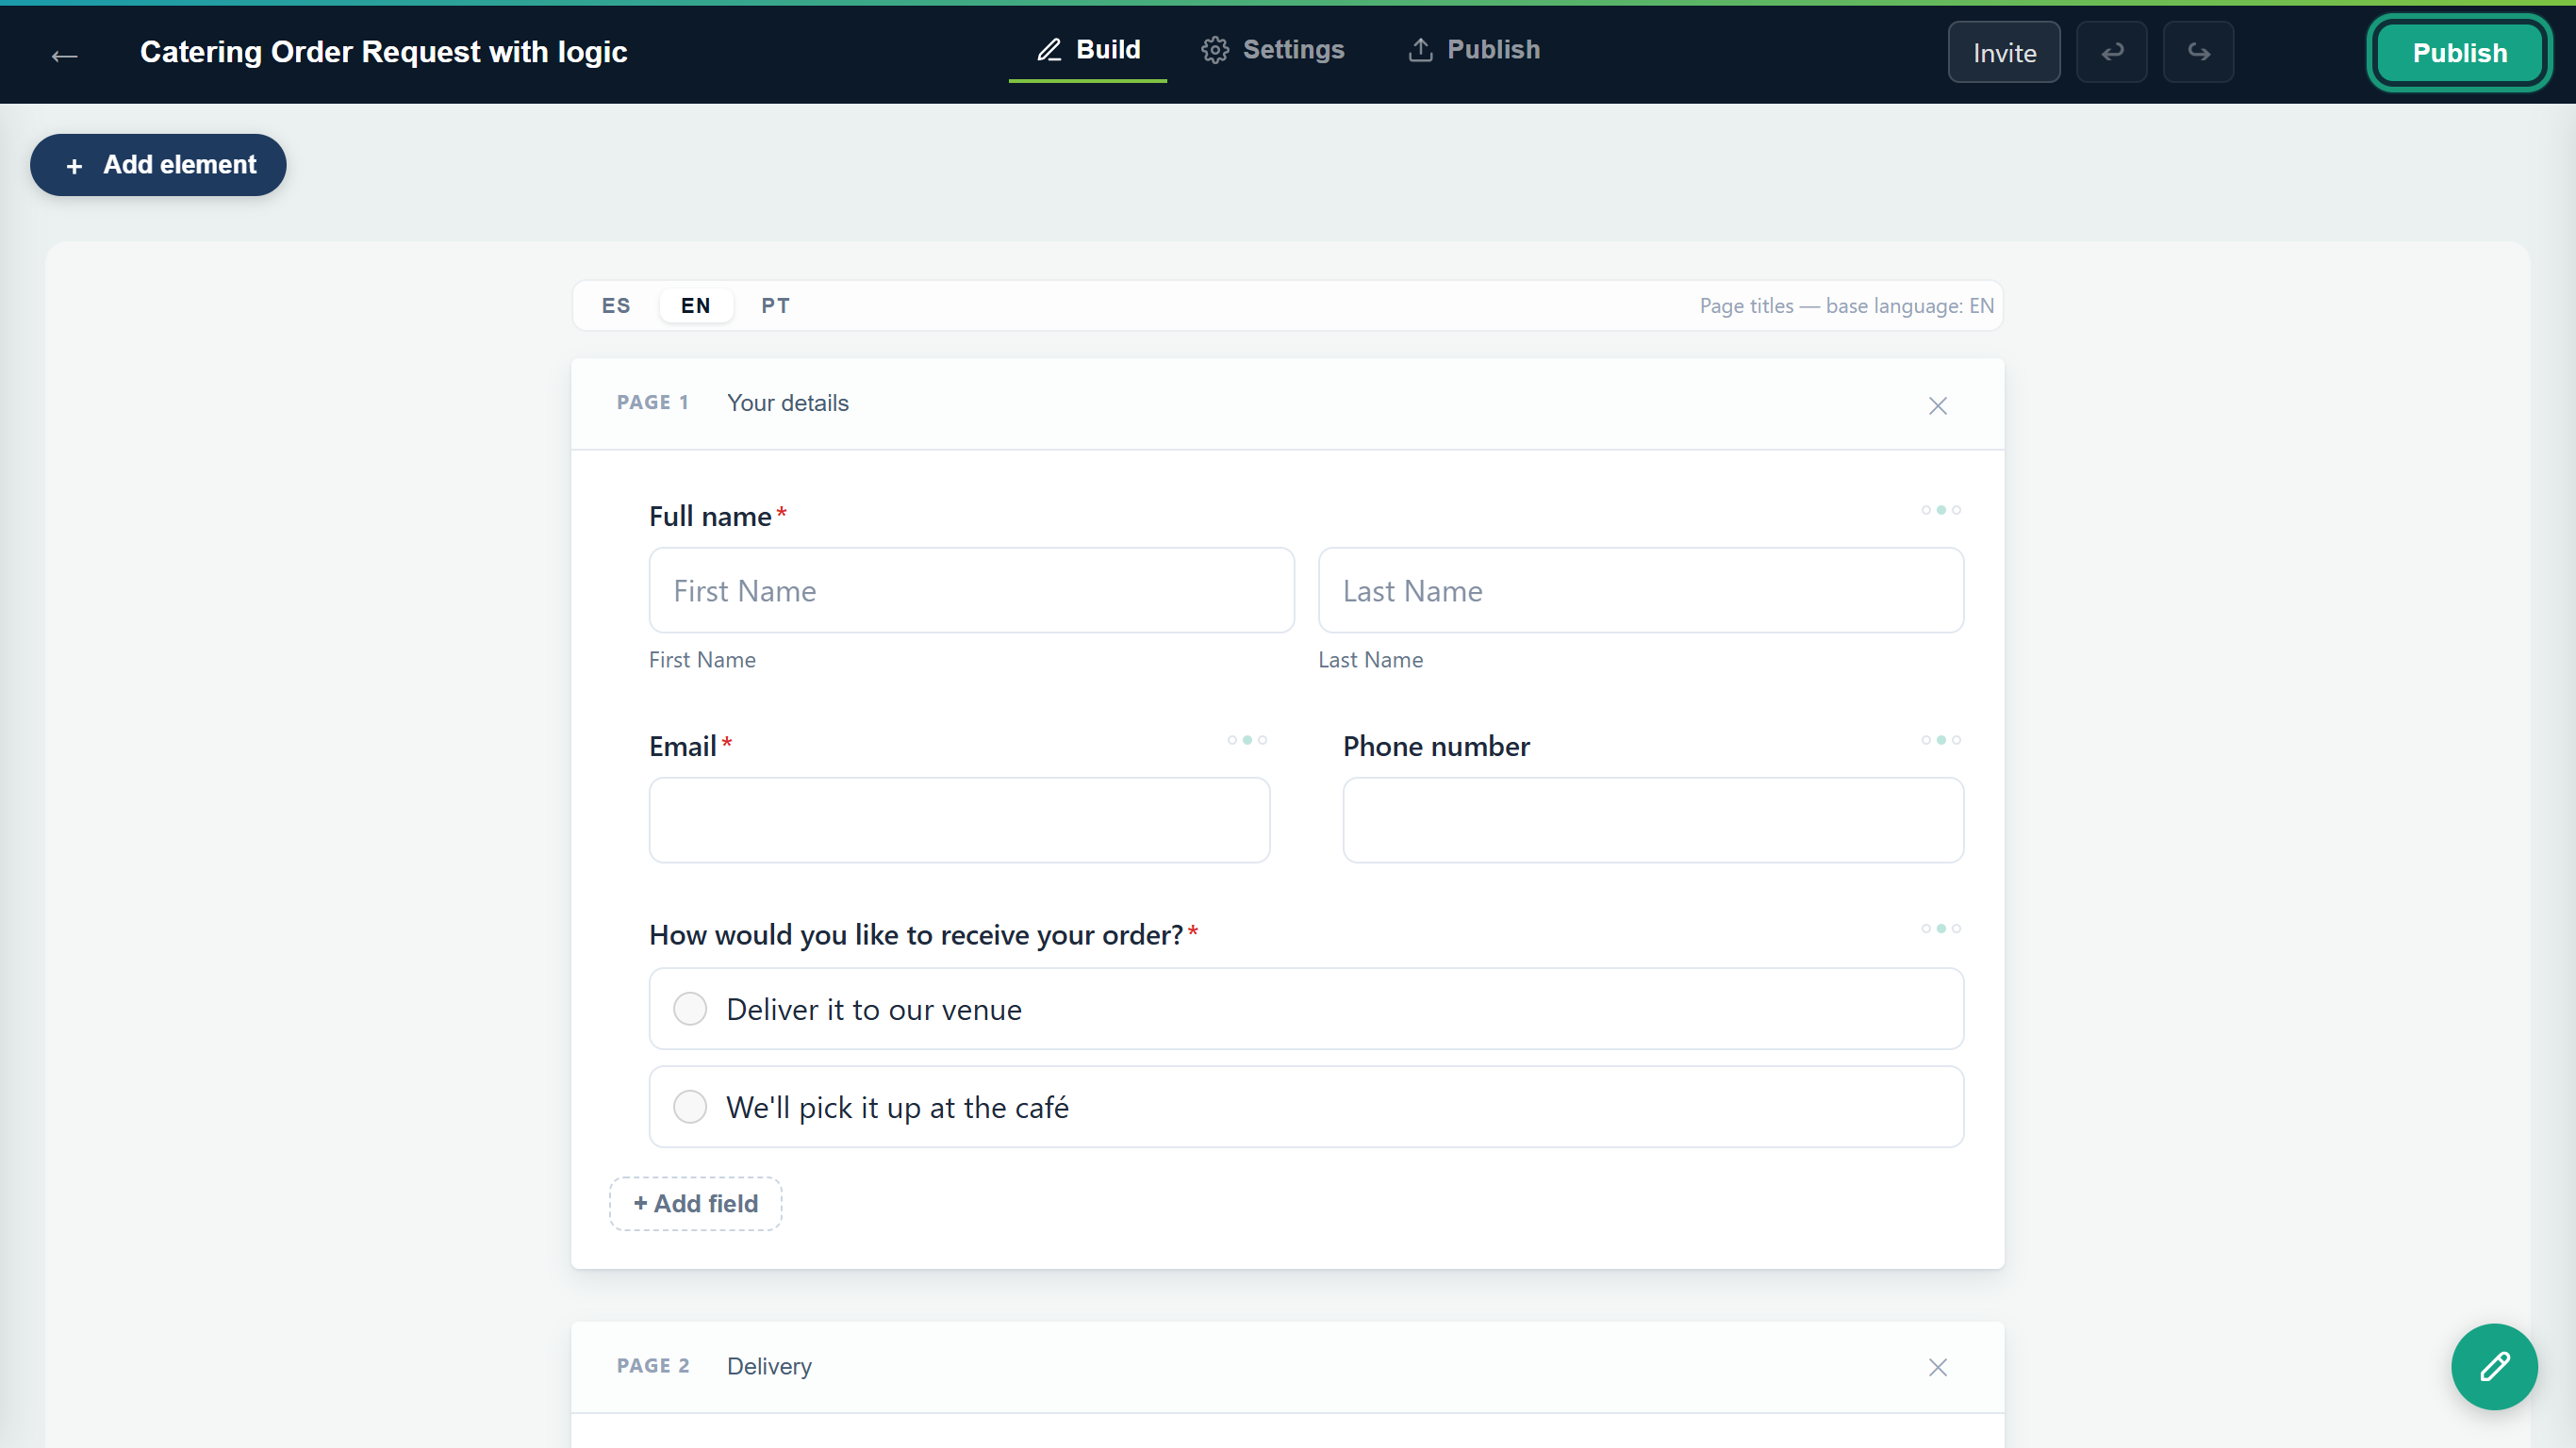 Publish pushes the form and its rules live.
On the public form, the visitor fills in Your details and chooses Deliver it to our venue, then clicks Next.
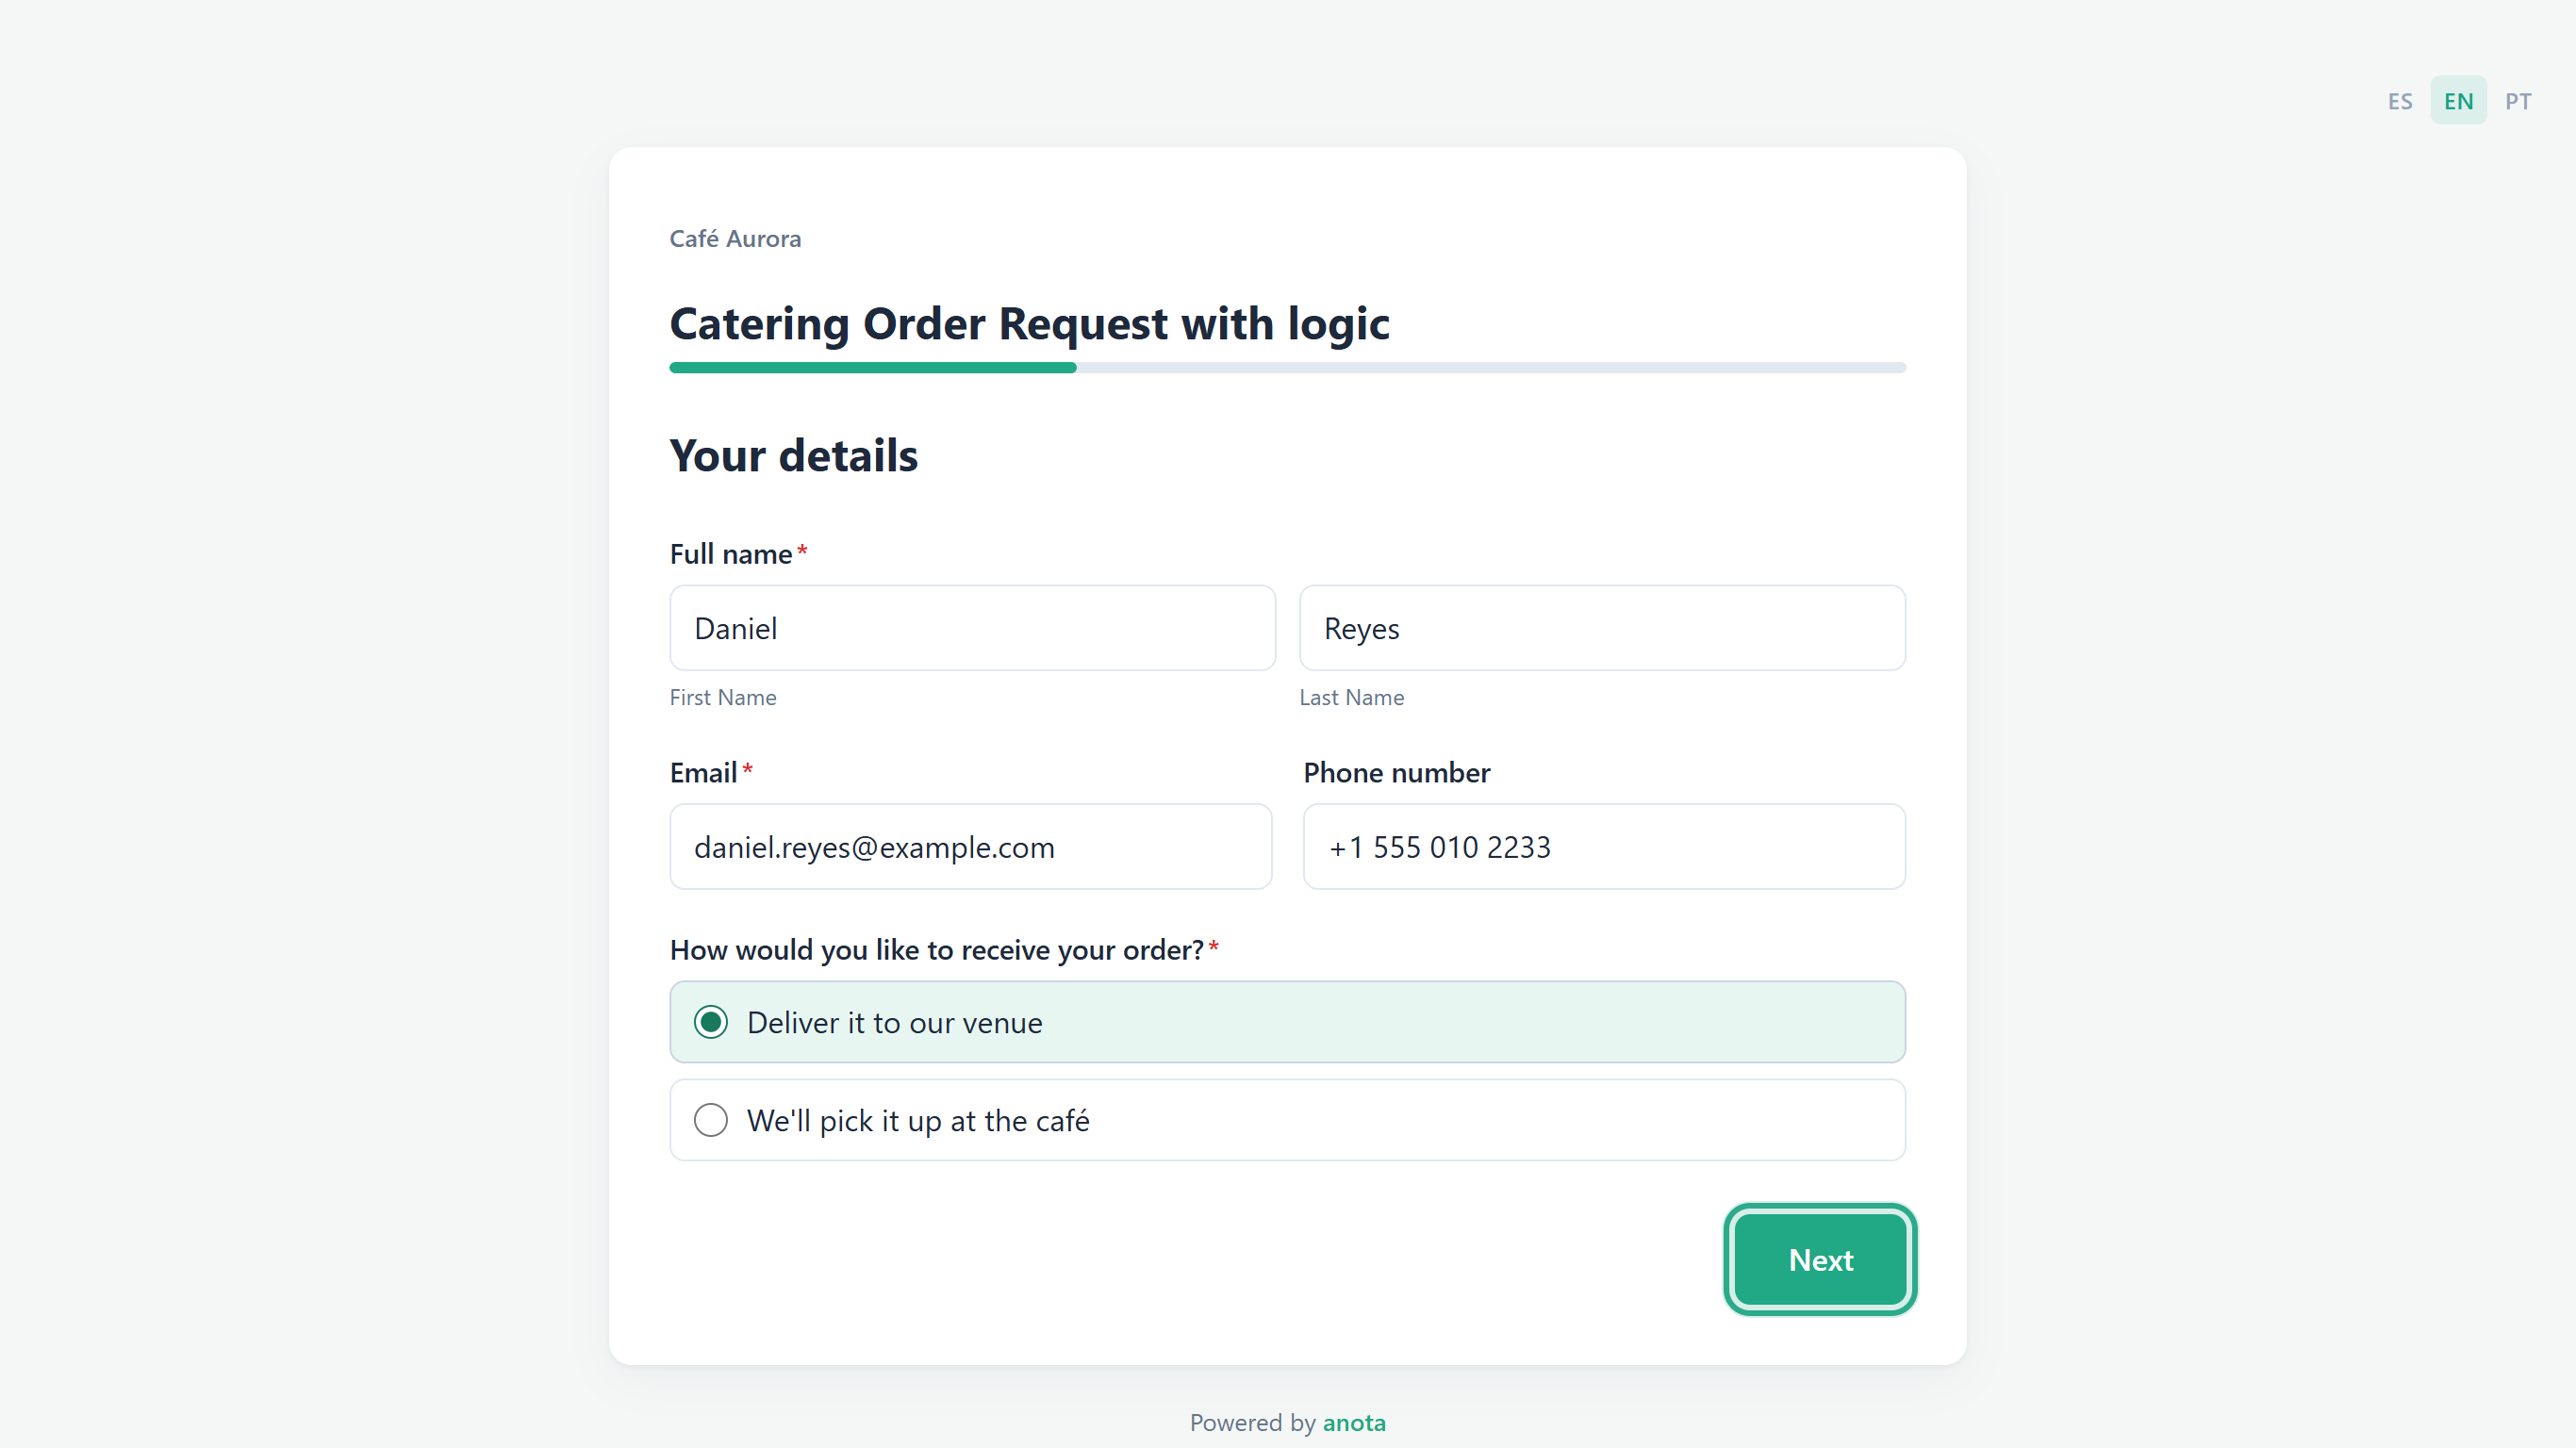 No rule matches yet, so the next page is Delivery.
They fill in the Delivery page and click Next.
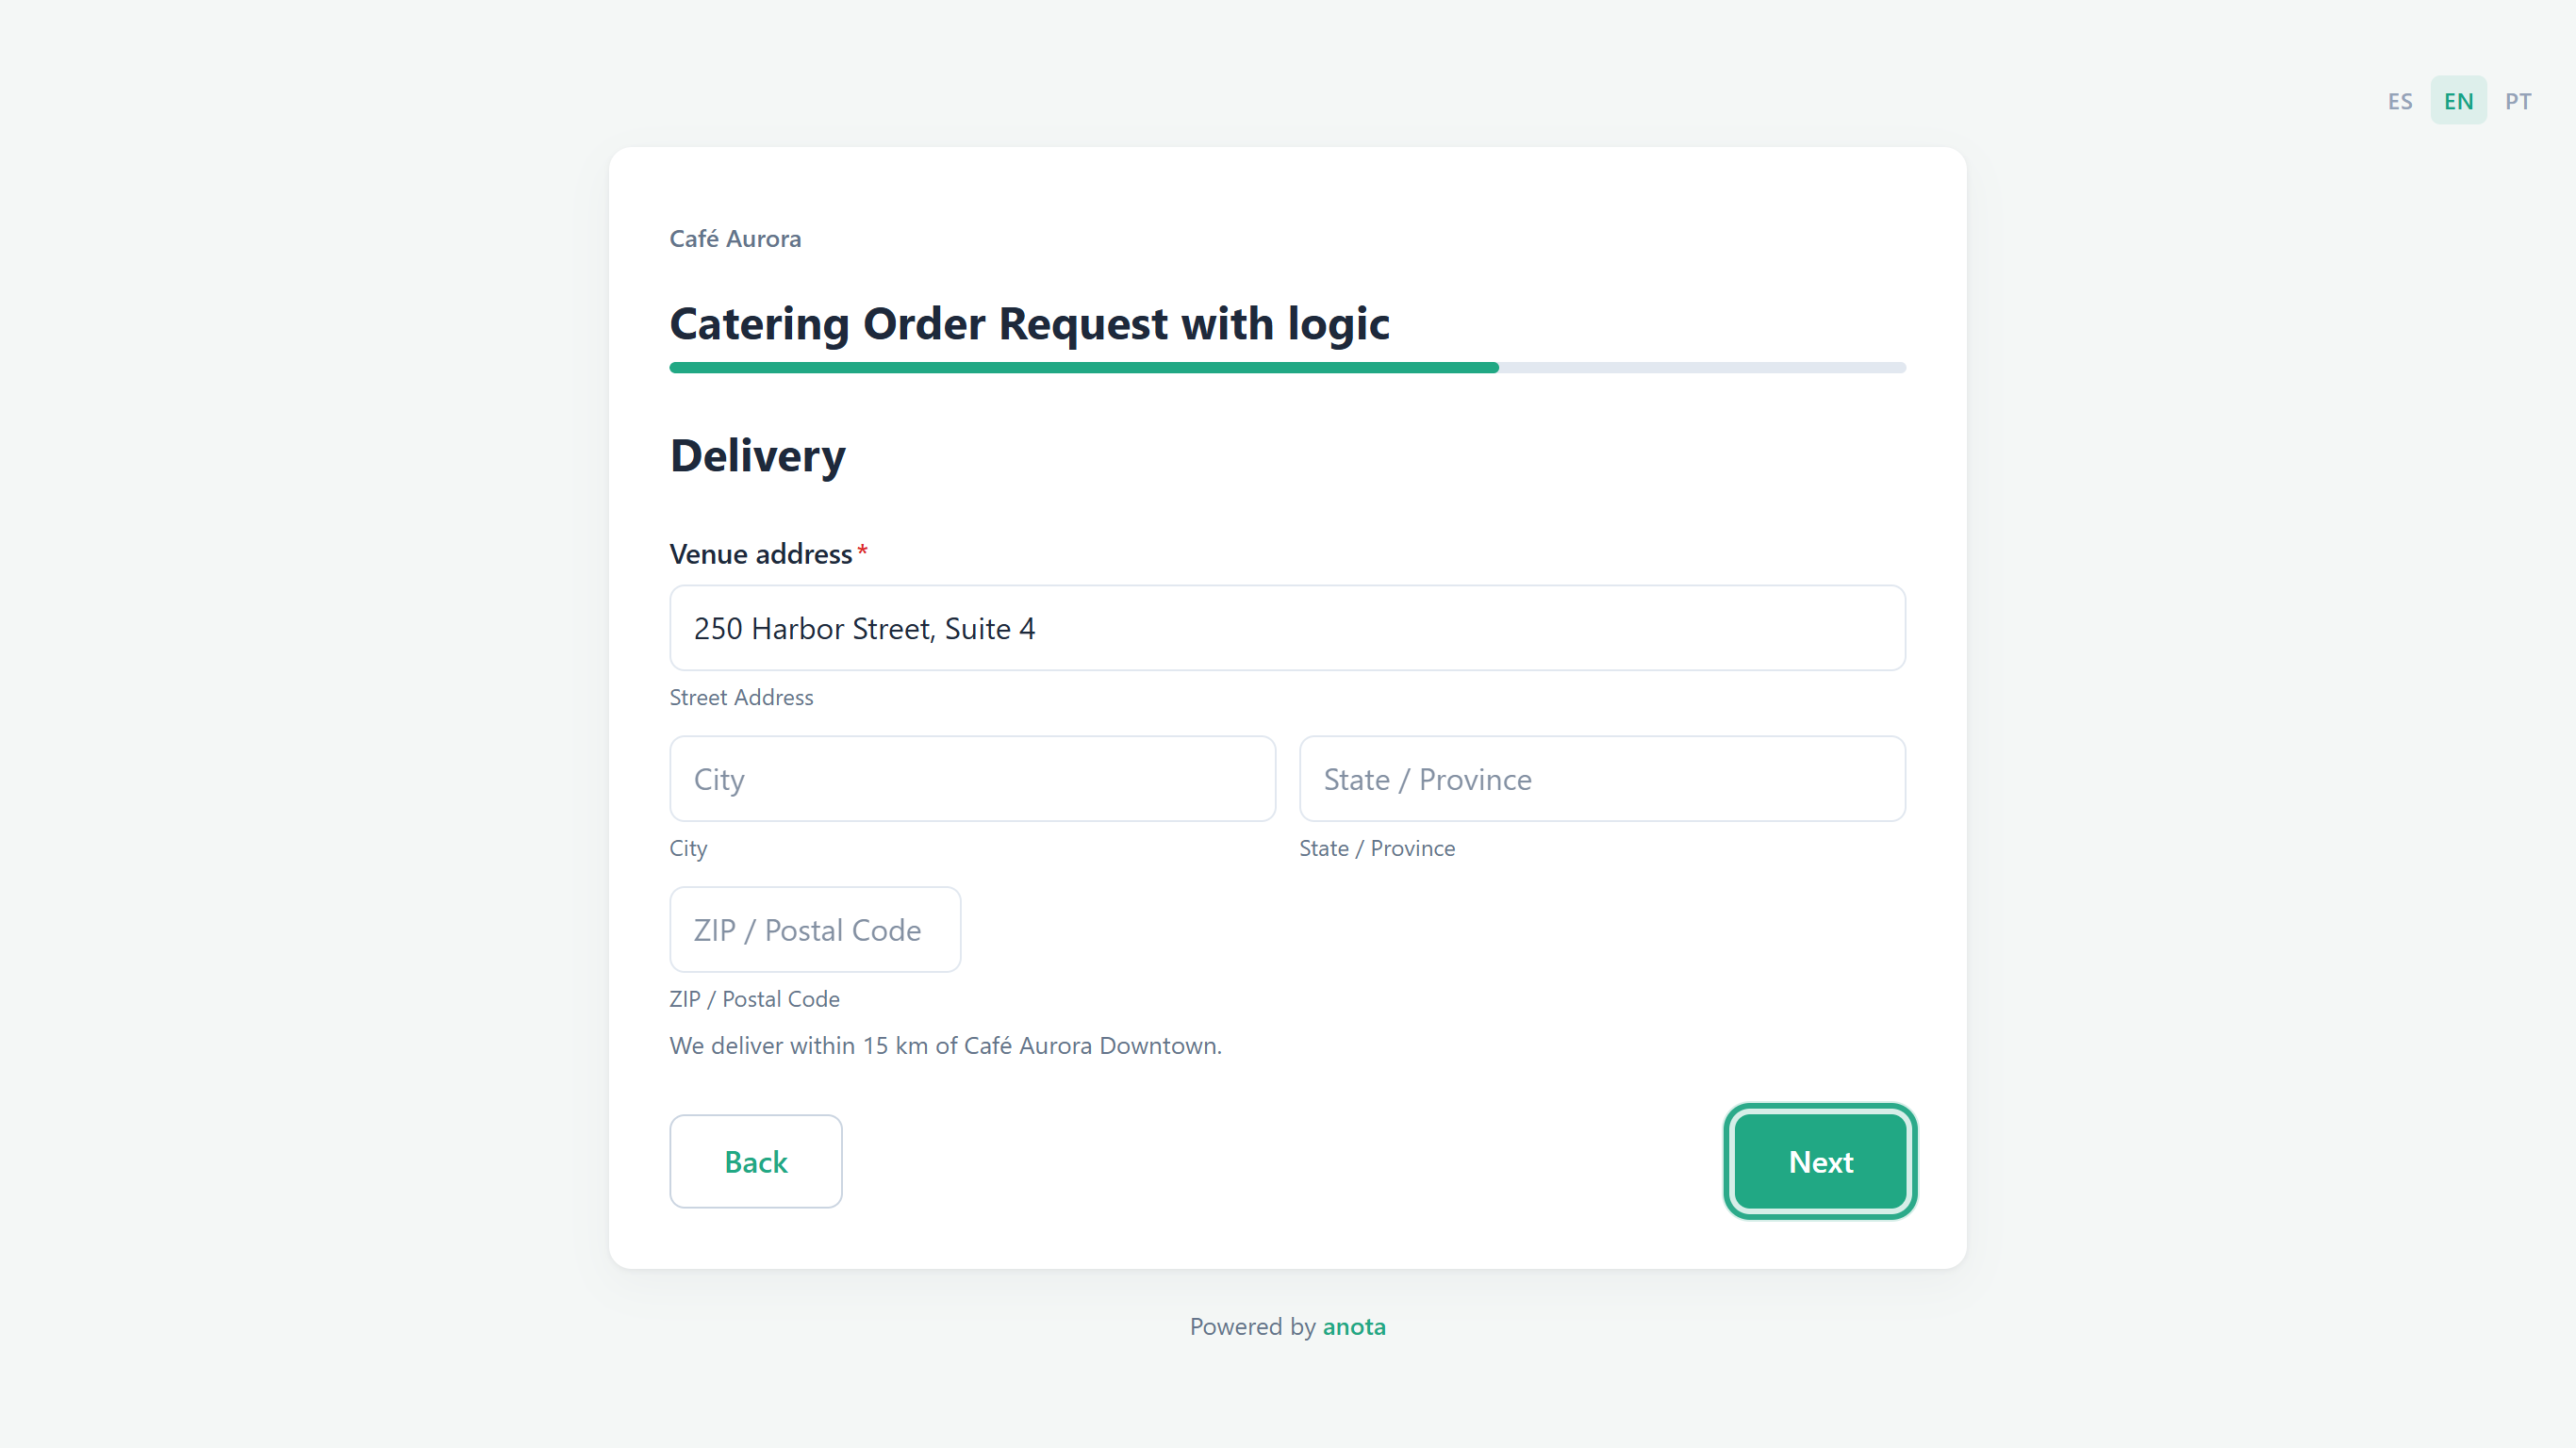 Delivery customers see the Delivery page.
On Your event, Dietary requirements and Best time to call you are not there yet, and Estimated total (USD) is empty.
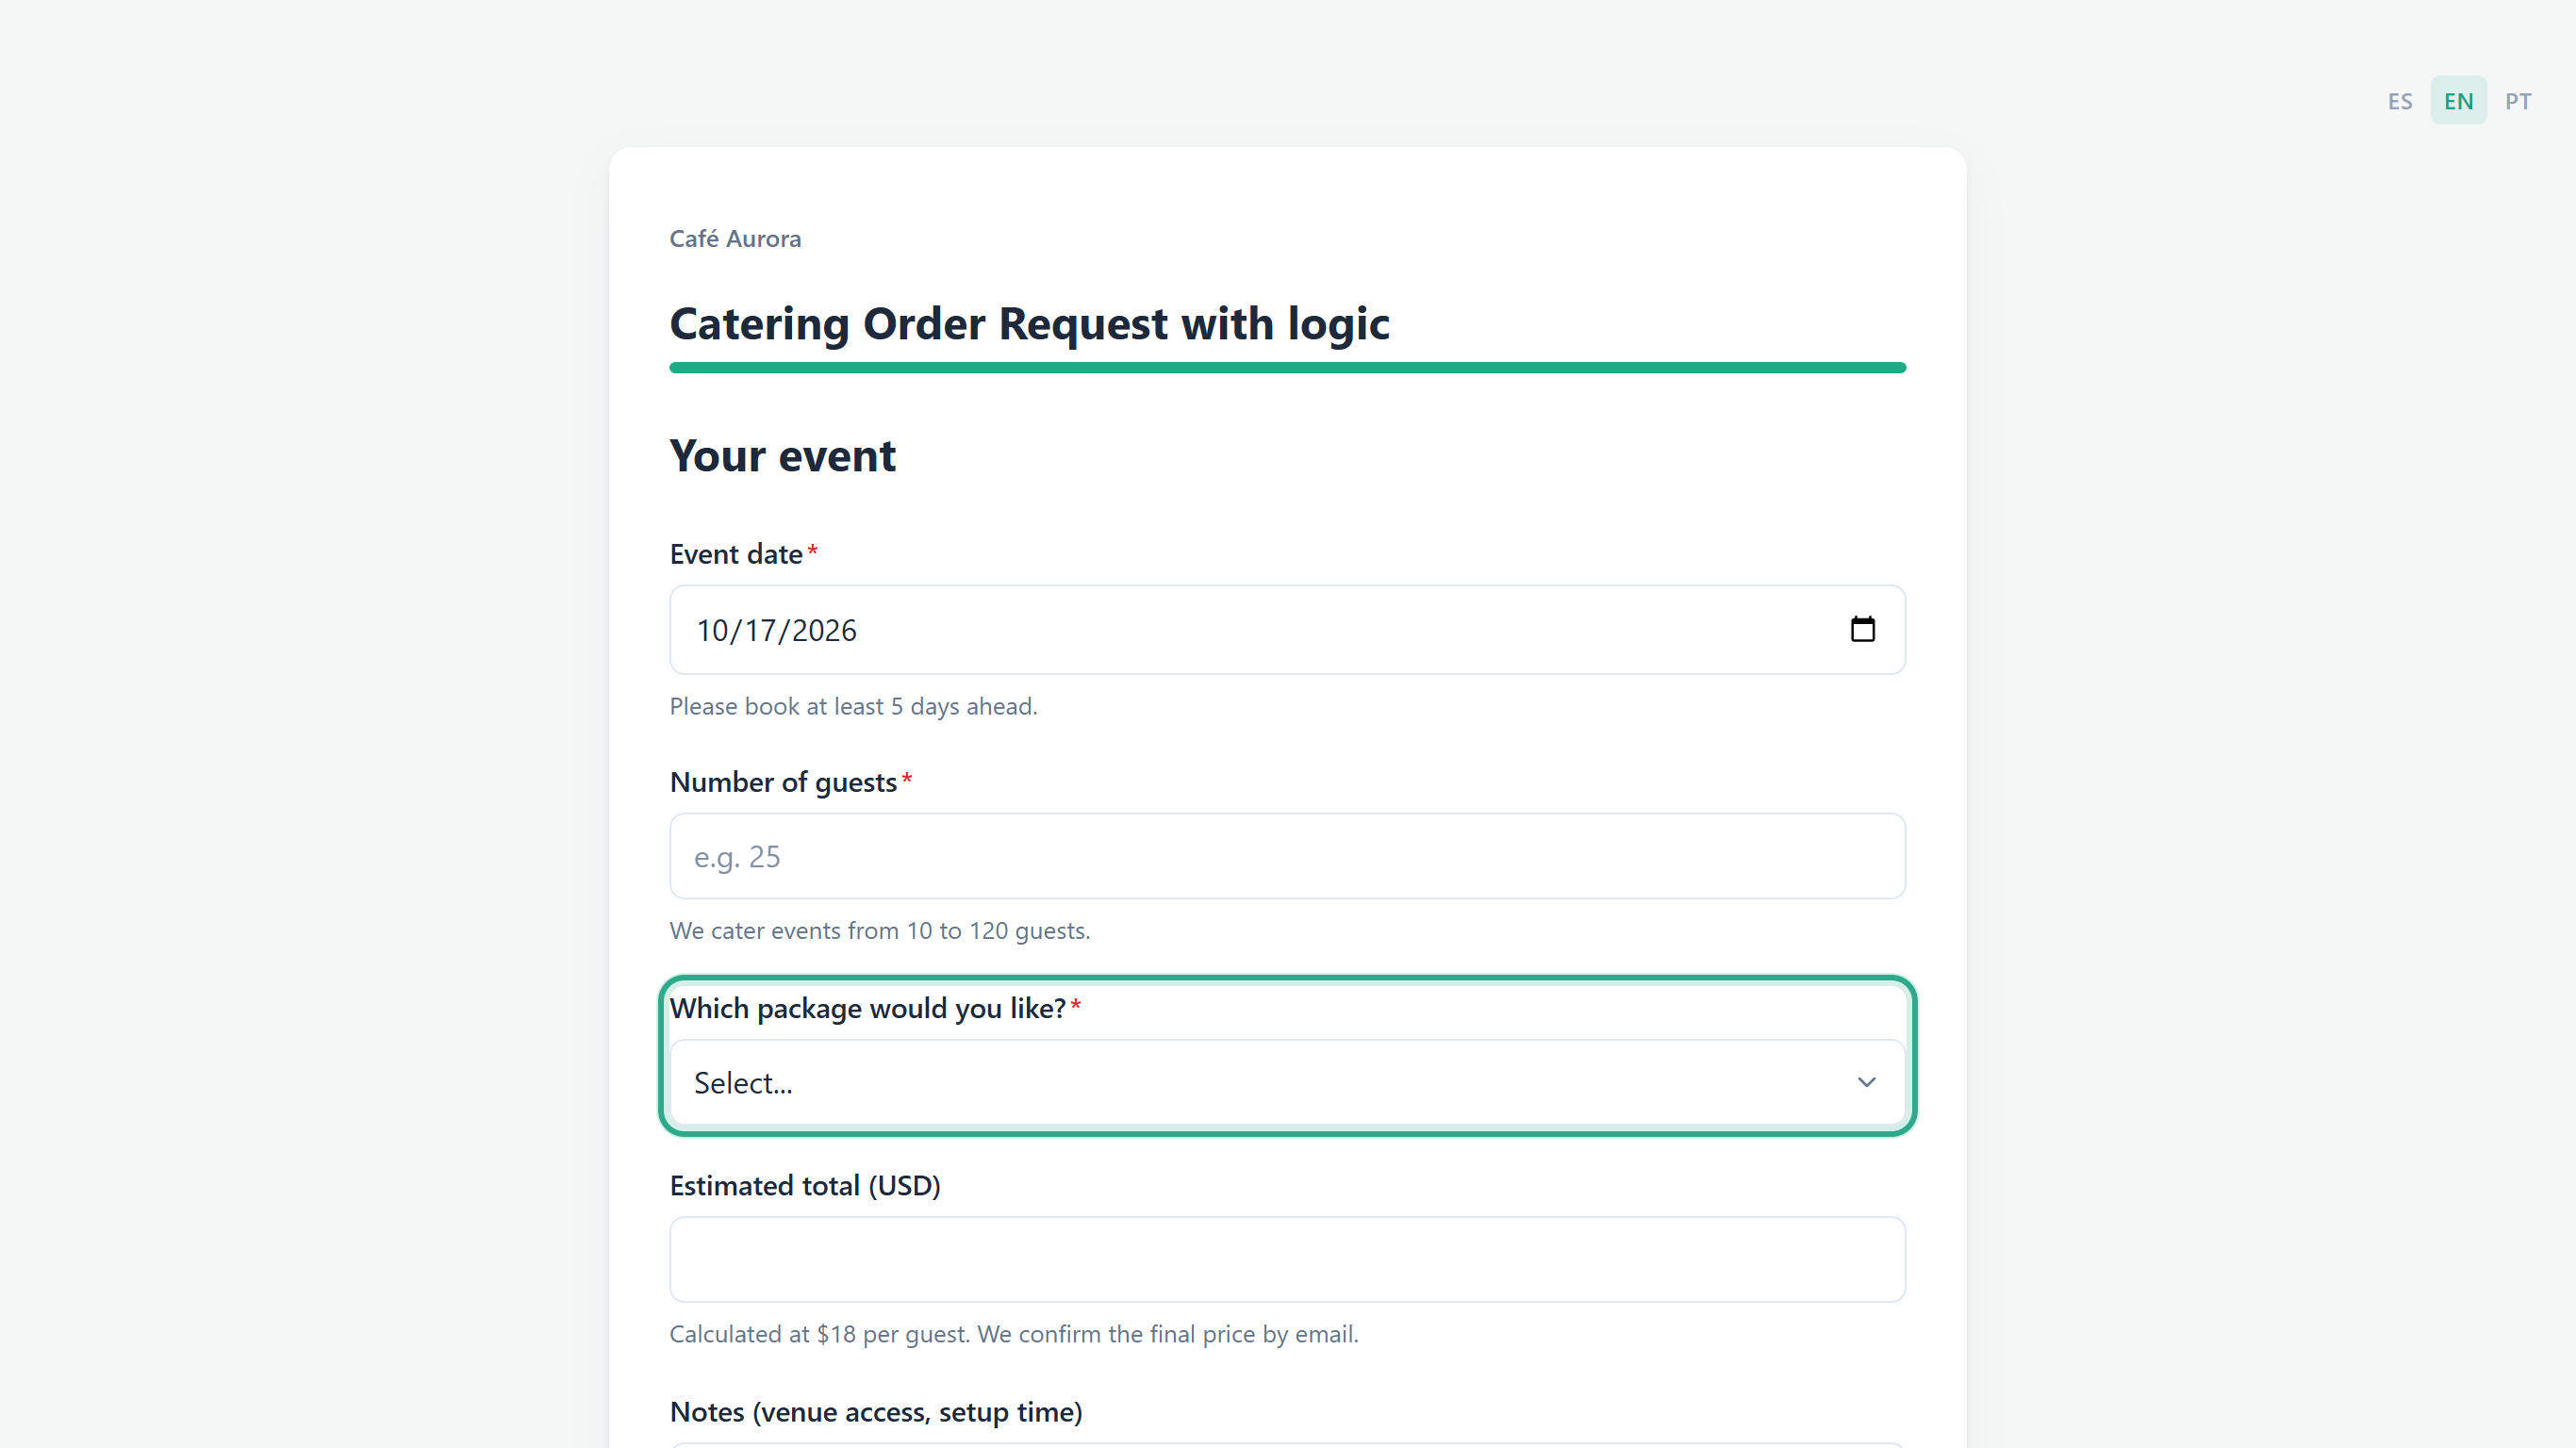 Before any condition is met.
As soon as they type 80 guests and choose Full brunch, the page changes: Dietary requirements appears with a red asterisk (Rule 1), Best time to call you appears (Rule 4) and Estimated total (USD) shows 1440 (Rule 3). No button needs to be clicked.
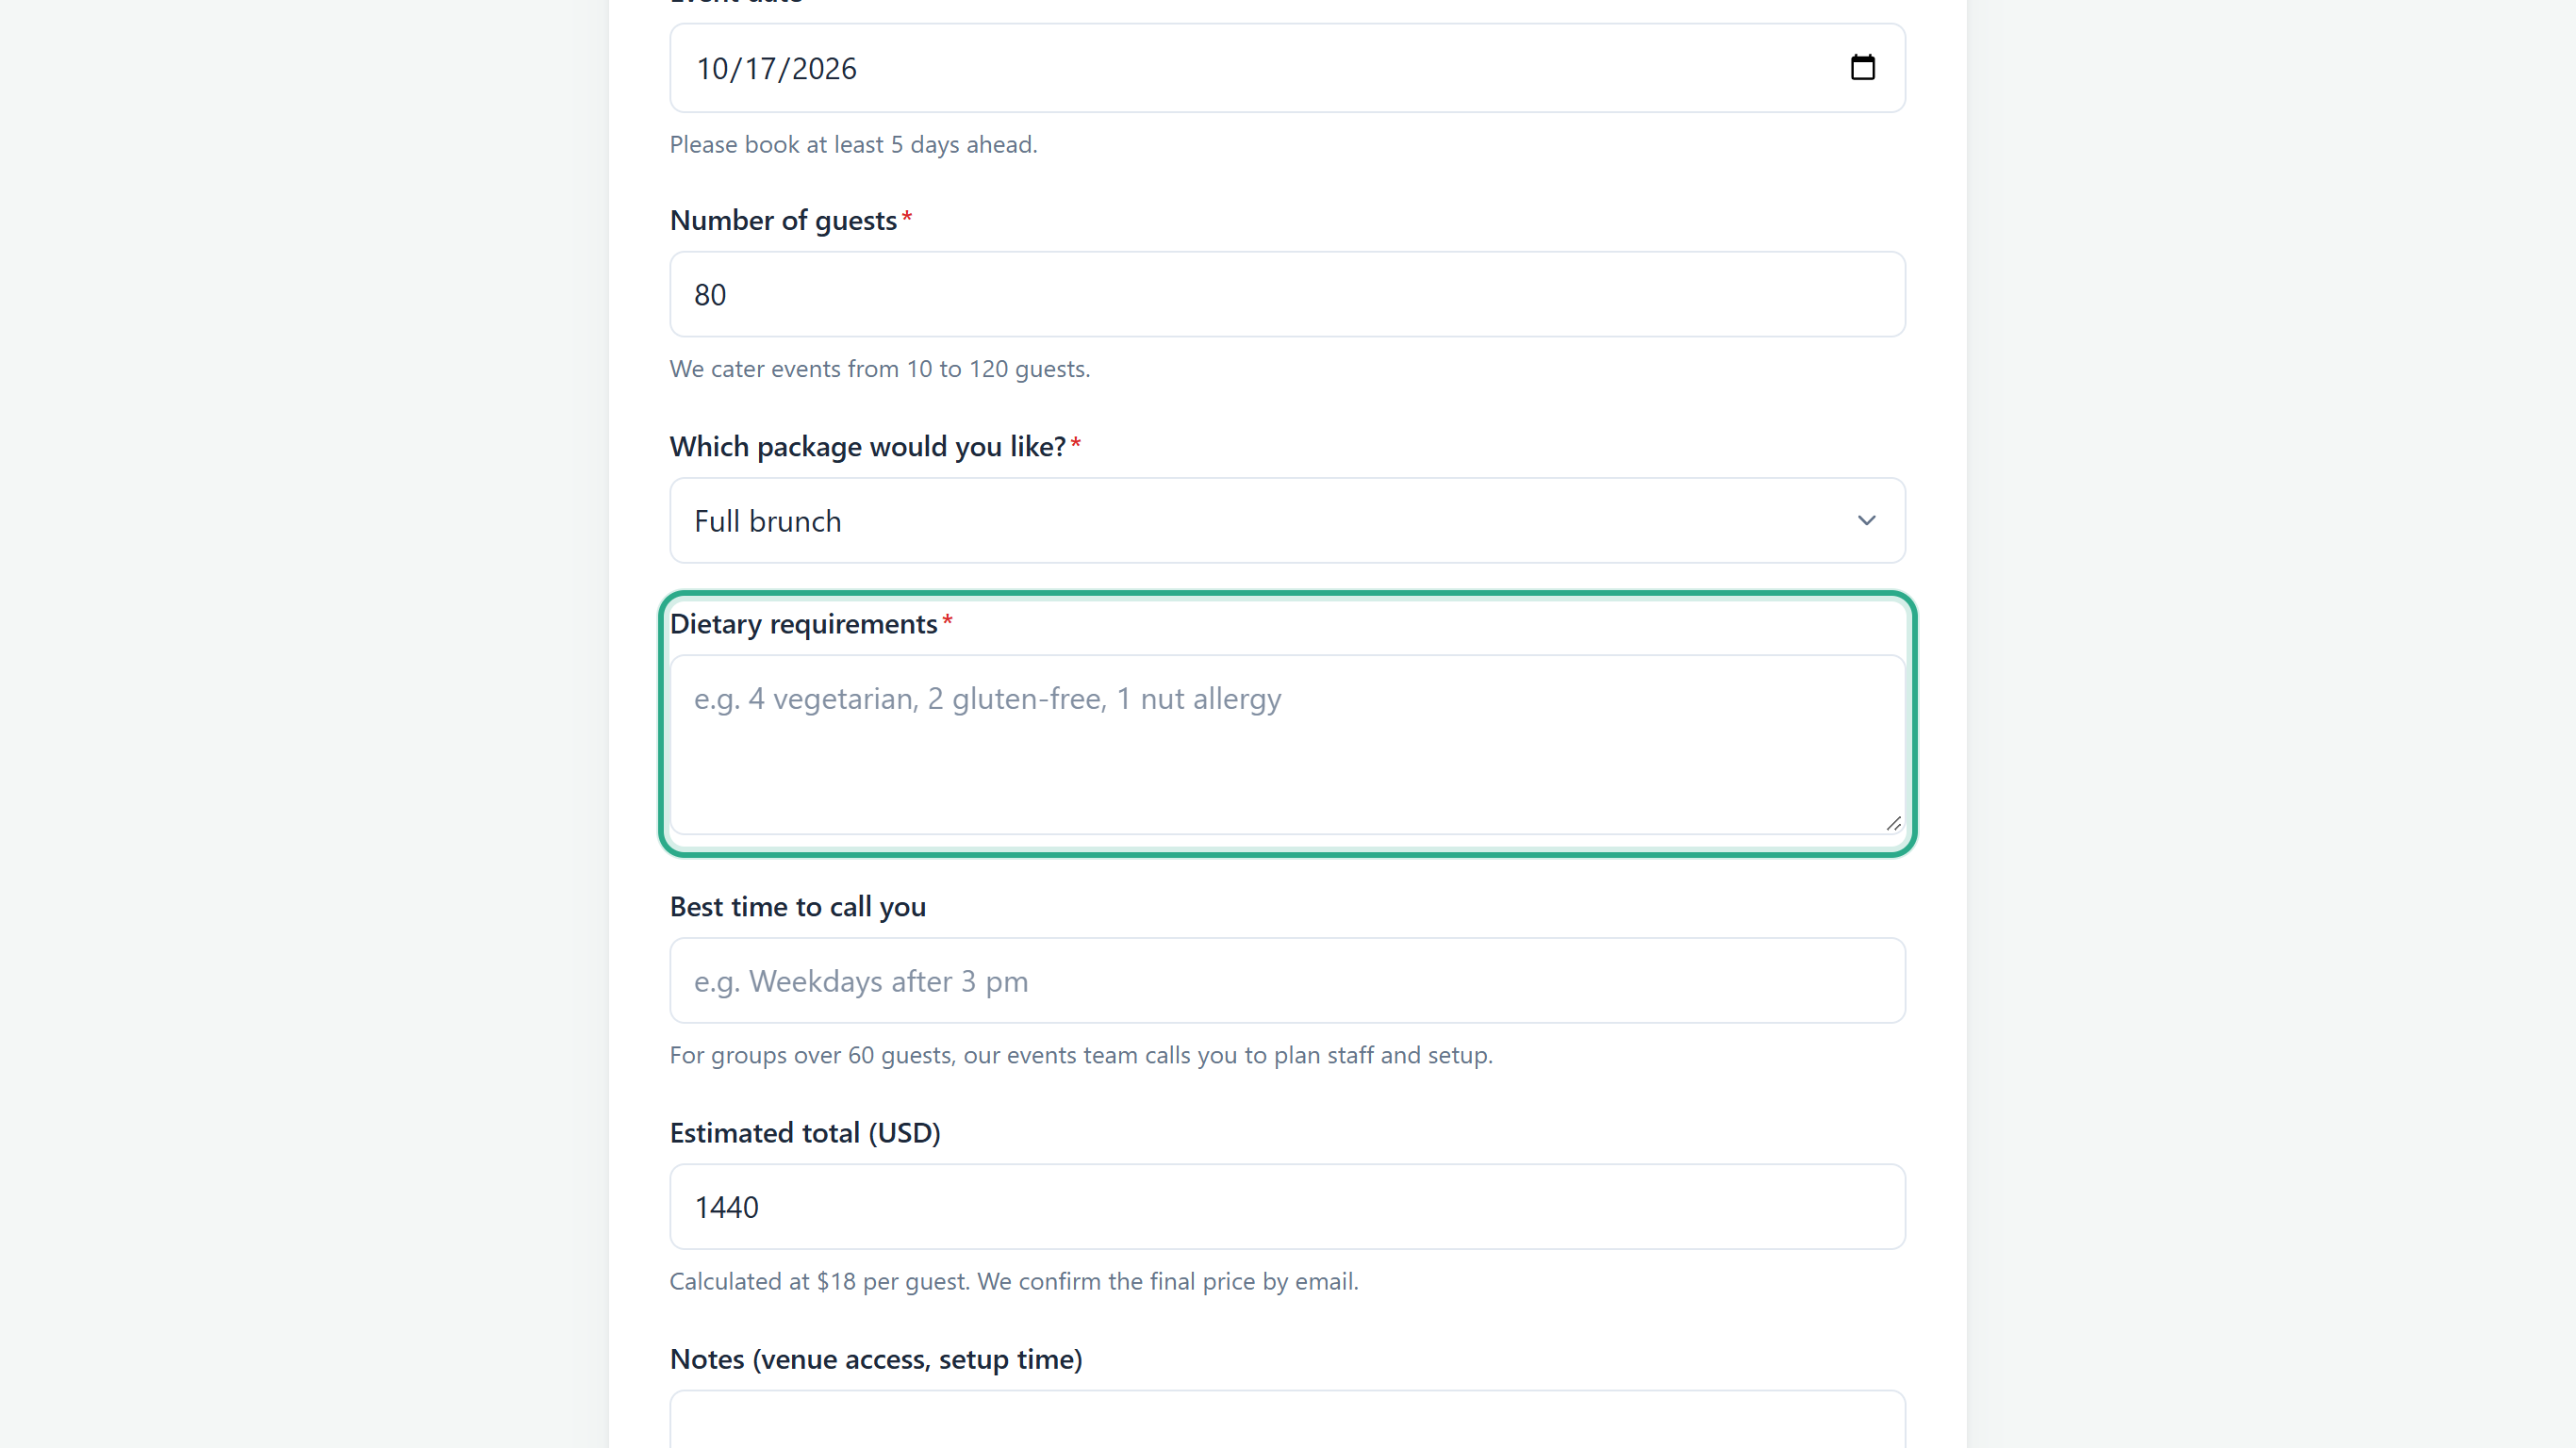 The rules apply live, while the person types.
They fill in the new fields and click Submit. Rule 5 replaces the default thank-you message. Because there are more than 60 guests, Rule 4 also sends a copy of the response to events@example.com.
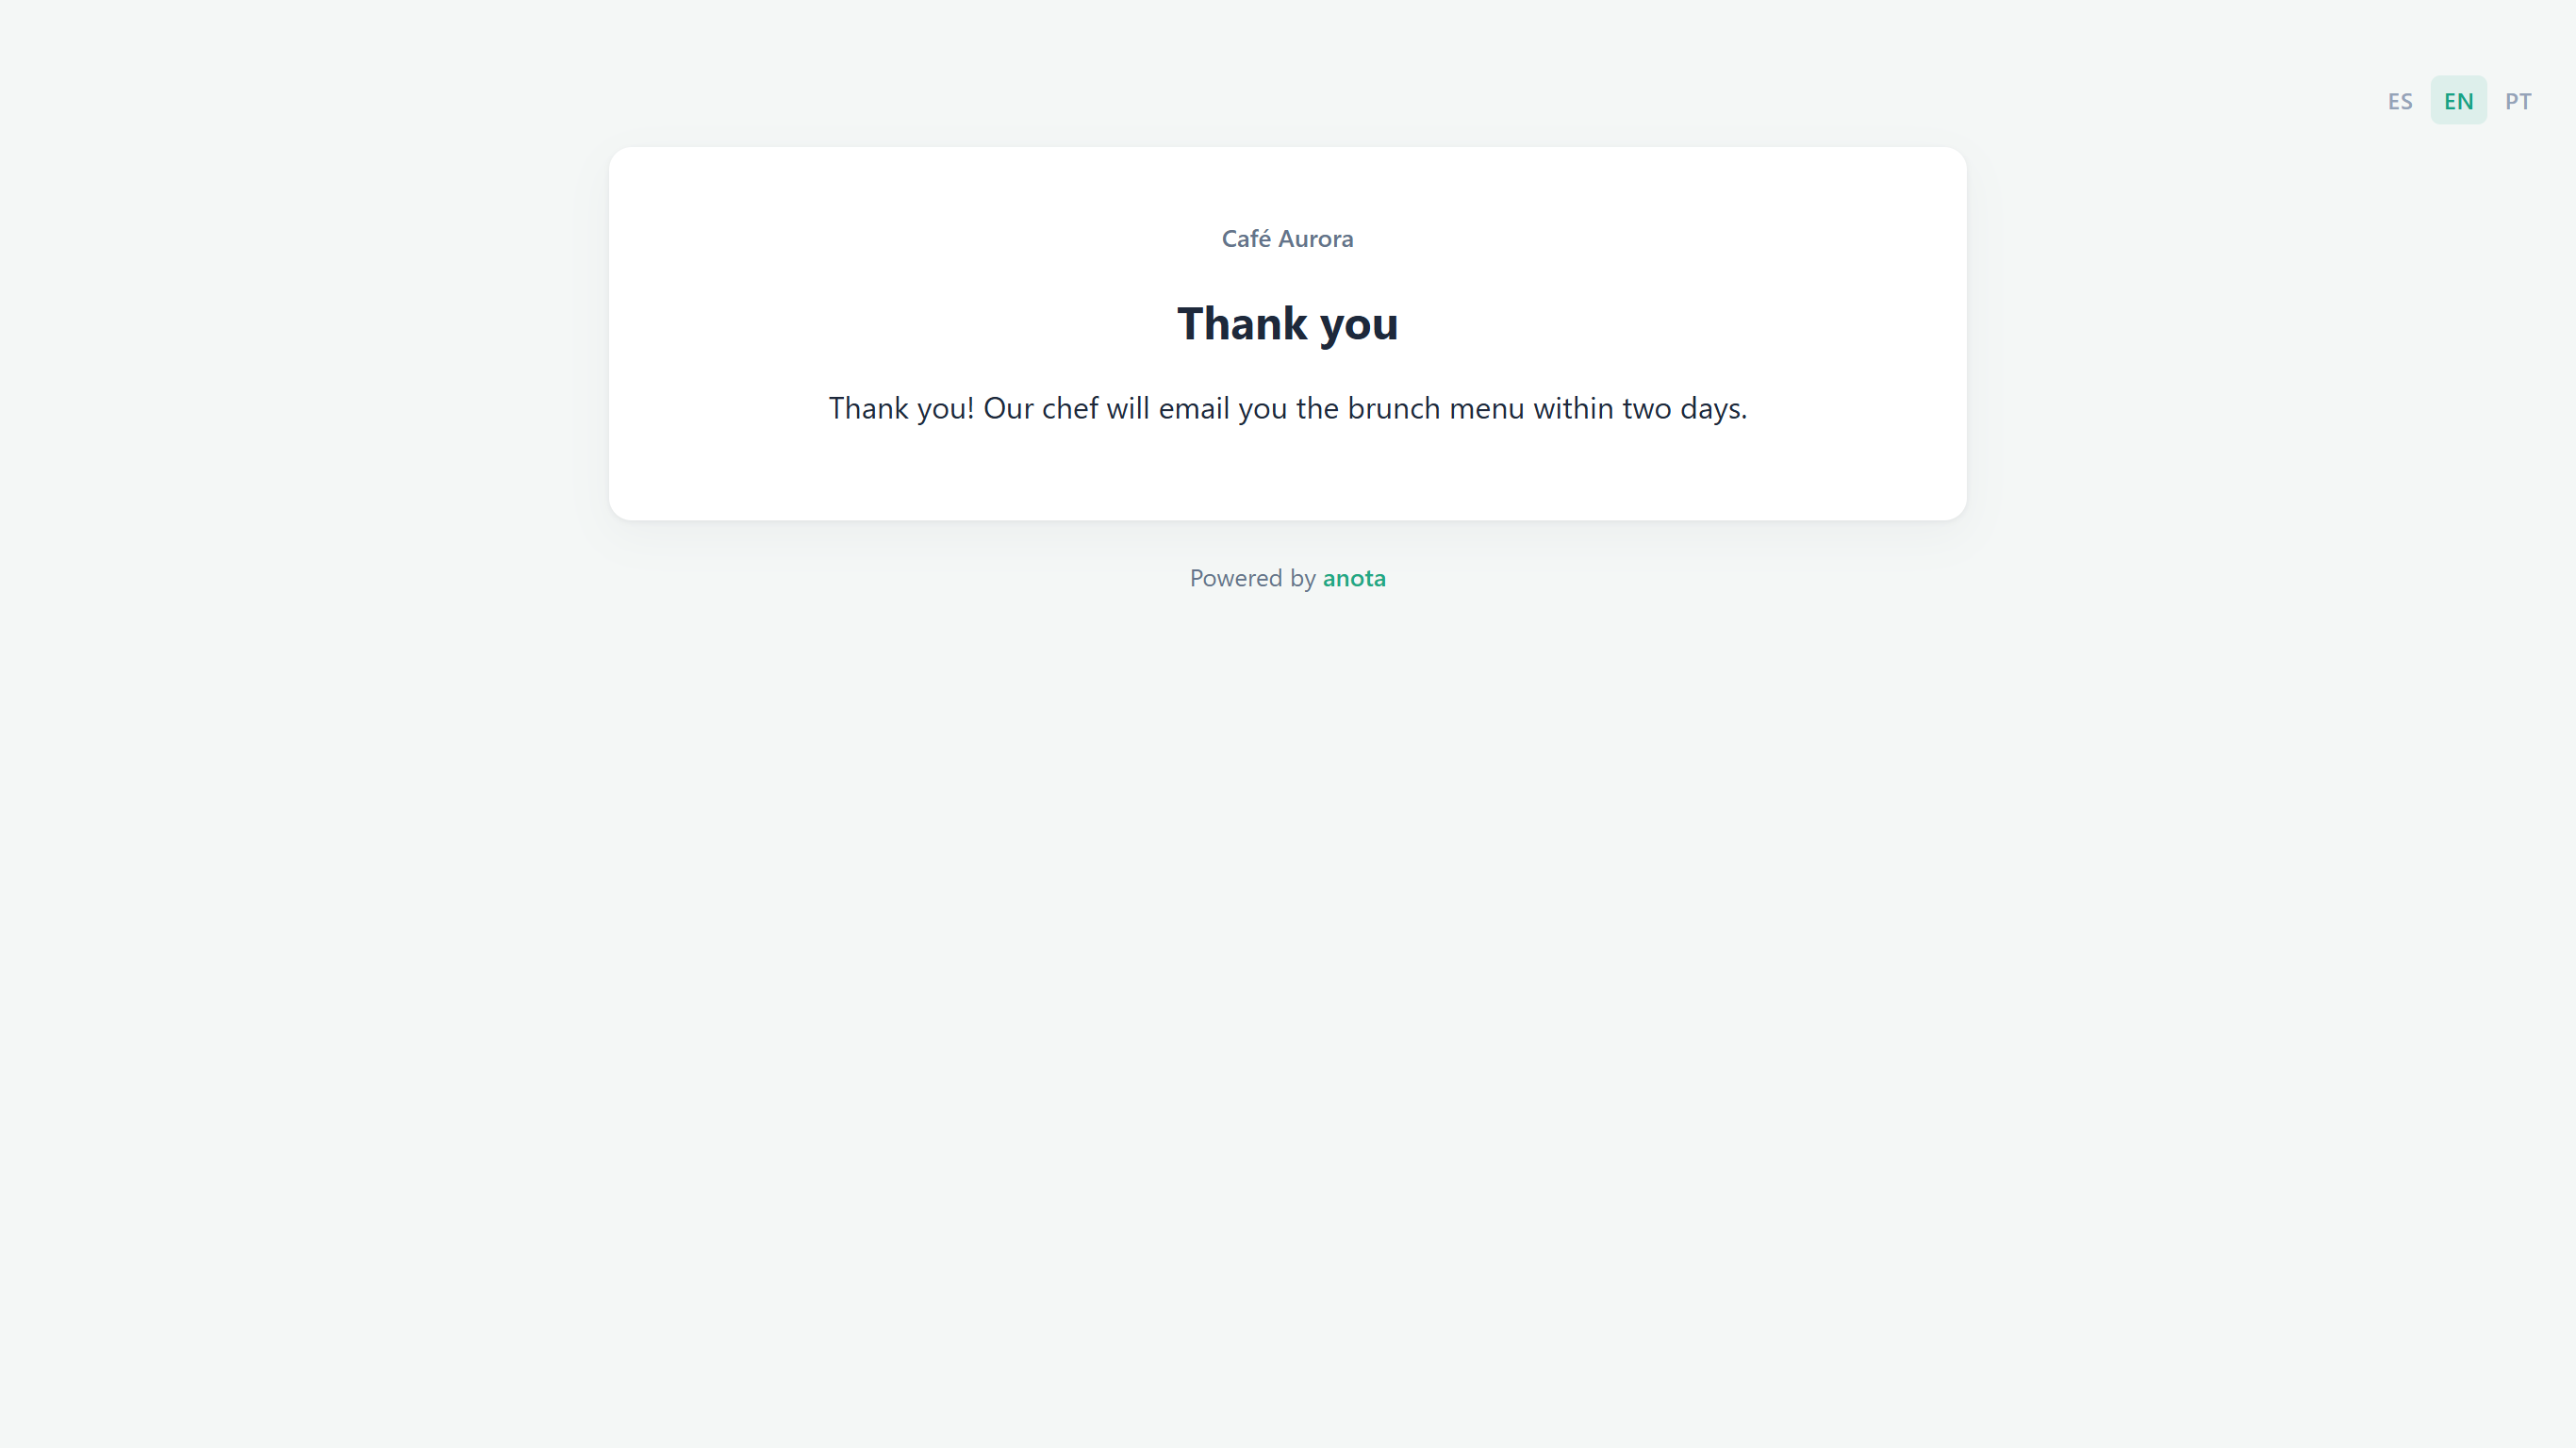 The thank-you message from Rule 5.
Another visitor chooses We'll pick it up at the café on the first page and clicks Next.
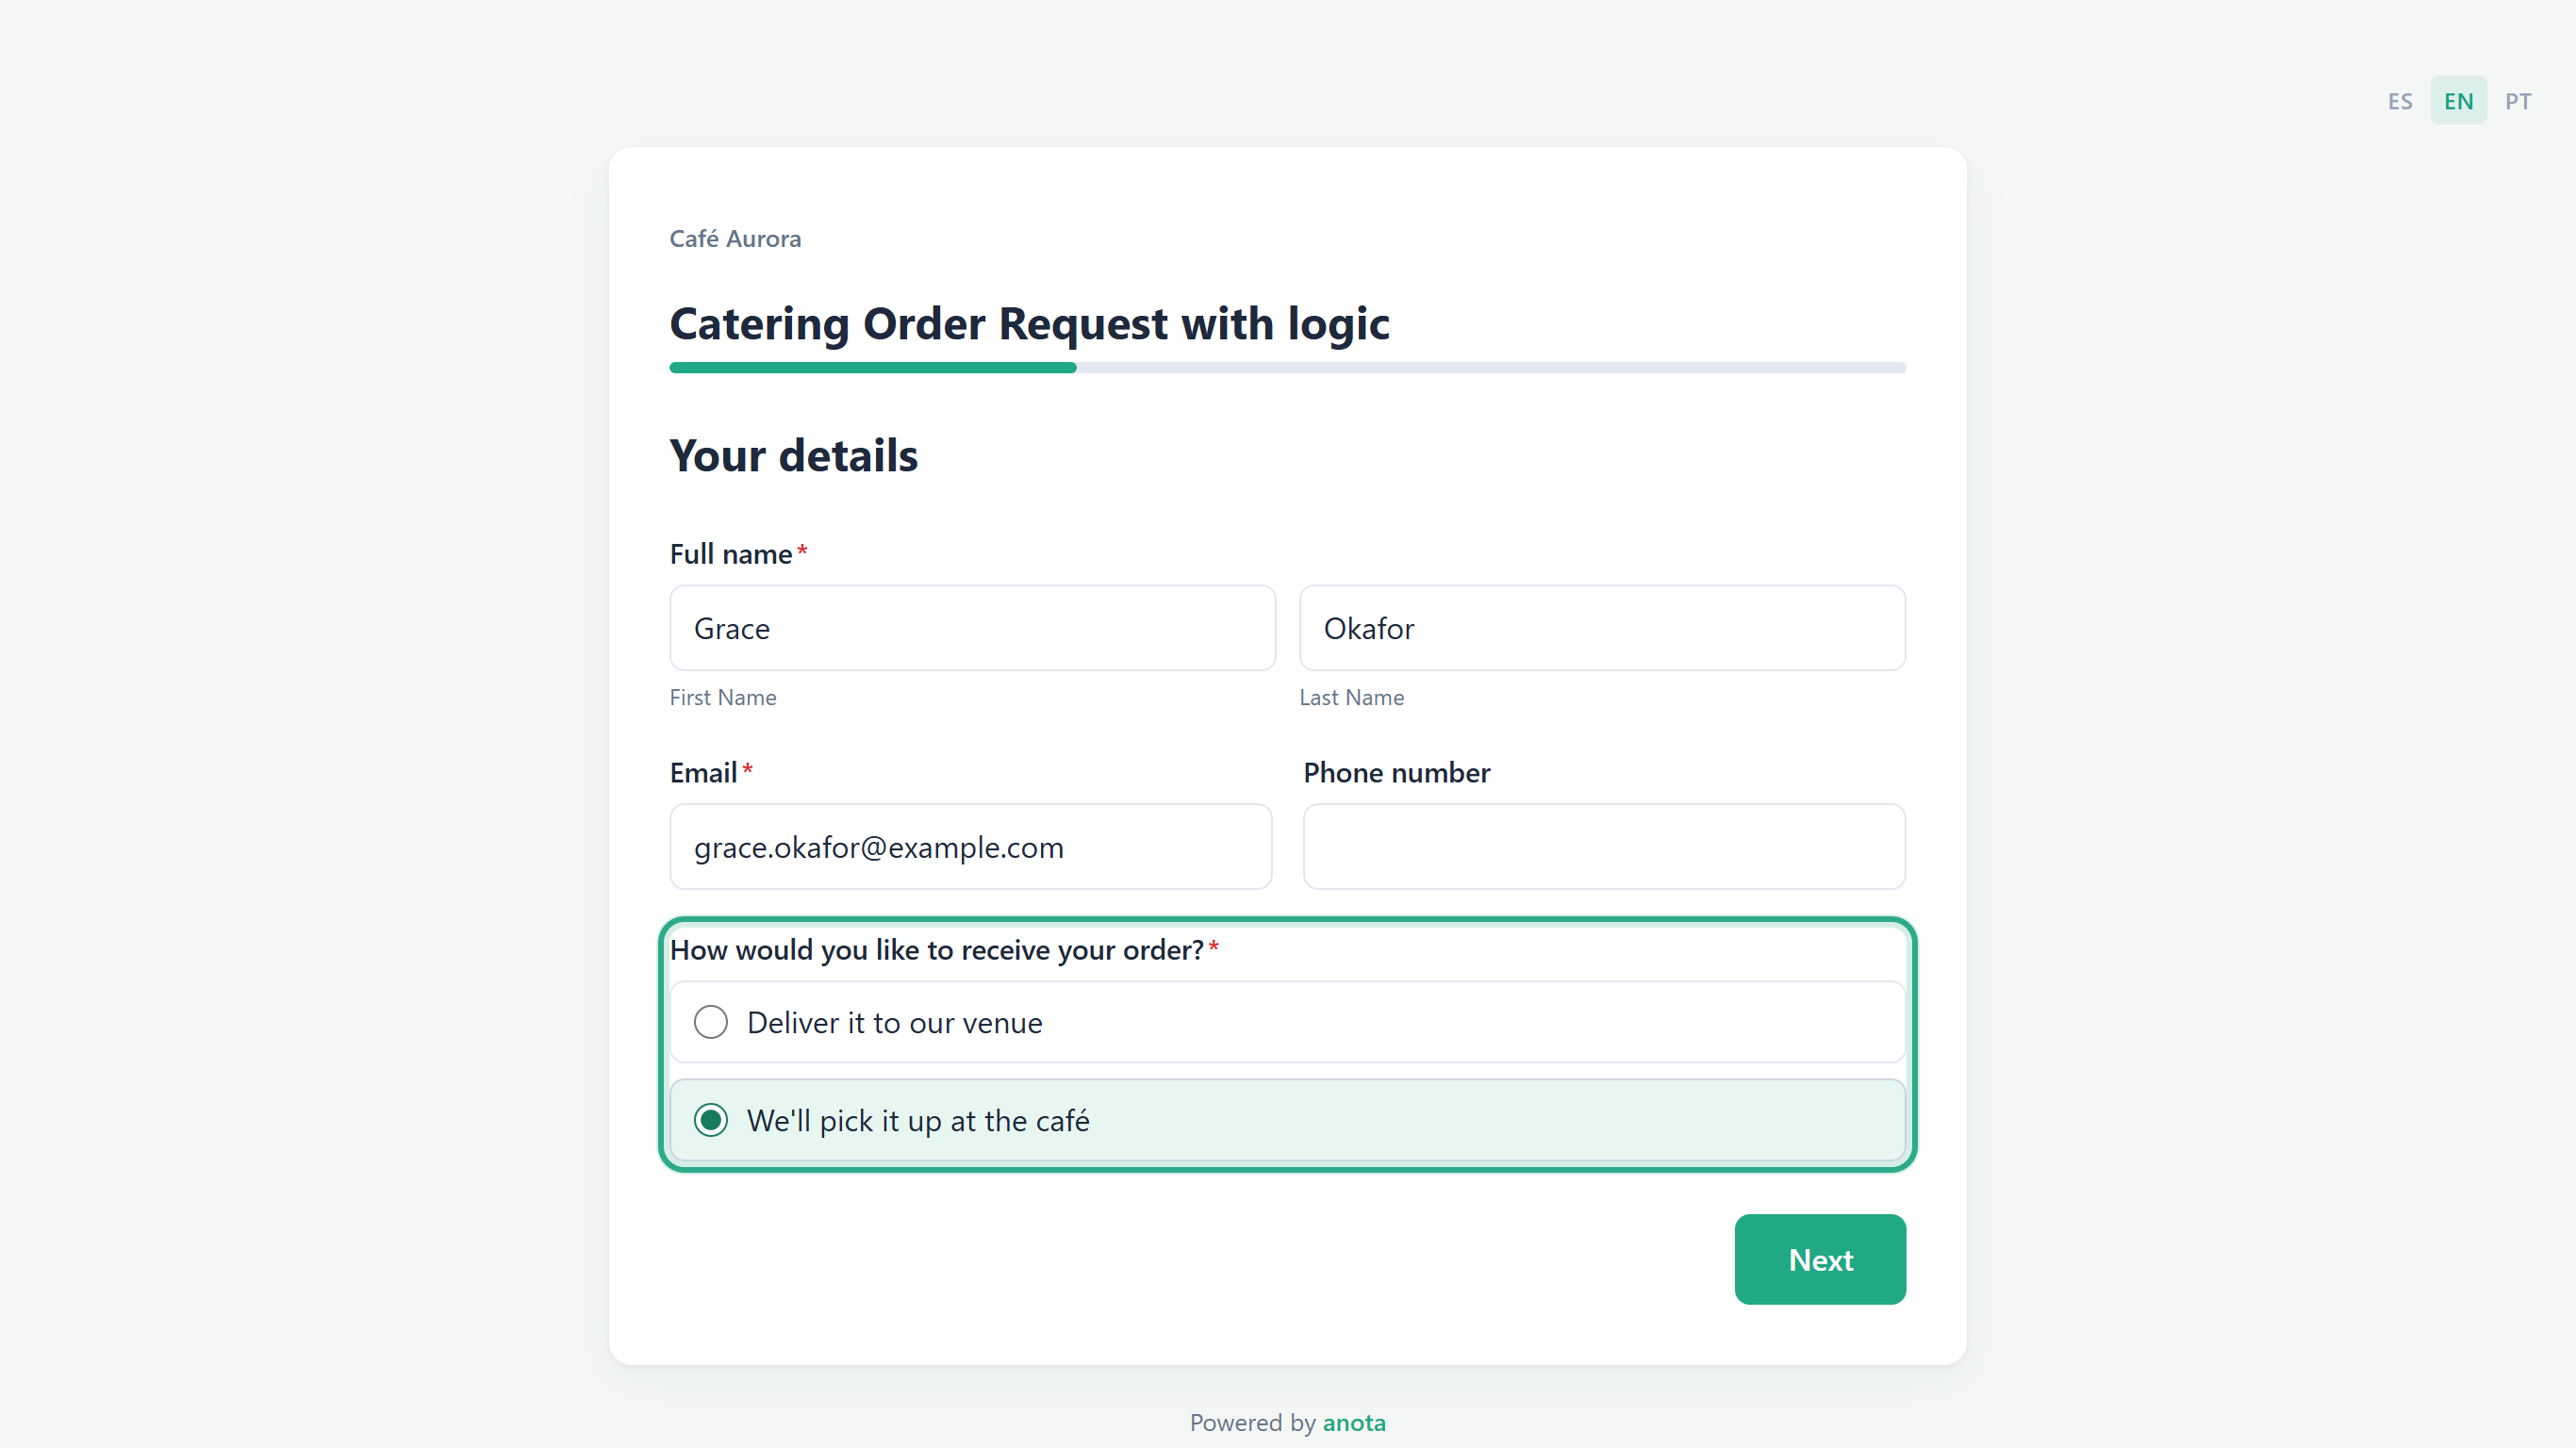 This answer matches Rule 2.
Rule 2 skips Delivery: the next page is Your event.
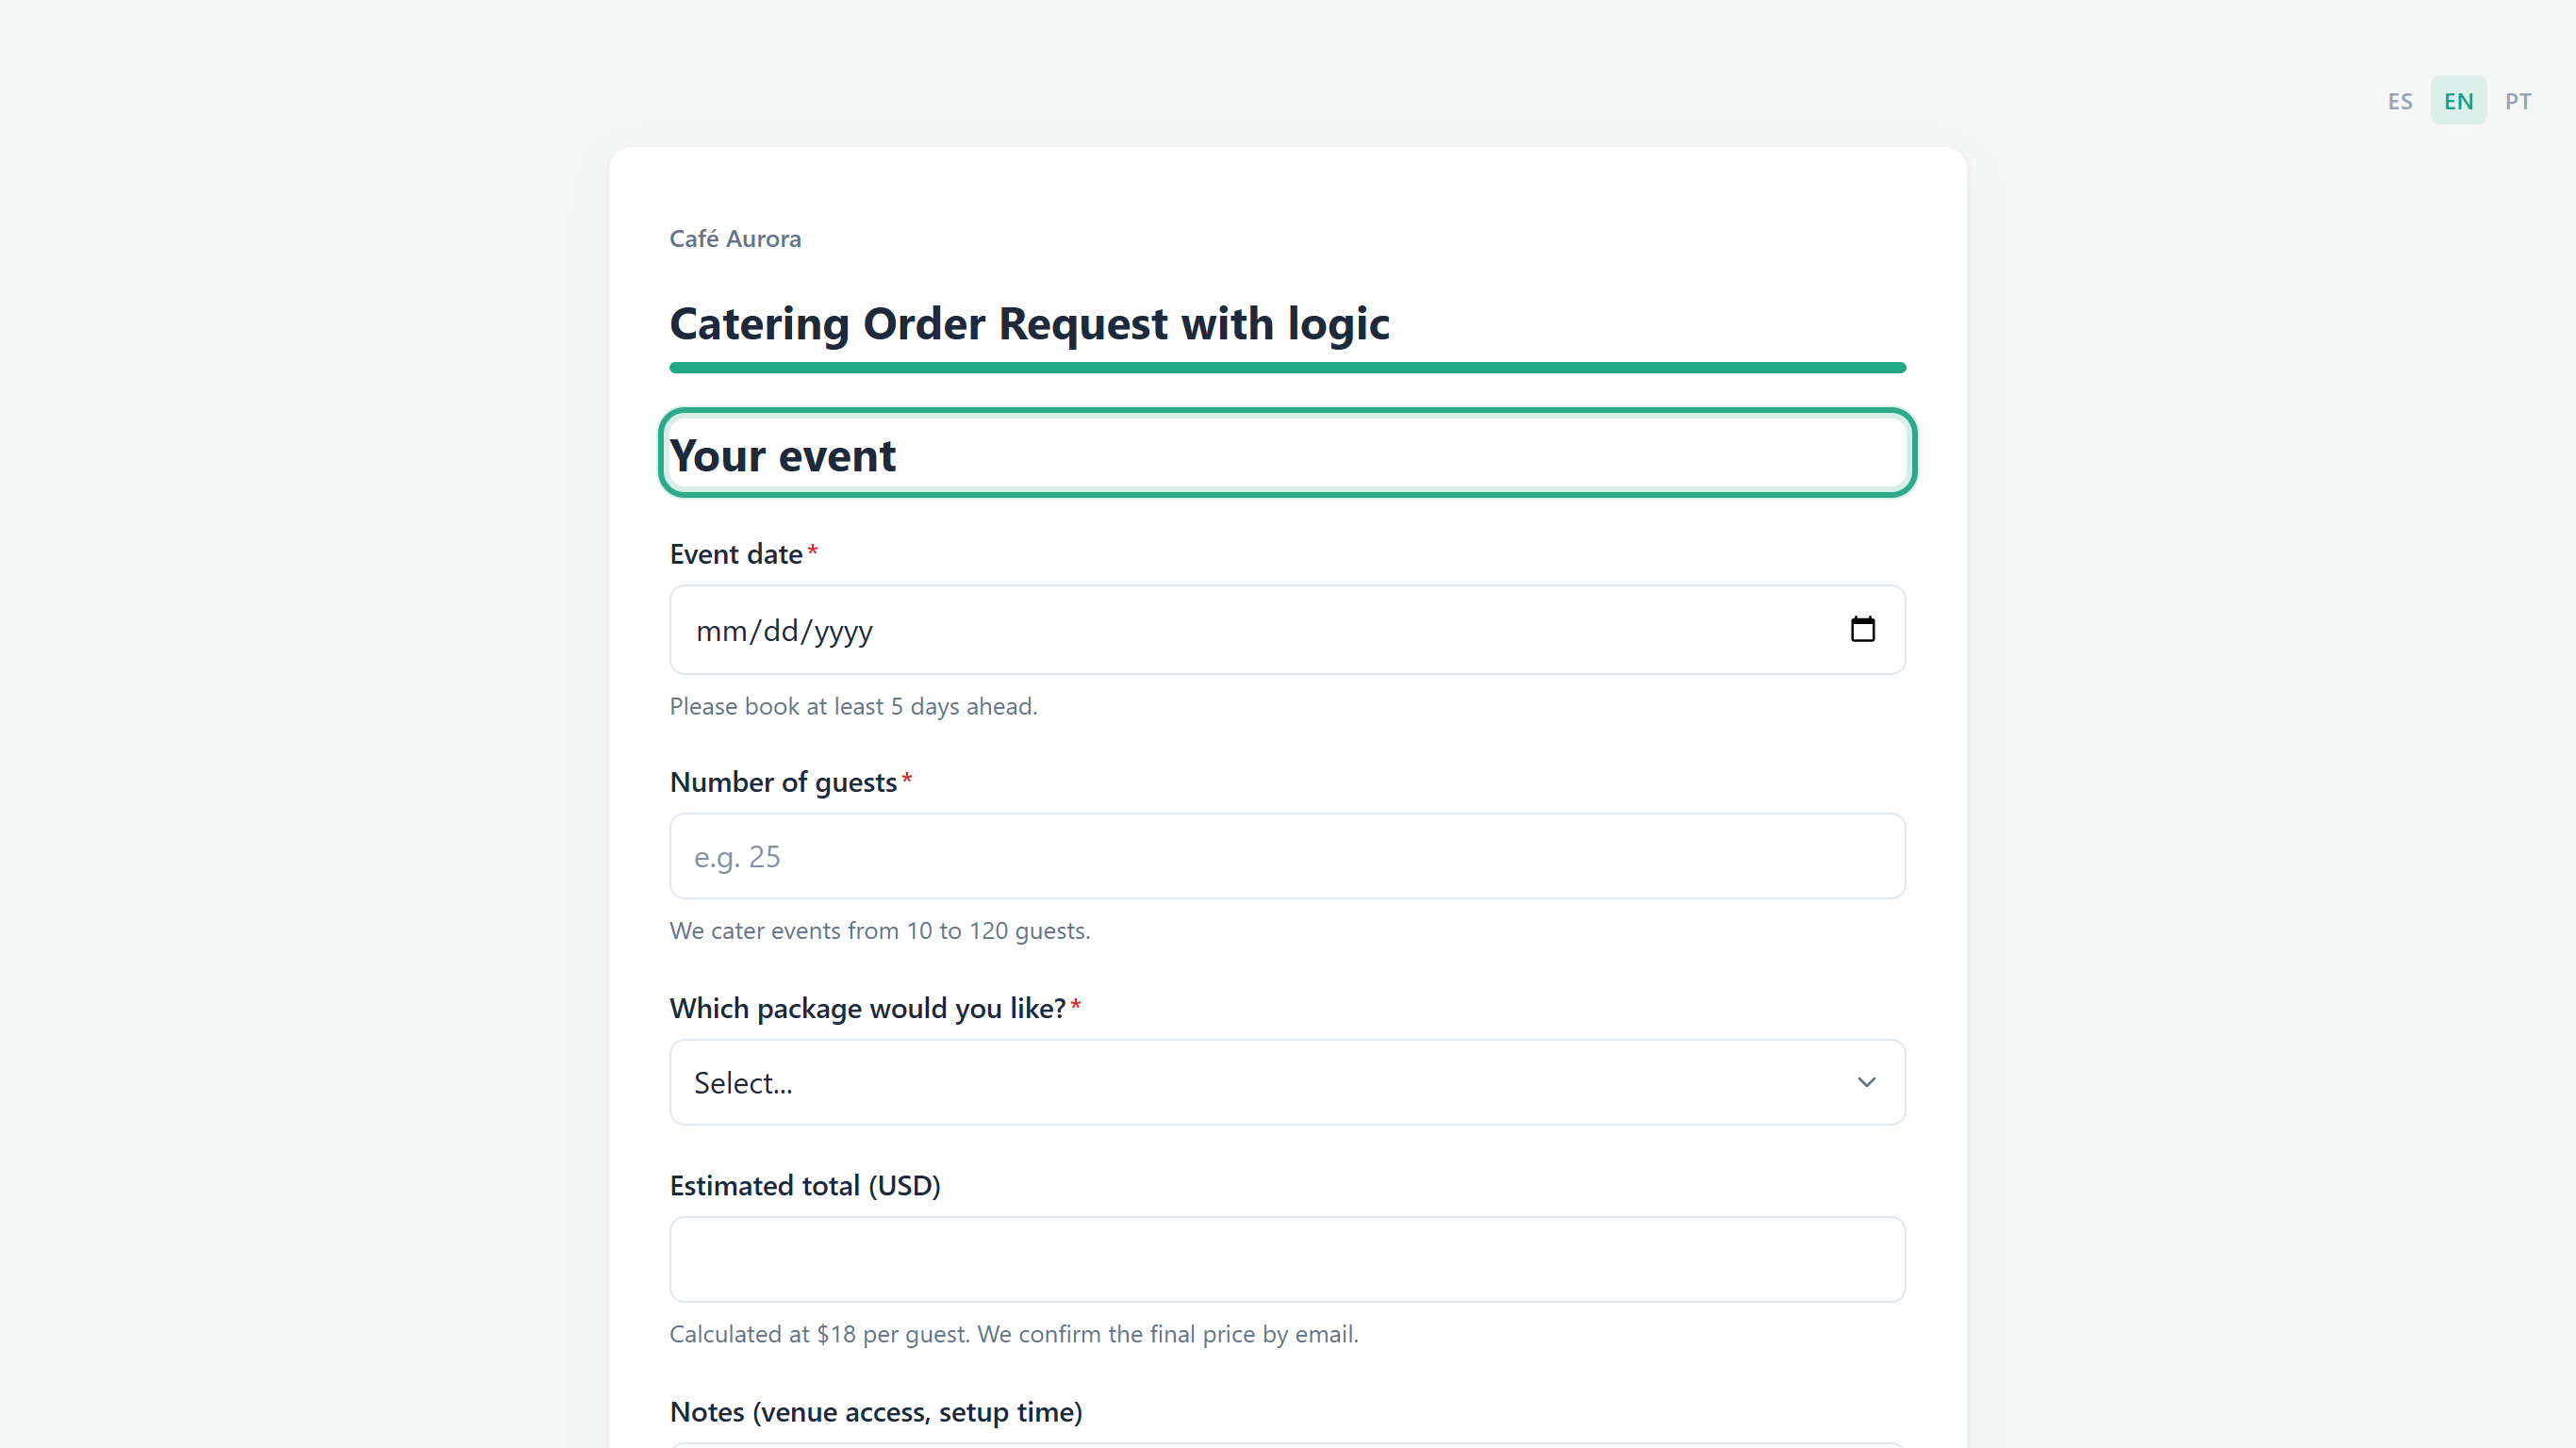 The Delivery page was skipped.
They fill in Your event (here 30 guests and Coffee bar) and click Submit. The skipped Delivery page isn't required, so the order goes through. No thank-you rule matches this order, so they see the form's default thank-you message.
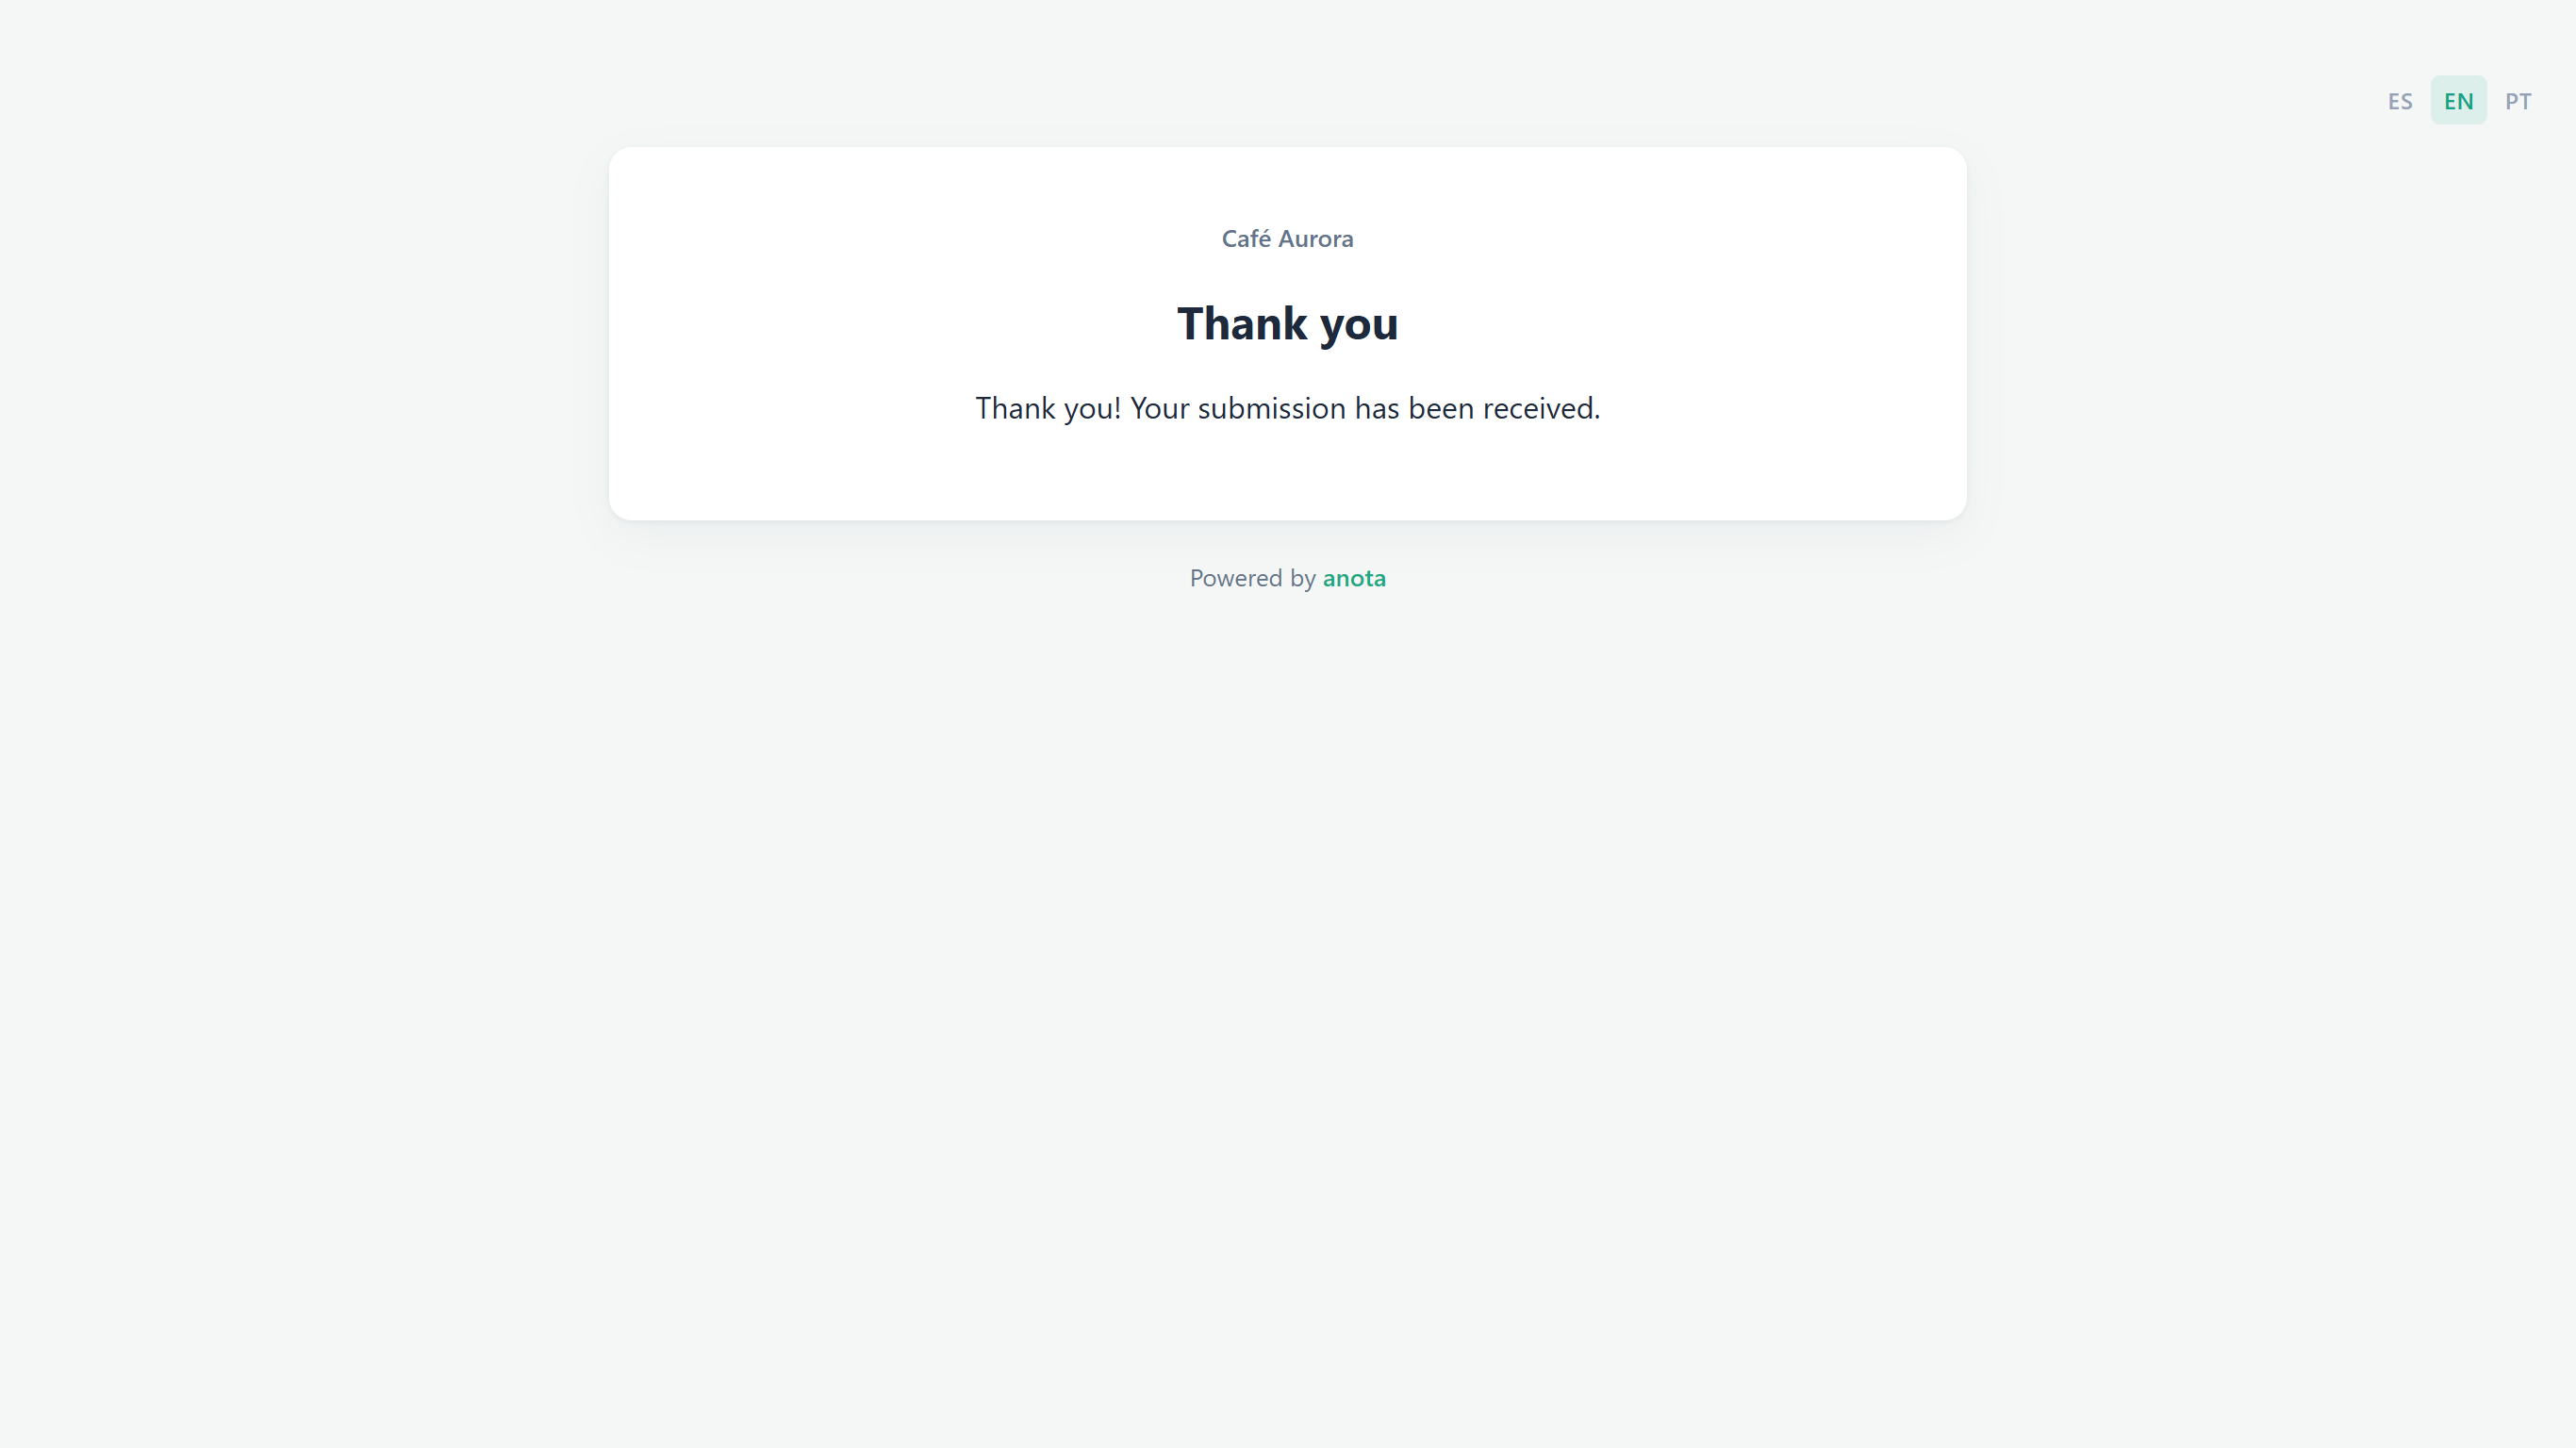 The pick-up order is received without a venue address.
Result
The form adapts to each person: questions appear when they apply, requirements follow the answers, the estimate calculates itself, and each response ends in the right place. anota checks the rules again on its server when a person moves to another page and when they submit, so the rules still hold if the checks in the browser are bypassed.
How rules are applied
- Live, in the browser: showing and hiding fields, required/not required, enabling and disabling fields, Copy value to and Calculate field react as soon as the person types or chooses an answer, including conditions on answers given on an earlier page. Copy value to and Calculate field are also worked out again by the server when the response is submitted, and the server's result is what gets saved, so a respondent can't change a calculated total or a copied value.
- When the person clicks Next: Skip to page.
- After submitting: Show thank-you message and Redirect to URL.
- When the response is received: Route a copy by email.
- Order: rules run from Rule 1 down. When two rules act on the same field, the lower one has the final say (hover a rule's number for the reminder Rules run in order; a later rule can override an earlier one's result.). The exception is Show thank-you message and Redirect to URL, where the first matching rule wins.
- Paused rules (Disabled) are never applied.
- Deleting a field or page used by a rule removes it from the rule instead of blocking the deletion. A rule left with no condition or no action is deleted too. ↩ Undo brings both back.
- Hidden answers: by default, anything typed into a field that ends up hidden is dropped from the response. To keep it, set Settings → Form settings → Hidden field values to Keep instead of Clear at submit (recommended). A disabled field's answer is never included.
- Rules can also be created and edited through the API and the MCP connector (tools
add_logic_rules,edit_logic_ruleanddelete_logic_rule); see Developers and API. Some templates come with rules already set up.
Operator reference
| Operator | True when the answer… | Available for |
|---|---|---|
| equals | matches the value (capital letters don't matter) | all fields |
| does not equal | is different from the value | all fields |
| contains | includes the text | Short text, Long text, Email, Phone number |
| does not contain | doesn't include the text | Short text, Long text, Email, Phone number |
| starts with | begins with the text | Short text, Long text, Email, Phone number |
| ends with | ends with the text | Short text, Long text, Email, Phone number |
| is greater than | is a number above the value | Number, Quantity, Rating, Scale |
| is less than | is a number below the value | Number, Quantity, Rating, Scale |
| is empty | has no answer | all fields |
| is not empty | has an answer | all fields |
Choice, date, time, upload, signature and multi-part fields (such as Full name and Address) offer equals, does not equal, is empty and is not empty. For Multiple choice, equals is true when any ticked option matches. The condition's field list only includes fields that collect an answer; headings, paragraphs, images, dividers and sections are left out.
Action reference
Listed in the order they appear in the action list.
| Action | What it does | Notes |
|---|---|---|
| Show field | Shows a field, heading, paragraph or image that is hidden by default or by an earlier rule | The target needs Hidden (shown by a rule) |
| Hide field | Hides a field | Its answer is dropped unless Hidden field values is Keep |
| Skip to page | Goes straight to a later page when the person clicks Next | Skipped pages aren't required; Back returns along the pages actually seen |
| Calculate field | Fills a Number or Quantity field from a formula such as {f_118fb0}*18 |
+ - * / and parentheses; an empty field counts as 0; dividing by zero gives 0; read-only for respondents and recomputed by the server |
| Route a copy by email | Sends the response notification to one more address | In addition to the usual recipients |
| Require field | Makes a field required while the rule matches | Answer fields only |
| Don't require field | Makes a required field optional while the rule matches | Answer fields only |
| Enable field | Undoes a Disable field from an earlier rule | Every field starts enabled |
| Disable field | Keeps a field visible but greyed out and not editable | Its answer is never included |
| Copy value to | Copies the answer of one field (after from) into another, live | If the source is empty, the target is emptied |
| Show thank-you message | Replaces the default thank-you message | First matching rule wins; same text in every language |
| Redirect to URL | Sends the person to a web address after submitting | First matching rule wins; takes priority over Show thank-you message |
Roles & permissions
| Role | View rules | Create, edit, pause and delete rules |
|---|---|---|
| Owner | Yes | Yes |
| Admin | Yes | Yes |
| Editor | Yes | Yes |
| Viewer | No (Viewers can't open the editor) | No |
Troubleshooting
| Symptom | Likely cause | Resolution |
|---|---|---|
| A Show field field is visible from the start | The field doesn't have Hidden (shown by a rule) ticked | Select it on the Build tab and tick the option under Appearance (step 3) |
| A field doesn't appear although the condition matches | A later rule hides it again | Rules lower in the list run later. Reorder with ↑ and ↓ |
| The rule I was building disappeared when I clicked ← Back | It had no condition or no action, so it was discarded | Add at least one condition and one action before leaving Edit rule |
| The calculated field shows the wrong number | The formula points at the wrong field, or a field in it is empty (counts as 0) | Use Insert field instead of typing field codes, and check the formula in Edit |
| Invalid formula under the formula box | A bracket or operator is missing or extra | Fix the formula; the preview appears once it's valid |
| The wrong thank-you message shows | Two thank-you rules matched; the higher one wins | Move the rule you want higher in the list |
| People are redirected instead of seeing the thank-you message | A Redirect to URL rule matched too, and it takes priority | Check that rule's conditions, or pause it |
| Enable field seems to do nothing | Every field starts enabled | It only matters after a Disable field |
| A rule has no effect on the live form | It's paused (Disabled), or the form hasn't been published since you added it | Click ▶ to resume it, then Update the form |
| An answer typed into a field that was later hidden is missing from the response | Hidden field values is Clear at submit (recommended) | Set it to Keep in Settings → Form settings if you need those answers |
Related features
- The form editor
- Field types
- Classic and Card layouts
- Email notifications
- Publish and share
- Products, orders and Stripe payments
- Templates
- Developers and API: create and edit rules through the API or MCP.
Was this page helpful?