Products, orders and Stripe payments
Products, orders and Stripe payments
Applies to: anota, all plans (paid orders per month depend on the plan) Roles required: Editor or above to add a Products field; Owner to connect Stripe Regulatory references: none
Overview
The Products field lets you list one or more items or services in a form, each with a name, a price and, optionally, a quantity, so respondents can choose what they want to order. When the form is submitted, anota stores the order with the selected items and shows it in the submission, the PDF and the notification email.
If your business is in the United States or Mexico, you can also collect payment for the order online with Stripe. Respondents pay for the products they picked by card, Apple Pay or Google Pay before the response counts, and the money goes straight to your own Stripe account.
Important: Stripe payments only appear when the feature is enabled for your workspace. If you don't see the Form payments card on the Billing page, the feature isn't available to you yet. The Products field still records orders without charging, and you handle payment outside anota.
Navigation
- Products field: in the form editor, click Add element and choose Products in the Payment category.
- Connect Stripe: Billing page (
/billing) → Form payments card. Only the workspace Owner sees it. - Turn on payment for a form: in the editor, Settings tab → Form settings → Collect payment with Stripe on submit.
Key concepts
| Term | Meaning |
|---|---|
| Products field | A field that lists the items or services that can be ordered, with their prices and currency. |
| Connected Stripe account | Your business's Stripe account, linked to anota from Billing. Payments are deposited there. |
| Checkout | Stripe's secure payment page, where respondents are sent to pay. It isn't part of anota's interface. |
| Pending order | A saved submission waiting for payment. It doesn't trigger notifications or webhooks until it's paid. |
| Abandoned / unpaid | An order whose payment was never completed (the respondent left Checkout or let the link expire). |
| anota fee | 1% of each payment collected, on top of Stripe's processing fees. |
Set up a Products field
Prerequisites
- A form, and a role of Editor or above (see Roles and permissions).
- Your list of items with their names and prices.
Step-by-step
Open the form in the editor.
Add a Products field (see Field types).
Select the field and open its Properties. The product editor appears when Stripe payments are enabled for your workspace; otherwise, the field keeps the products that came with the template. For each item, click + Add product and set:
- Name: the item or service name.
- Price: the unit price in the field's currency (for example
12.50). - Allow quantity (optional): lets respondents choose how many units they want. You can set a Max quantity. Without it, each item picked counts as one unit.
Click ✕ (Remove) to delete an item.
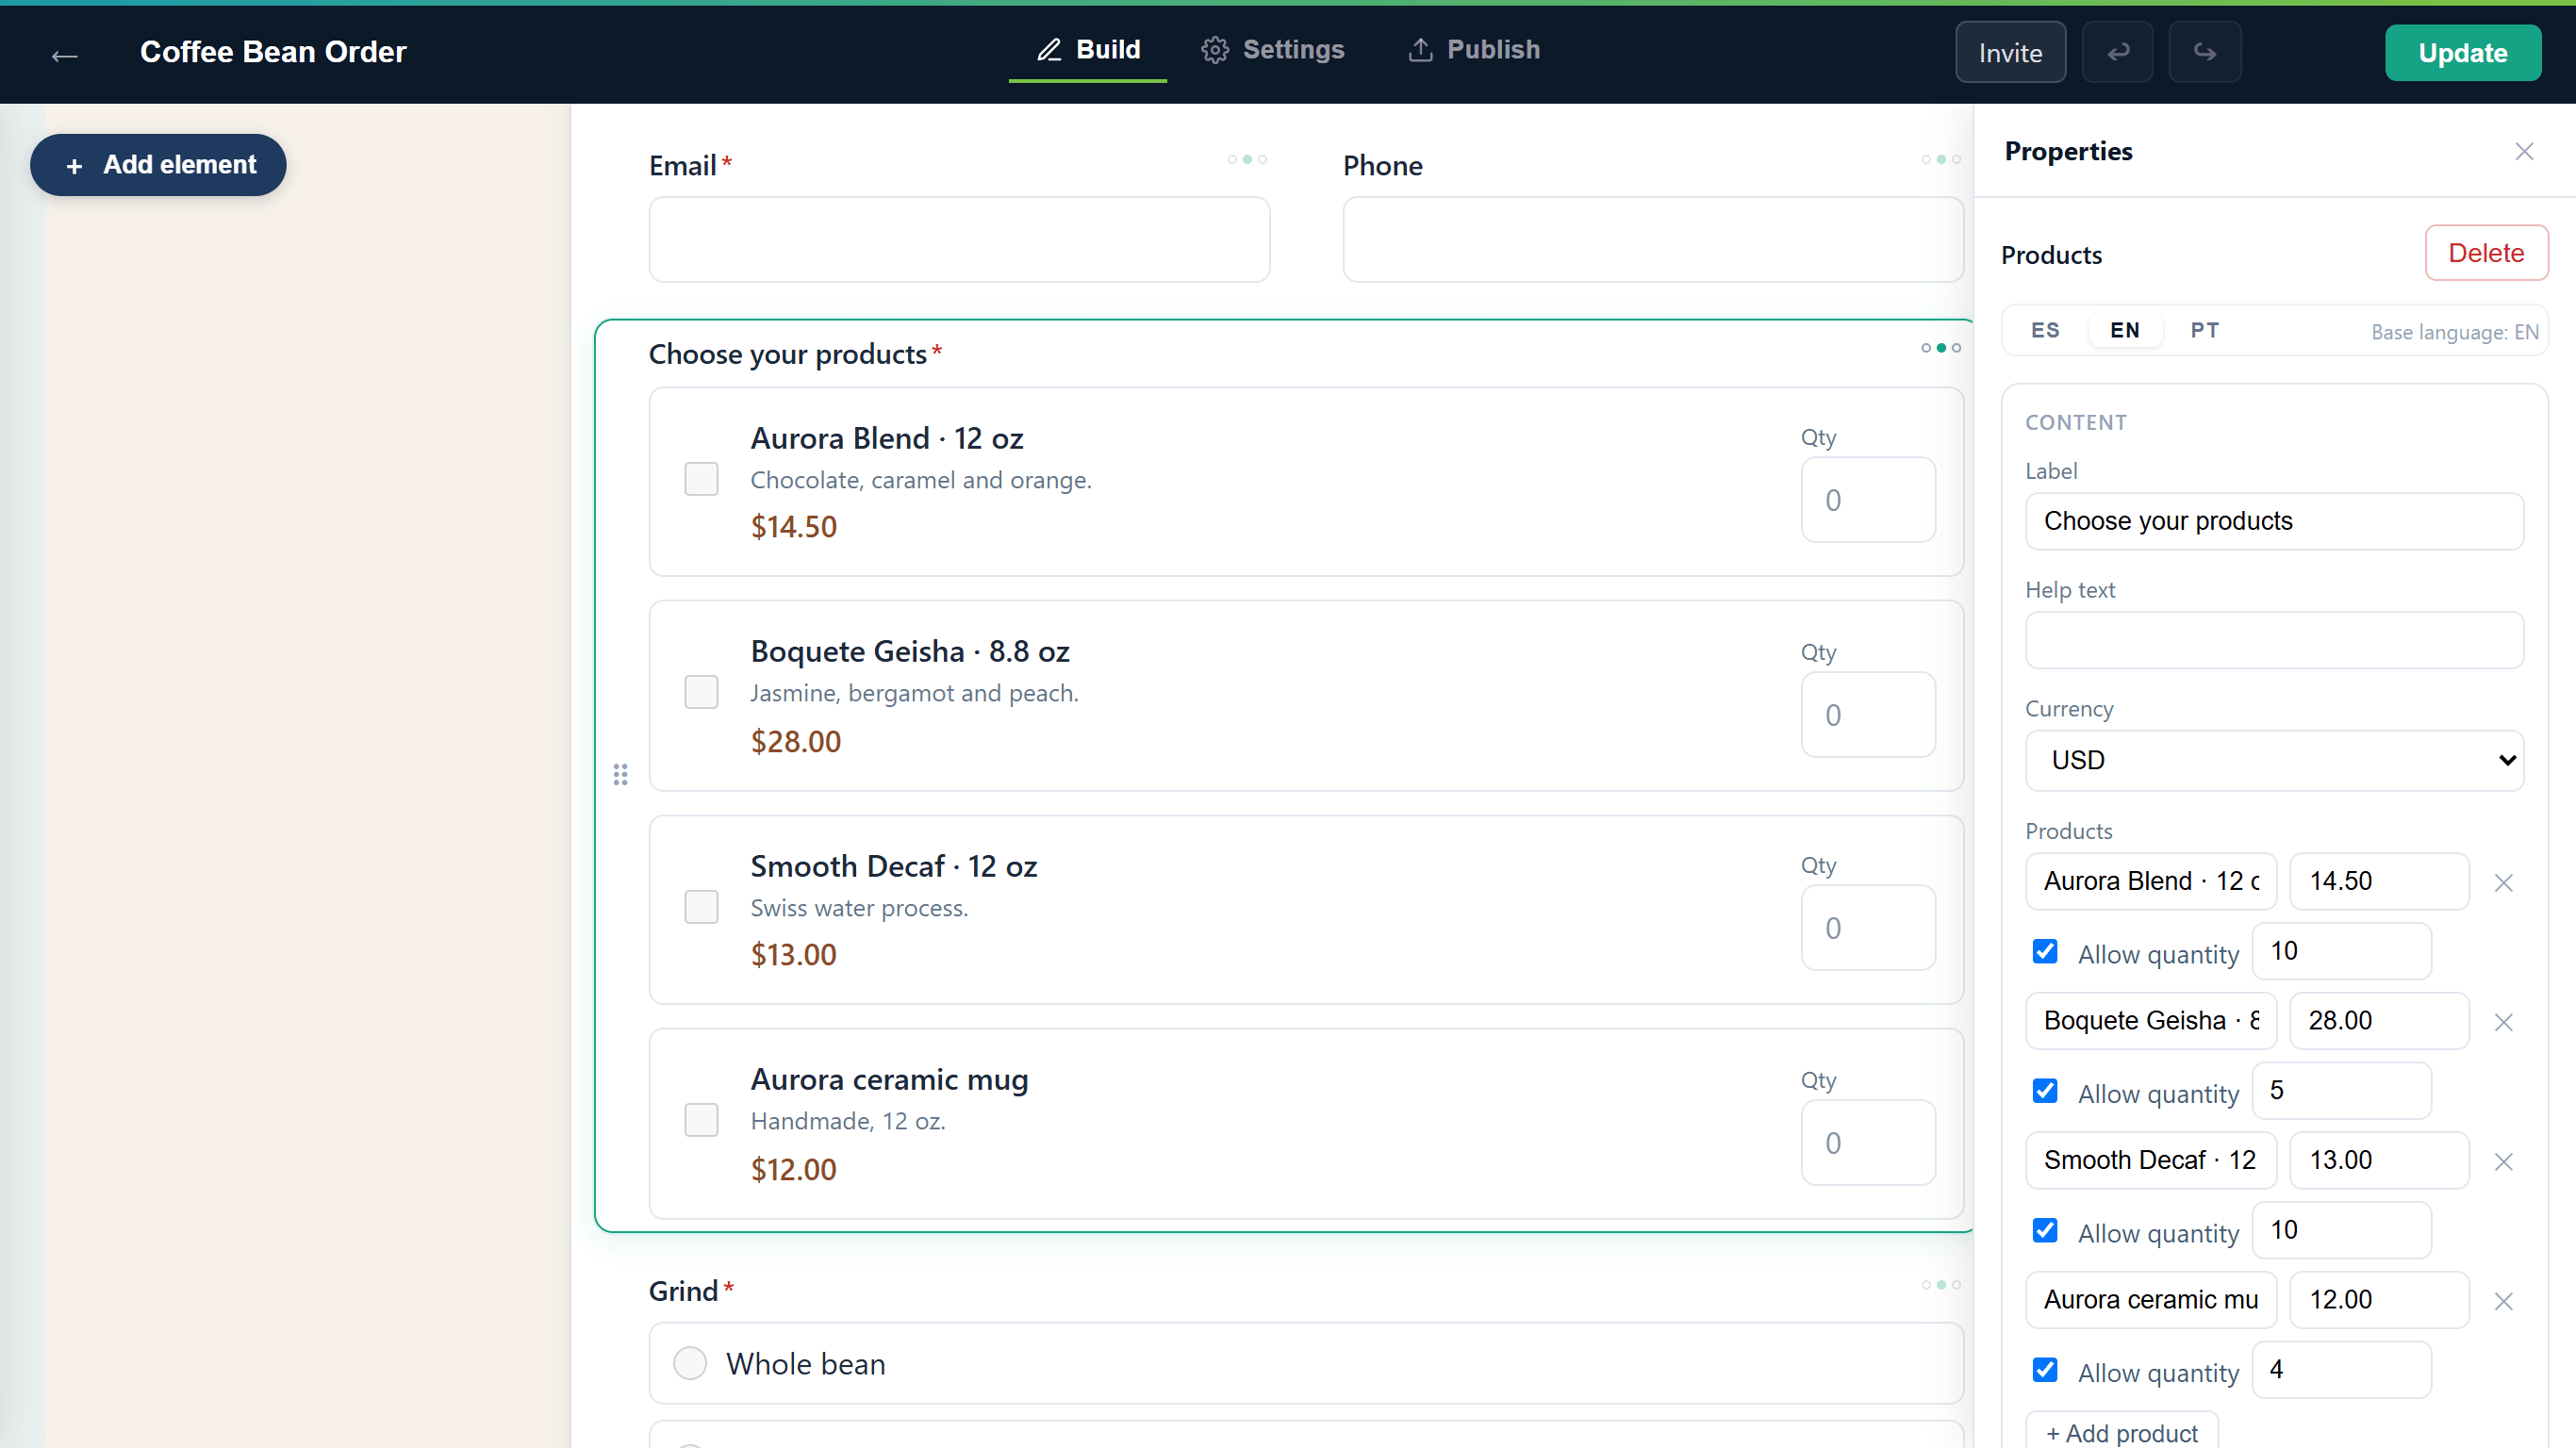 The product editor in the Properties panel, with Stripe payments enabled. Without them, the panel doesn't show this list and the field keeps its existing products.
Choose the field's Currency. To charge with Stripe it must be USD or MXN.
Publish the form (see Publish and share).
For example, a bakery could offer "Chocolate cake (slice)" at $8.00 and "Chocolate cake (whole)" at $45.00 with quantity allowed. Someone who orders 2 whole cakes and 1 slice places a $98.00 order.
Result
When someone submits the form, anota stores the order with the items and quantities chosen. You see it when you open the submission in the submissions inbox, in the submission PDF and in the notification email.
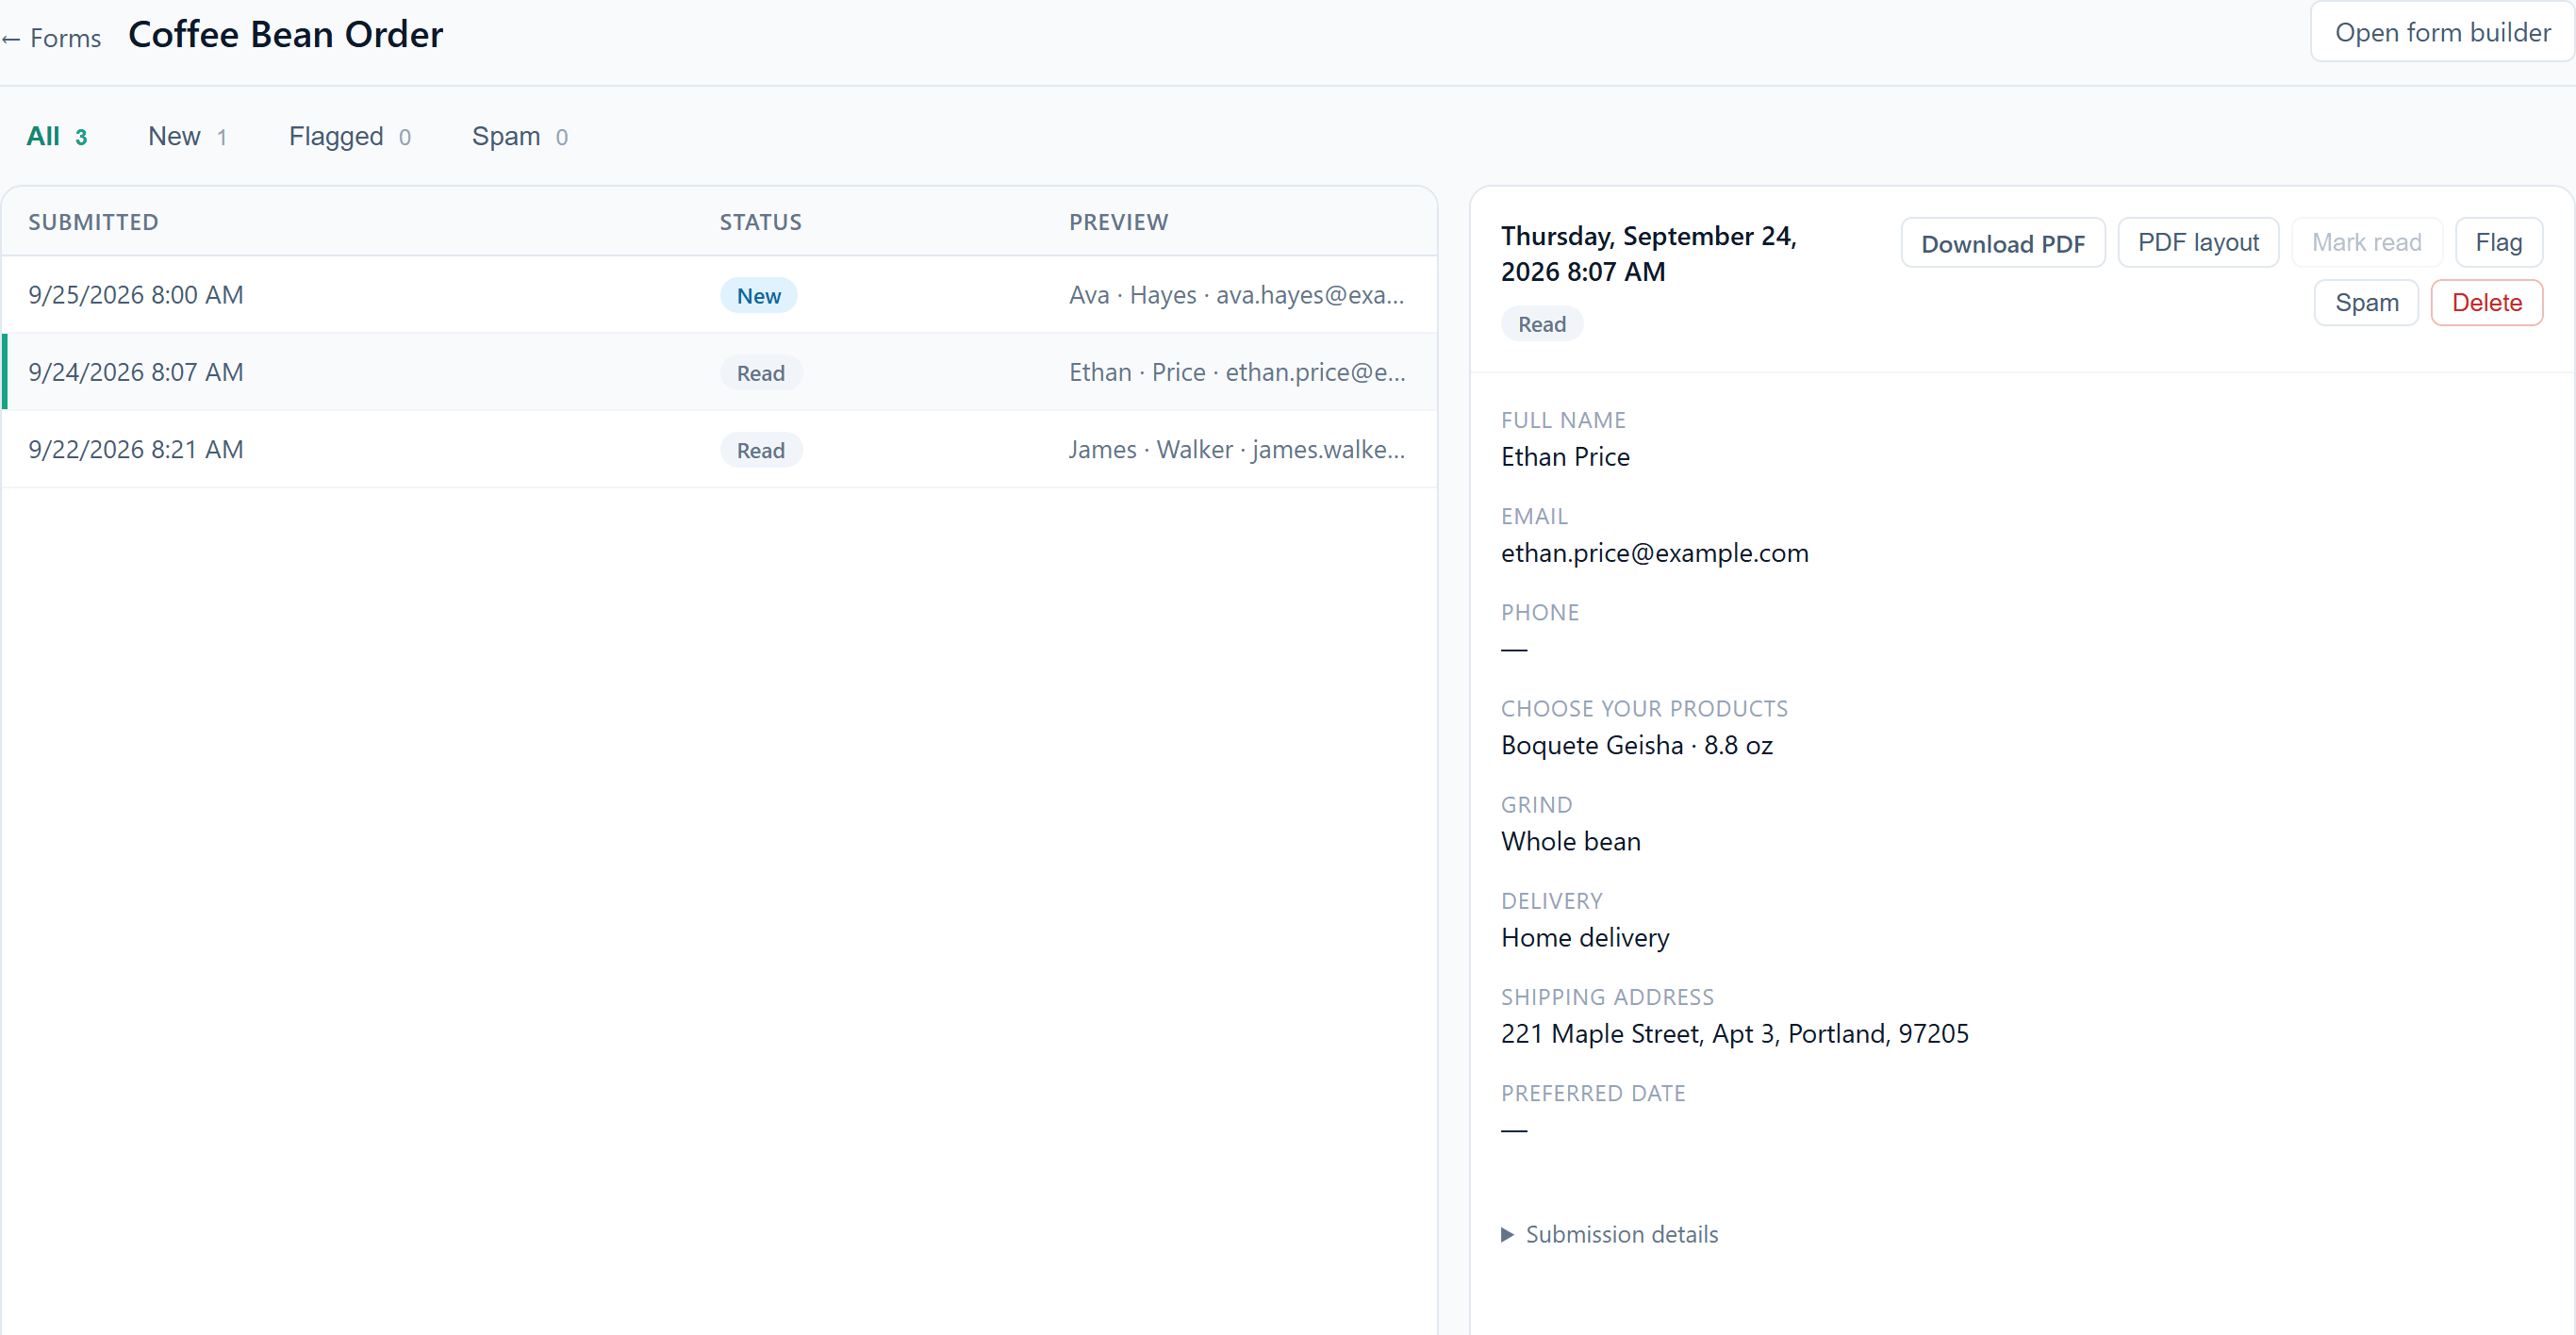 An order opened in the Submissions inbox.
Collect payments with Stripe
Prerequisites
- Payments must be enabled for your workspace (you see the Form payments card on Billing).
- You must be the workspace Owner to connect Stripe. Admins can't set up Form payments.
- Your business must be in the United States or Mexico.
- The form needs exactly one Products field, in products mode, with currency USD or MXN.
Step 1: connect your Stripe account
- Go to Billing.
- On the Form payments card, choose Your business's country (United States or Mexico).
- Click Connect with Stripe. Stripe's sign-up opens, outside anota.
- Enter the details Stripe asks for (your business, identity and the bank account that receives the money). If you already have a Stripe account, you can use it.
- When you finish, Stripe sends you back to Billing and the card shows the status:
- Active: you can start charging.
- Setup pending: Stripe still needs information or is reviewing your account. Click Continue setup to finish what's missing, or Refresh status a few minutes later.
Your Stripe account is yours: the Open Stripe button takes you to the Stripe dashboard, where you see your payments, payouts and refunds. Stripe charges its processing fees directly to your account.
Step 2: turn on payment in a form
- Open the form in the editor and go to Settings → Form settings.
- Check Collect payment with Stripe on submit. The option only appears when your Stripe account is Active.
- If the editor shows a warning, fix it:
- "Add exactly one Products field (products mode) to collect payments."
- "The Products field's currency must be USD or MXN."
- Publish the form (or click Update if it's already published).
What respondents see
They fill in the form and pick their products.
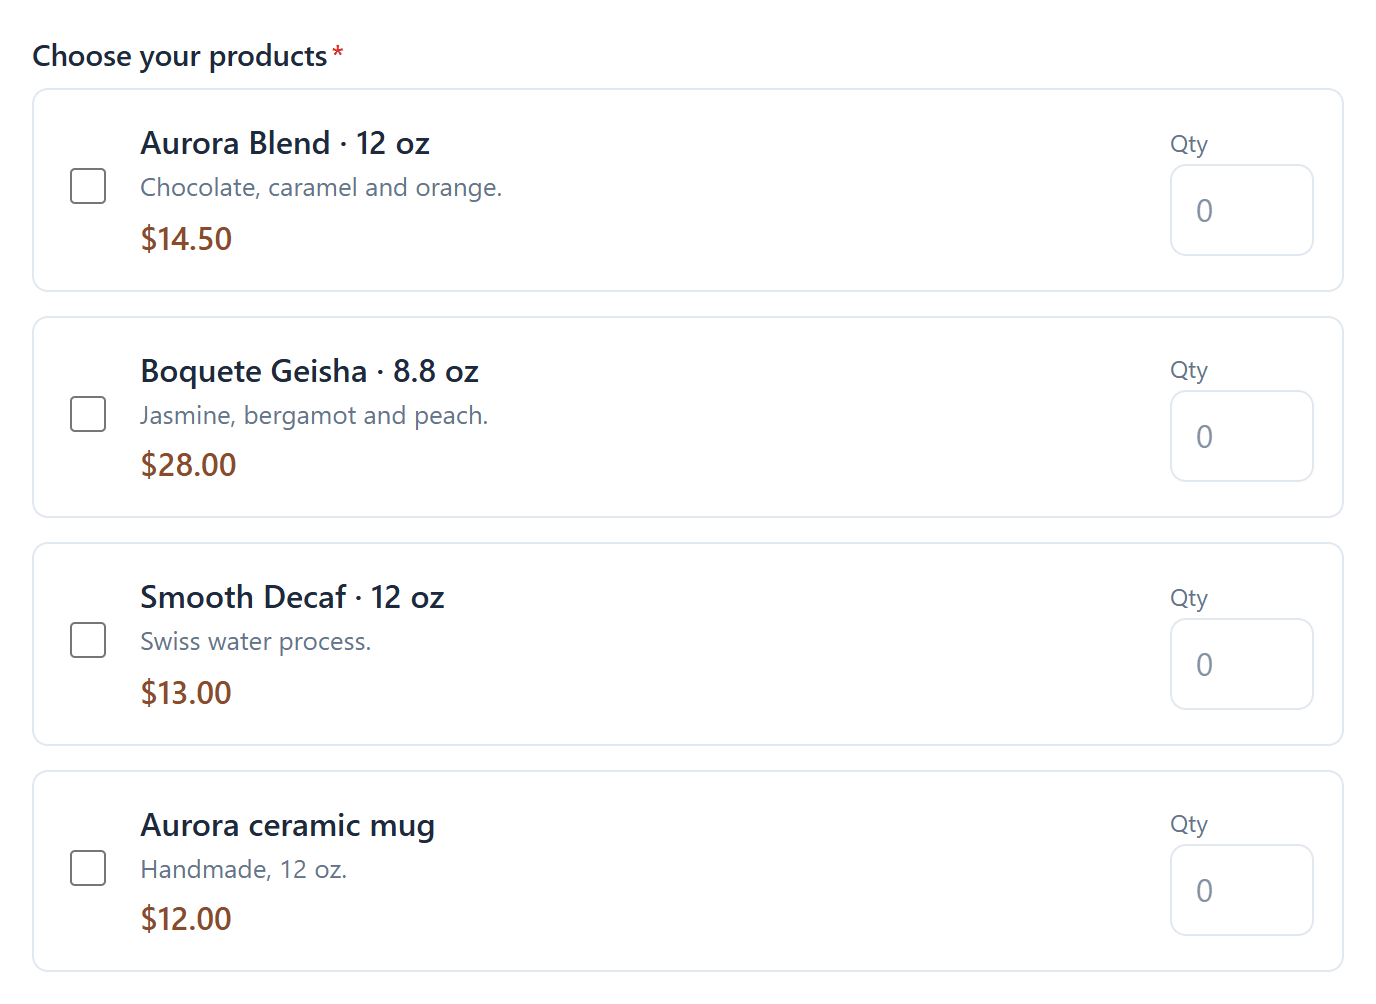 Respondents tick the products they want and set a quantity.
When they submit, anota calculates the total from the prices saved in the form (never from amounts sent by the browser) and sends them to Stripe's payment page.
They pay by card, Apple Pay or Google Pay. If the form has an email field, Stripe uses that address to send the receipt.
After paying, they return to the form's thank-you page (or the redirect URL you set up with Conditional logic).
If they leave the payment page without paying, they see "The payment wasn't completed" with a Retry payment button. Their order is still saved and they can pay later.
The Stripe payment link is valid for 60 minutes. If it expires, Retry payment creates a new one for the same order.
If the form is embedded in your website, submitting shows a Payment required screen with a Continue to payment button, which opens Stripe's payment page in the full browser window (Stripe doesn't allow paying inside an embedded frame).
What you receive
- Only paid orders count: Email notifications, the PDF, webhooks and integrations are sent once the payment is confirmed, not before.
- In the Submissions inbox, every order from a paying form shows a payment label: Paid, Payment pending, Payment processing, Abandoned / unpaid, Refunded or Partly refunded. Payment processing means the respondent finished Stripe Checkout but the payment is still settling; it only happens with asynchronous payment methods, so it's rare with cards and wallets, and the order moves to Paid once Stripe confirms it. Opening an order shows the Amount paid, the currency and the Paid on date.
- The All tab shows regular submissions and paid orders. Unpaid orders don't appear there, so an abandoned payment doesn't look like a real order.
- The Paid and Abandoned / unpaid tabs appear as soon as the form receives its first order with payment.
- Abandoned / unpaid orders are kept for 30 days, so you can contact those people if you want, and are then deleted automatically.
- If you issue a refund from your Stripe dashboard, anota updates the order's label to Refunded or Partly refunded.
Costs
- anota: 1% of each payment collected, on every plan.
- Stripe: its usual processing fees, charged by Stripe directly to your account.
Limits
- Each plan includes a number of paid orders per month (see Plans and billing). When you reach it, the form stops accepting orders with payment until the next month or until you change plans.
- The minimum total per payment is USD 0.50 or MXN 10.00 (Stripe's minimums). If an order is below the minimum, the form shows "The minimum total for online payment is…" and doesn't submit.
- If a respondent doesn't pick any product, the response is saved as a regular submission, with no charge.
- Payment methods: credit or debit cards, Apple Pay and Google Pay. Cash or delayed methods such as OXXO aren't accepted.
Disconnect Stripe
On Billing → Form payments, click Disconnect, then Yes, disconnect. Your forms stop charging and go back to receiving unpaid orders. Your Stripe account is not deleted and you keep its full history. Payments already in progress are still recorded on their orders.
Field reference
| Field | Type | Required | Description |
|---|---|---|---|
| Name | Text | Yes | Item or service name (shown to the respondent on the payment page). |
| Description | Text | No | Extra detail about the item. Only some Templates include it; it can't be edited in the editor. |
| Price | Number | Yes | Unit price in the field's currency. |
| Allow quantity | Checkbox | No | Lets respondents choose how many units they want. |
| Max (maximum quantity) | Number | No | Maximum units per item when quantity is allowed. |
| Currency | Dropdown | No | The field's currency (USD by default). To charge with Stripe: USD or MXN. |
Roles and permissions
| Role | Add and edit a Products field | Turn on payment for a form | Connect or disconnect Stripe |
|---|---|---|---|
| Owner | Yes | Yes | Yes |
| Admin | Yes | Yes | No |
| Editor | Yes | Yes | No |
| Viewer | No | No | No |
Troubleshooting
| Symptom | Likely cause | Resolution |
|---|---|---|
| I don't see the Form payments card on Billing. | The feature isn't enabled for your workspace, or you aren't the Owner. | Ask the Owner to check. If nobody sees it, the feature isn't available yet. |
| Collect payment with Stripe on submit doesn't appear. | Your Stripe account isn't Active yet. | On Billing, use Continue setup or Refresh status. |
| The form doesn't charge even though the option is checked. | The form doesn't have exactly one Products field with currency USD or MXN, or Stripe was disconnected. | Check the warning in the editor and the status on Billing. |
| A respondent says they paid, but no notification arrived. | Stripe hasn't confirmed the payment yet, or the respondent didn't finish paying. | Check the Abandoned / unpaid tab and your Stripe dashboard. The notification is sent when the payment is confirmed. |
| An order shows as Abandoned / unpaid. | The respondent left the payment page or let the link expire. | They can pay with Retry payment from the page Stripe returned them to. Otherwise the order is deleted after 30 days. |
| "The minimum total for online payment is…" | The order is below Stripe's minimum for that currency. | Adjust the form's prices or quantities. |
| My business isn't in the US or Mexico. | Payments are only available in those two countries for now. | Use the Products field to record orders and collect payment outside anota. |
Related features
Was this page helpful?