The form editor
The form editor
Applies to: anota, all plans Roles required: Editor or above (Viewers cannot open the editor) Regulatory references: none
Overview
The form editor (the "anota builder") is where you design a form: you add fields, arrange them on one or more pages, set each field's properties and publish the result. You use it both before a form goes live and afterwards, to change a form people are already filling in.
This page walks through the everyday jobs in the editor, one task at a time, with the screen you should see at every step and the button or field to use outlined in green. The example is a Catering Order Request form for Café Aurora, a coffee shop that caters meetings and events.
Key concepts
- Build / Settings / Publish: the three tabs at the top of the editor. Build is where you add and arrange fields; Settings holds form settings, conditions and the thank-you page; Publish holds sharing, notifications and integrations.
- Canvas: the middle of the Build tab. It shows the form's pages and fields in the order people see them.
- Form elements panel: the list of Field types that slides in from the left when you click + Add element.
- Properties panel: the settings of the selected field, on the right.
- Field actions: the column of small buttons next to the selected field: Properties, Move up, Move down, Move to page… (only when the form has more than one page), Duplicate and Delete.
- Draft: the version you are editing. It saves automatically but stays private until you publish.
- Published: the form has a live public page. From then on the top-bar button reads Update, which pushes your latest draft to the live form.
Task 1 — Find your way around the editor
Prerequisites
- A role of Editor or above in the workspace (see Roles and permissions).
Step-by-step
Open Forms in the top menu and click the form's title. (You can also choose Edit in the form's ⋯ menu. To start a new form, click Create form; see Getting started.)
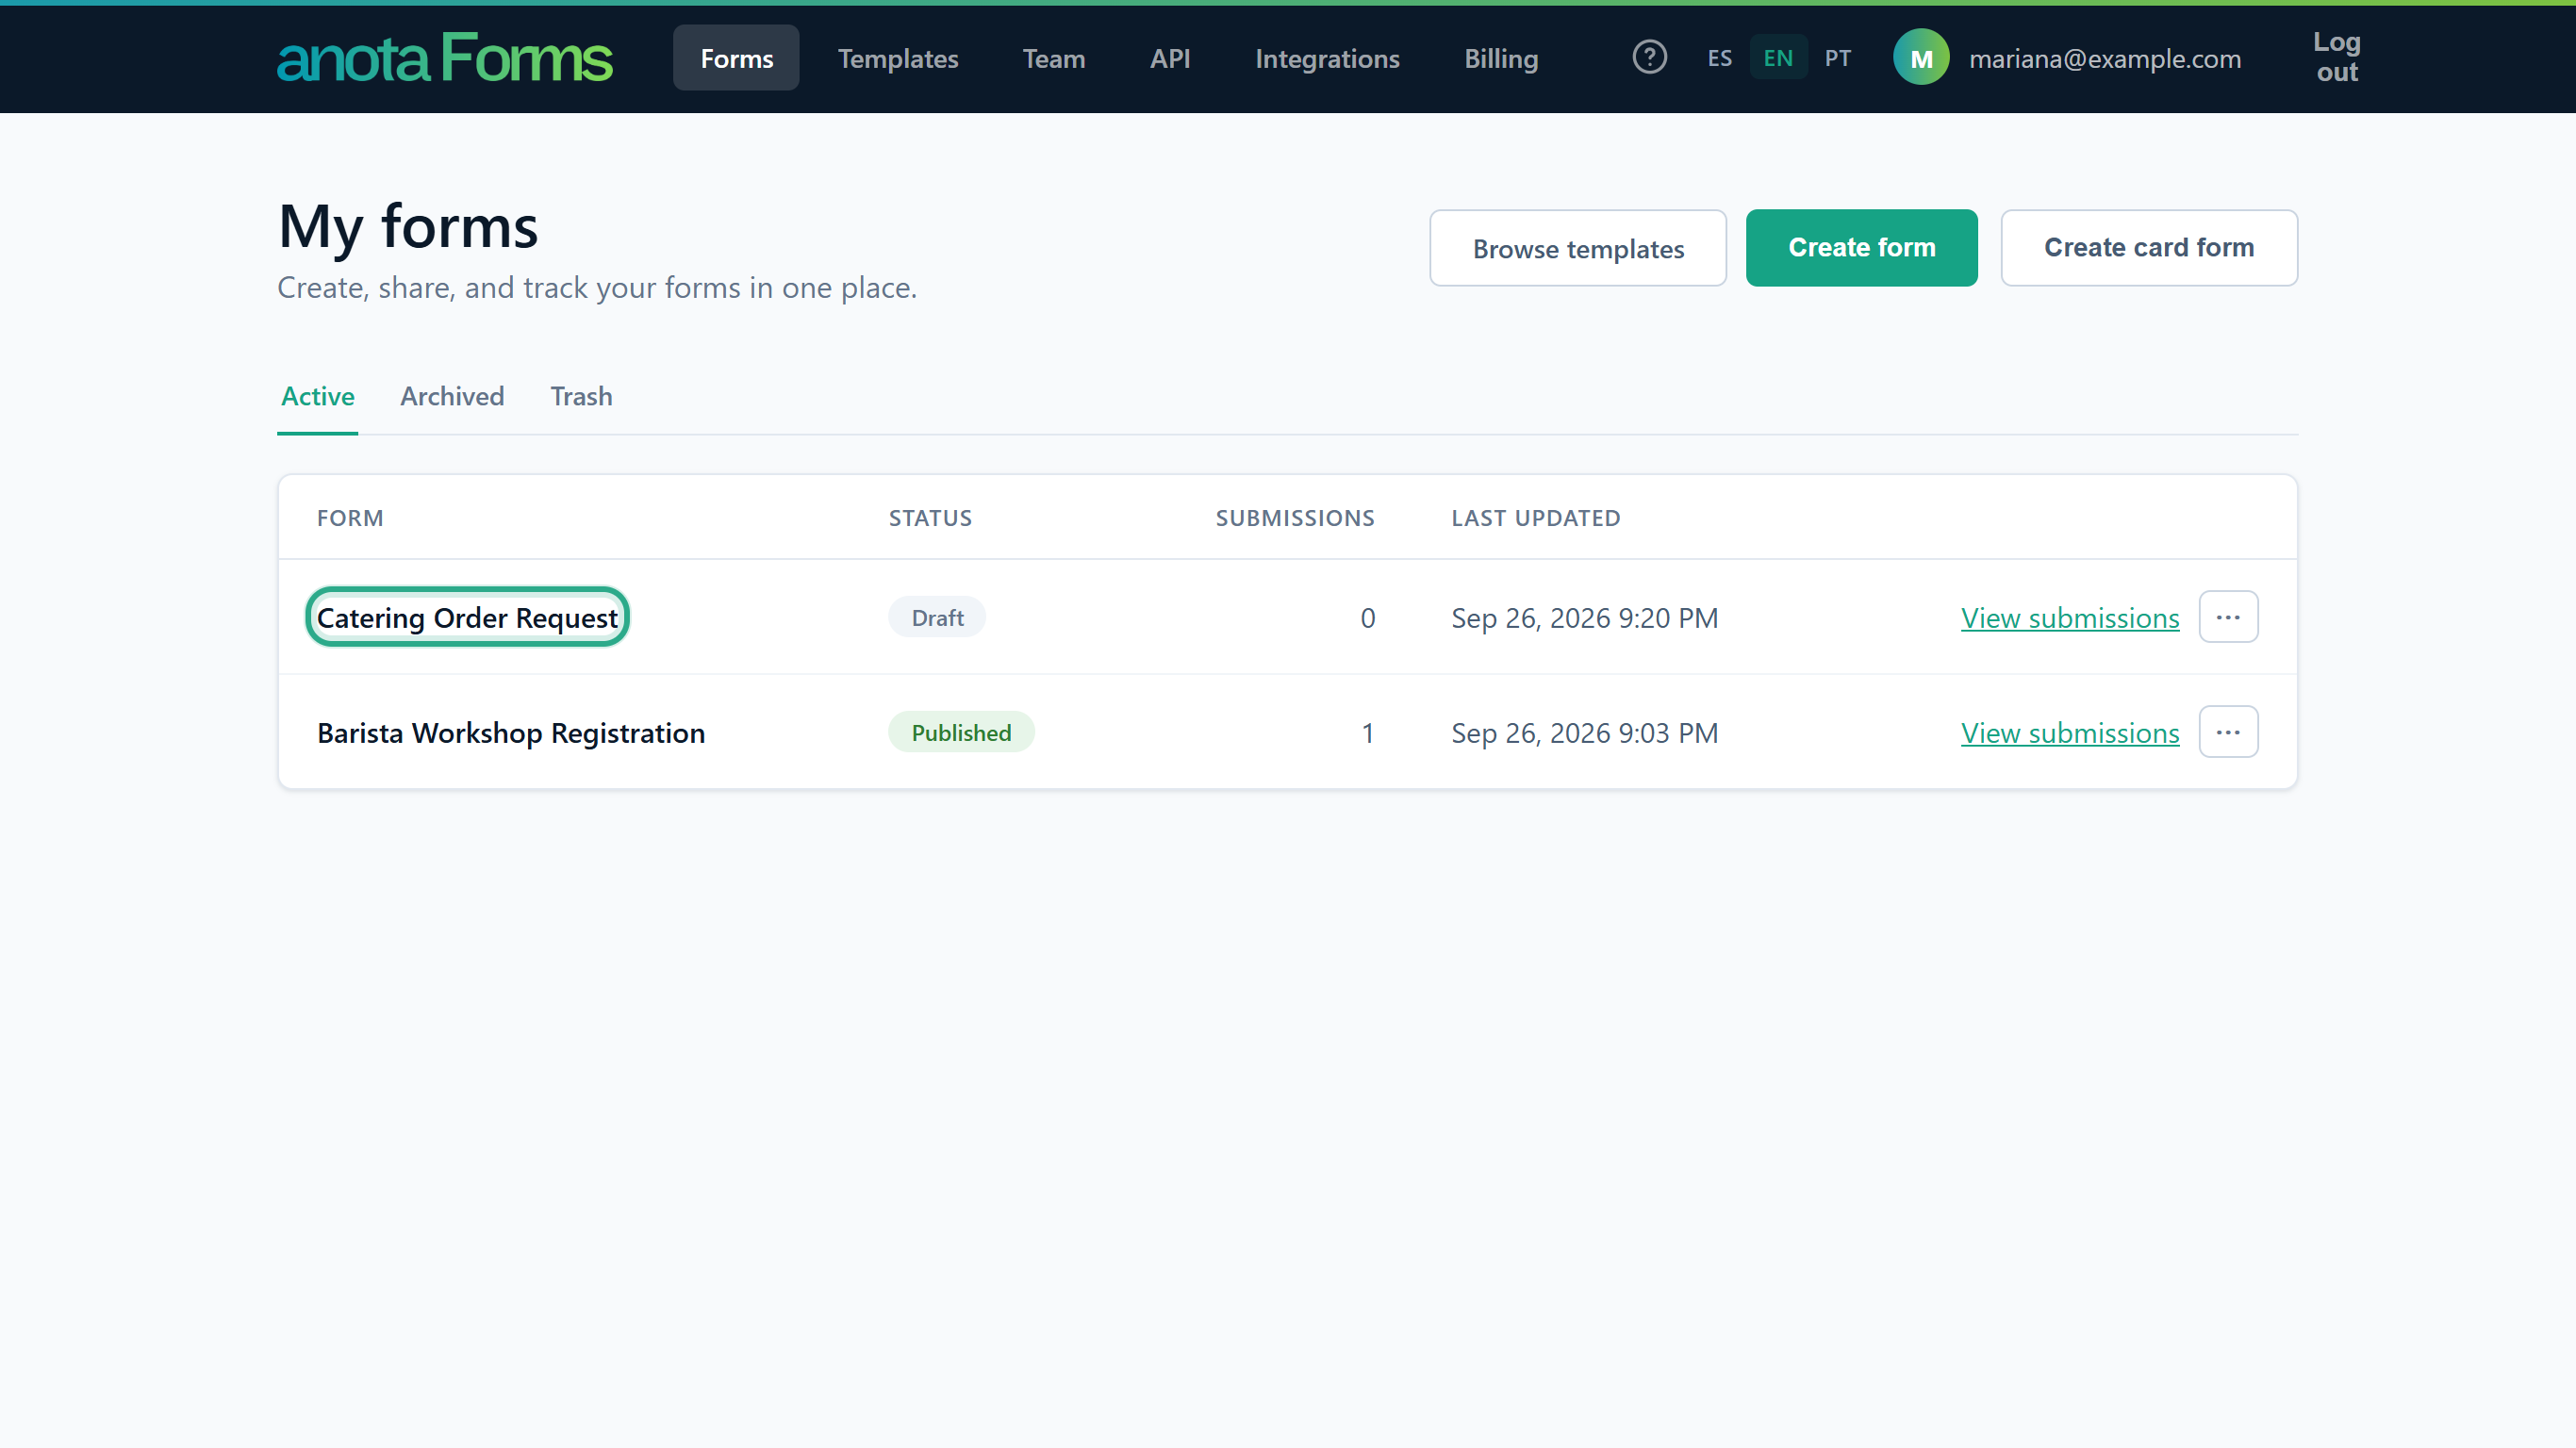 Click a form's title to open it in the editor.
The editor opens on the Build tab. Along the top bar you'll find, from left to right: ← to go back to your forms, the form title (click it to rename the form), the Build, Settings and Publish tabs, Invite (opens the Team page in a new tab to invite a teammate), ↩ Undo and ↪ Redo, the save status and the Publish button. Below the bar are + Add element and the canvas.
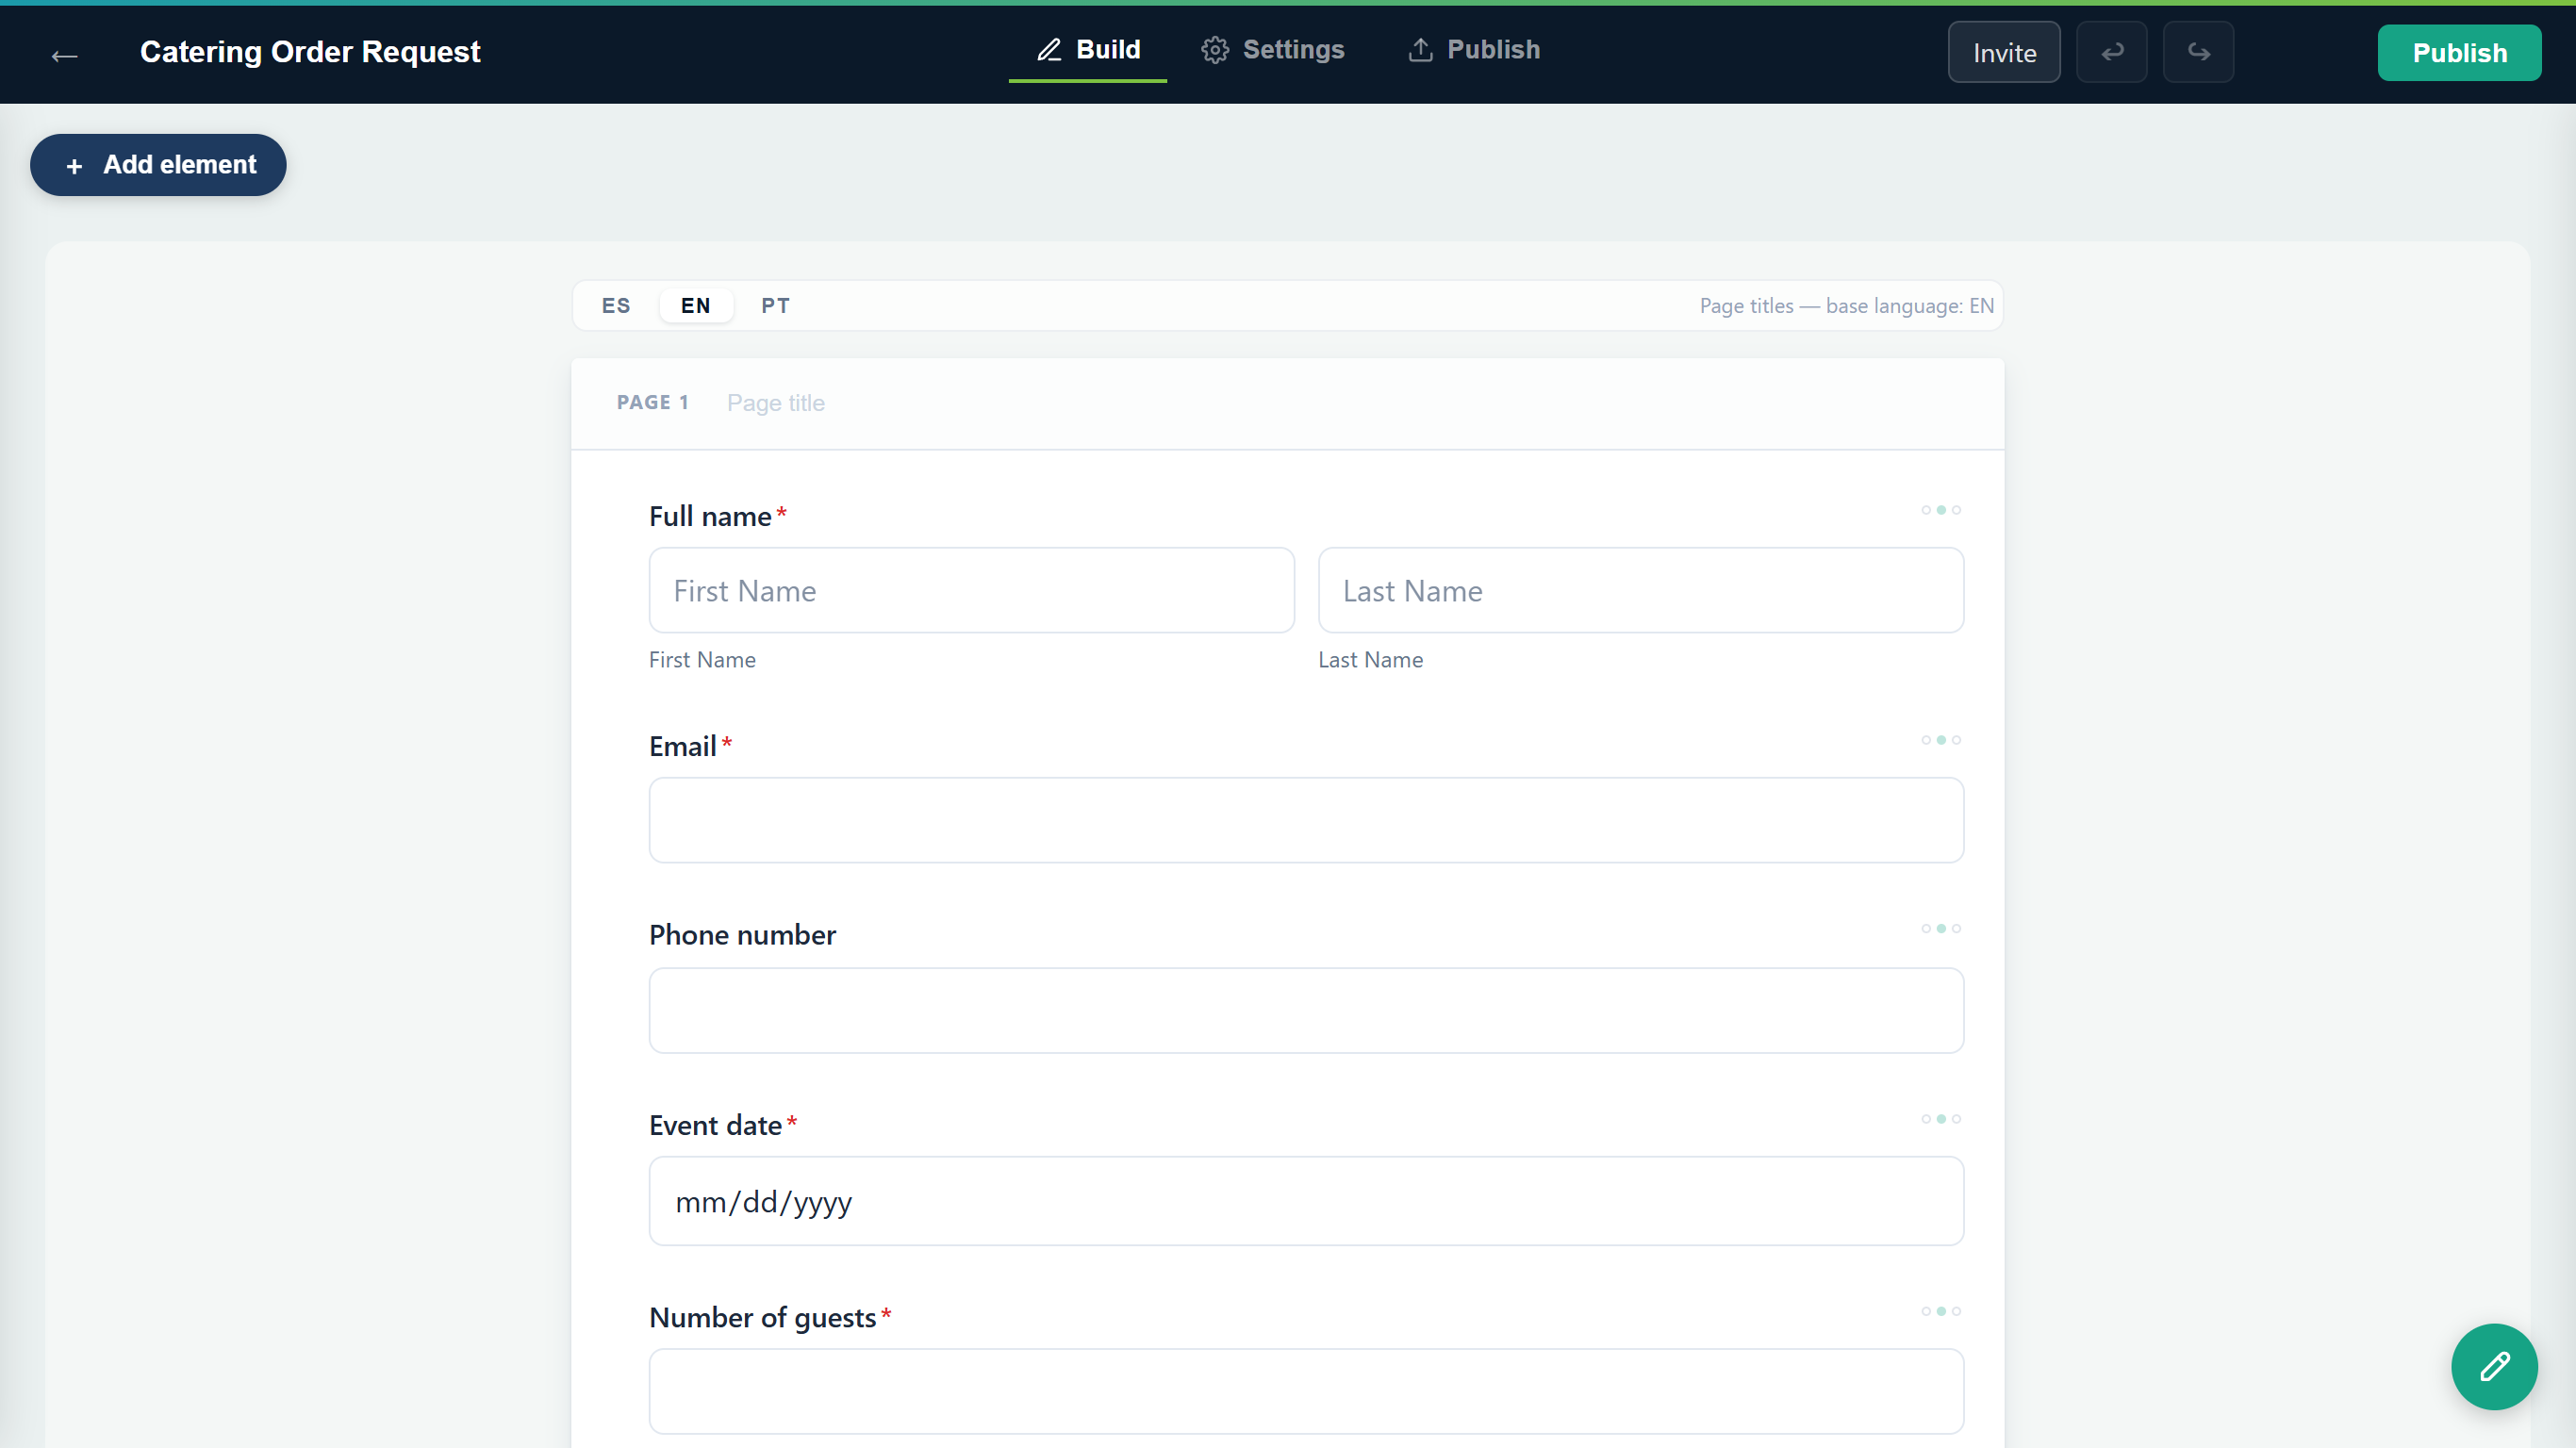 The Build tab: top bar, + Add element and the canvas with the form's first page.
Click + Add element. The Form elements panel opens on the left, with Search fields… at the top and every field type grouped by category. Click ✕ in the panel to close it.
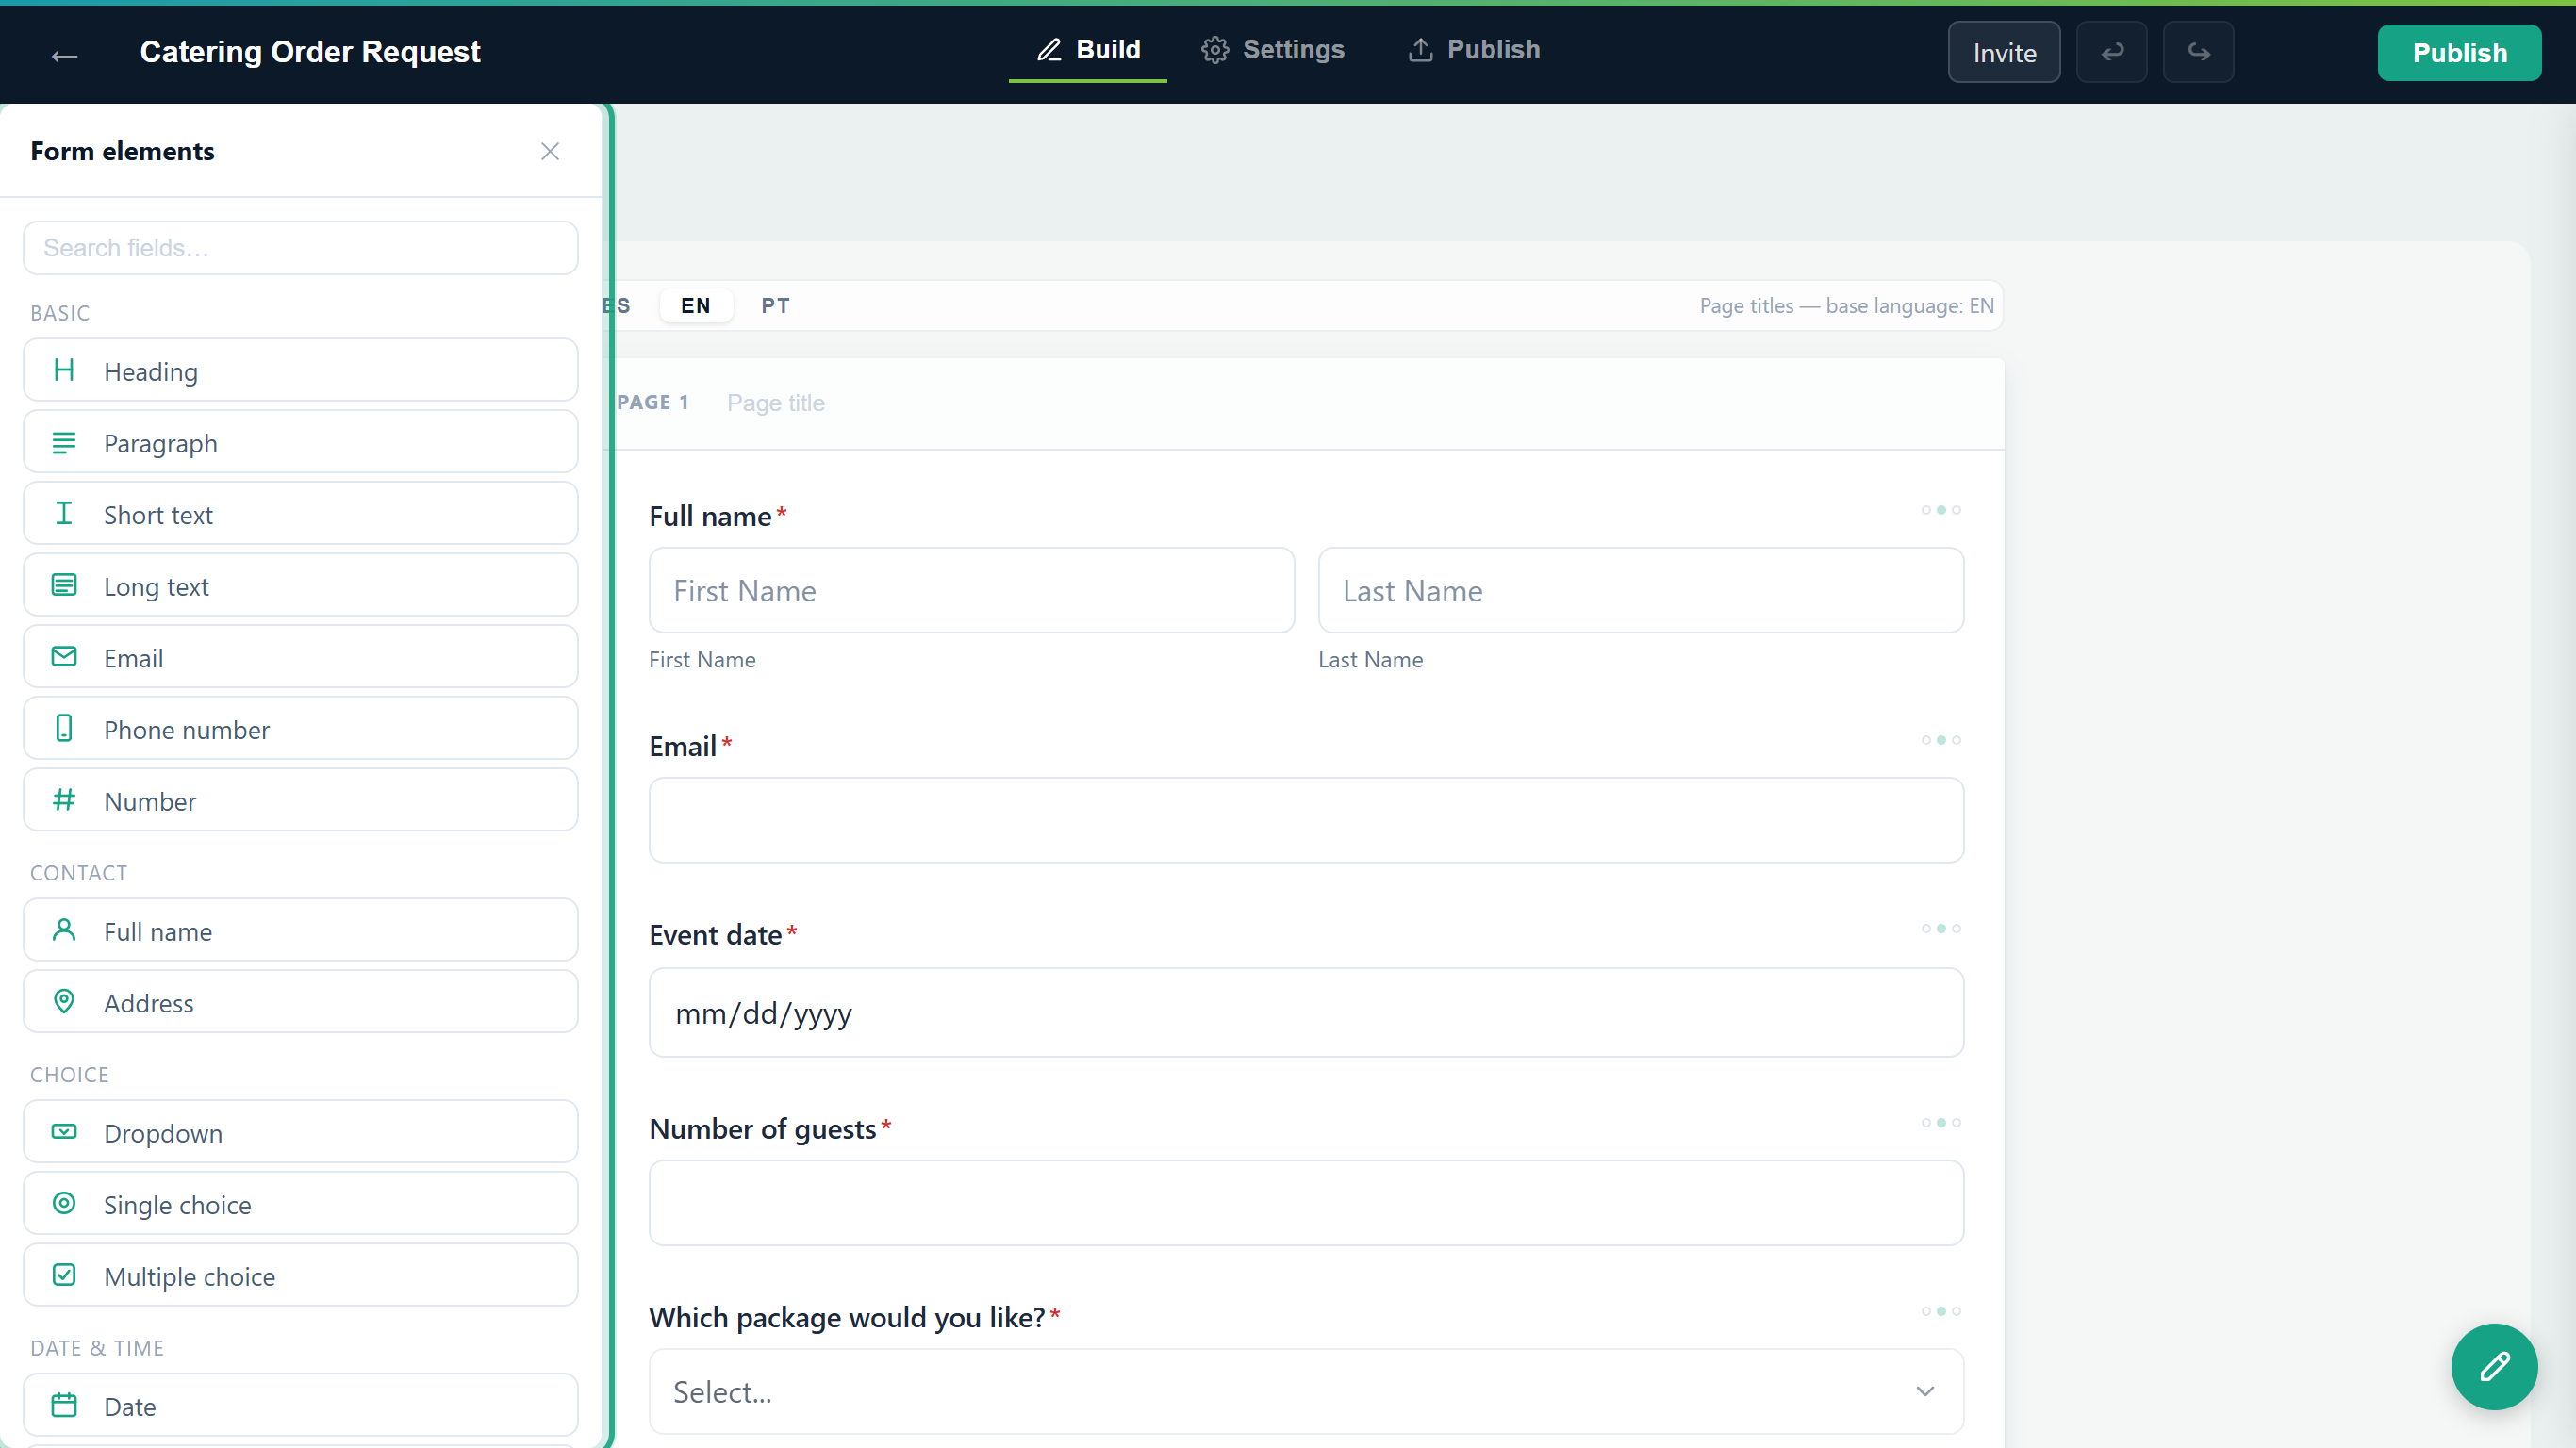 The Form elements panel lists every field type by category.
Click a field on the canvas to select it, then click the gear (Properties) next to it. The Properties panel opens on the right with that field's settings. It stays open and follows your selection when you click another field; ✕ closes it.
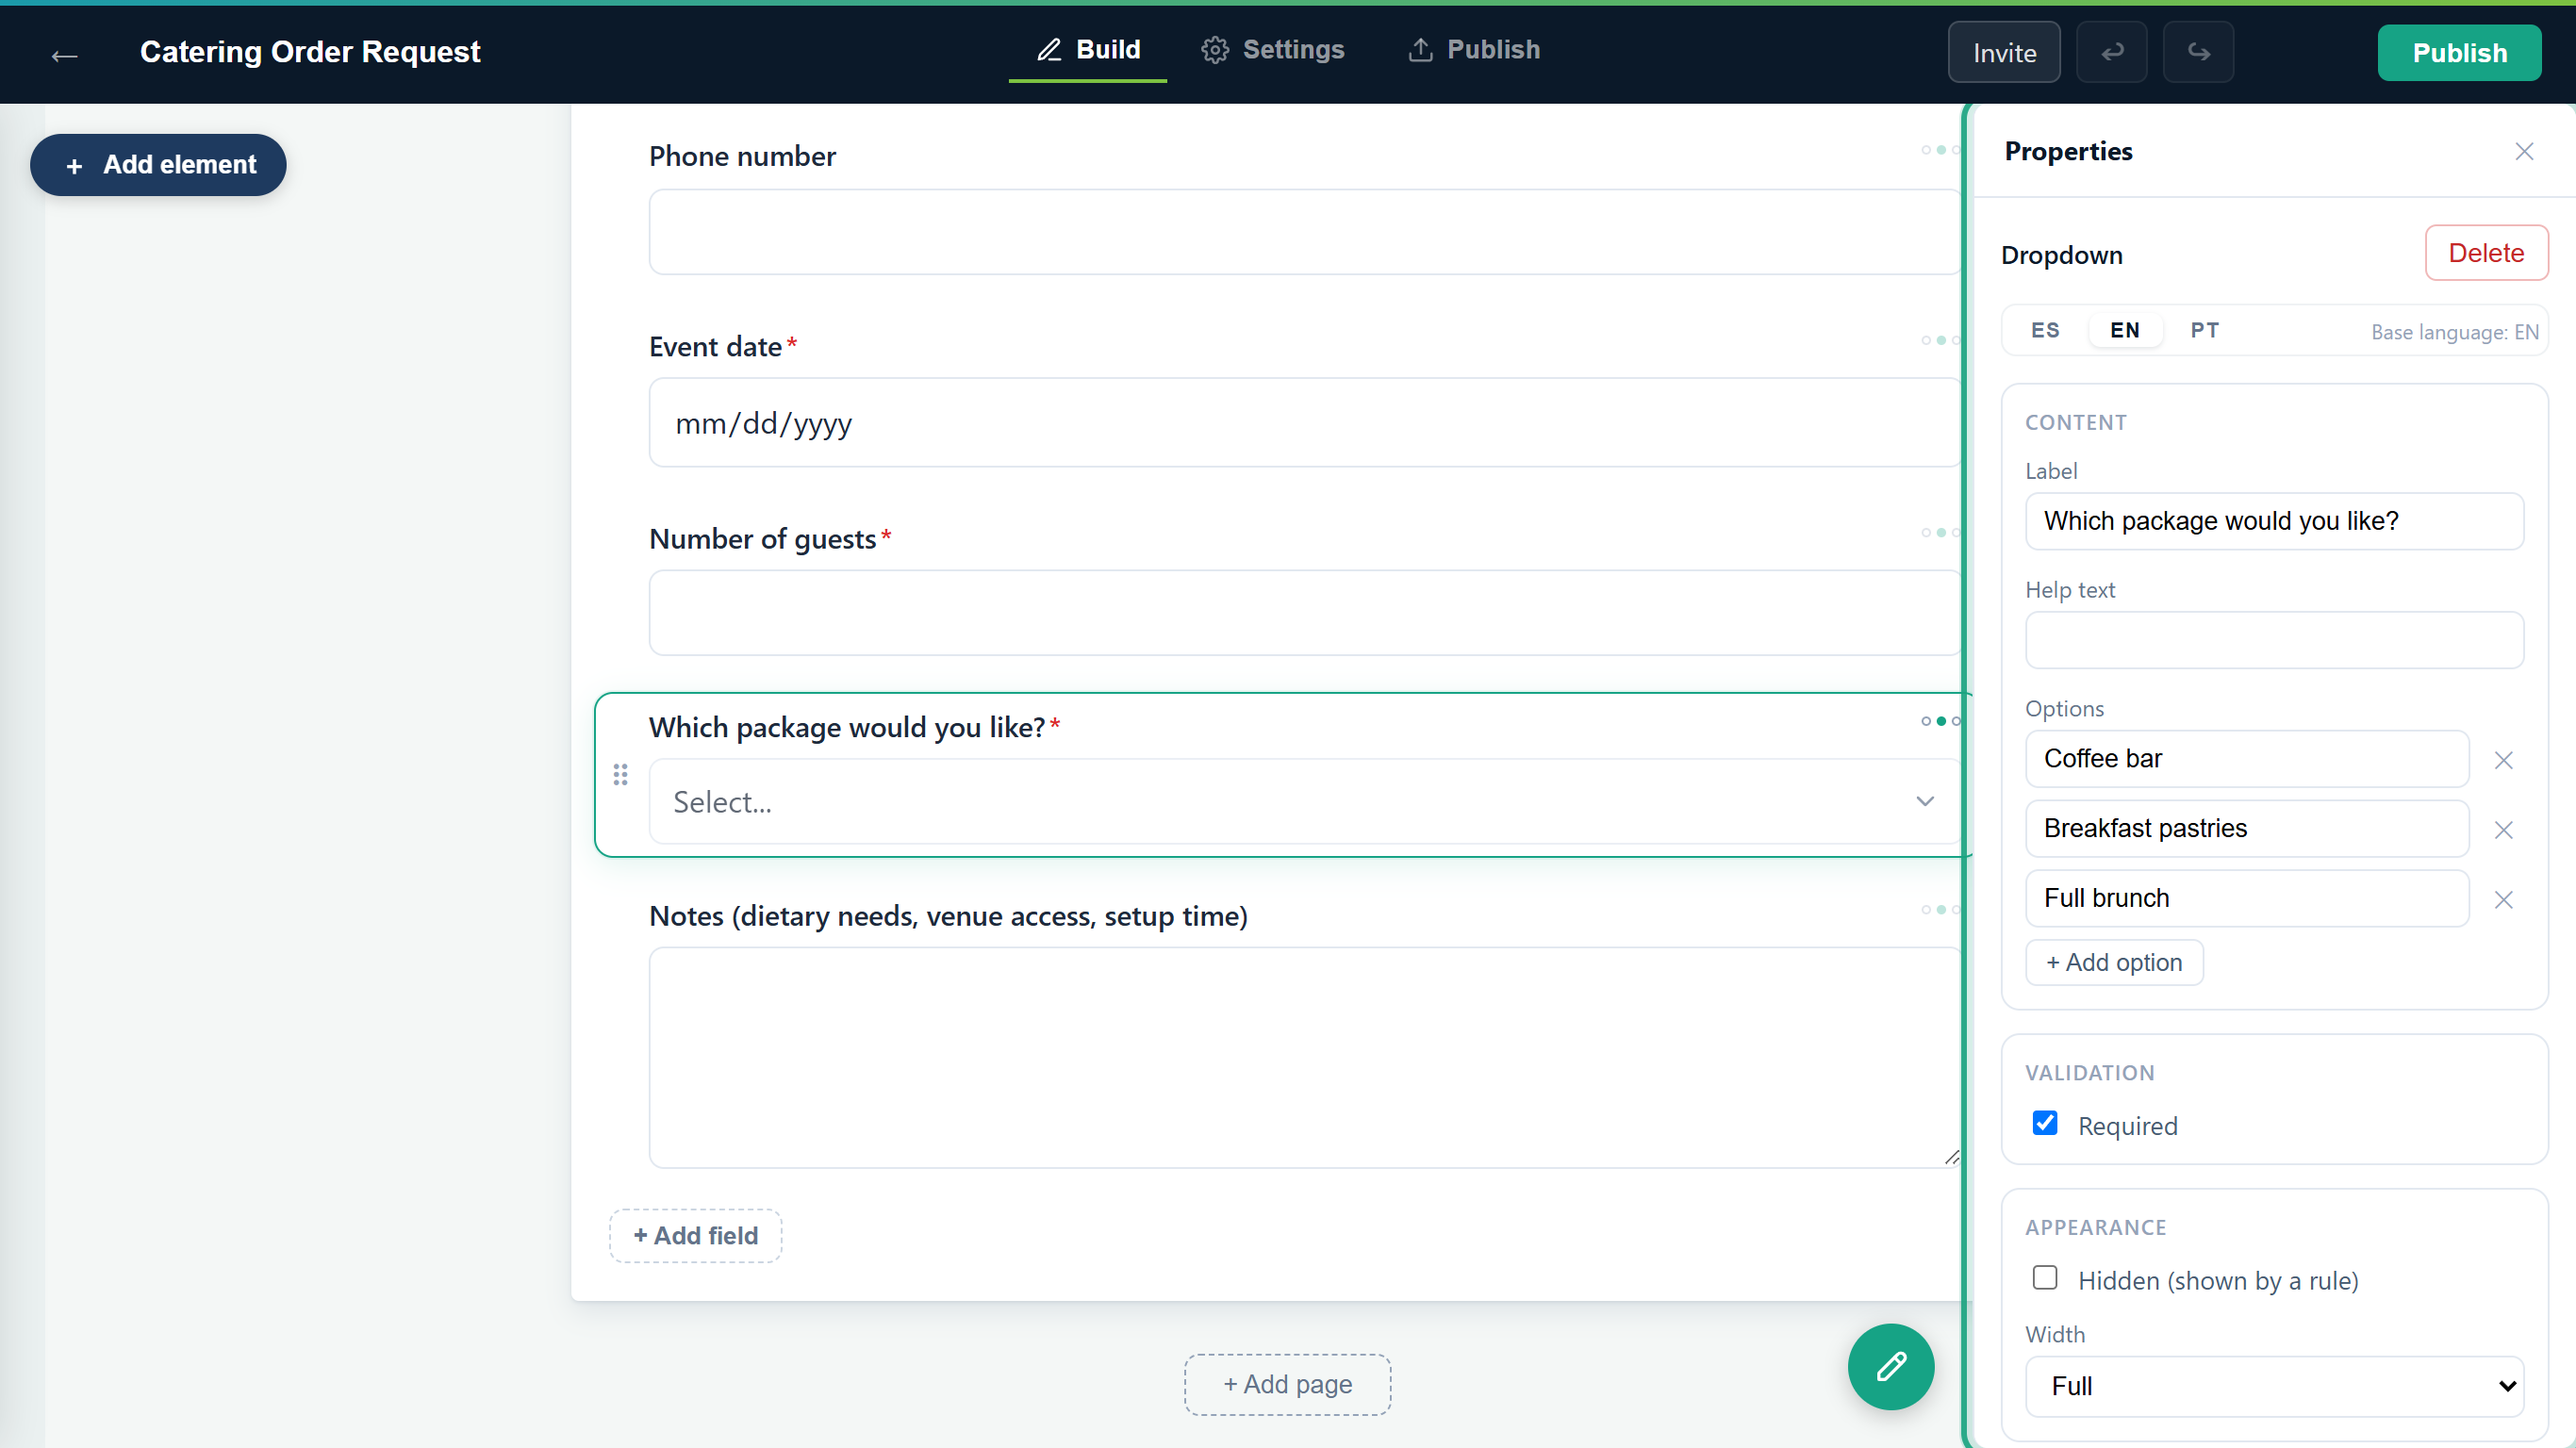 The Properties panel for the selected field.
Click the Settings tab to see the form-wide settings: Form settings, Conditions and Thank you page (see The Settings tab below).
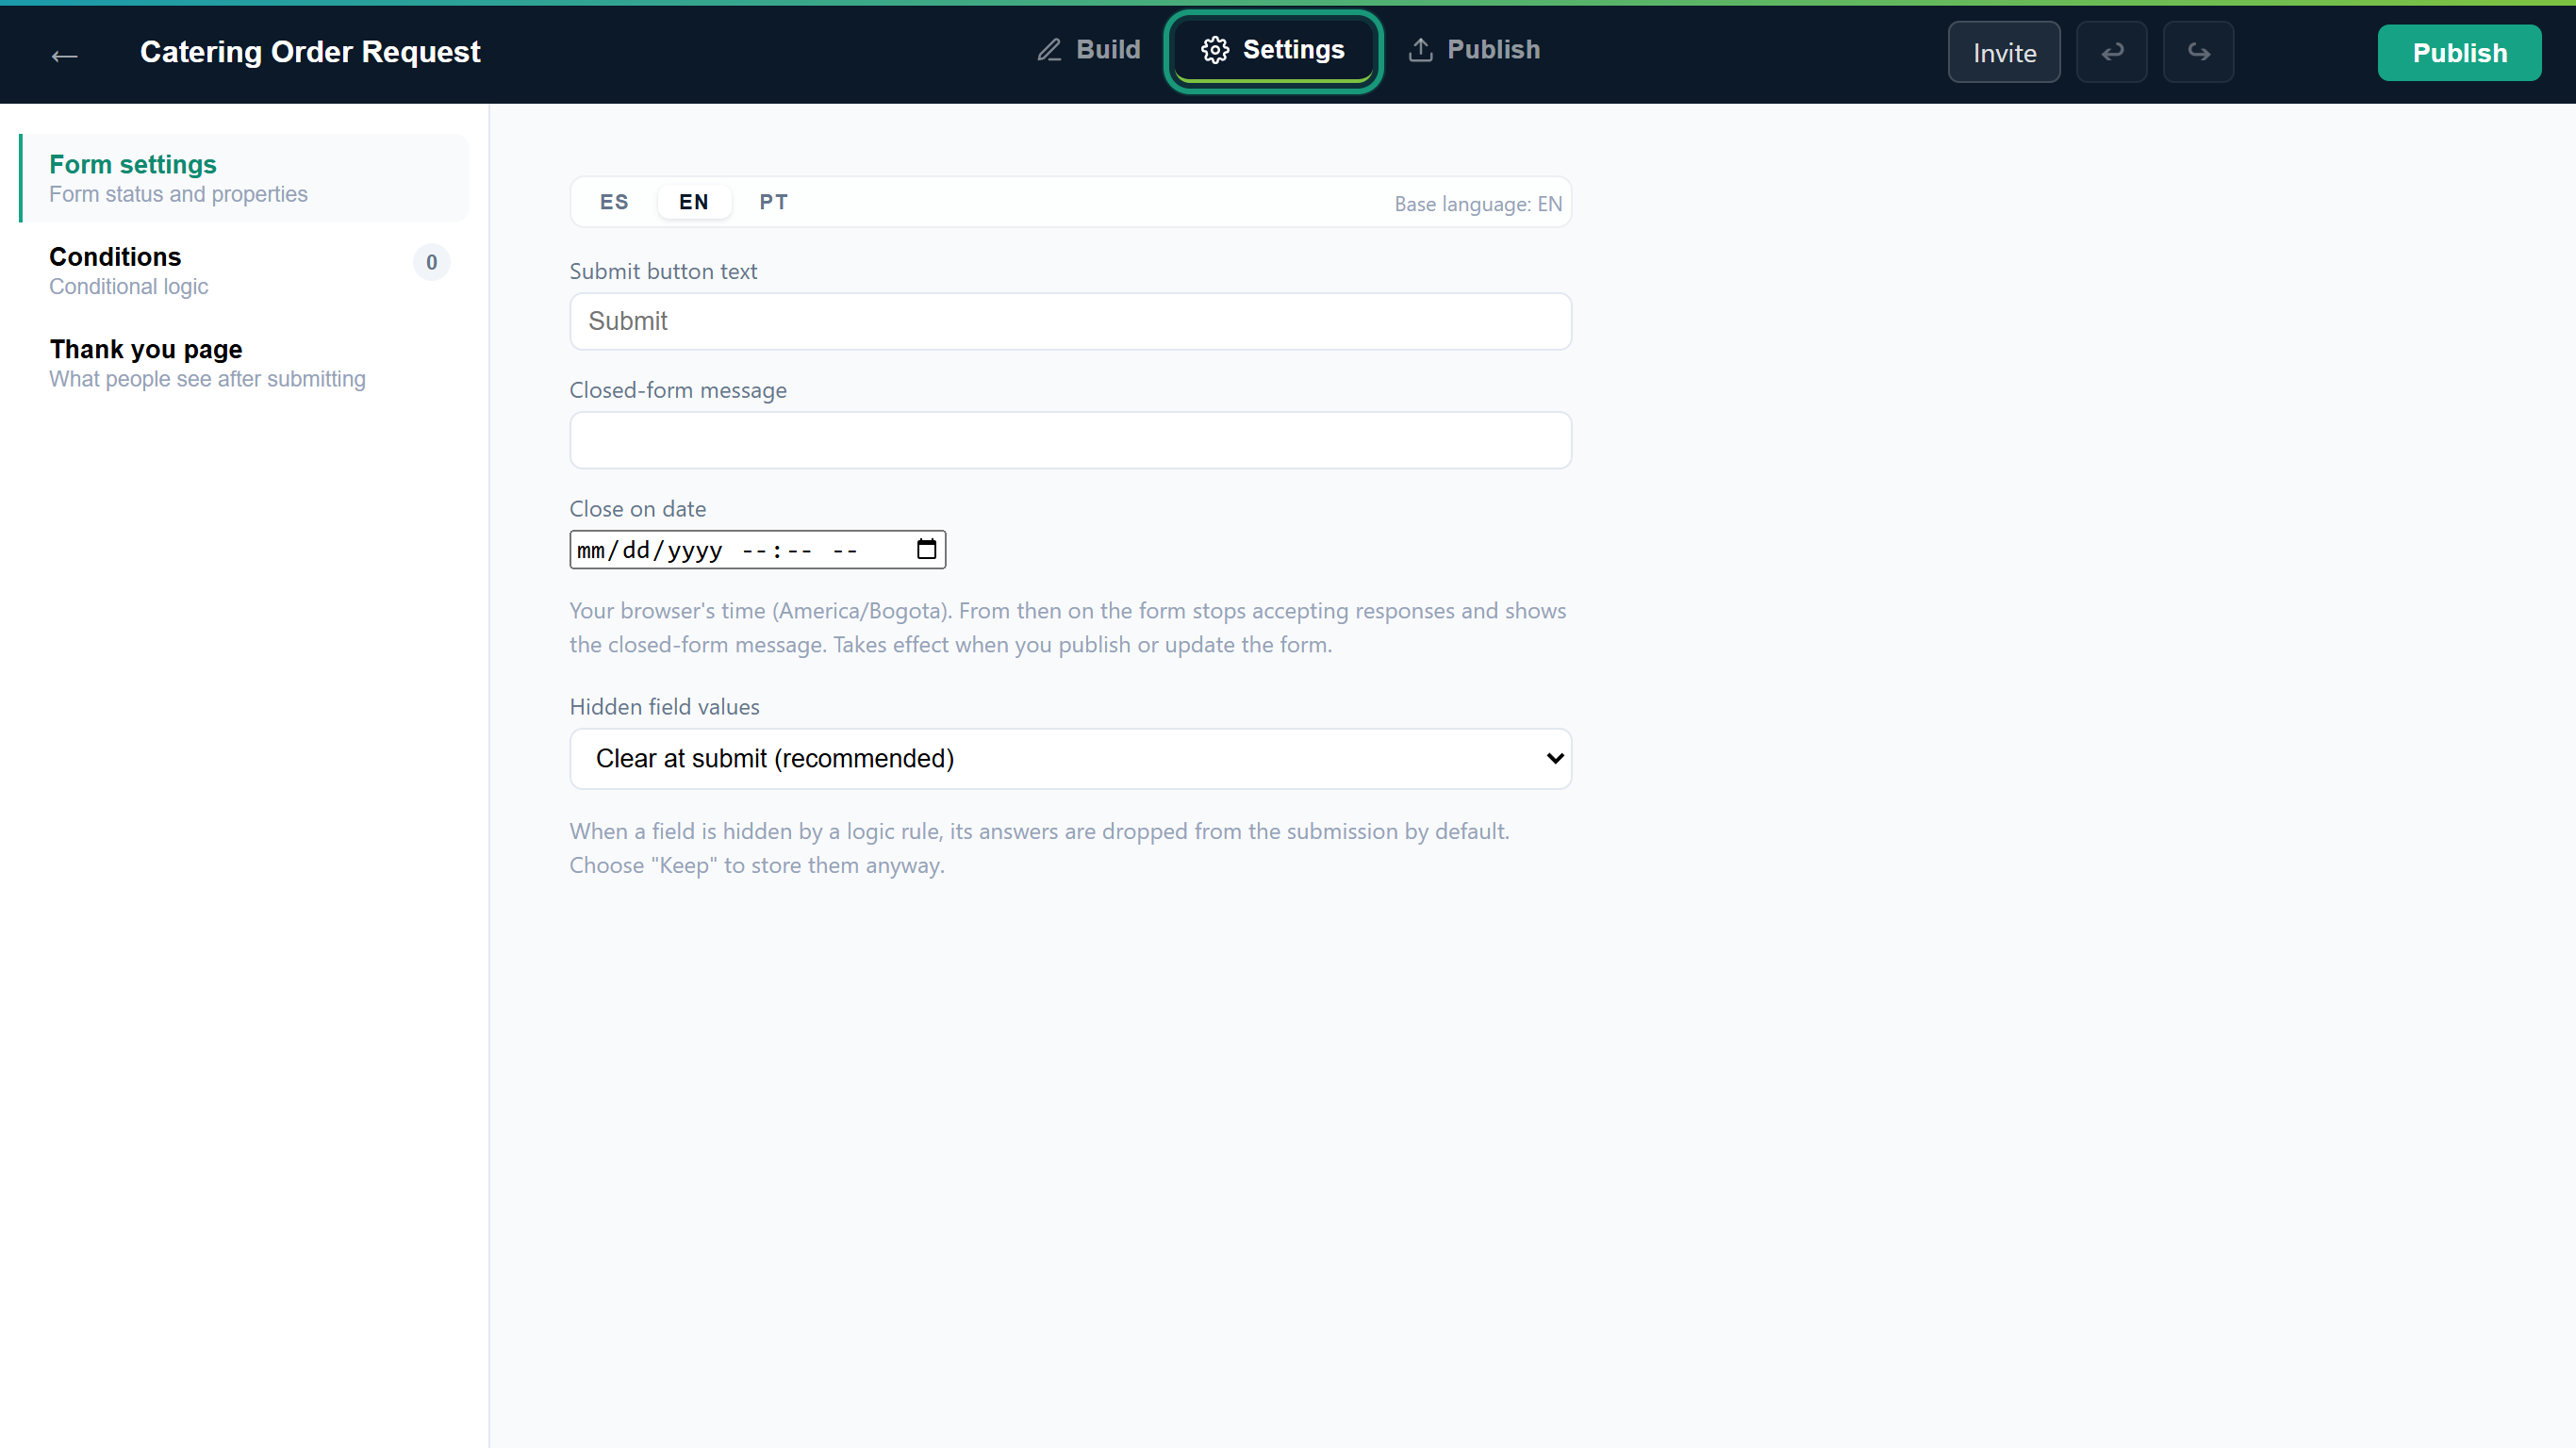 The Settings tab opens on Form settings.
Click the Publish tab. Before the first publication it only shows Publish your form and a Publish button; once the form is live it shows Share, Notifications and Integrations. Click Build to go back to the canvas.
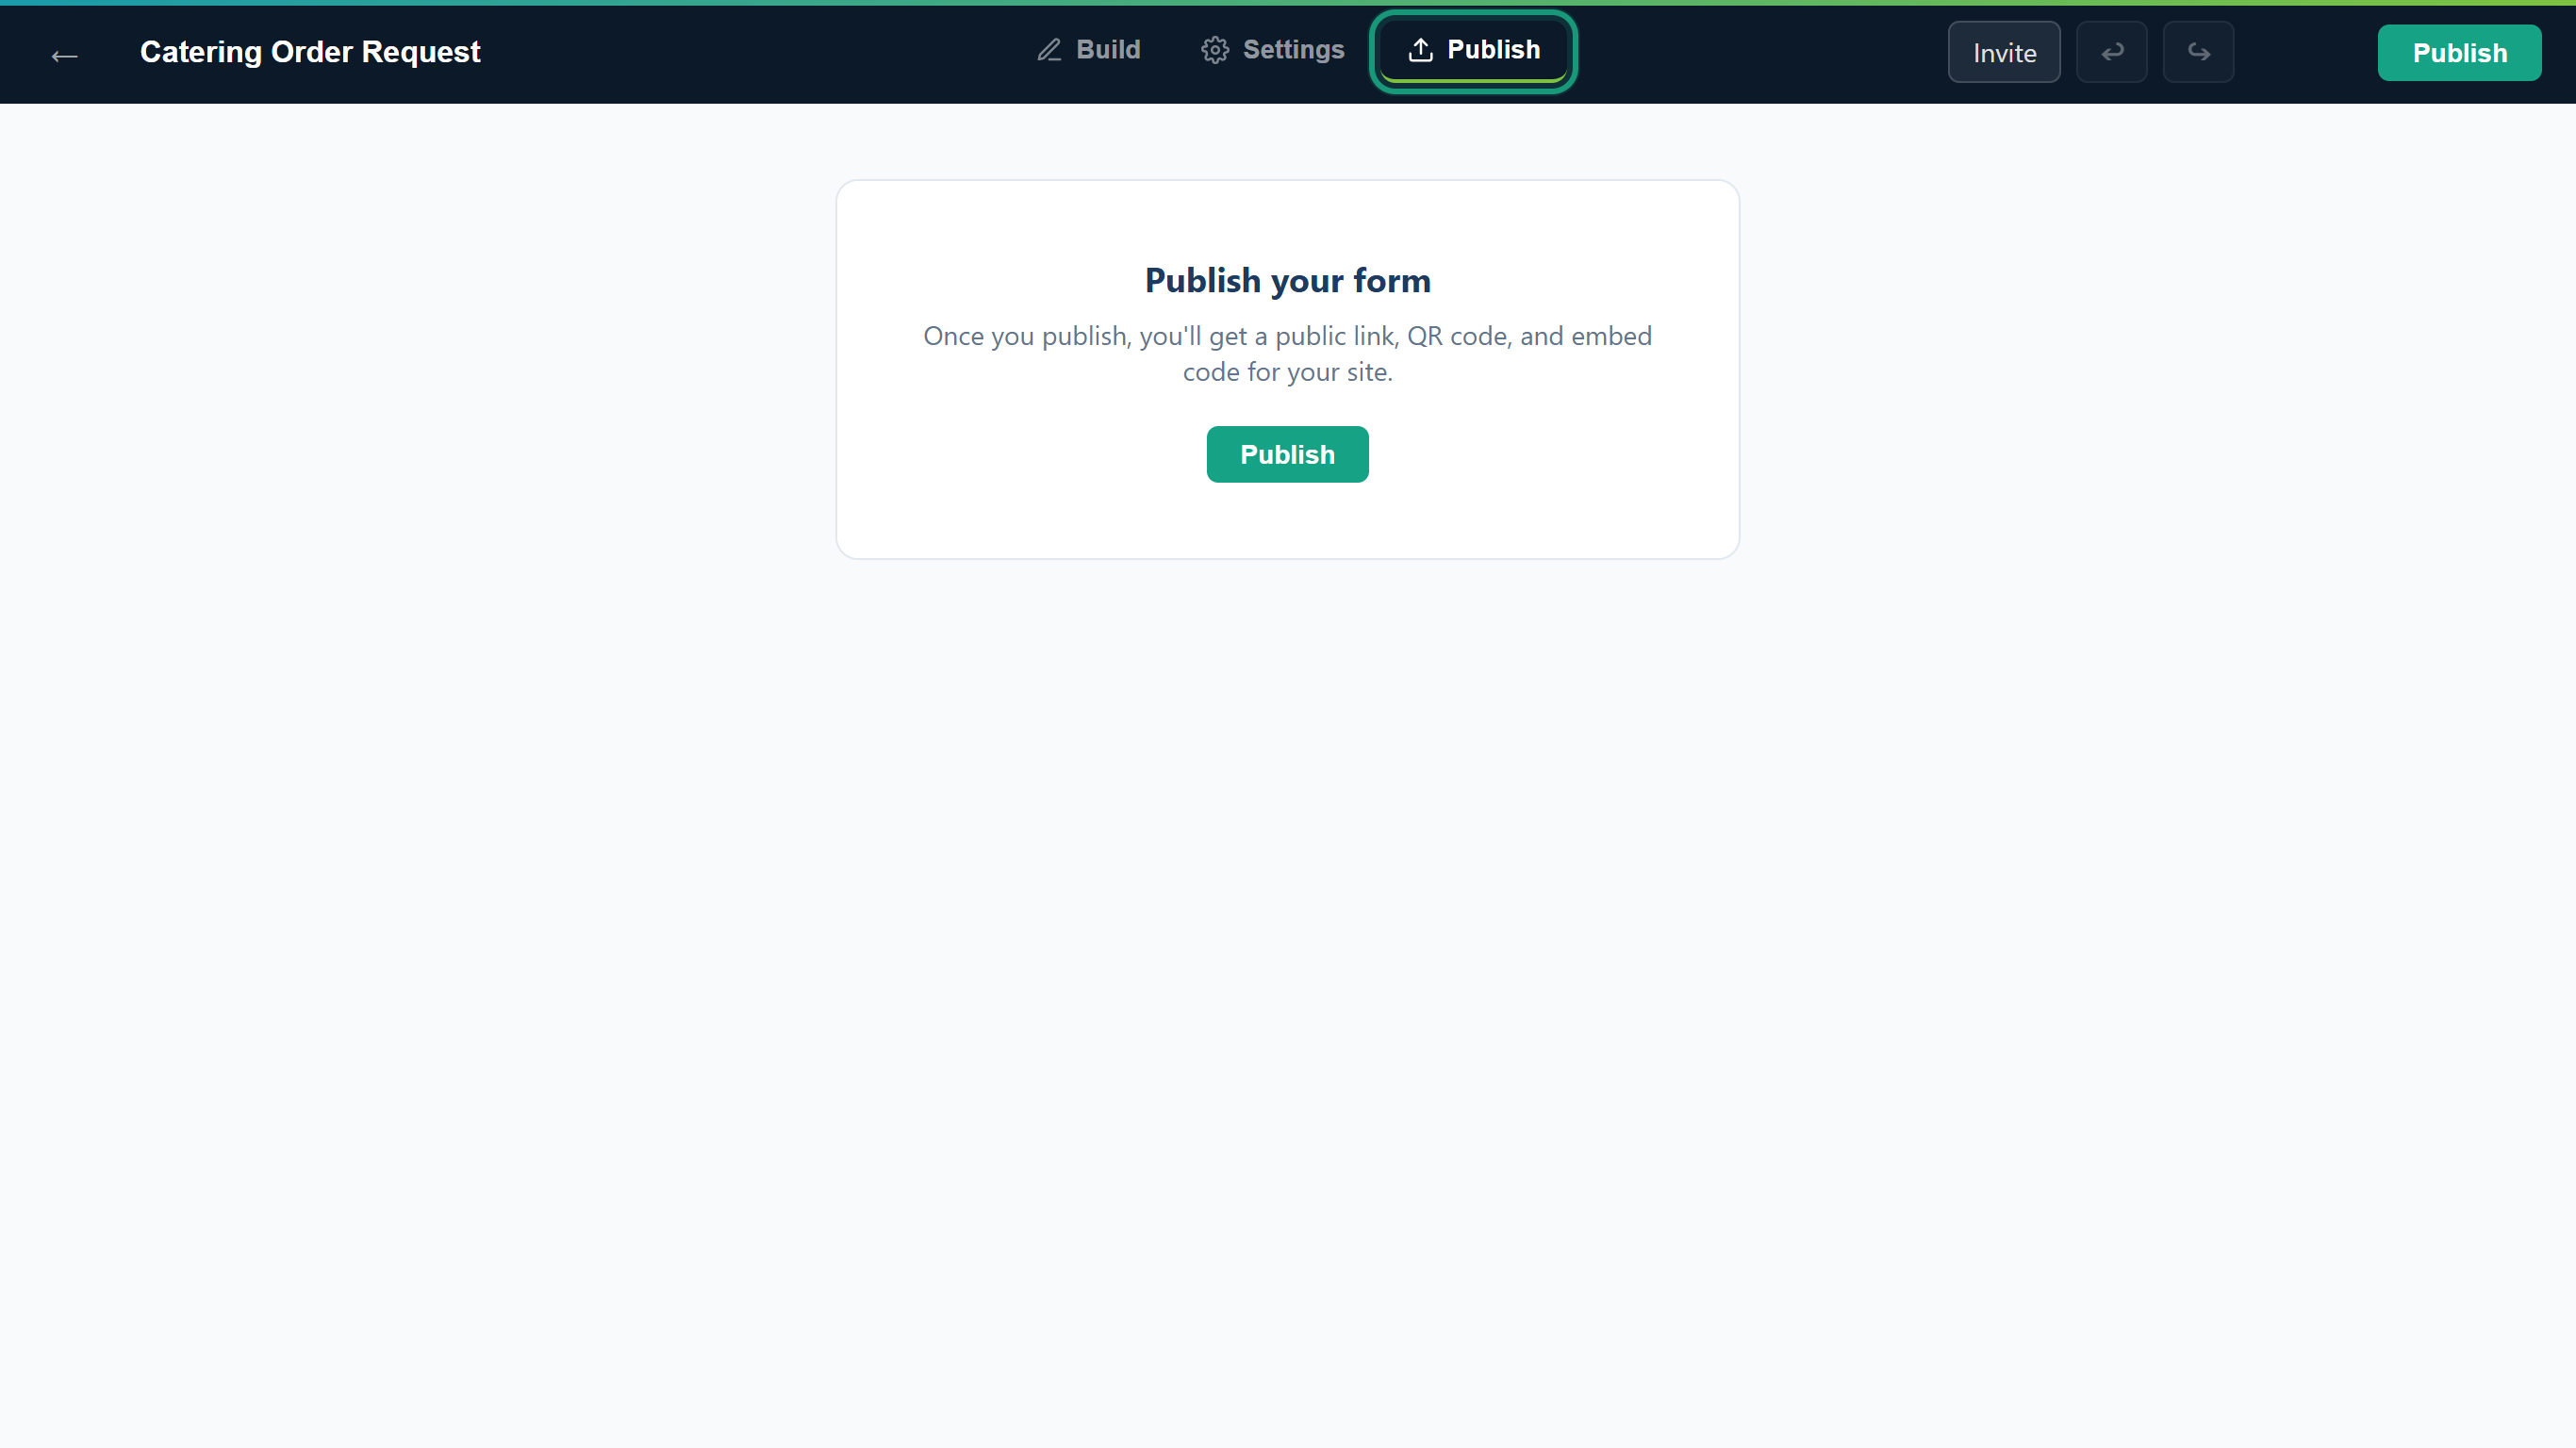 A form that has never been published: the Publish tab only offers to publish it.
Result
You know where everything is: fields on Build, form-wide options on Settings, sharing on Publish.
Task 2 — Add a field
Step-by-step
Select the field you want the new one to follow (here, Email), click + Add element and type in Search fields… to filter the list, for example phone.
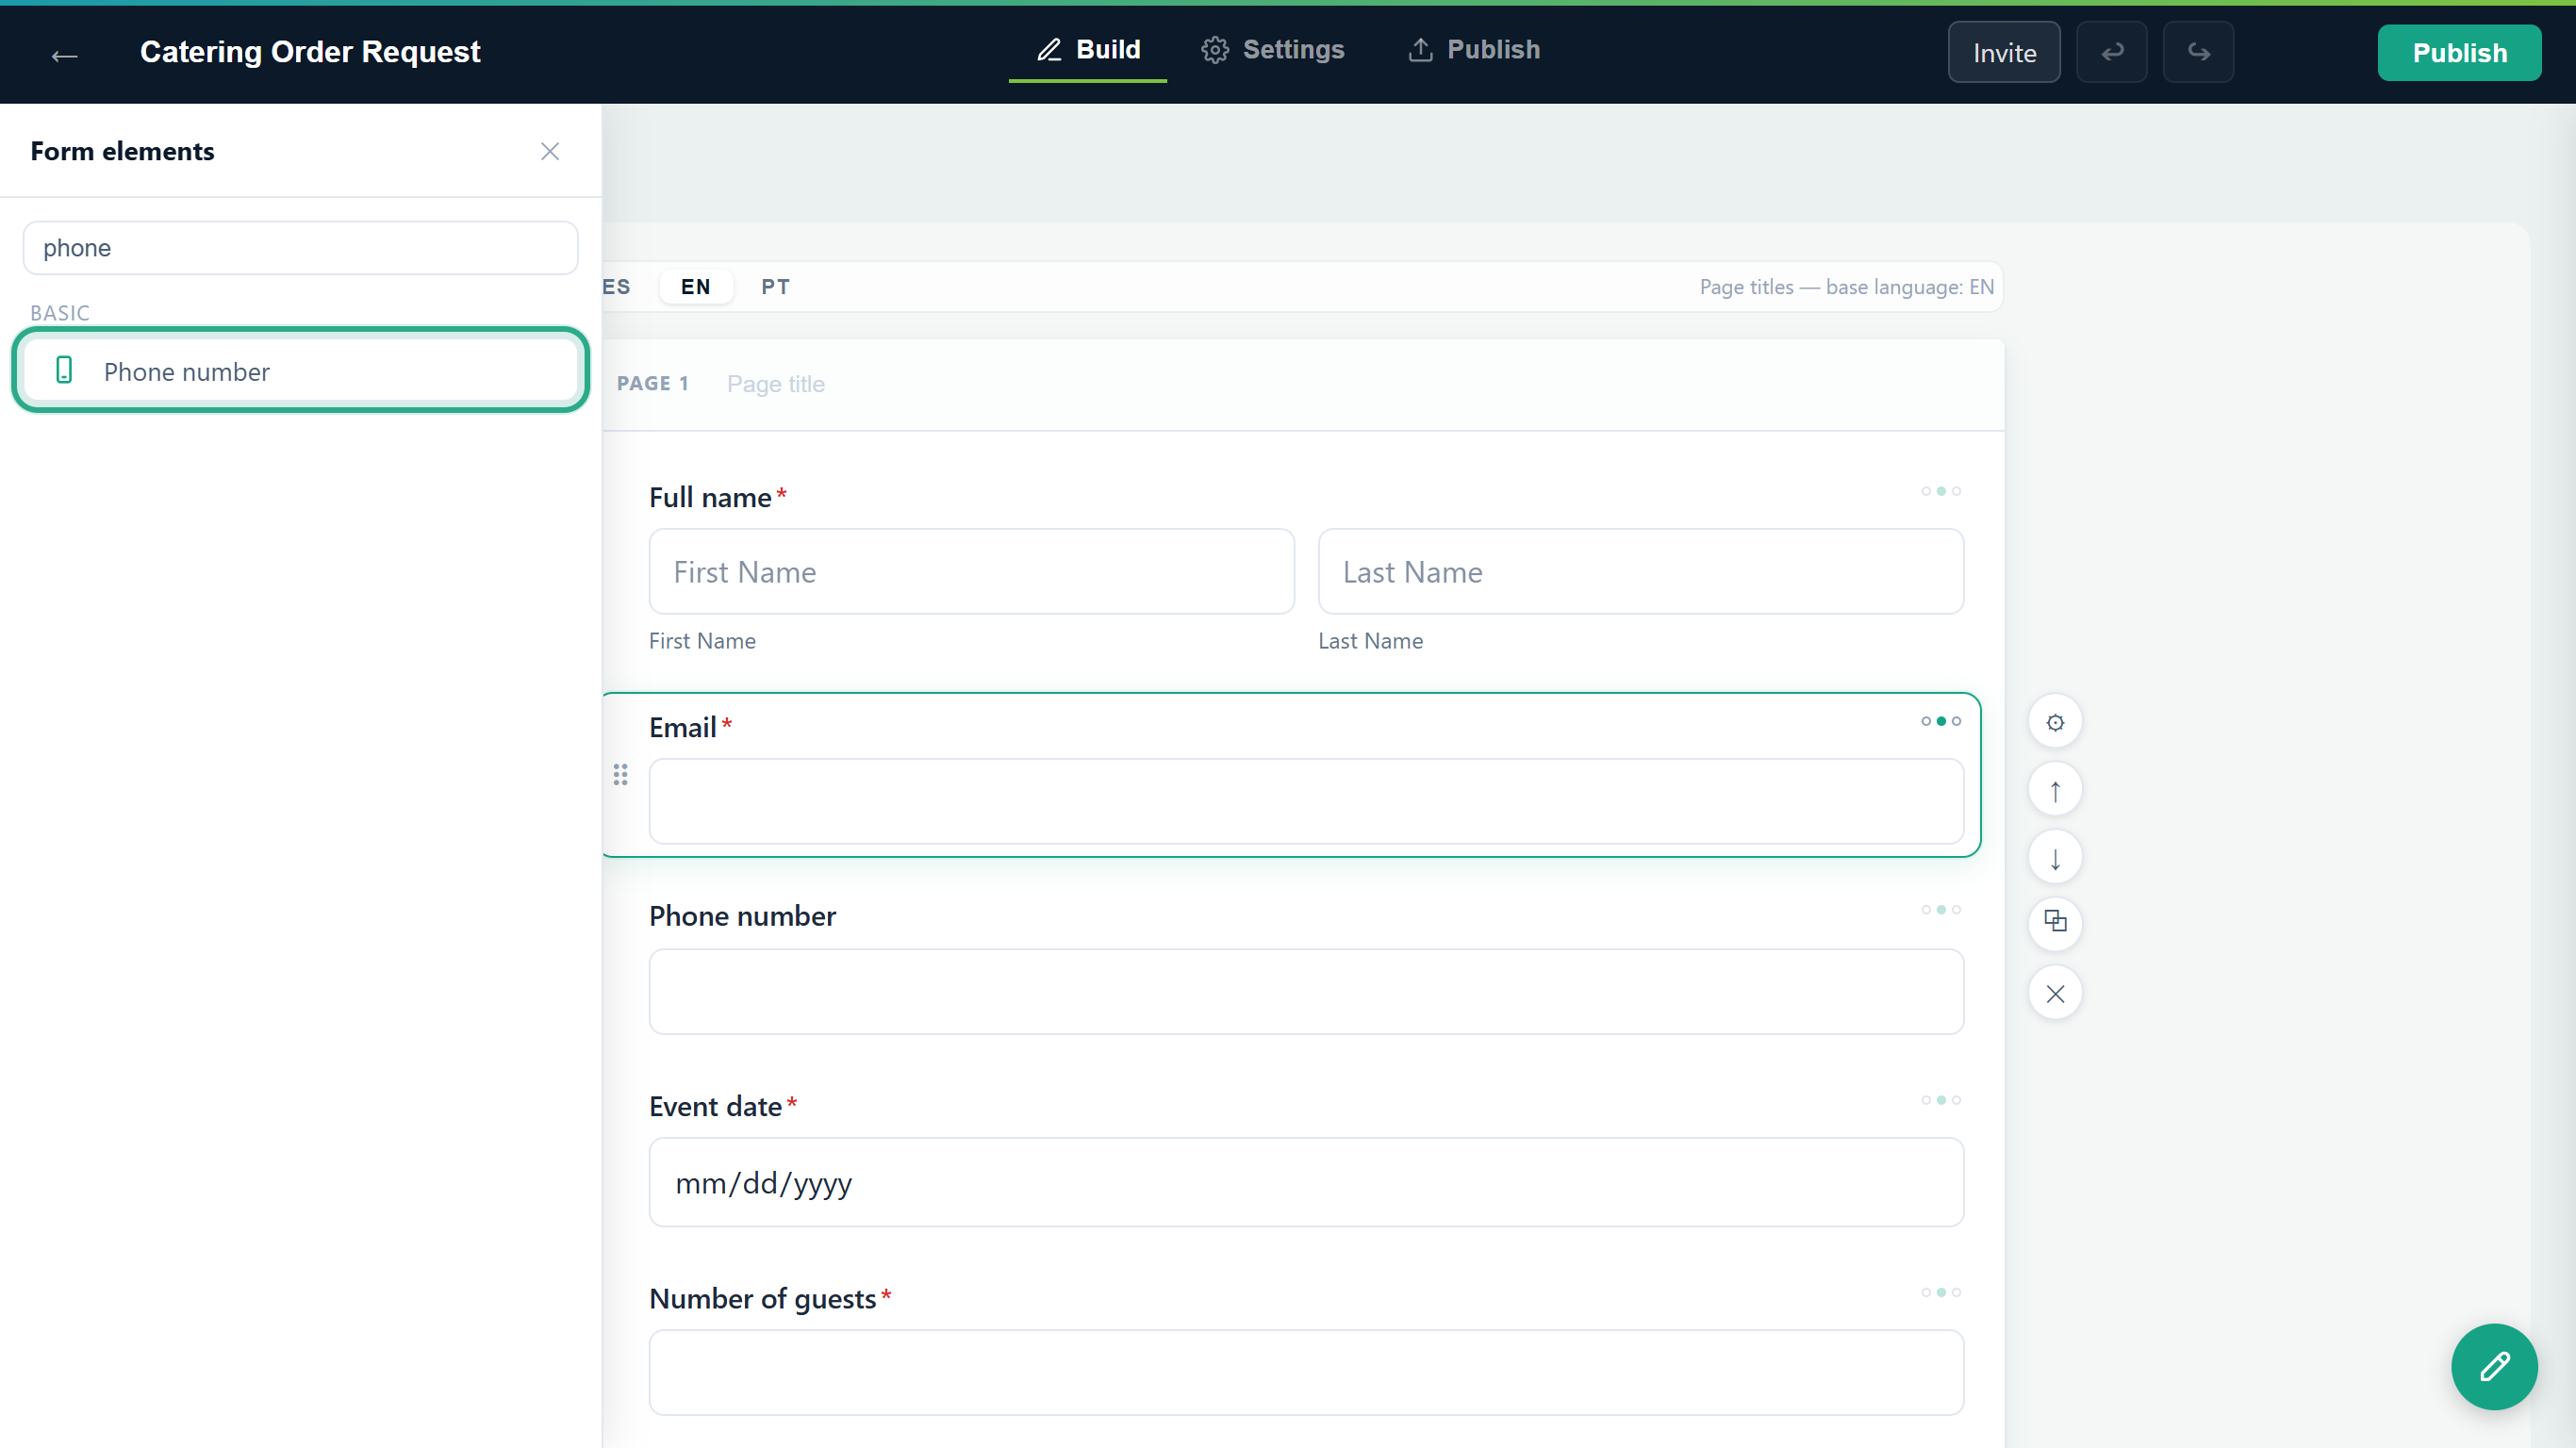 Searching the list. The new field will land below the selected Email field.
Click Phone number. The field is added directly below the selected field (or at the end of the page when nothing is selected), and the panel closes. You can also drag a field from the panel onto the canvas: a drop line shows where it will land, and Esc cancels the drag.
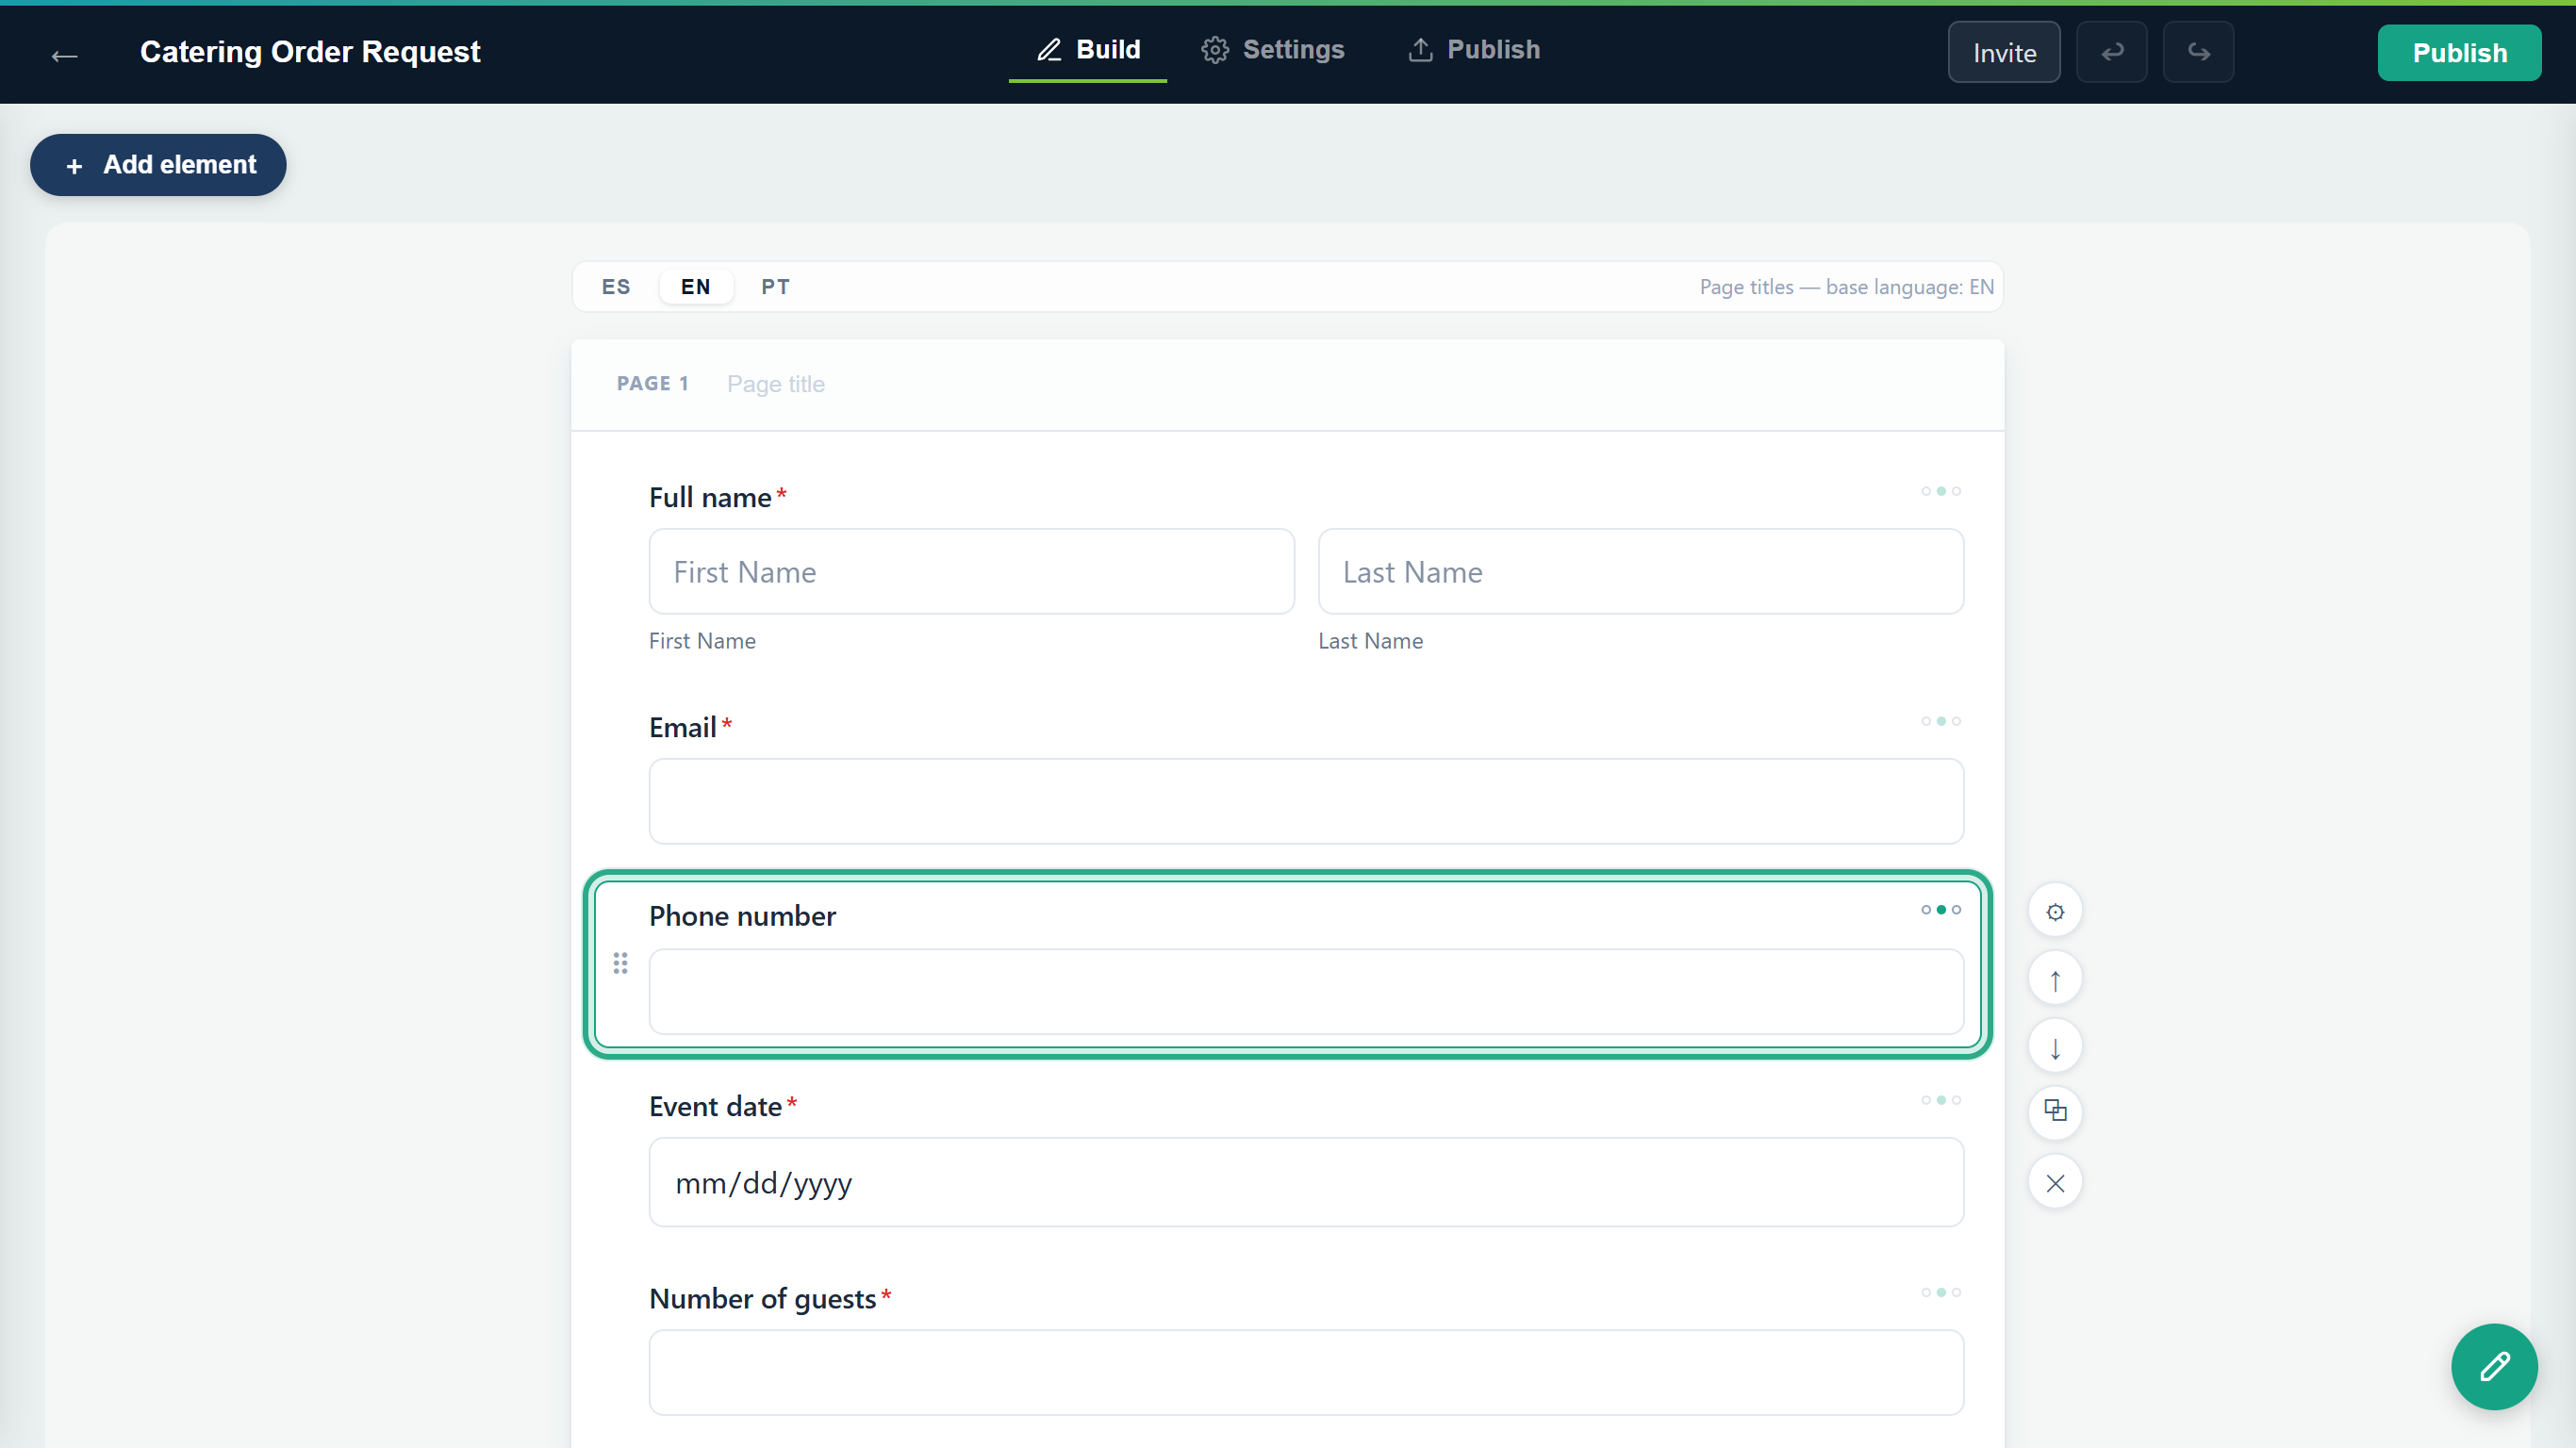 The new field arrives selected, ready for its properties.
To add a field at an exact spot, point between two rows and click the + that appears (Insert a field here). The Form elements panel opens and the field you pick lands there. Each page also has a + Add field button under its last field, and an empty page shows Click or drag a field here with its own + Add field.
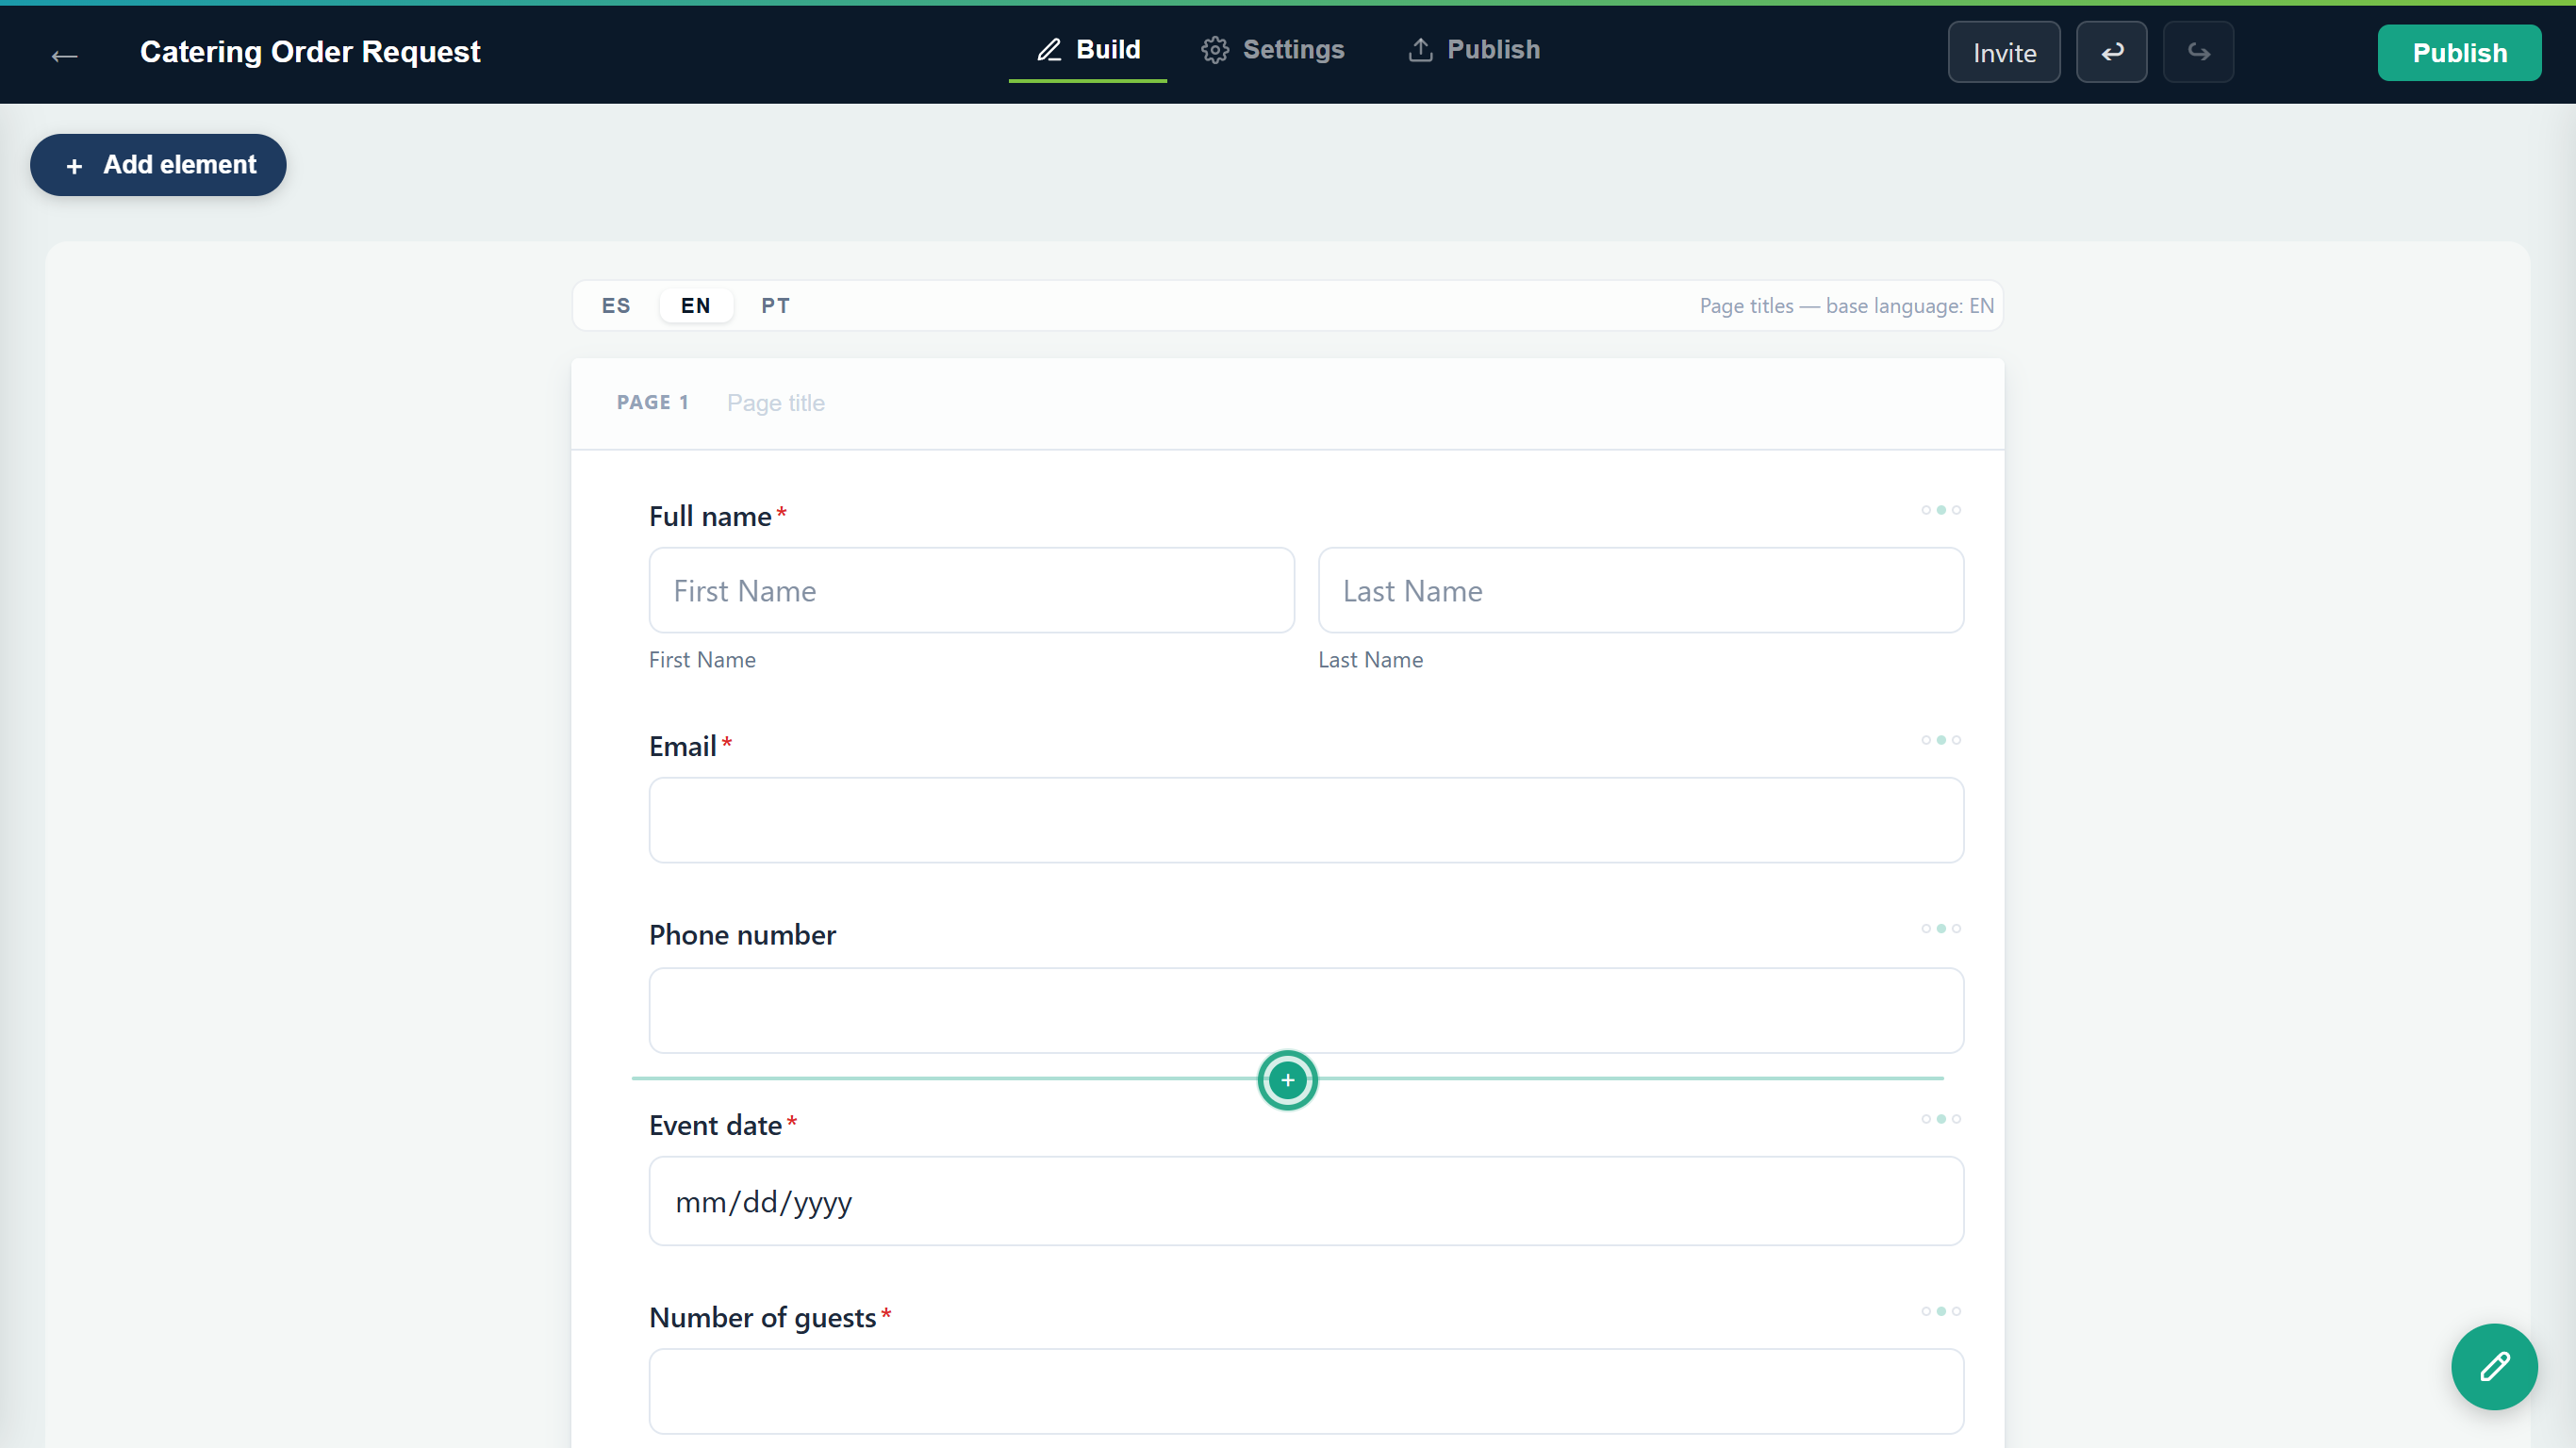 The + between rows inserts a field at that spot.
Result
The field is on the form. Its default label is the field type (Phone number); change it in Properties (Task 4). Every field type is described in Field types.
Task 3 — Reorder, duplicate and delete fields
Step-by-step
Select the field to move (here, Number of guests) and click ↑ (Move up (Alt+↑)) or ↓ (Move down (Alt+↓)) in its field actions. Each click moves it one step. With a field selected you can also press Alt+↑ or Alt+↓ on the keyboard, as long as you're not typing in a text box.
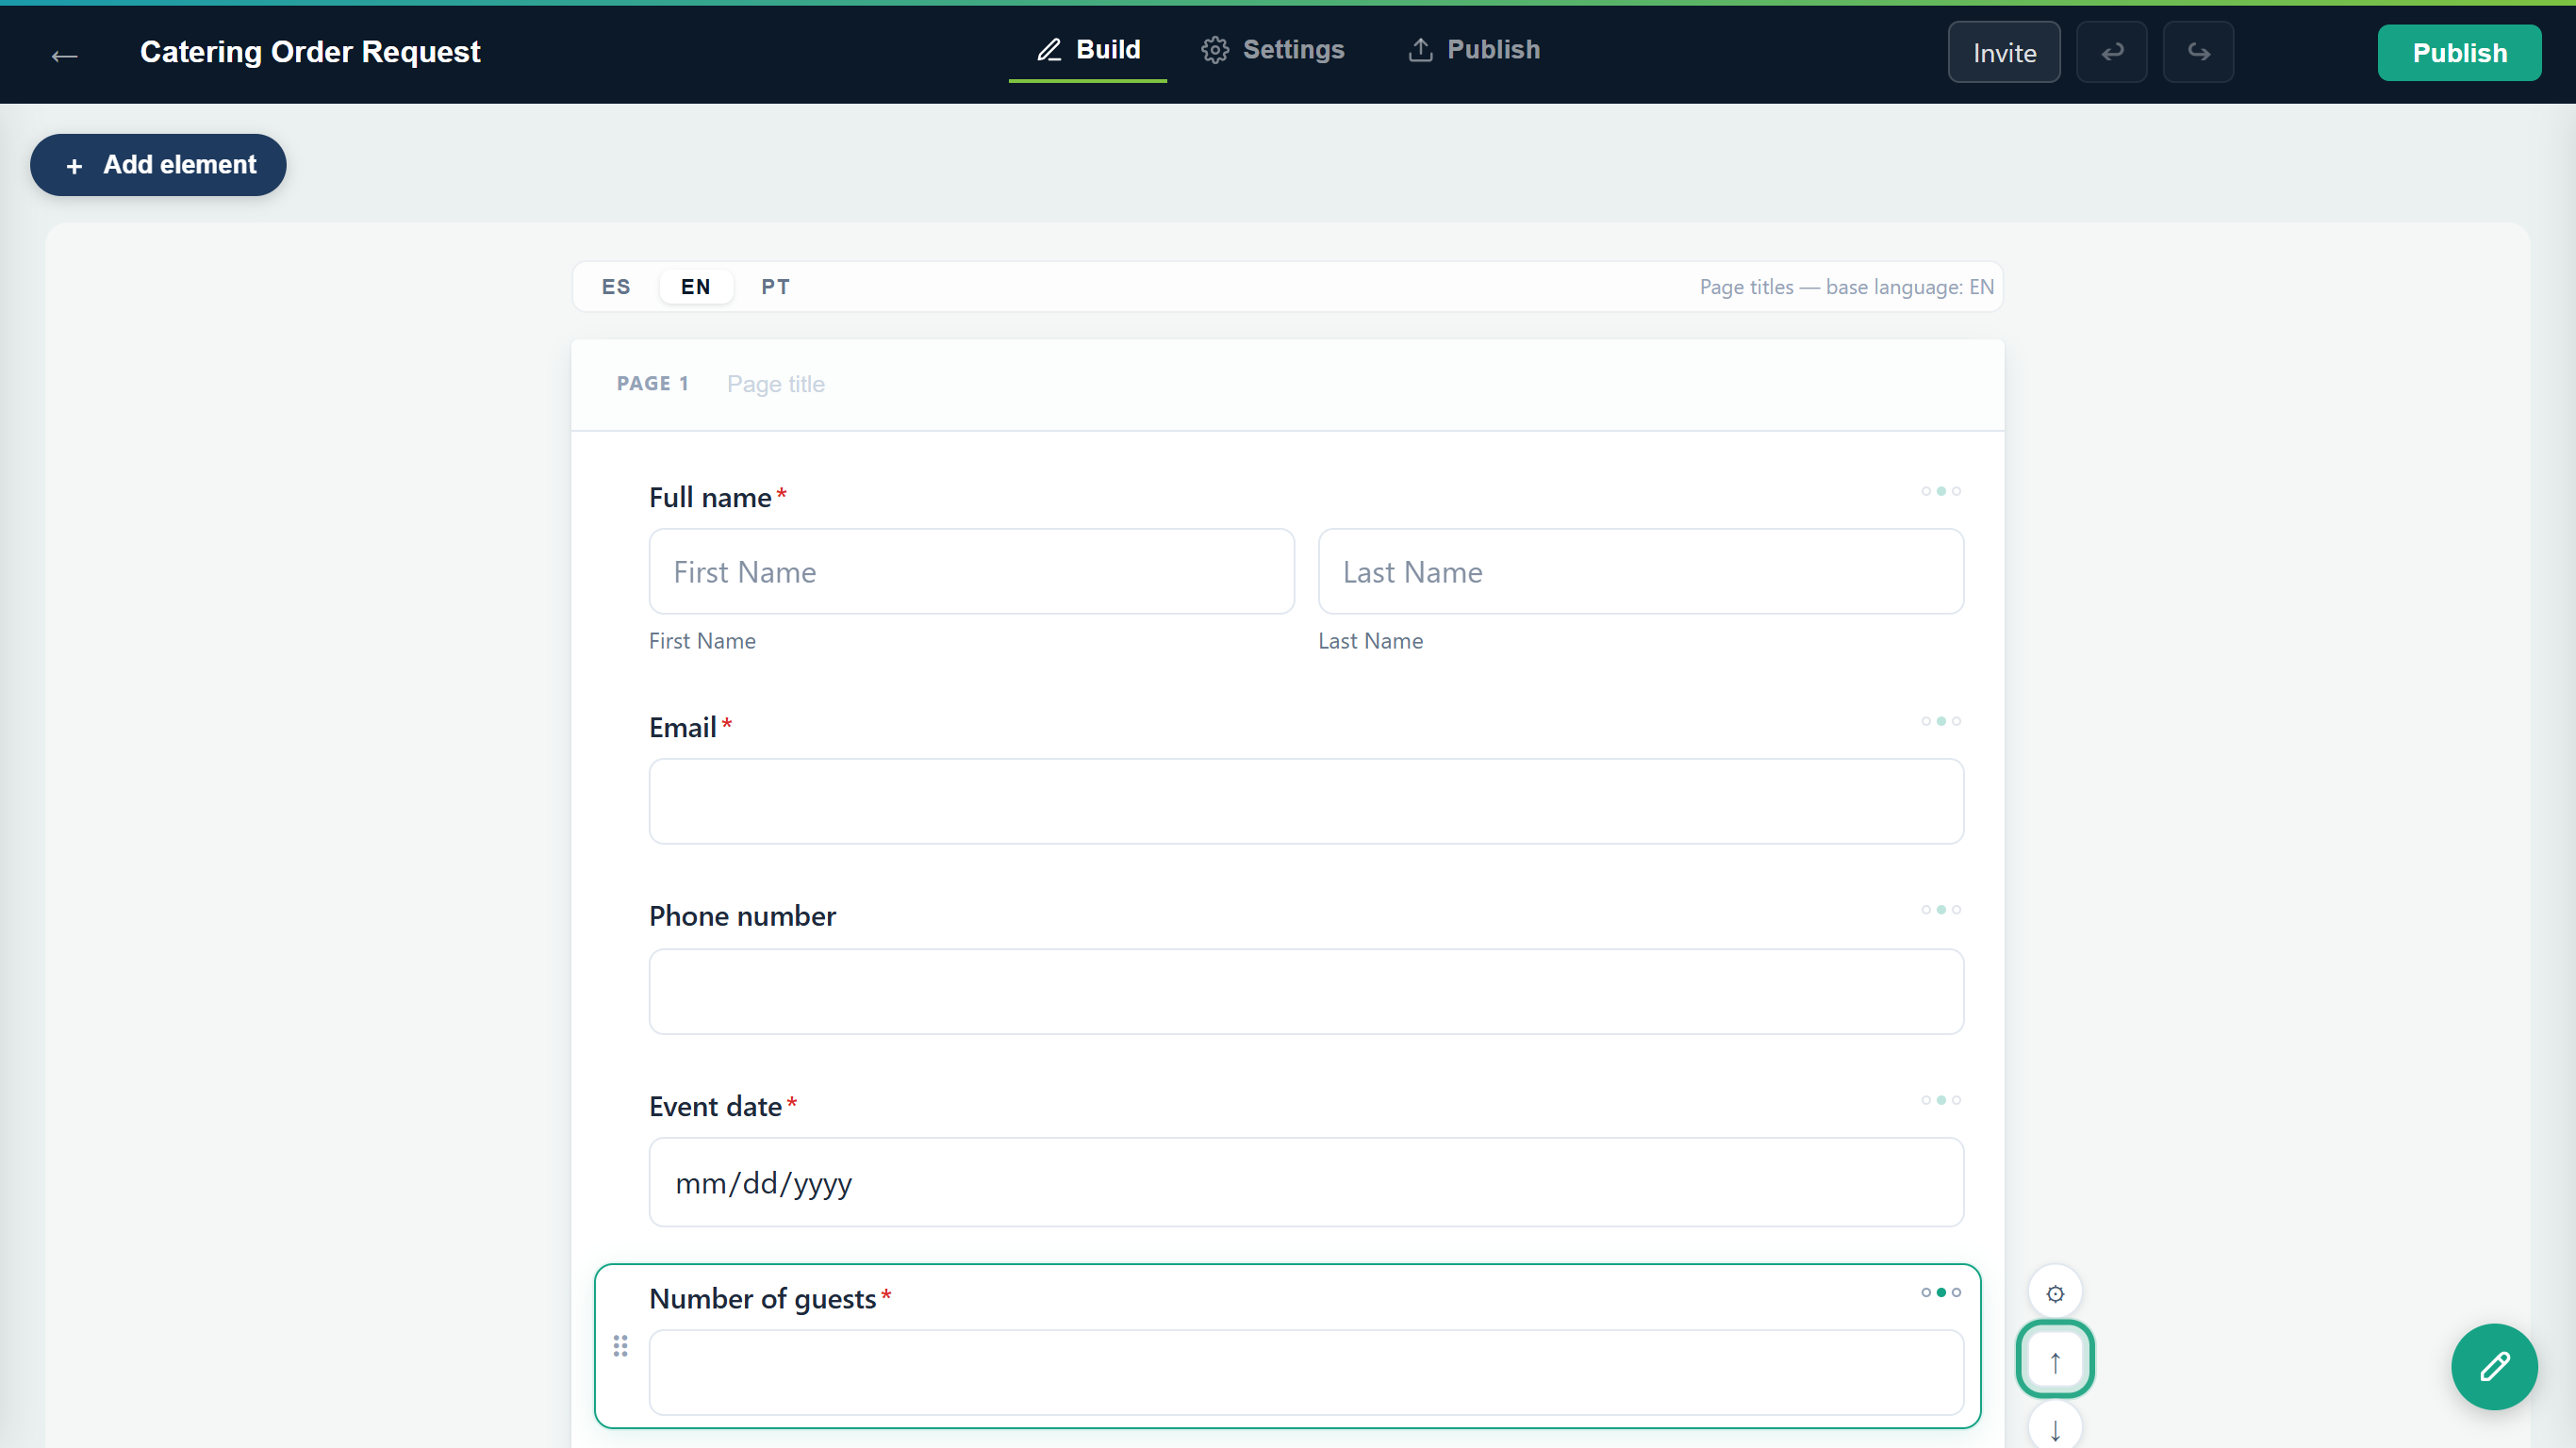 Move up and Move down shift the field one position.
To move a field further, drag it. Every field has a ⠿ grip on its left (Drag to move). With a mouse you can drag the whole field; on a touchscreen or with a pen, start the drag from the grip, so swiping anywhere else scrolls the page.
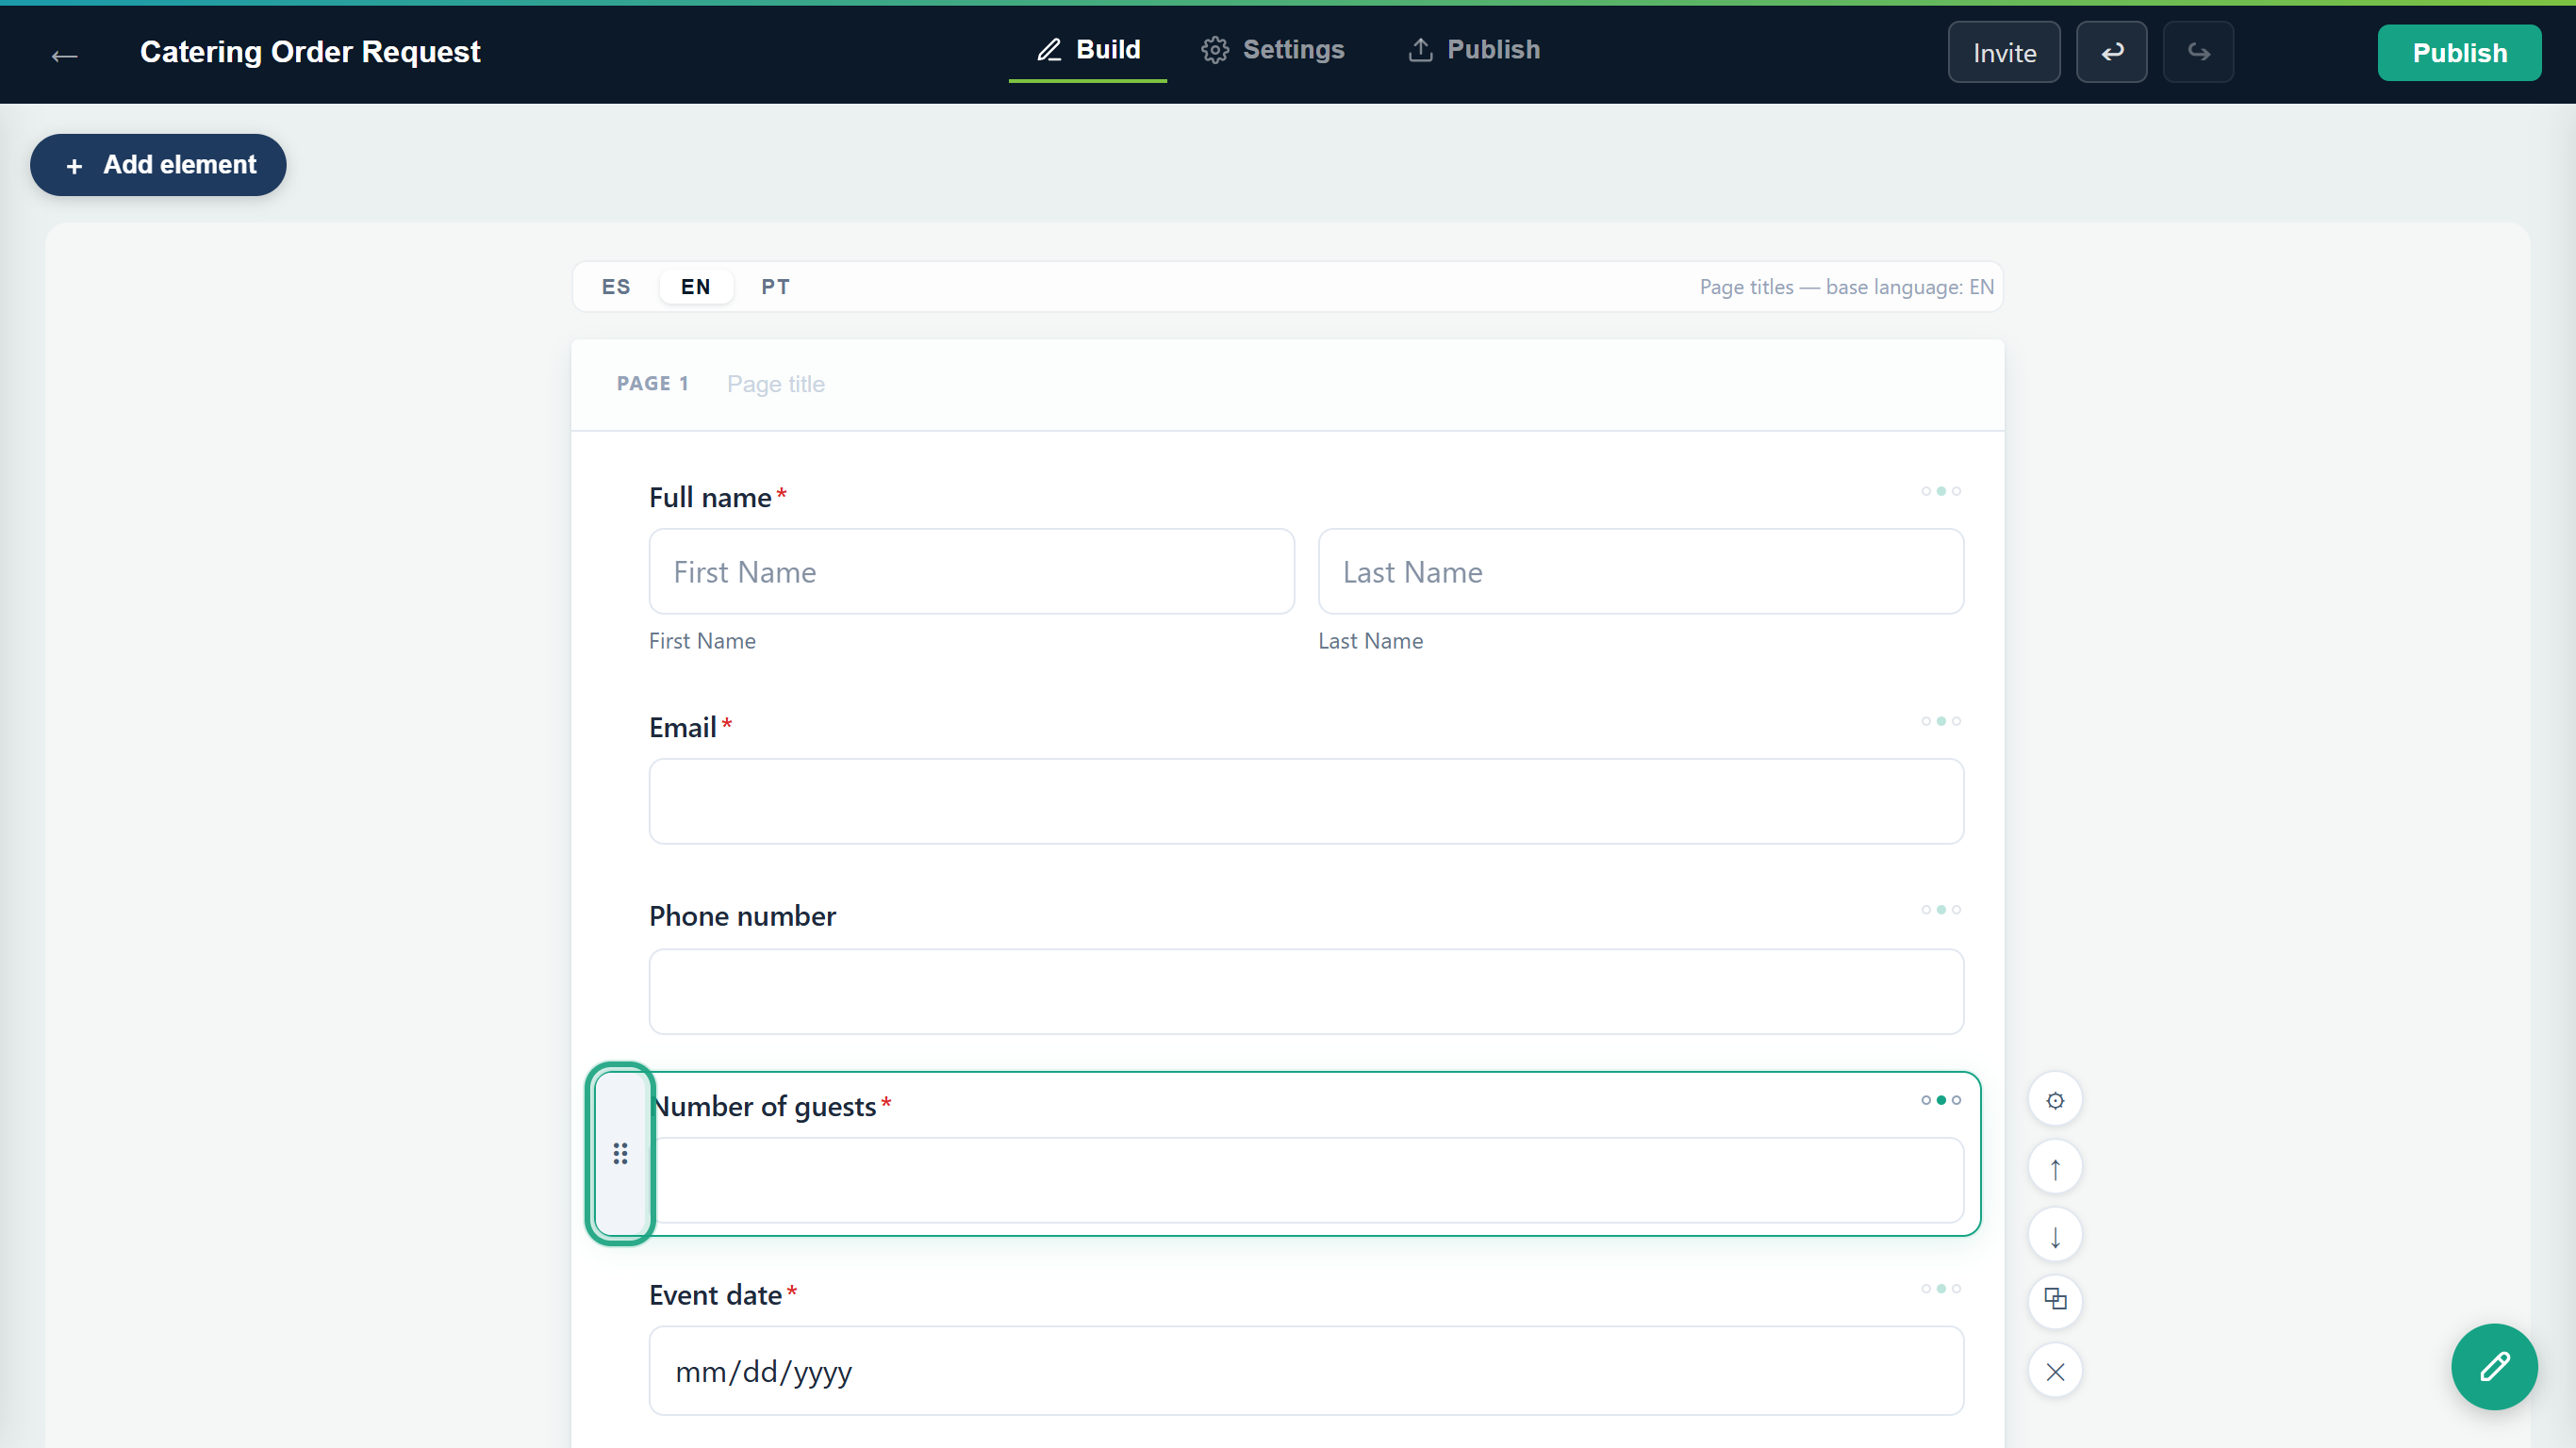 Number of guests has moved above Event date. The grip is for dragging.
To copy a field with all its properties, select it and click ⧉ (Duplicate). The copy appears right below the original.
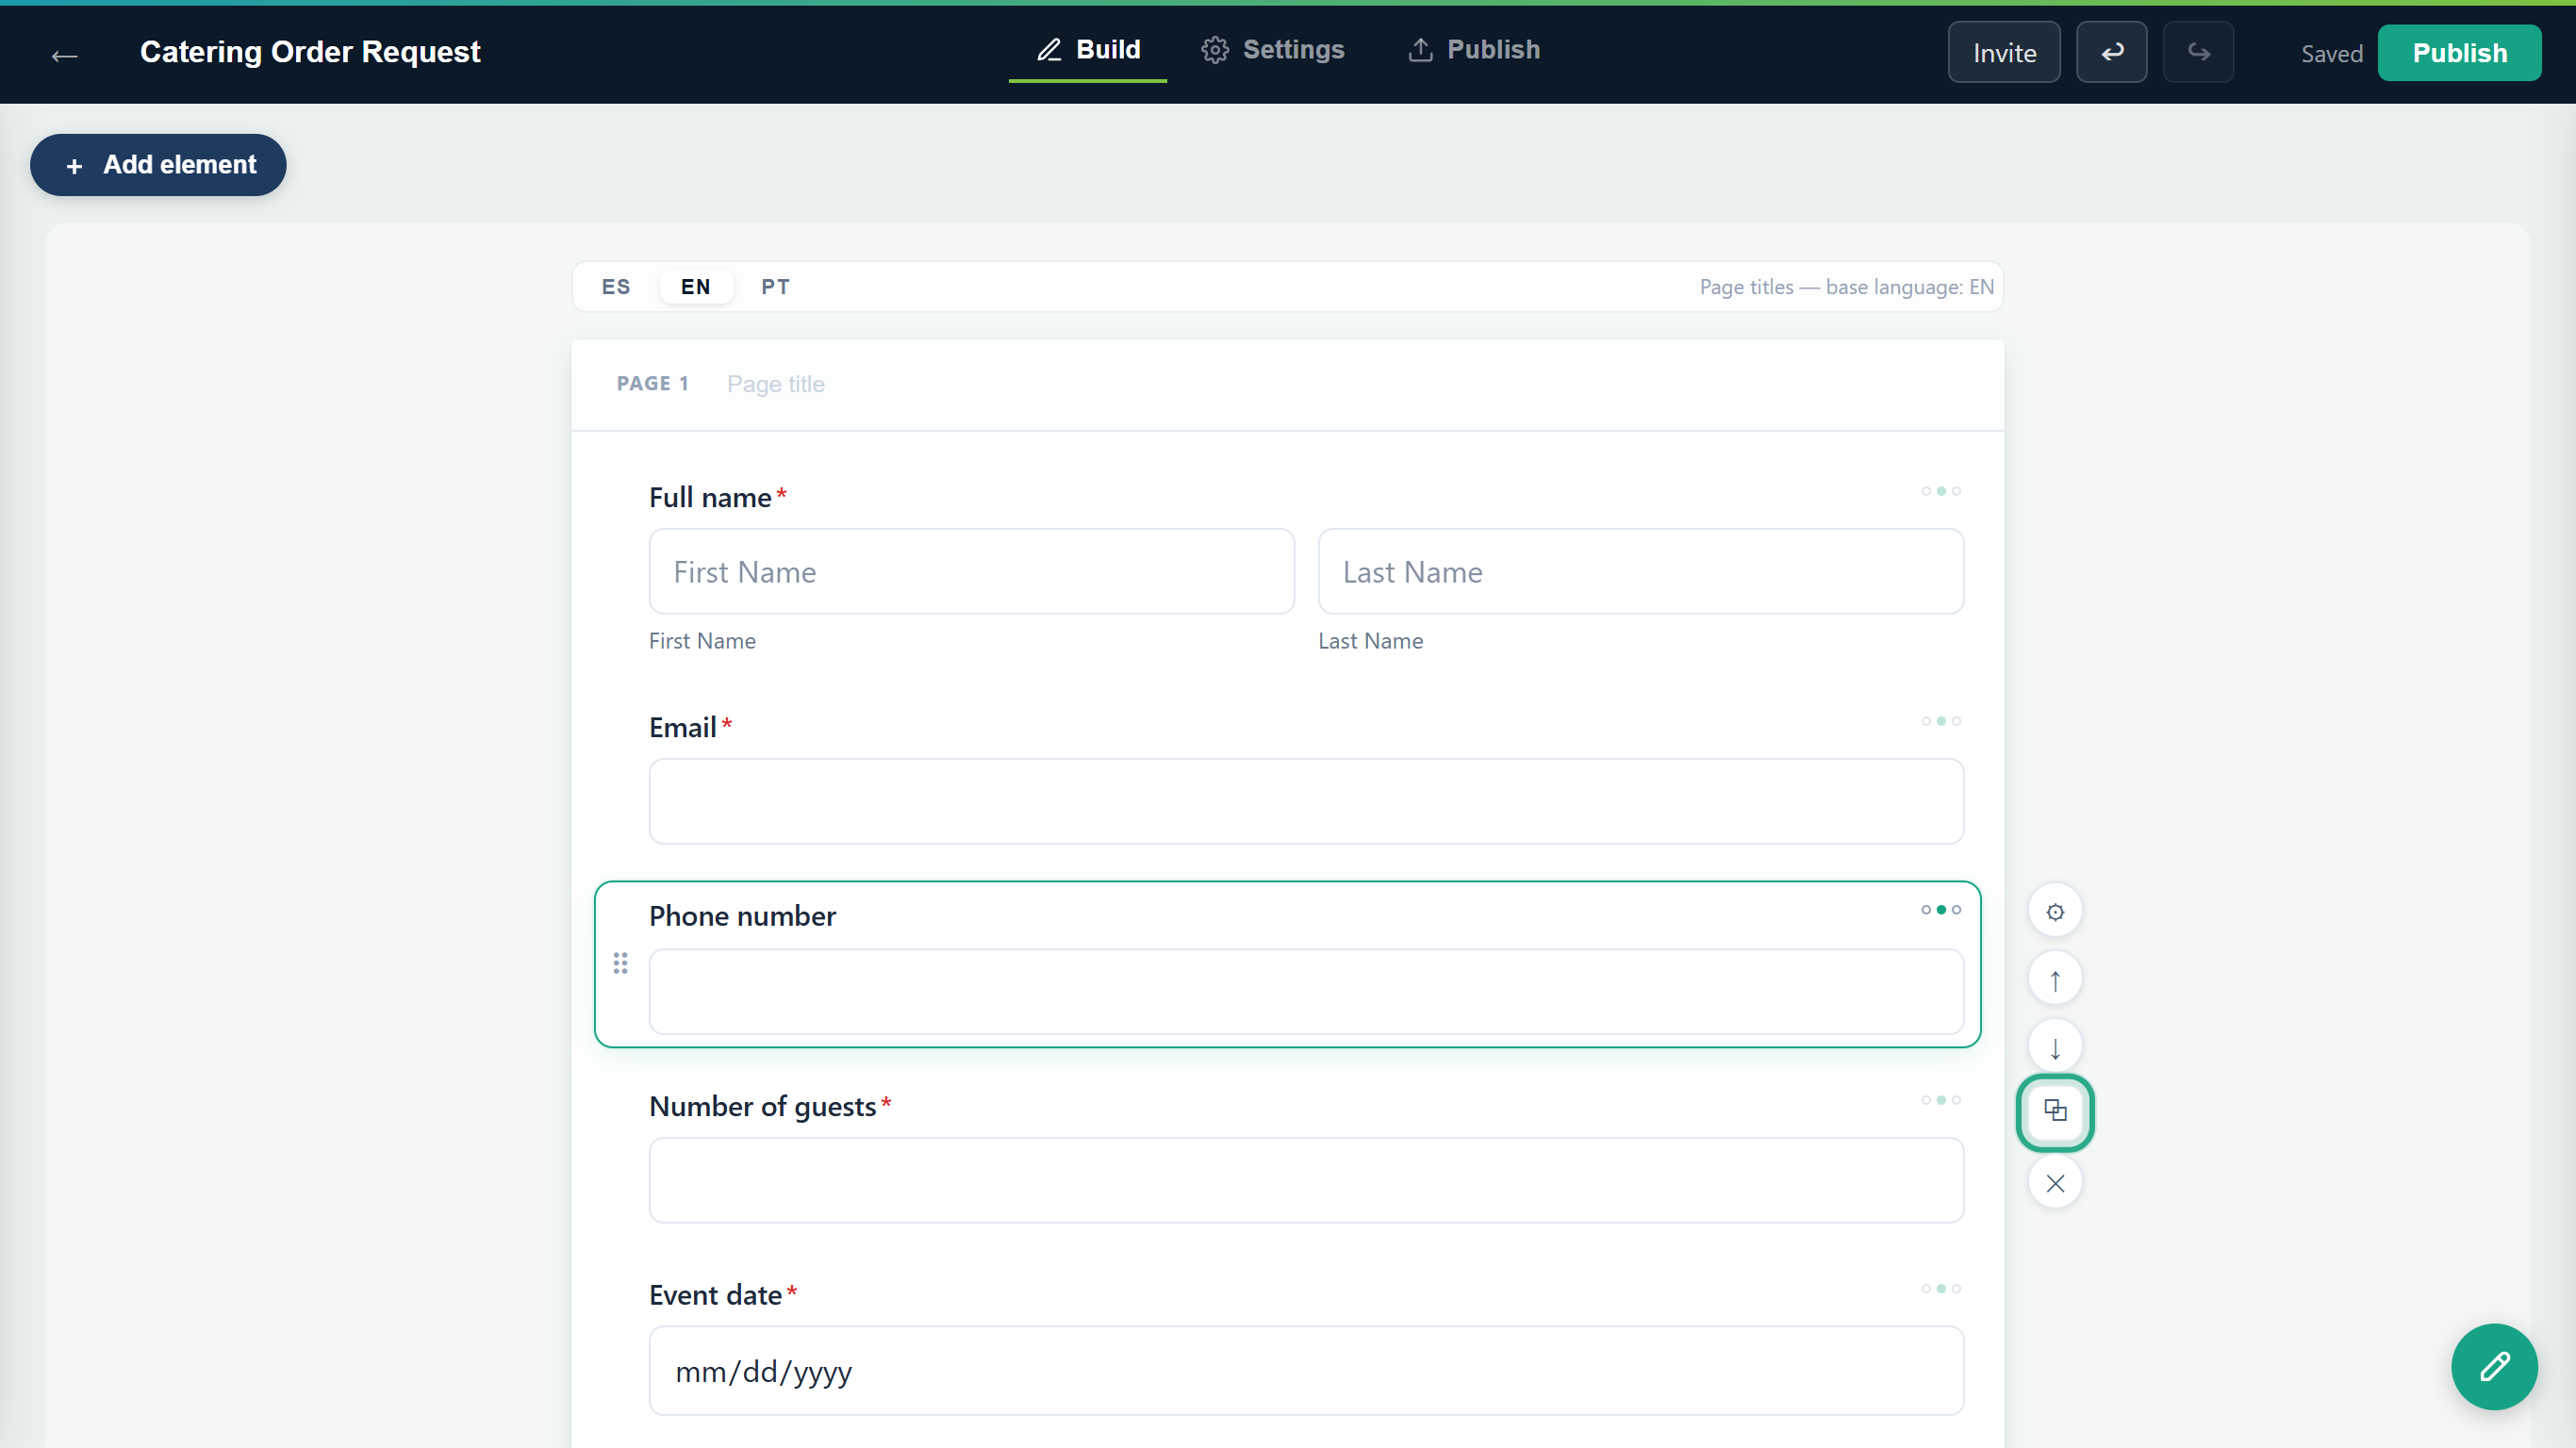 Duplicate copies the field, properties included.
To remove a field, select it and click ✕ (Delete). (The Delete button at the top of the Properties panel does the same.) On a form that has never been published the field goes straight away; you can bring it back with ↩ Undo. On a published form anota asks first (see Task 7).
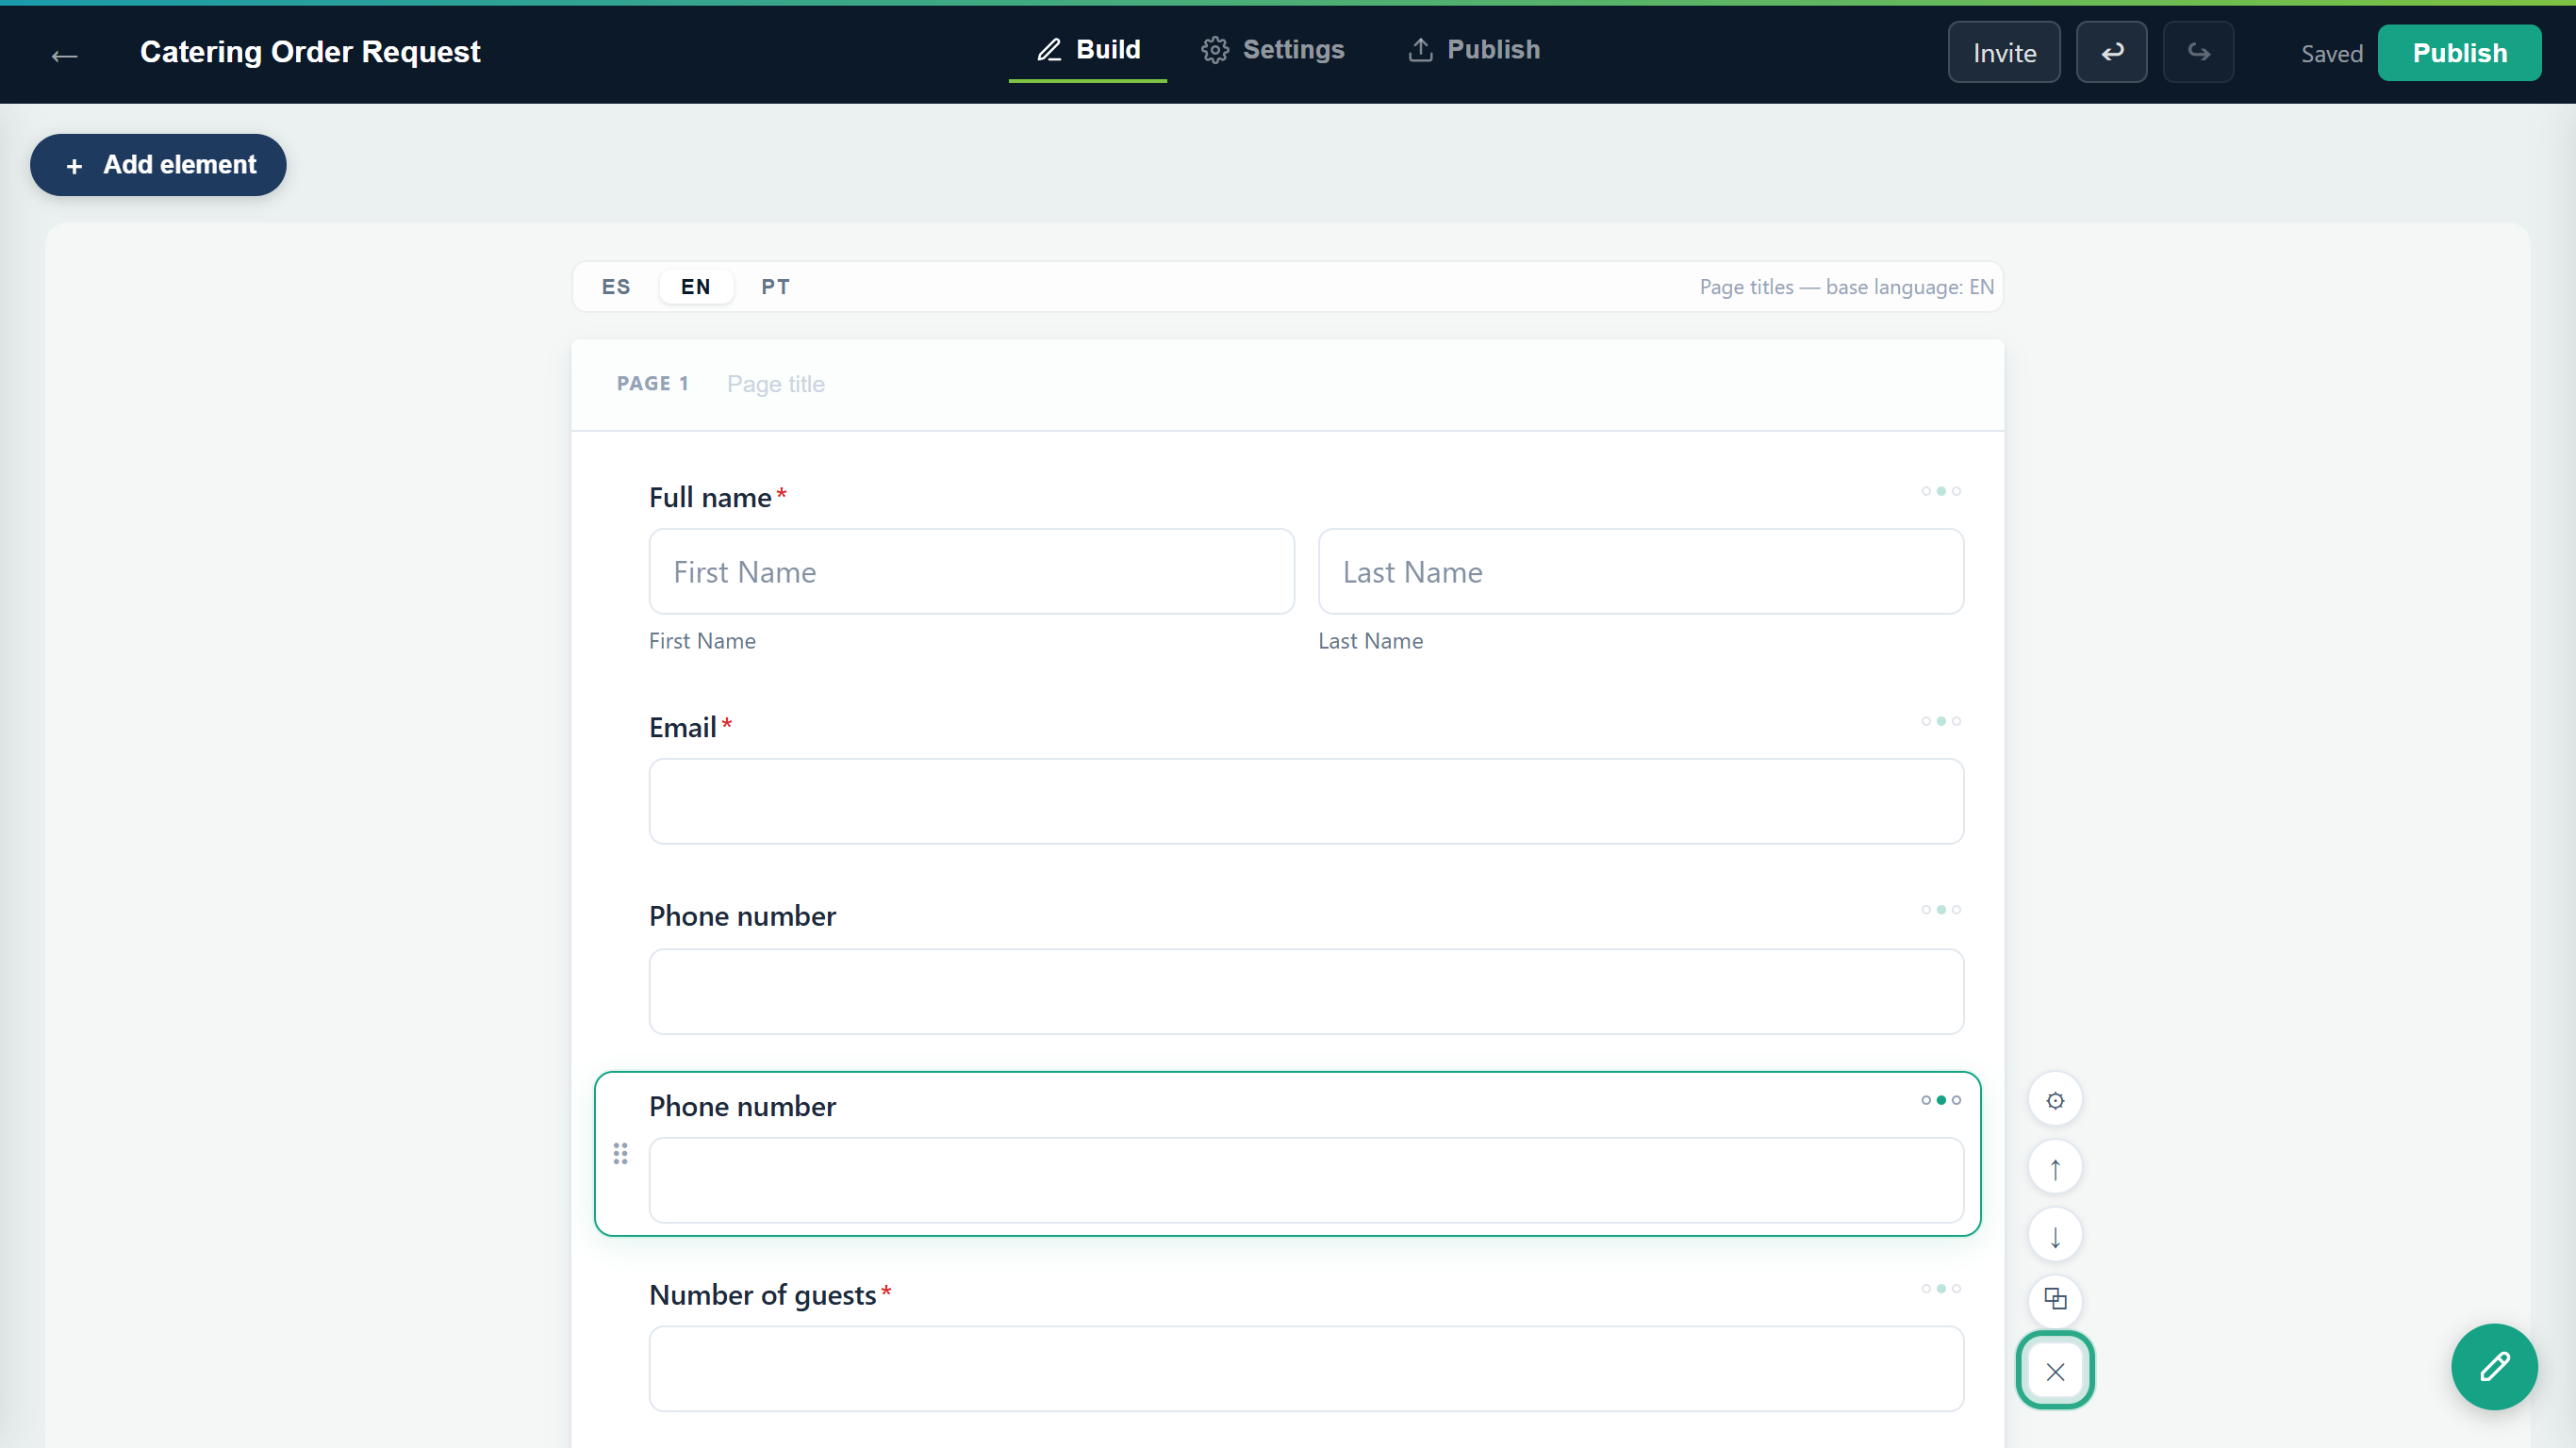 Deleting the duplicate we don't need.
Result
The fields are in the order you want. Moves, copies and deletions can all be undone (Task 5).
Task 4 — Edit a field's properties
Step-by-step
Select the field (here, Number of guests) and open Properties. Under Content, change the Label (the question people see), add a Placeholder (grey example text inside the box) and a Help text (a hint shown under the field). Choice fields also have Options here, with + Add option.
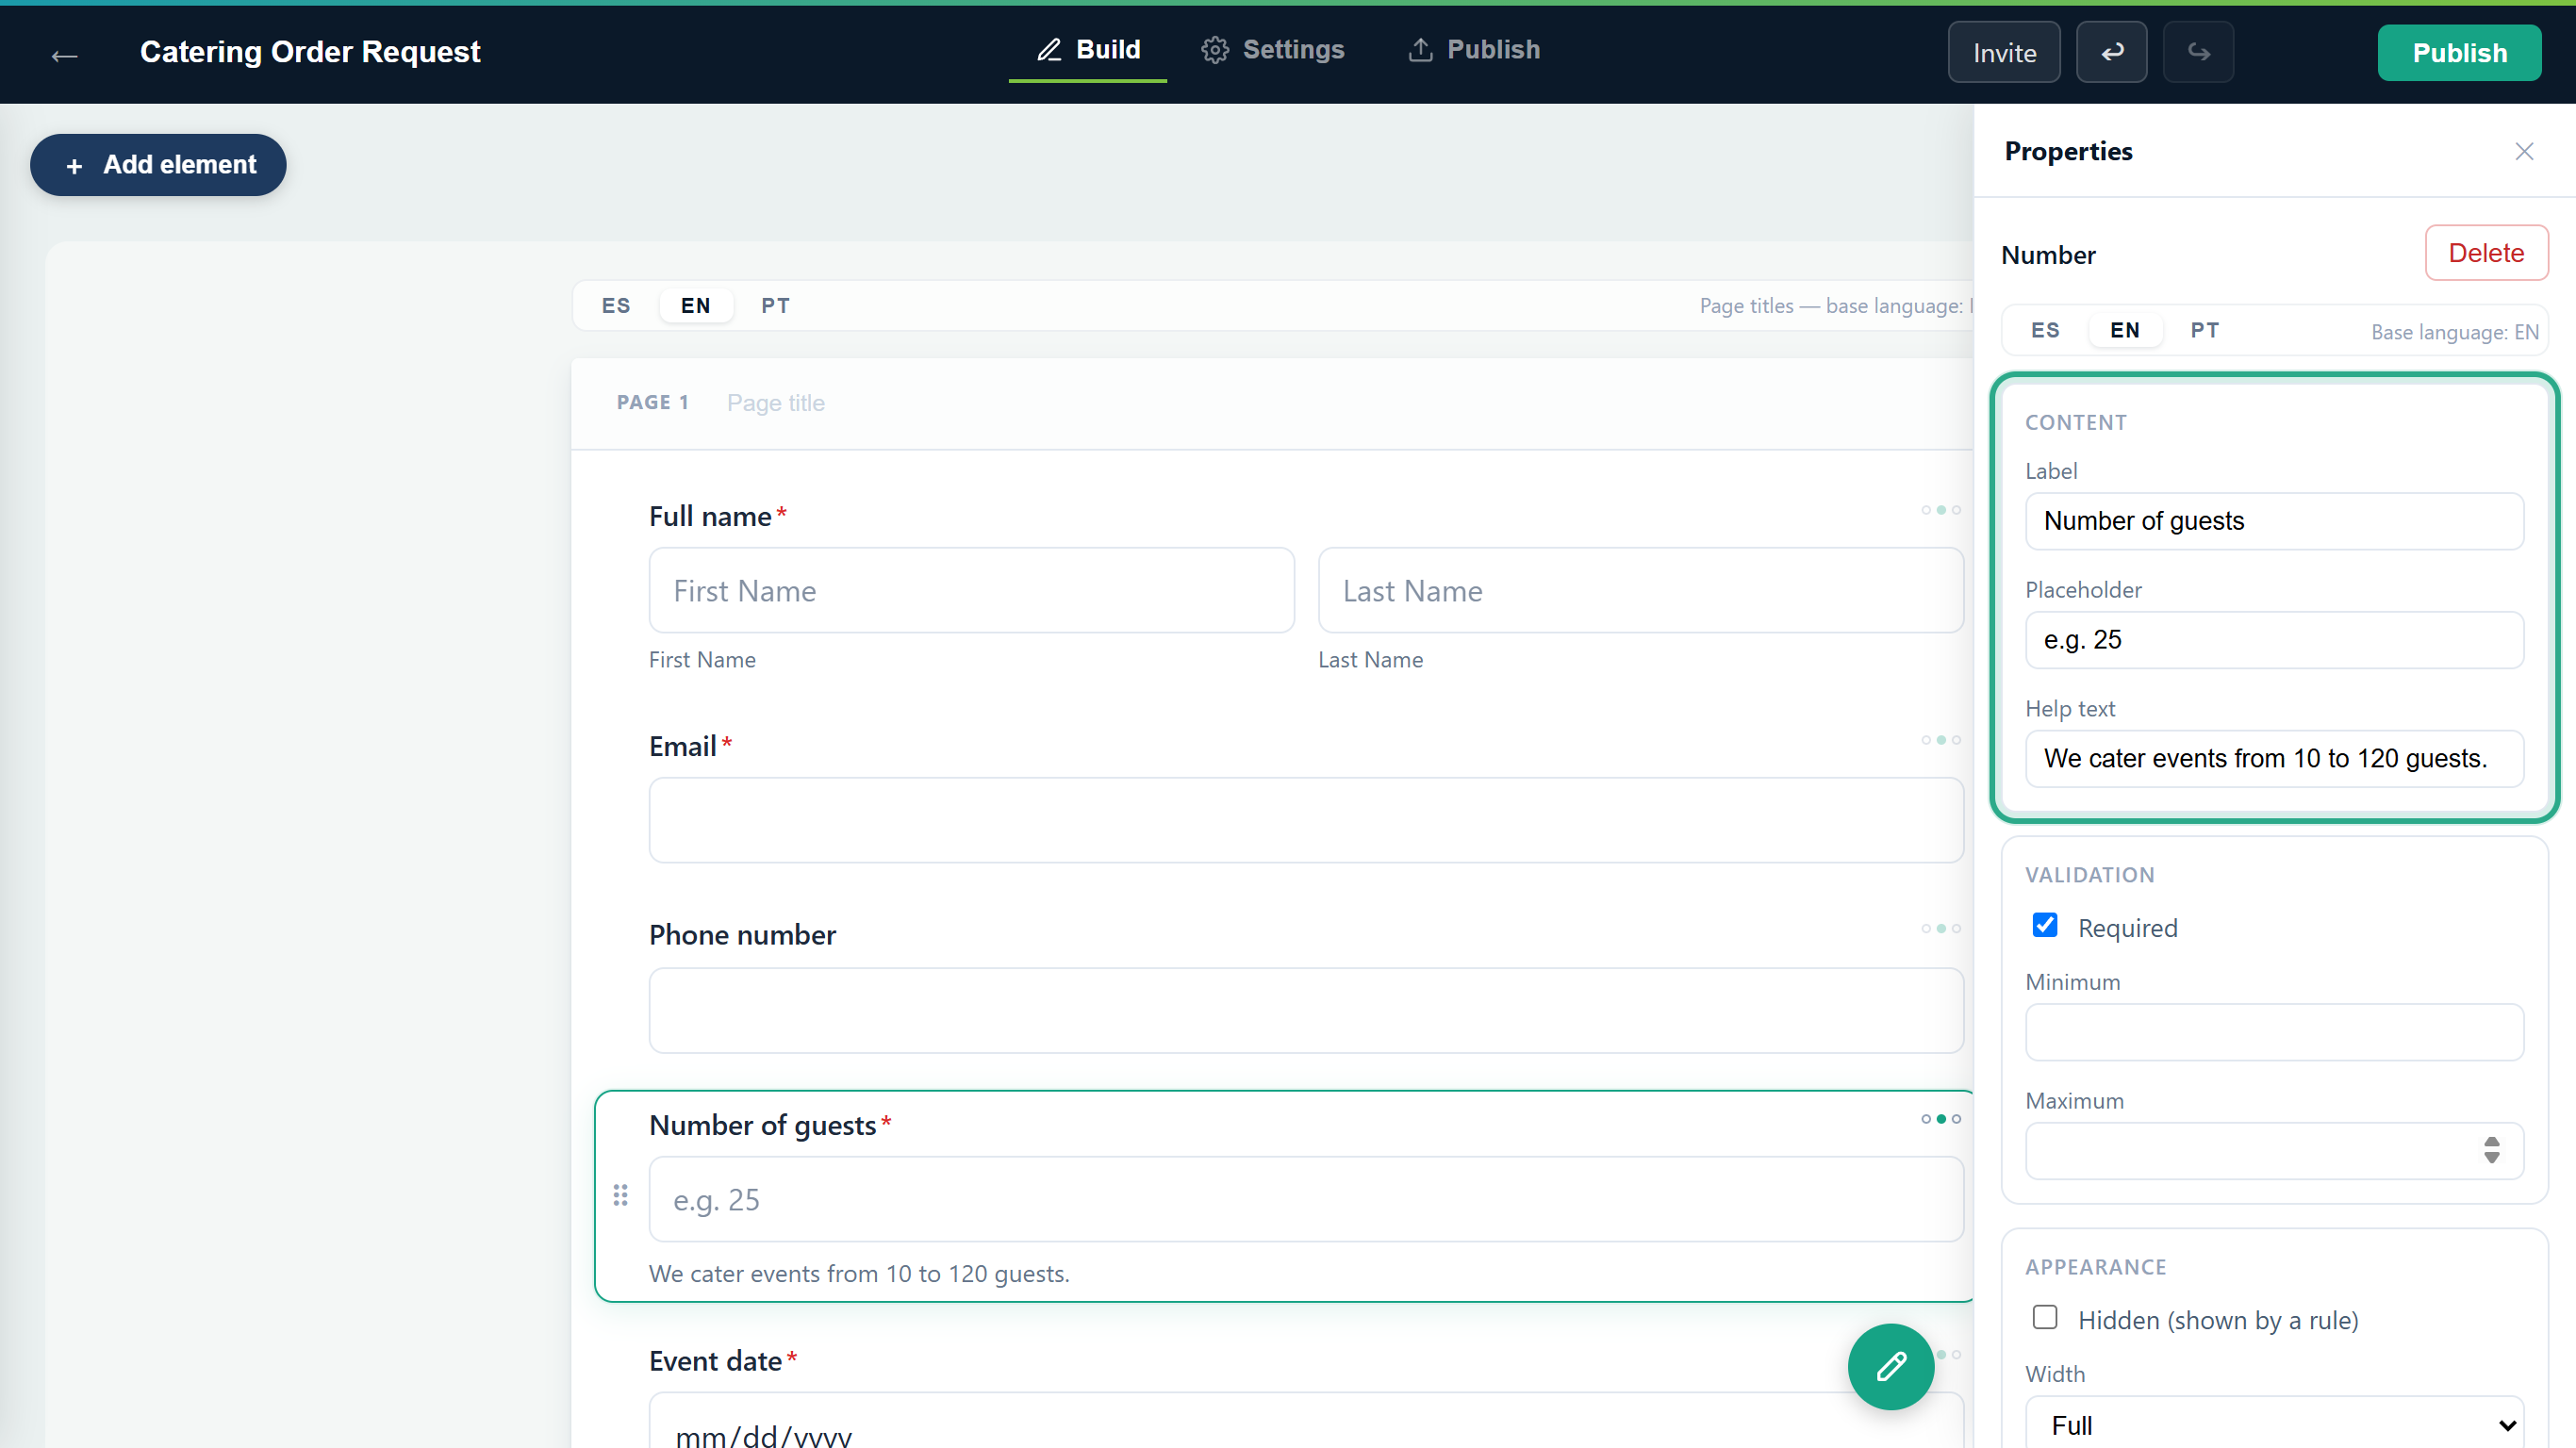 The placeholder and help text show on the canvas as you type.
Under Validation, tick Required so the form can't be sent without an answer. Depending on the field type there are limits too: a Number field has Minimum and Maximum (here 10 and 120); text fields have Length & pattern; File upload has Max files and Max size (MB).
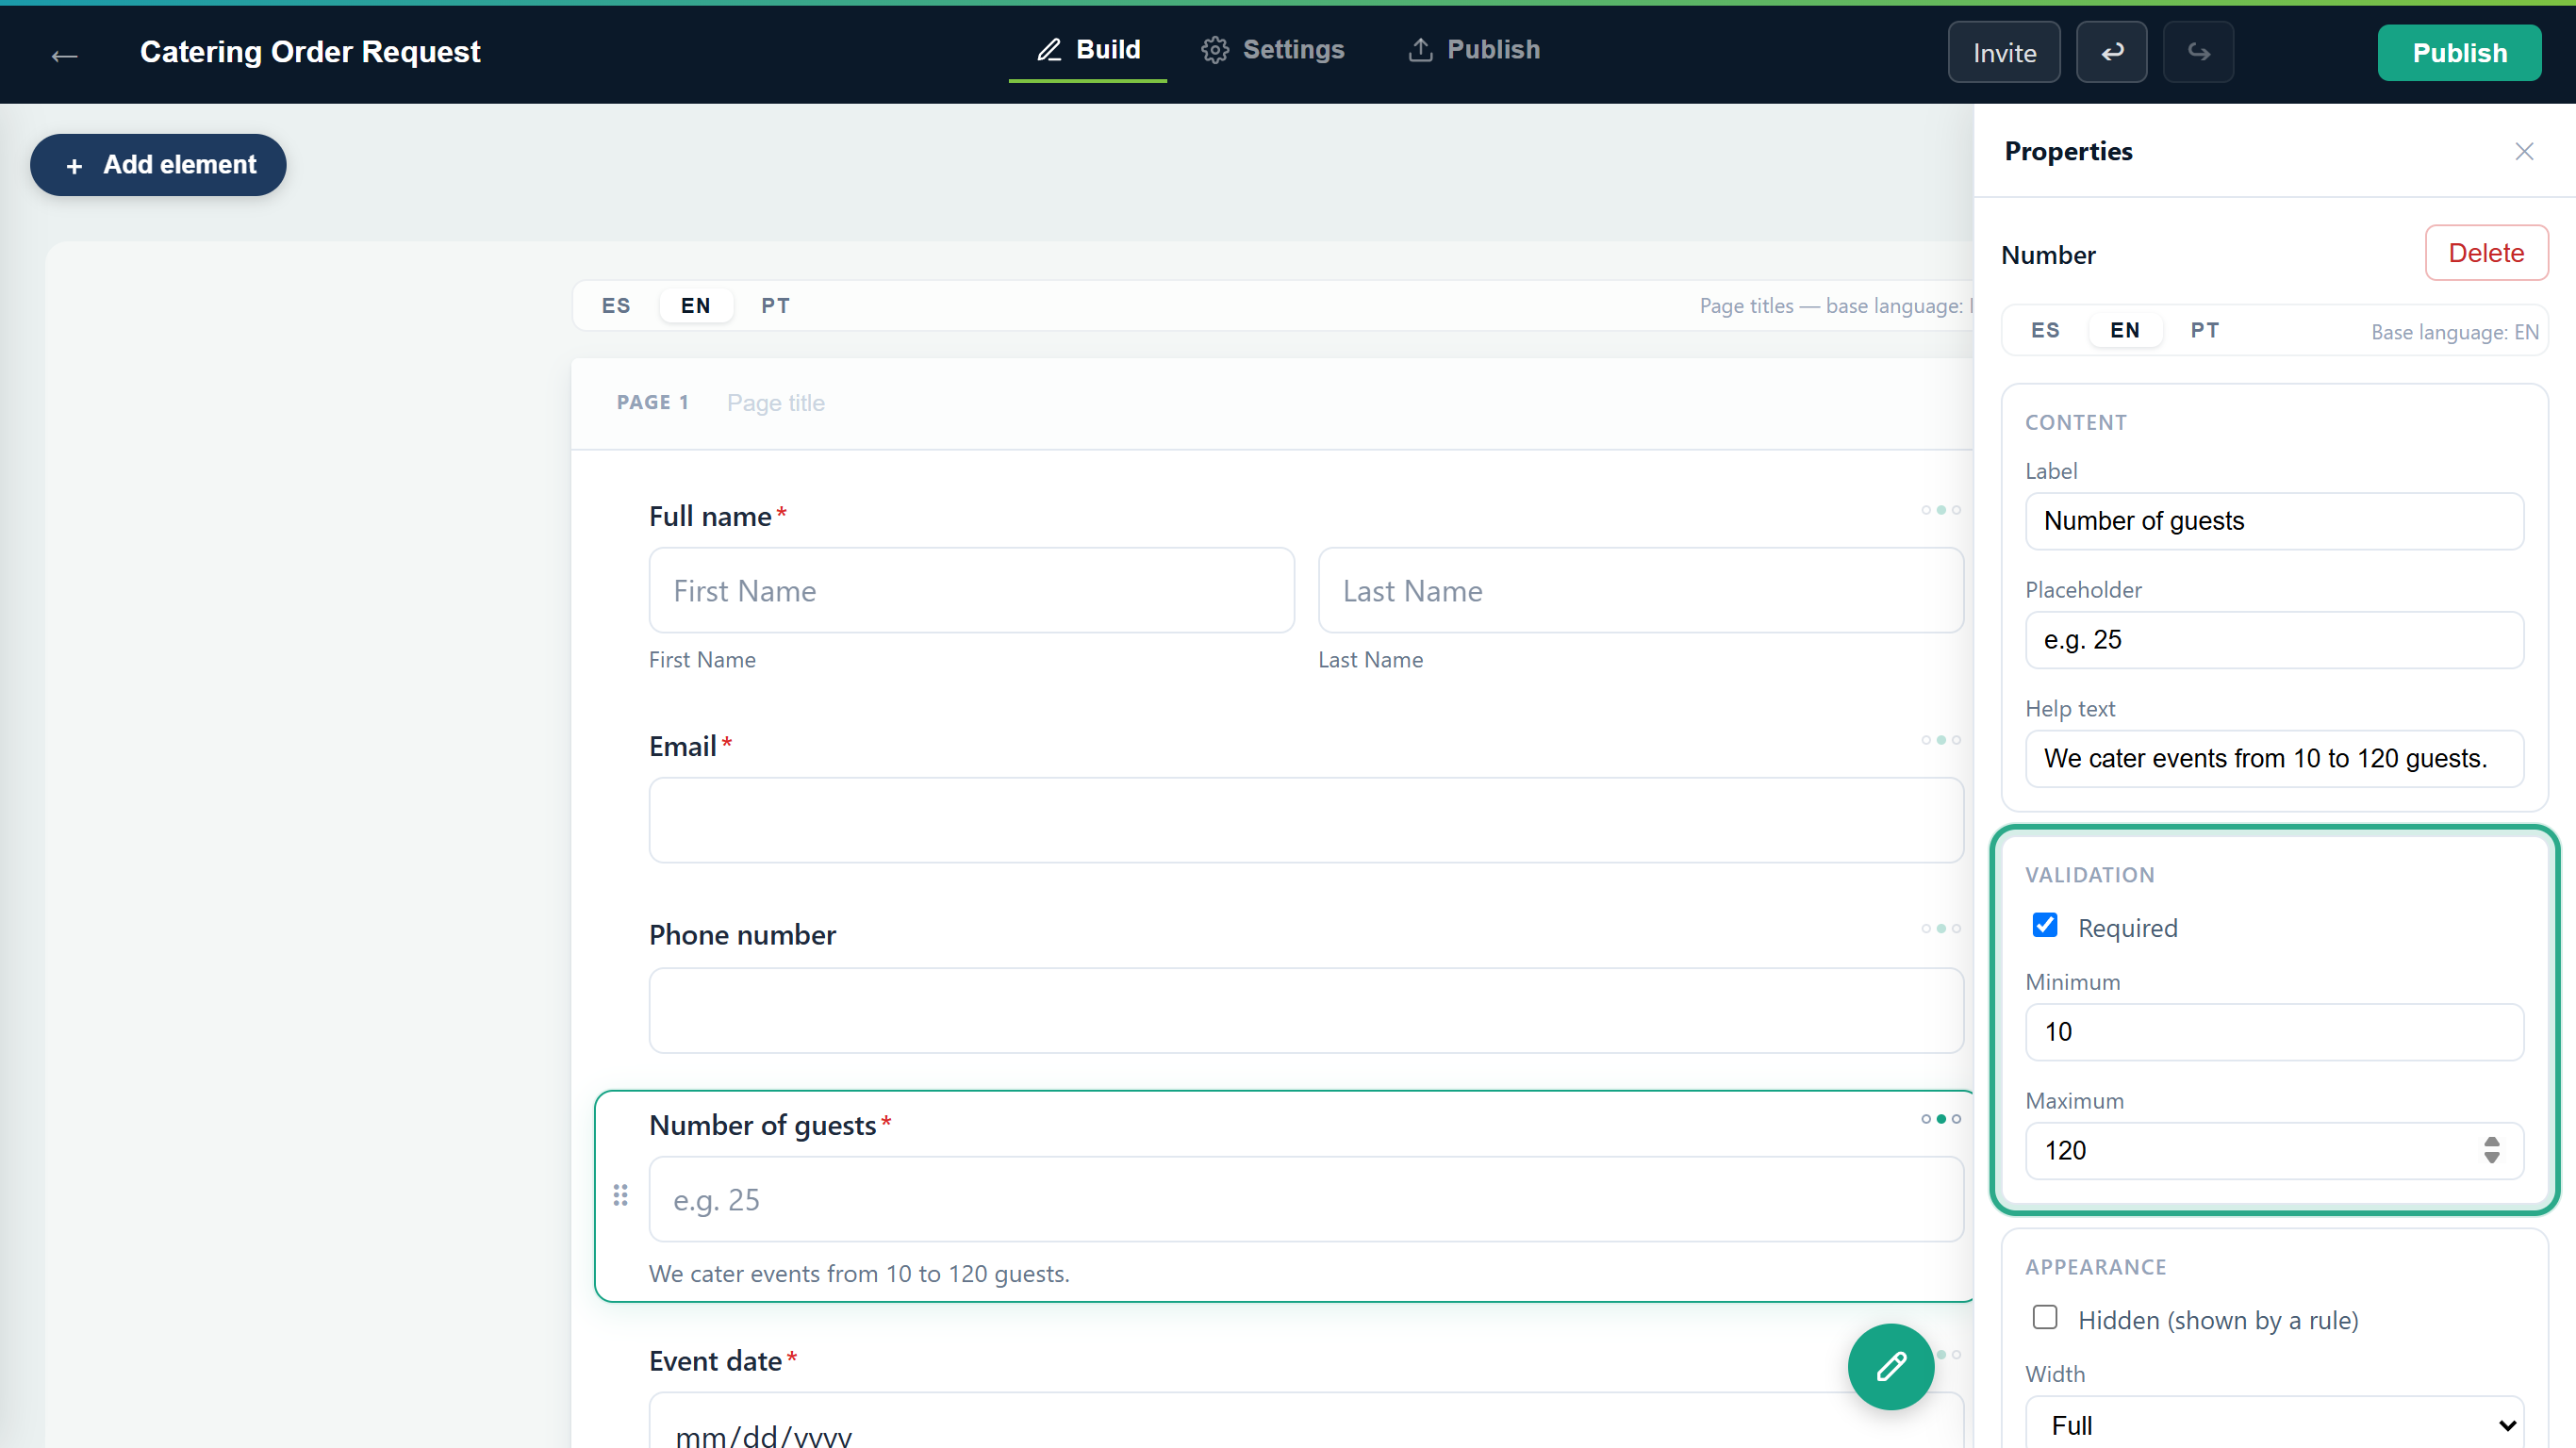 Required fields show a red asterisk on the form.
Under Appearance, Width sets how much of the row the field uses: Full, Half, Third or Quarter. Narrower fields sit side by side. Here Email and Phone number are both set to Half.
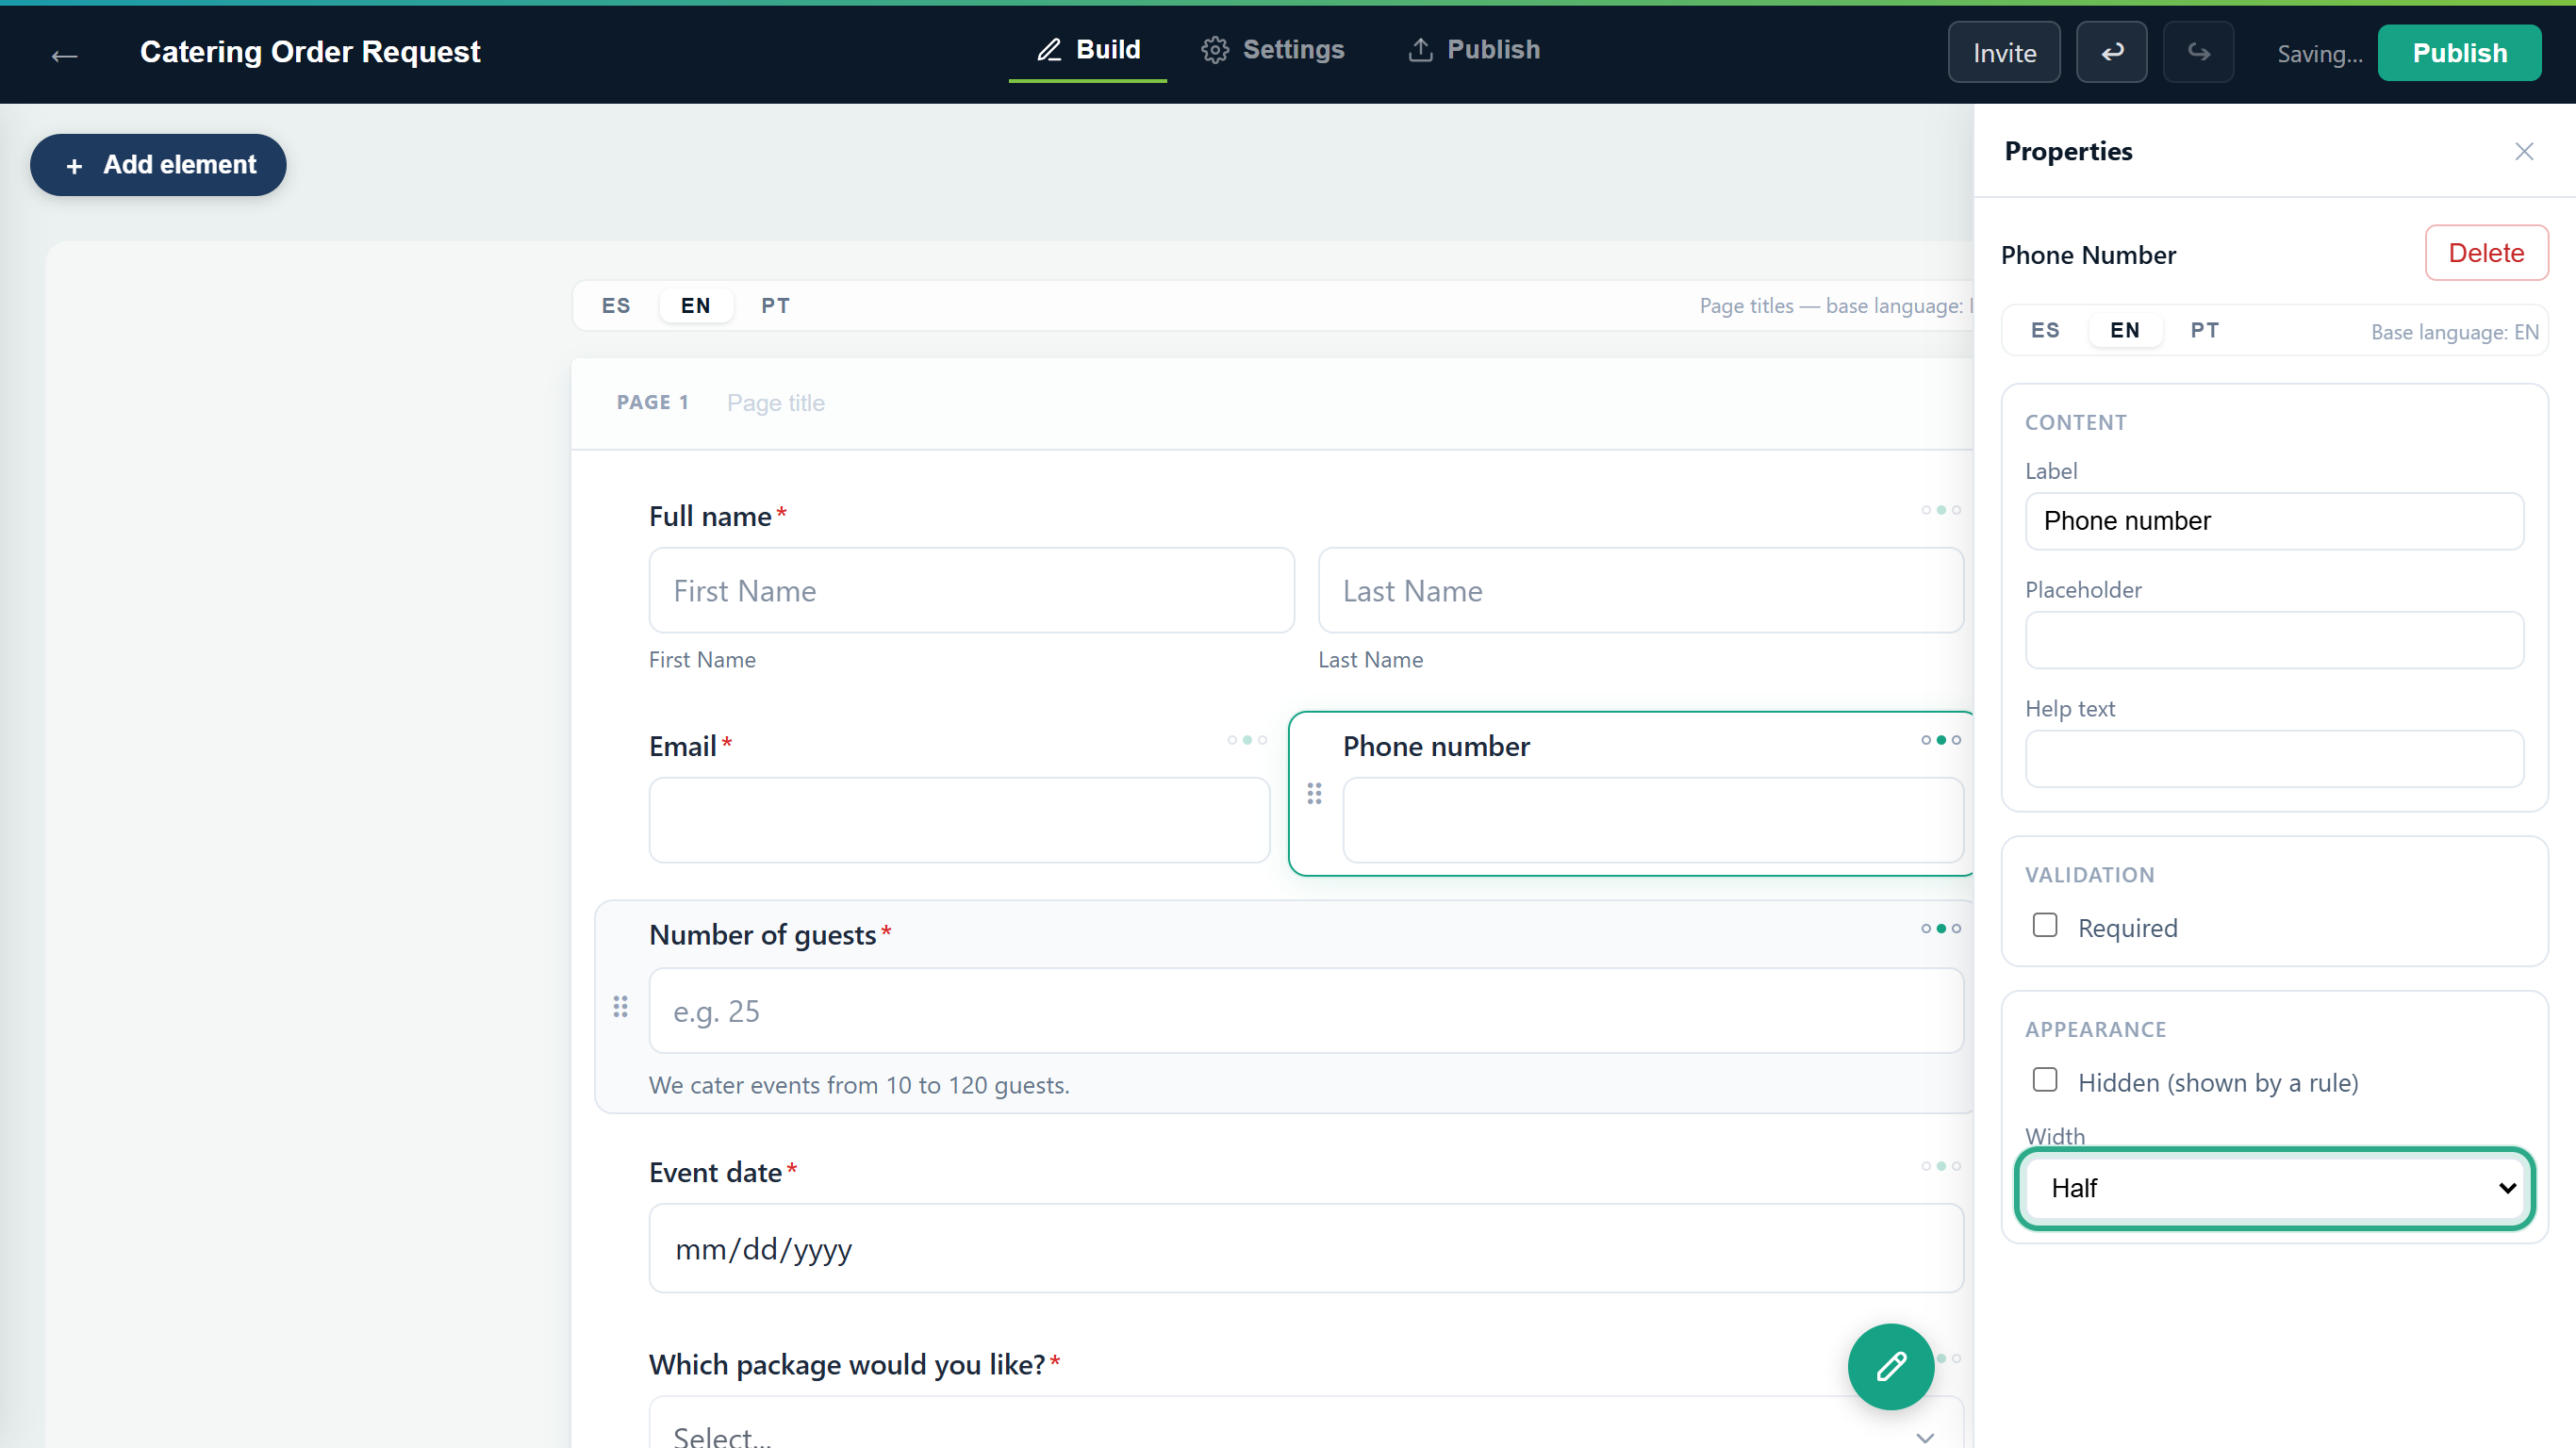 Two Half fields share one row.
Click an empty area of the canvas to deselect and check the result.
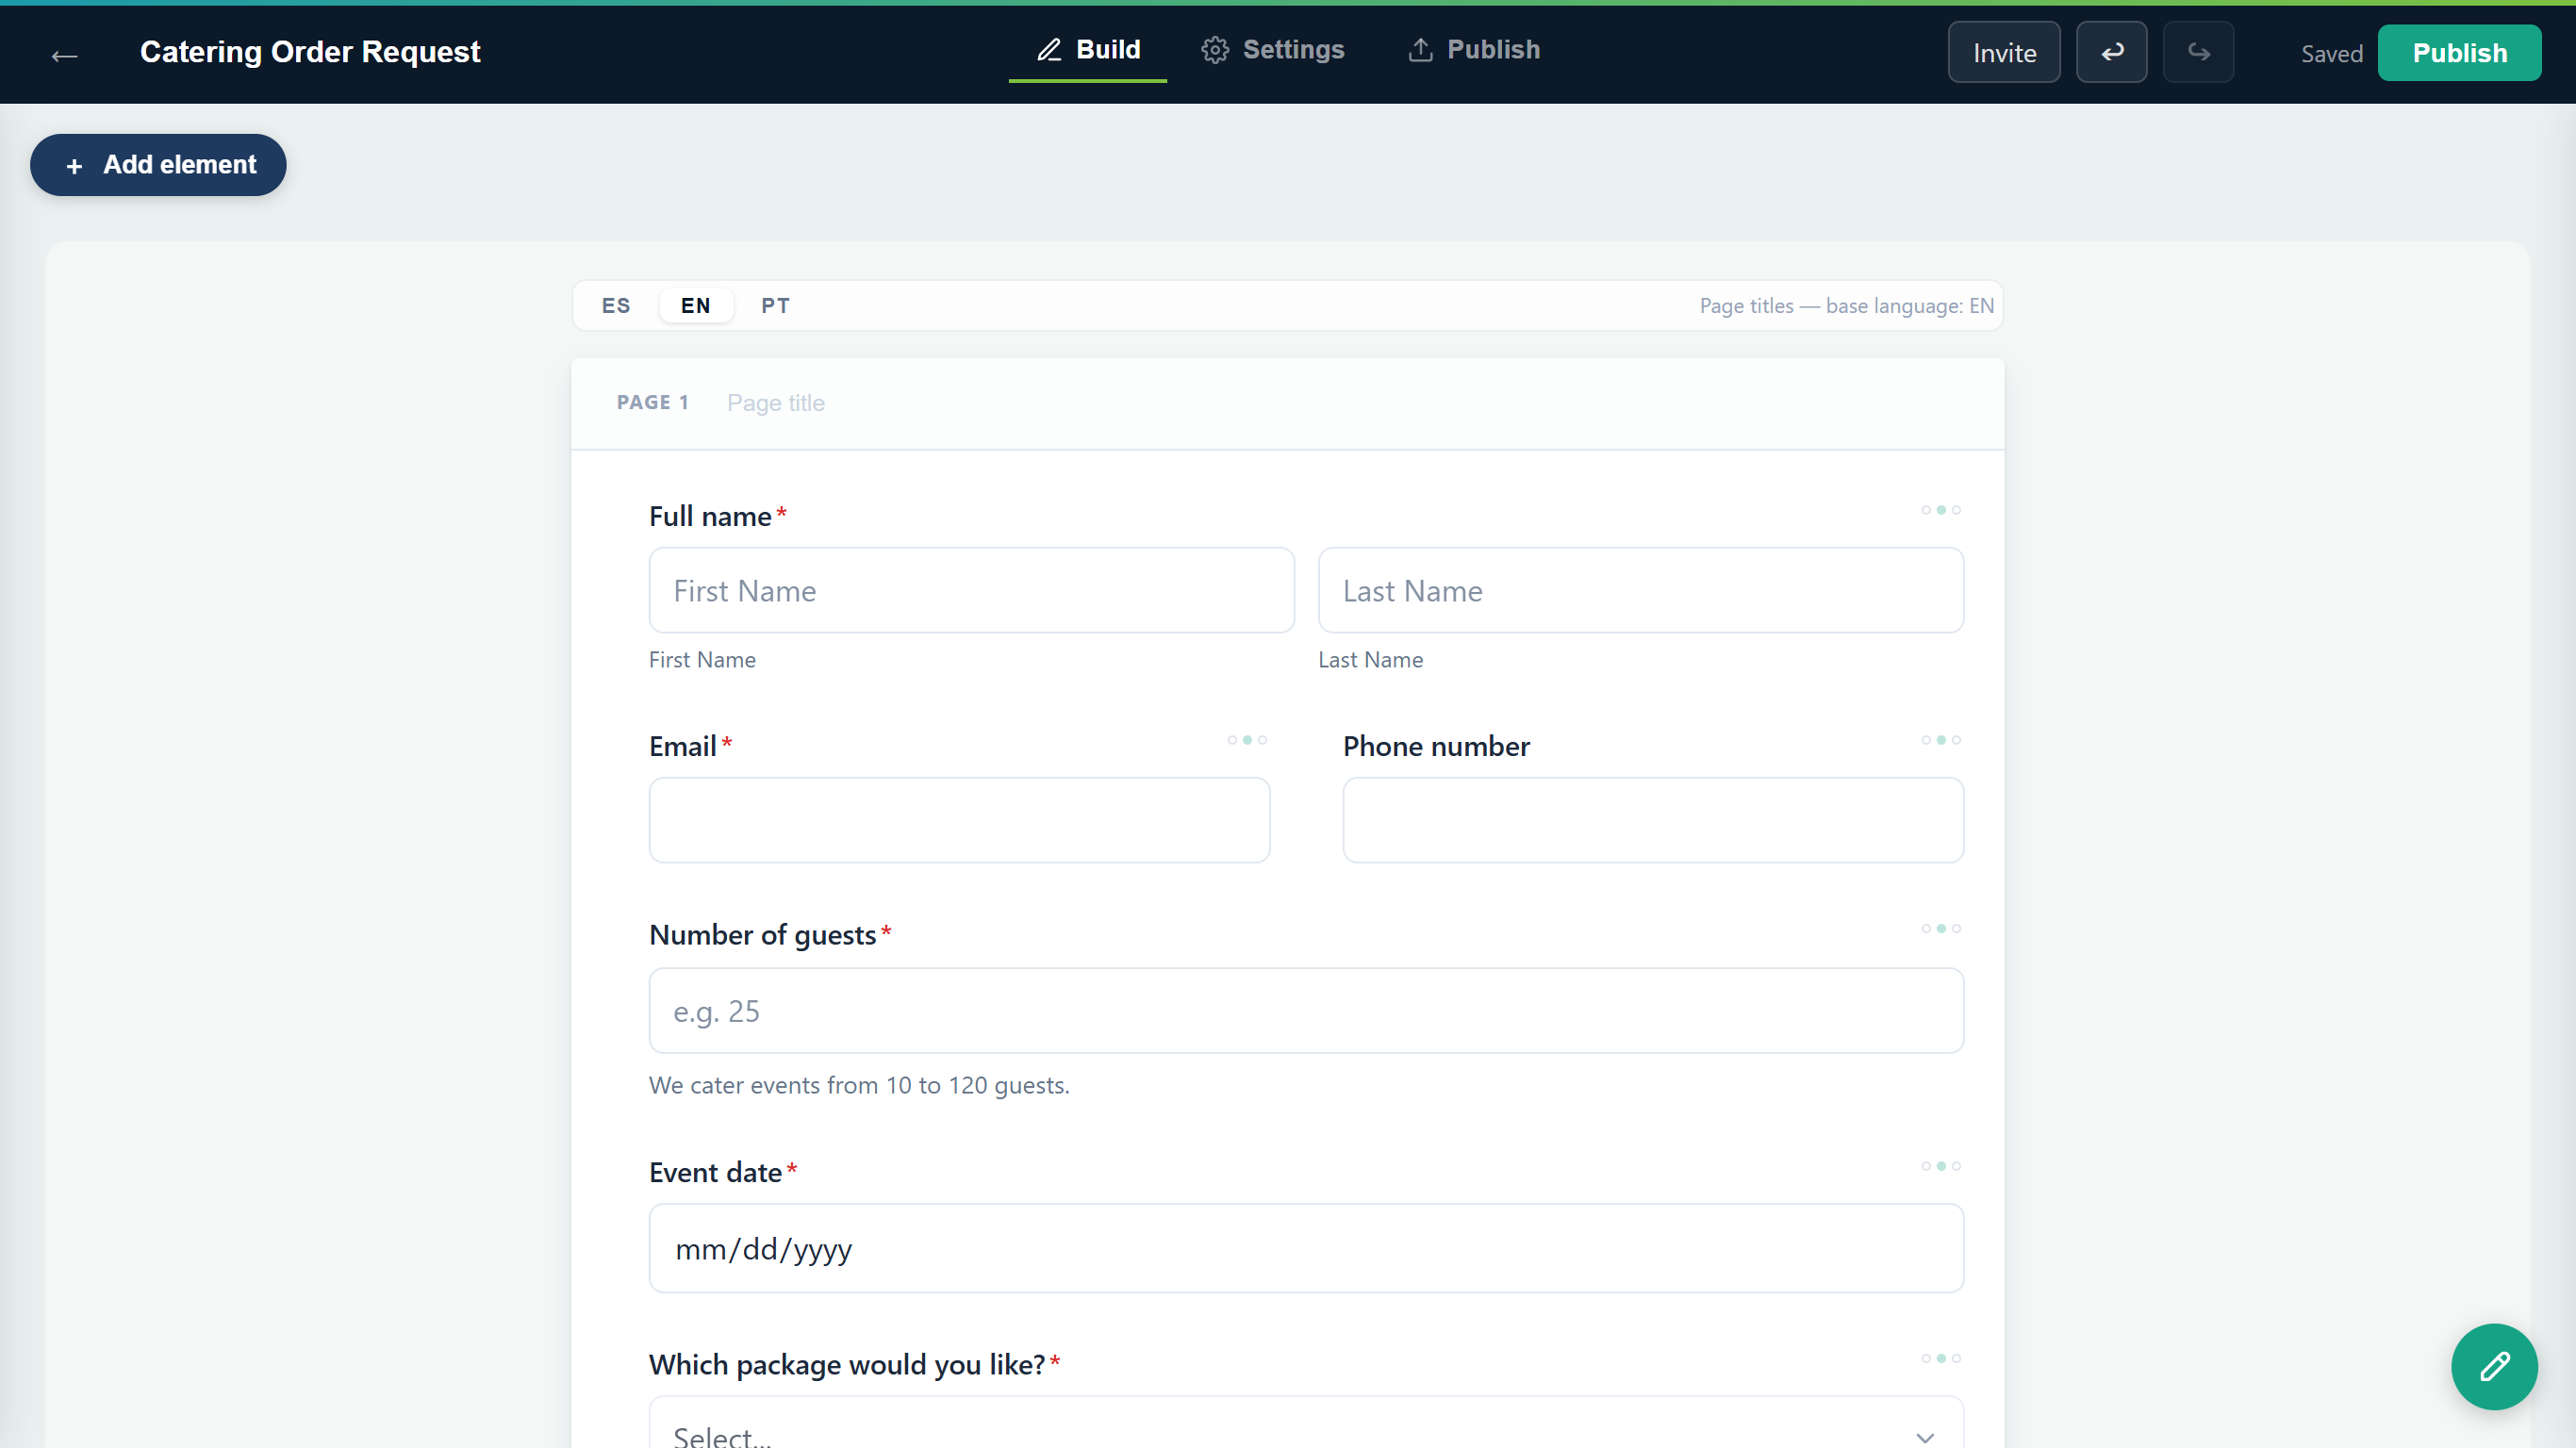 Email and Phone number now sit on the same row.
Result
The field asks the right question, with the right hints and rules. The language tabs (ES / EN / PT) at the top of Properties let you translate the field; see Multilingual forms.
Task 5 — Hide a field, undo a change and check that it saved
Step-by-step
Hidden (shown by a rule), under Appearance, keeps a field off the published form until a conditional logic rule shows it. In the editor the field stays visible, with a hidden badge. Here it was ticked on the Notes field by mistake.
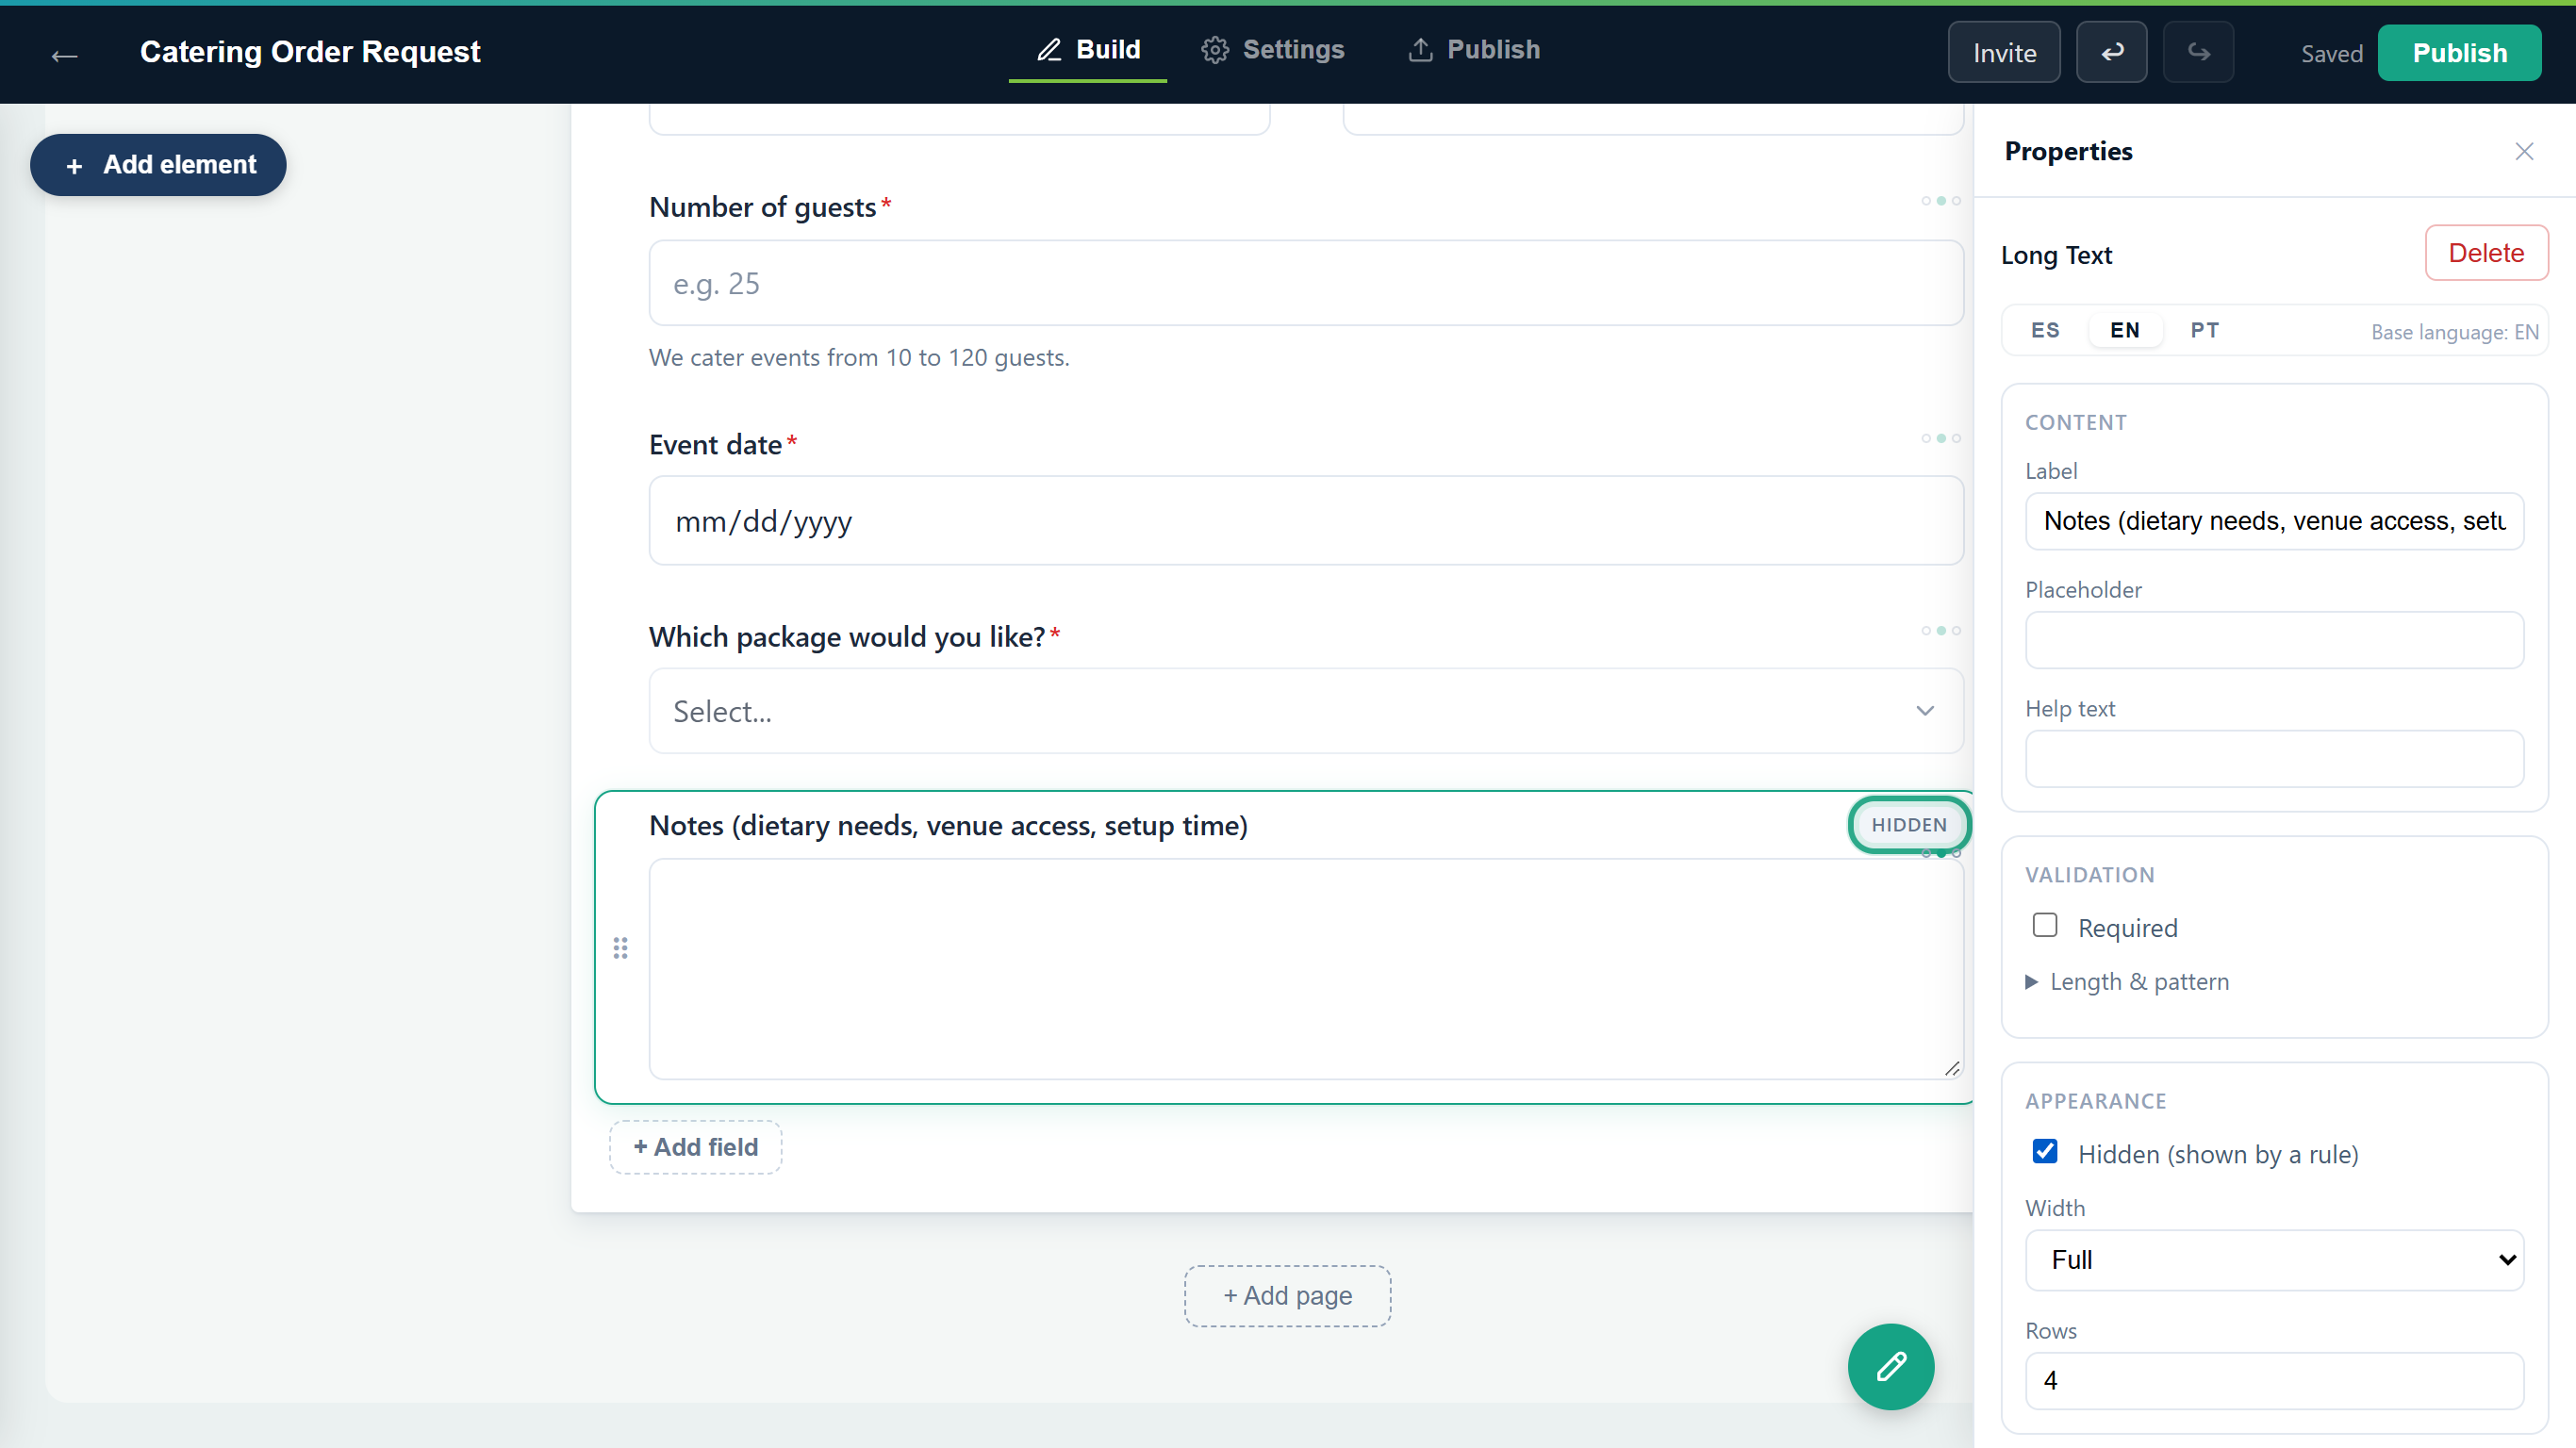 A hidden field is marked hidden on the canvas.
Click ↩ (Undo) in the top bar to take the last change back. Click it again to go further back, and ↪ (Redo) to reapply what you undid. Undo covers the changes you made since you opened the editor.
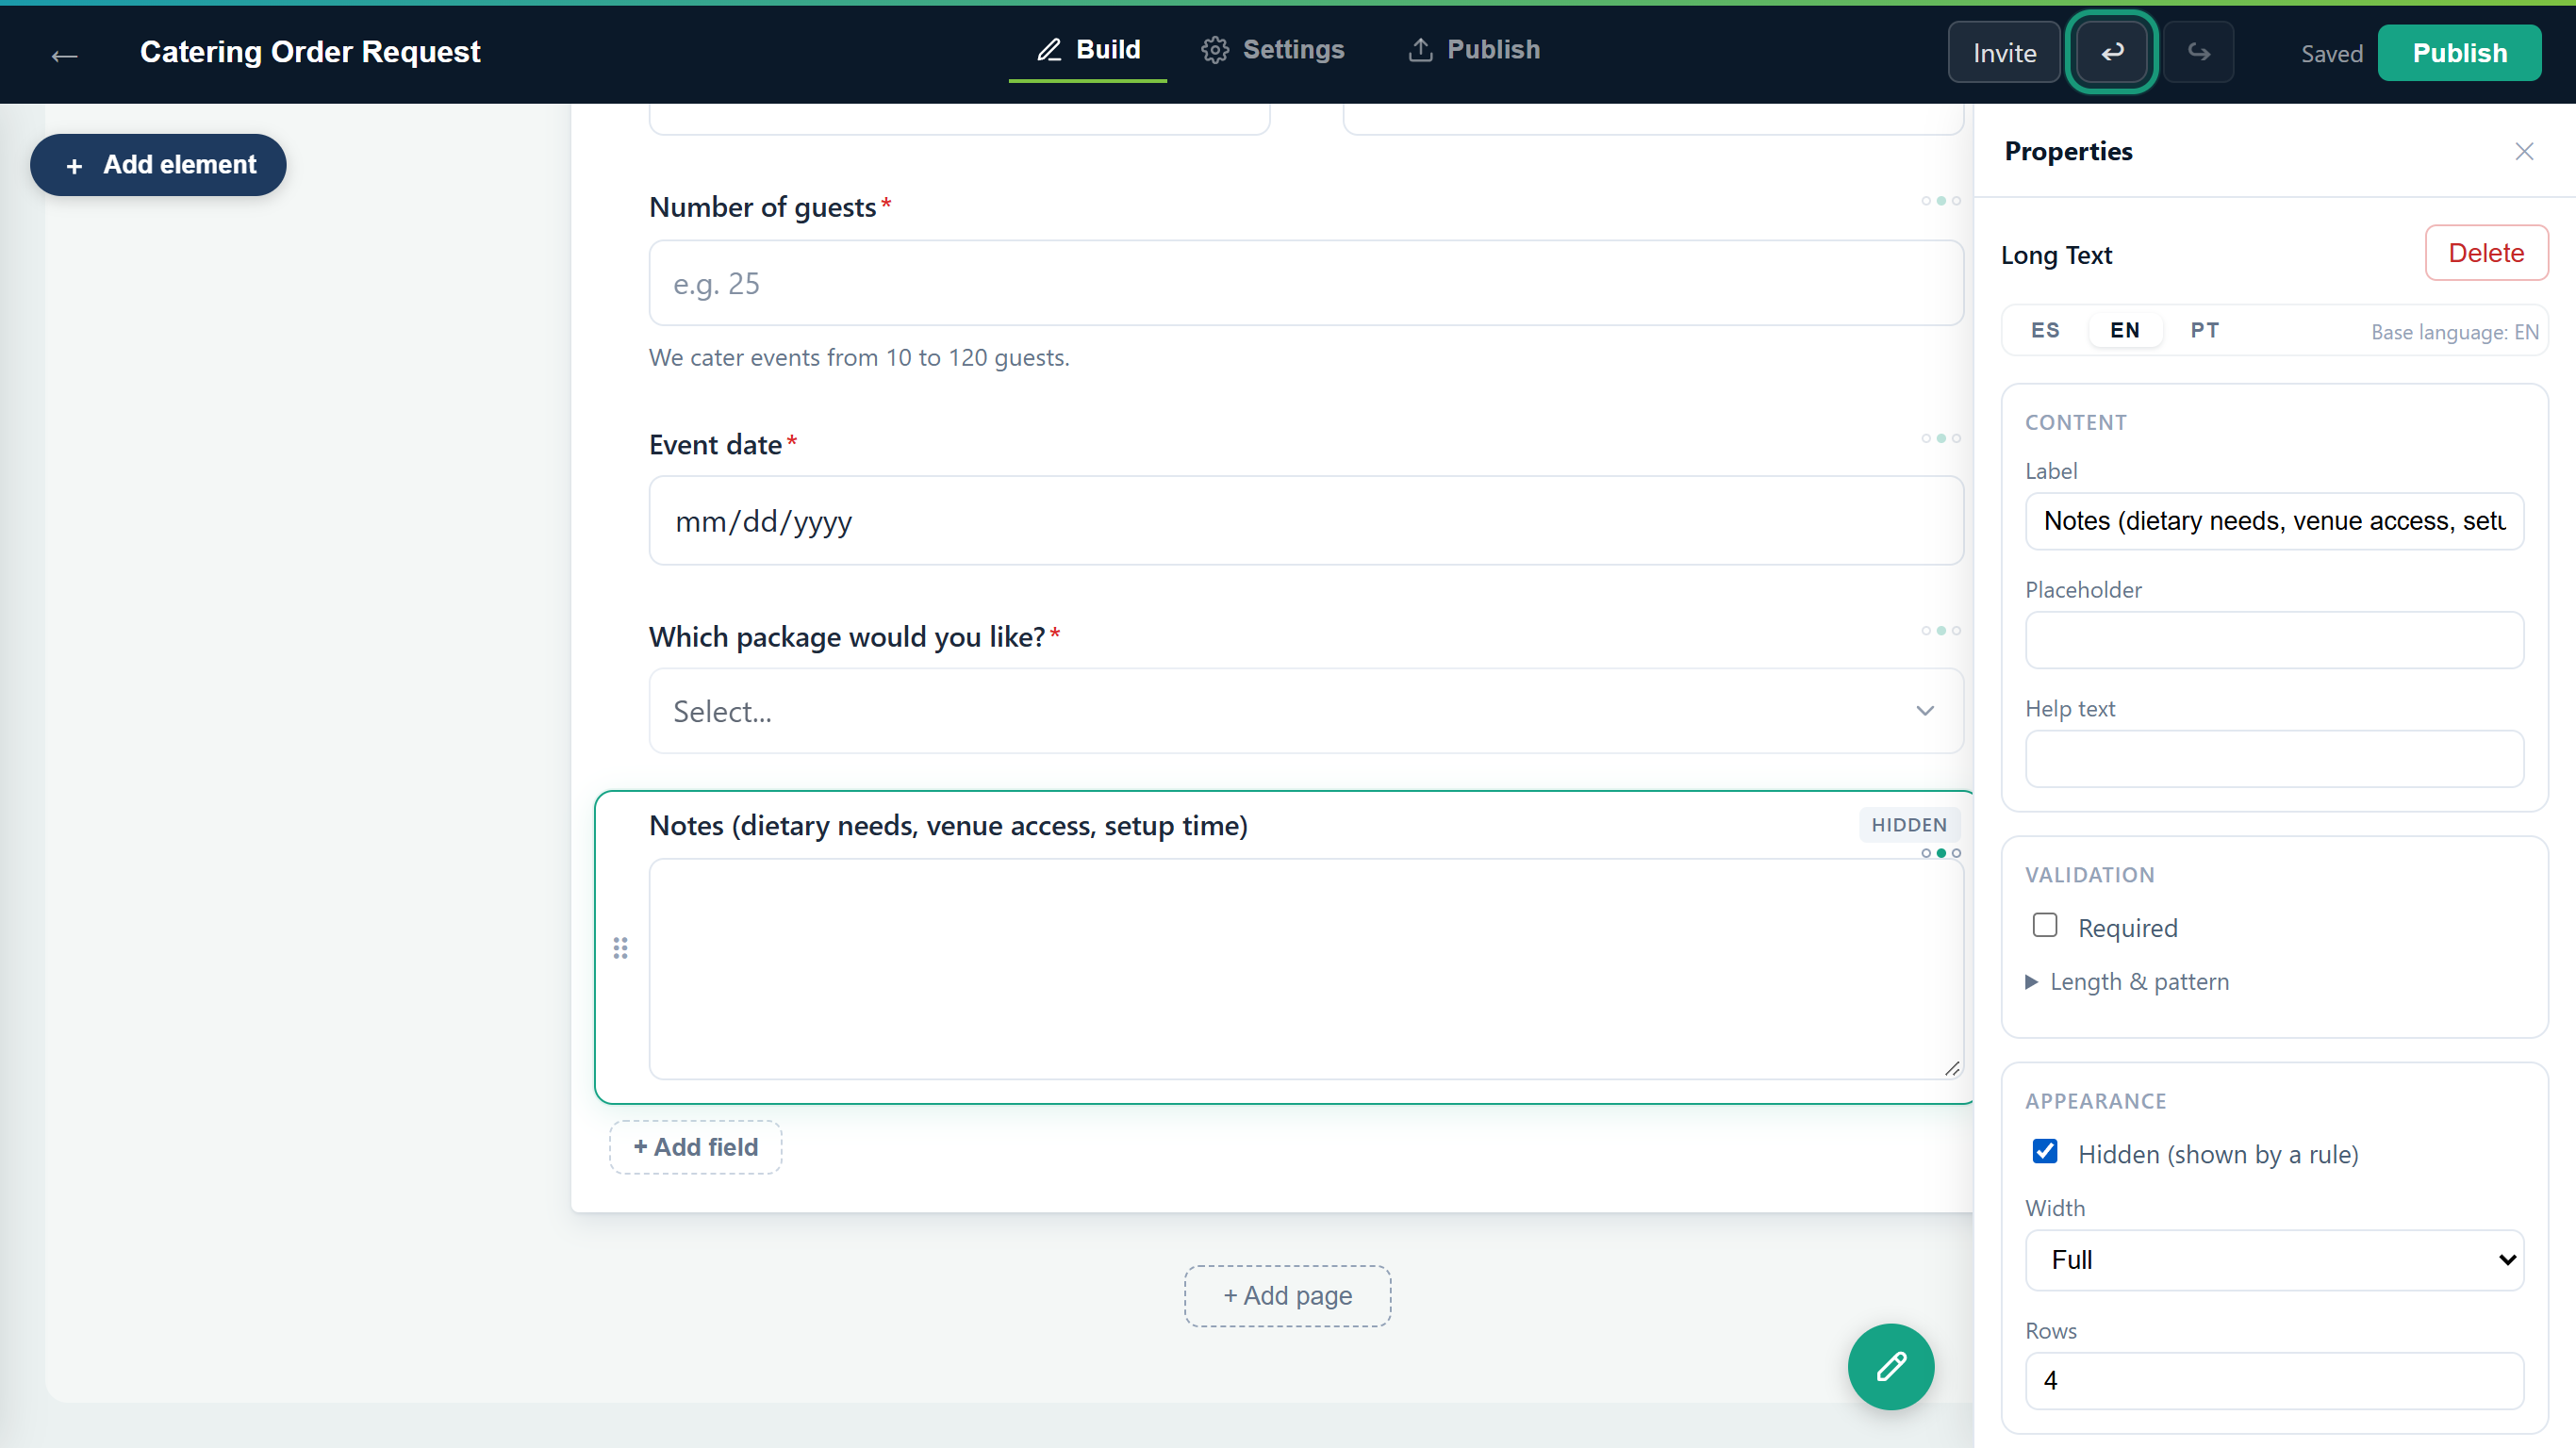 Undo takes back the last change.
You never need to save. About two seconds after each change the status next to the Publish button shows Saving… and then Saved.
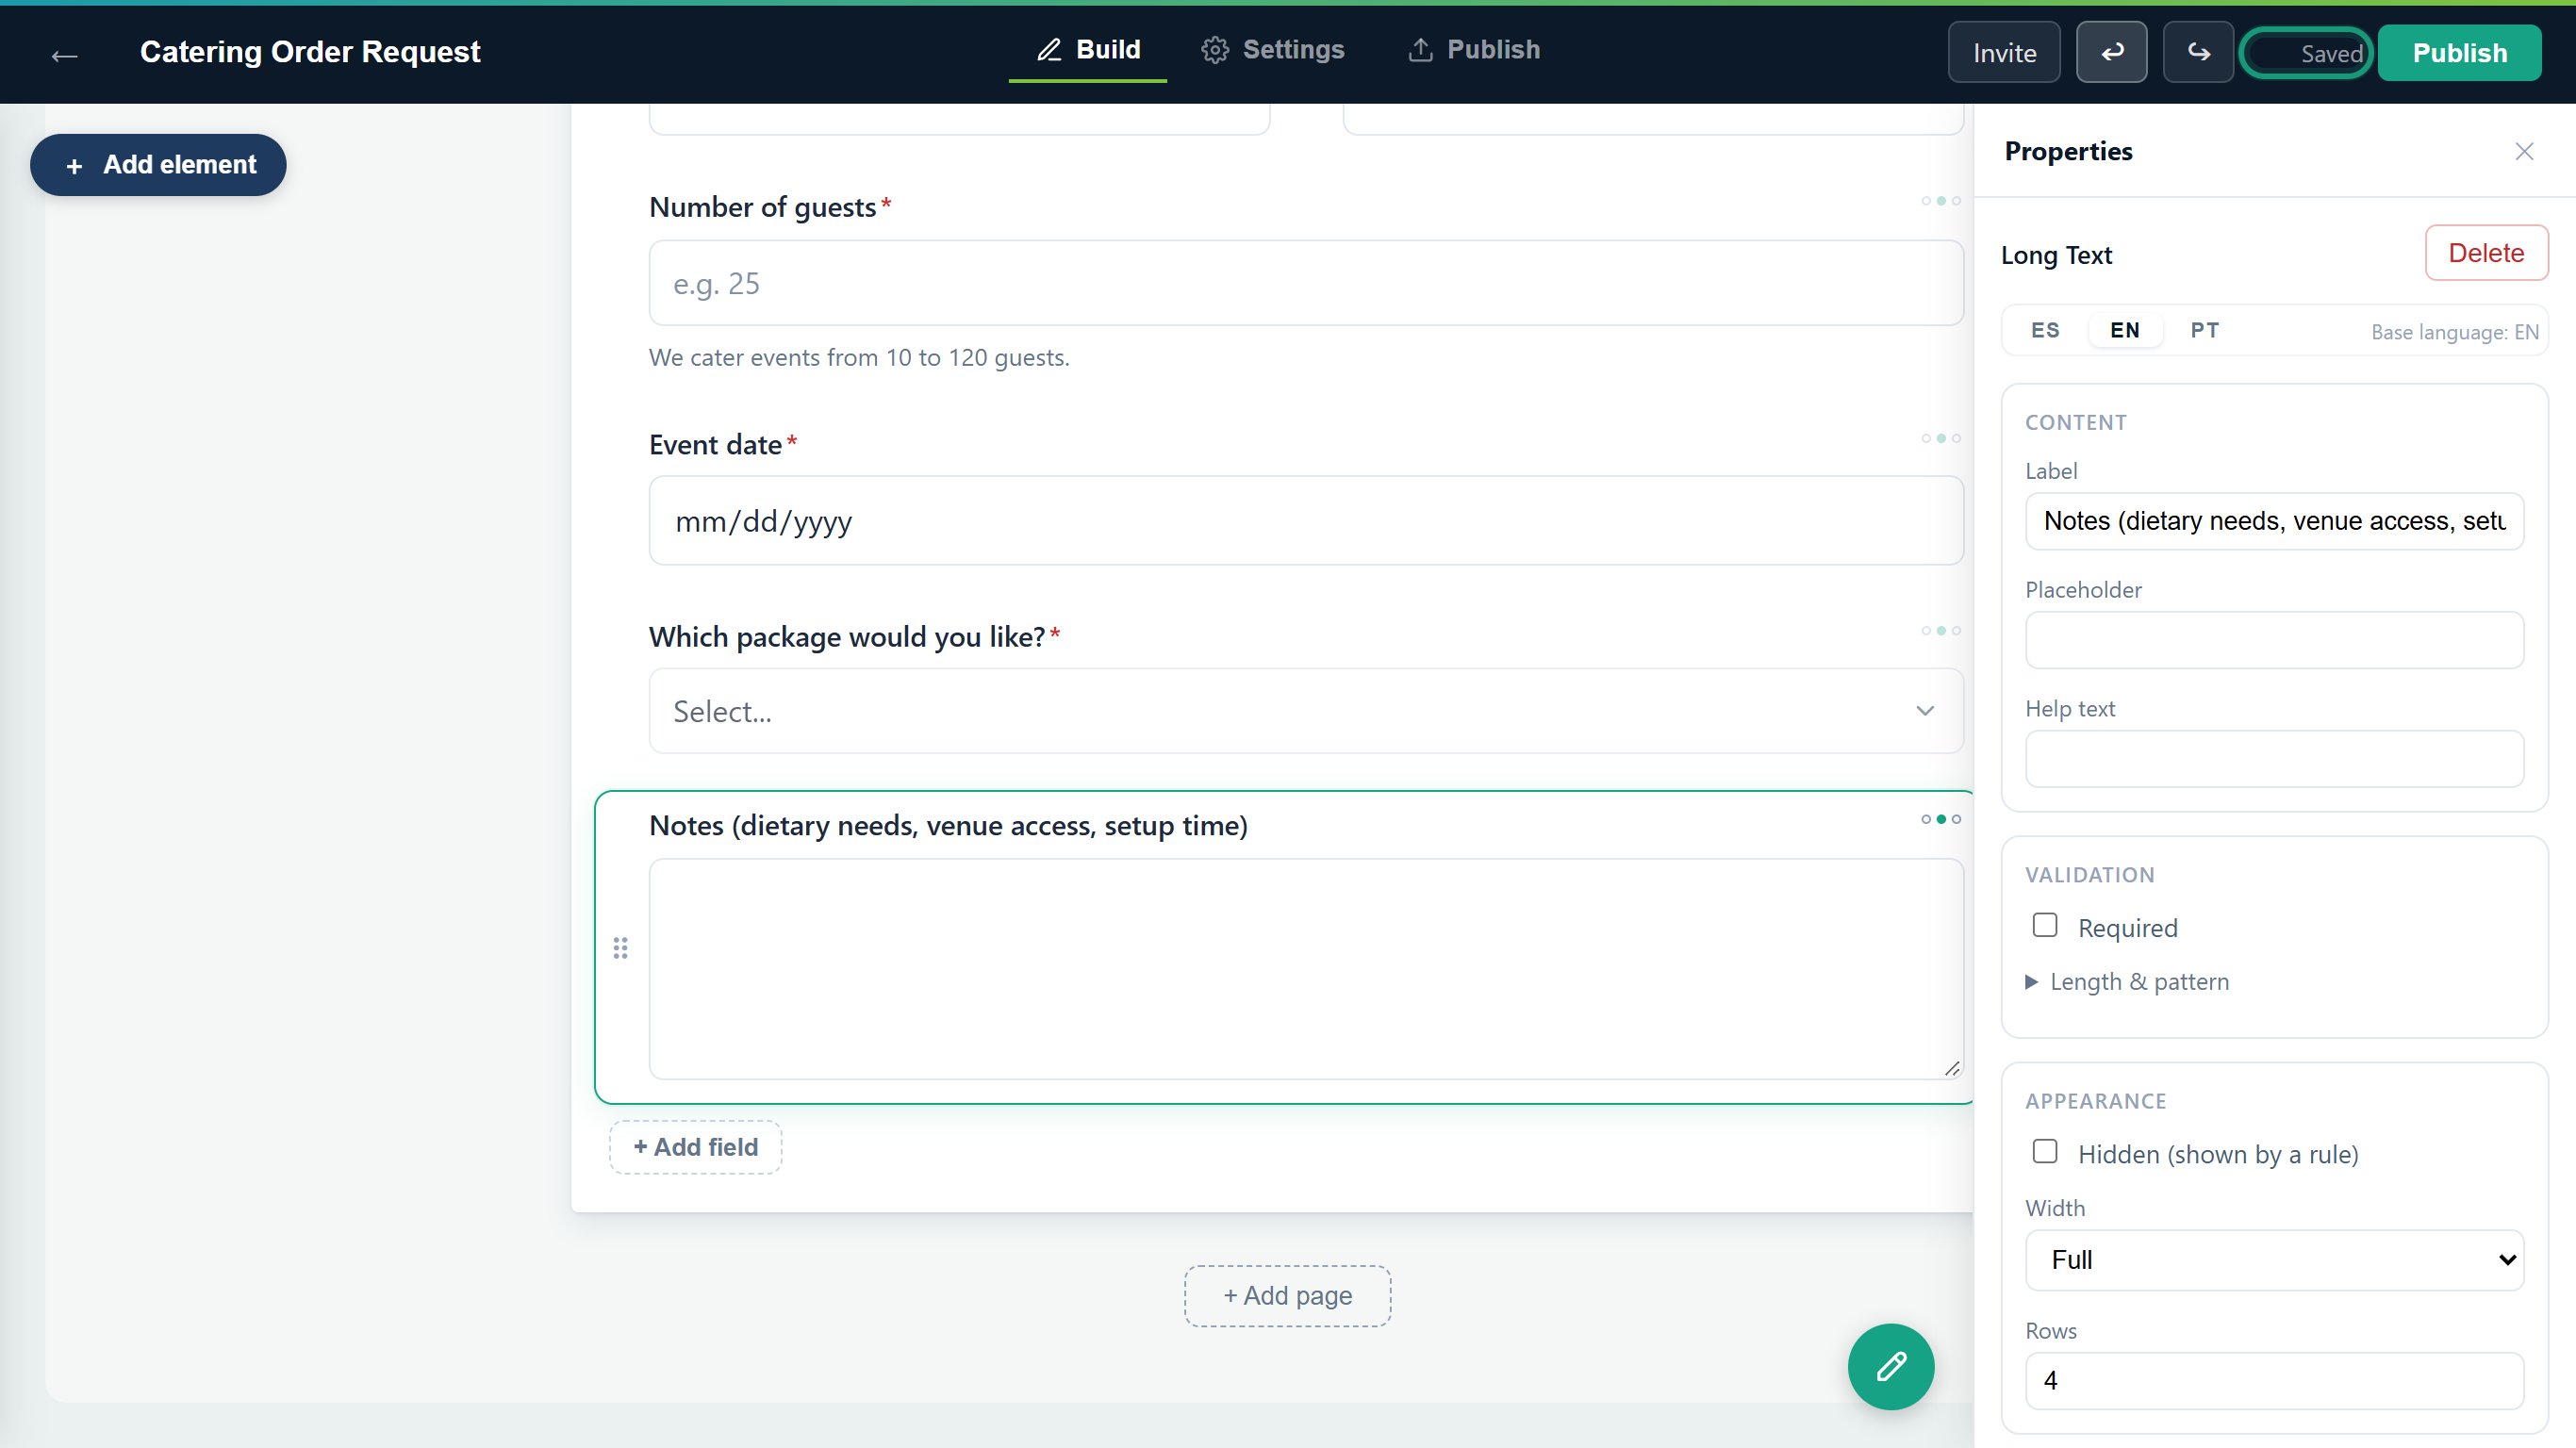 The mistake is undone and the draft is Saved.
Result
The draft is up to date. It's still private: people only see it after you publish (Task 7).
Task 6 — Split the form into pages
Step-by-step
Click + Add page below the last page. A new, empty page is added at the end.
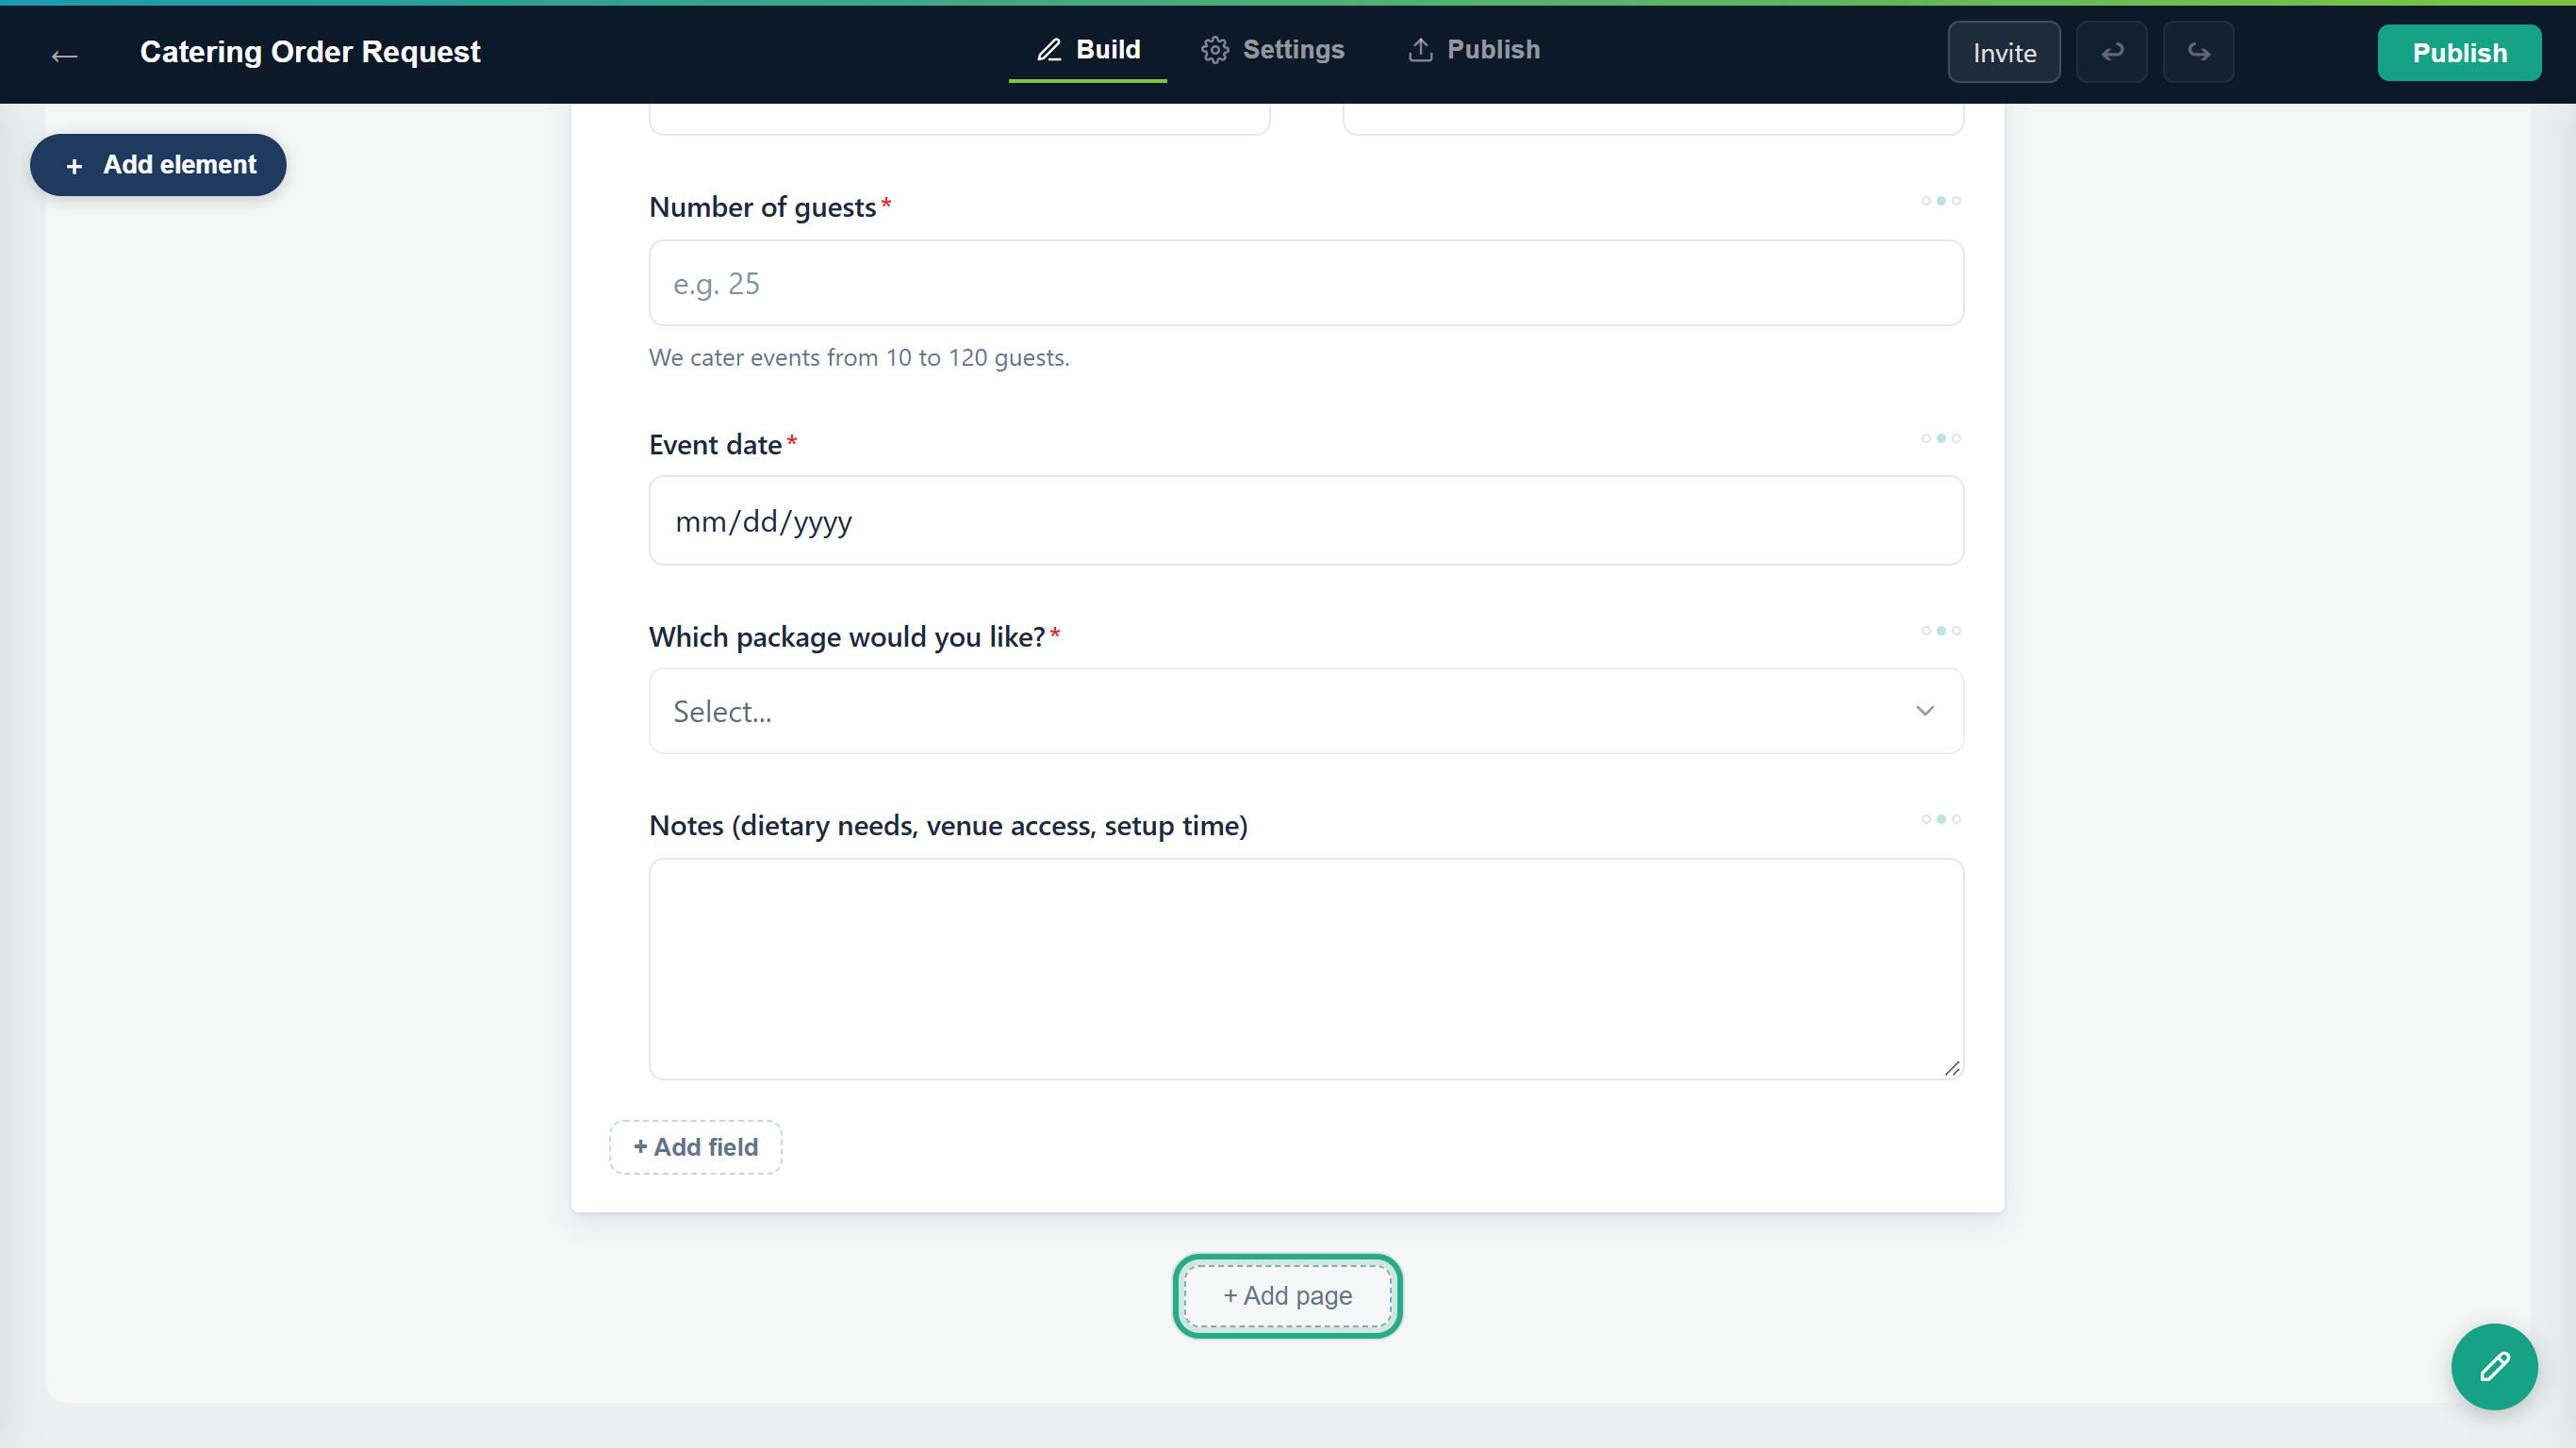 Each page becomes one step of the public form.
Each page is labelled Page N and has an optional title. Click Page title and type one, for example Your details for page 1 and Your event for page 2. (To translate page titles, use the ES / EN / PT tabs above the canvas, next to Page titles — base language:.)
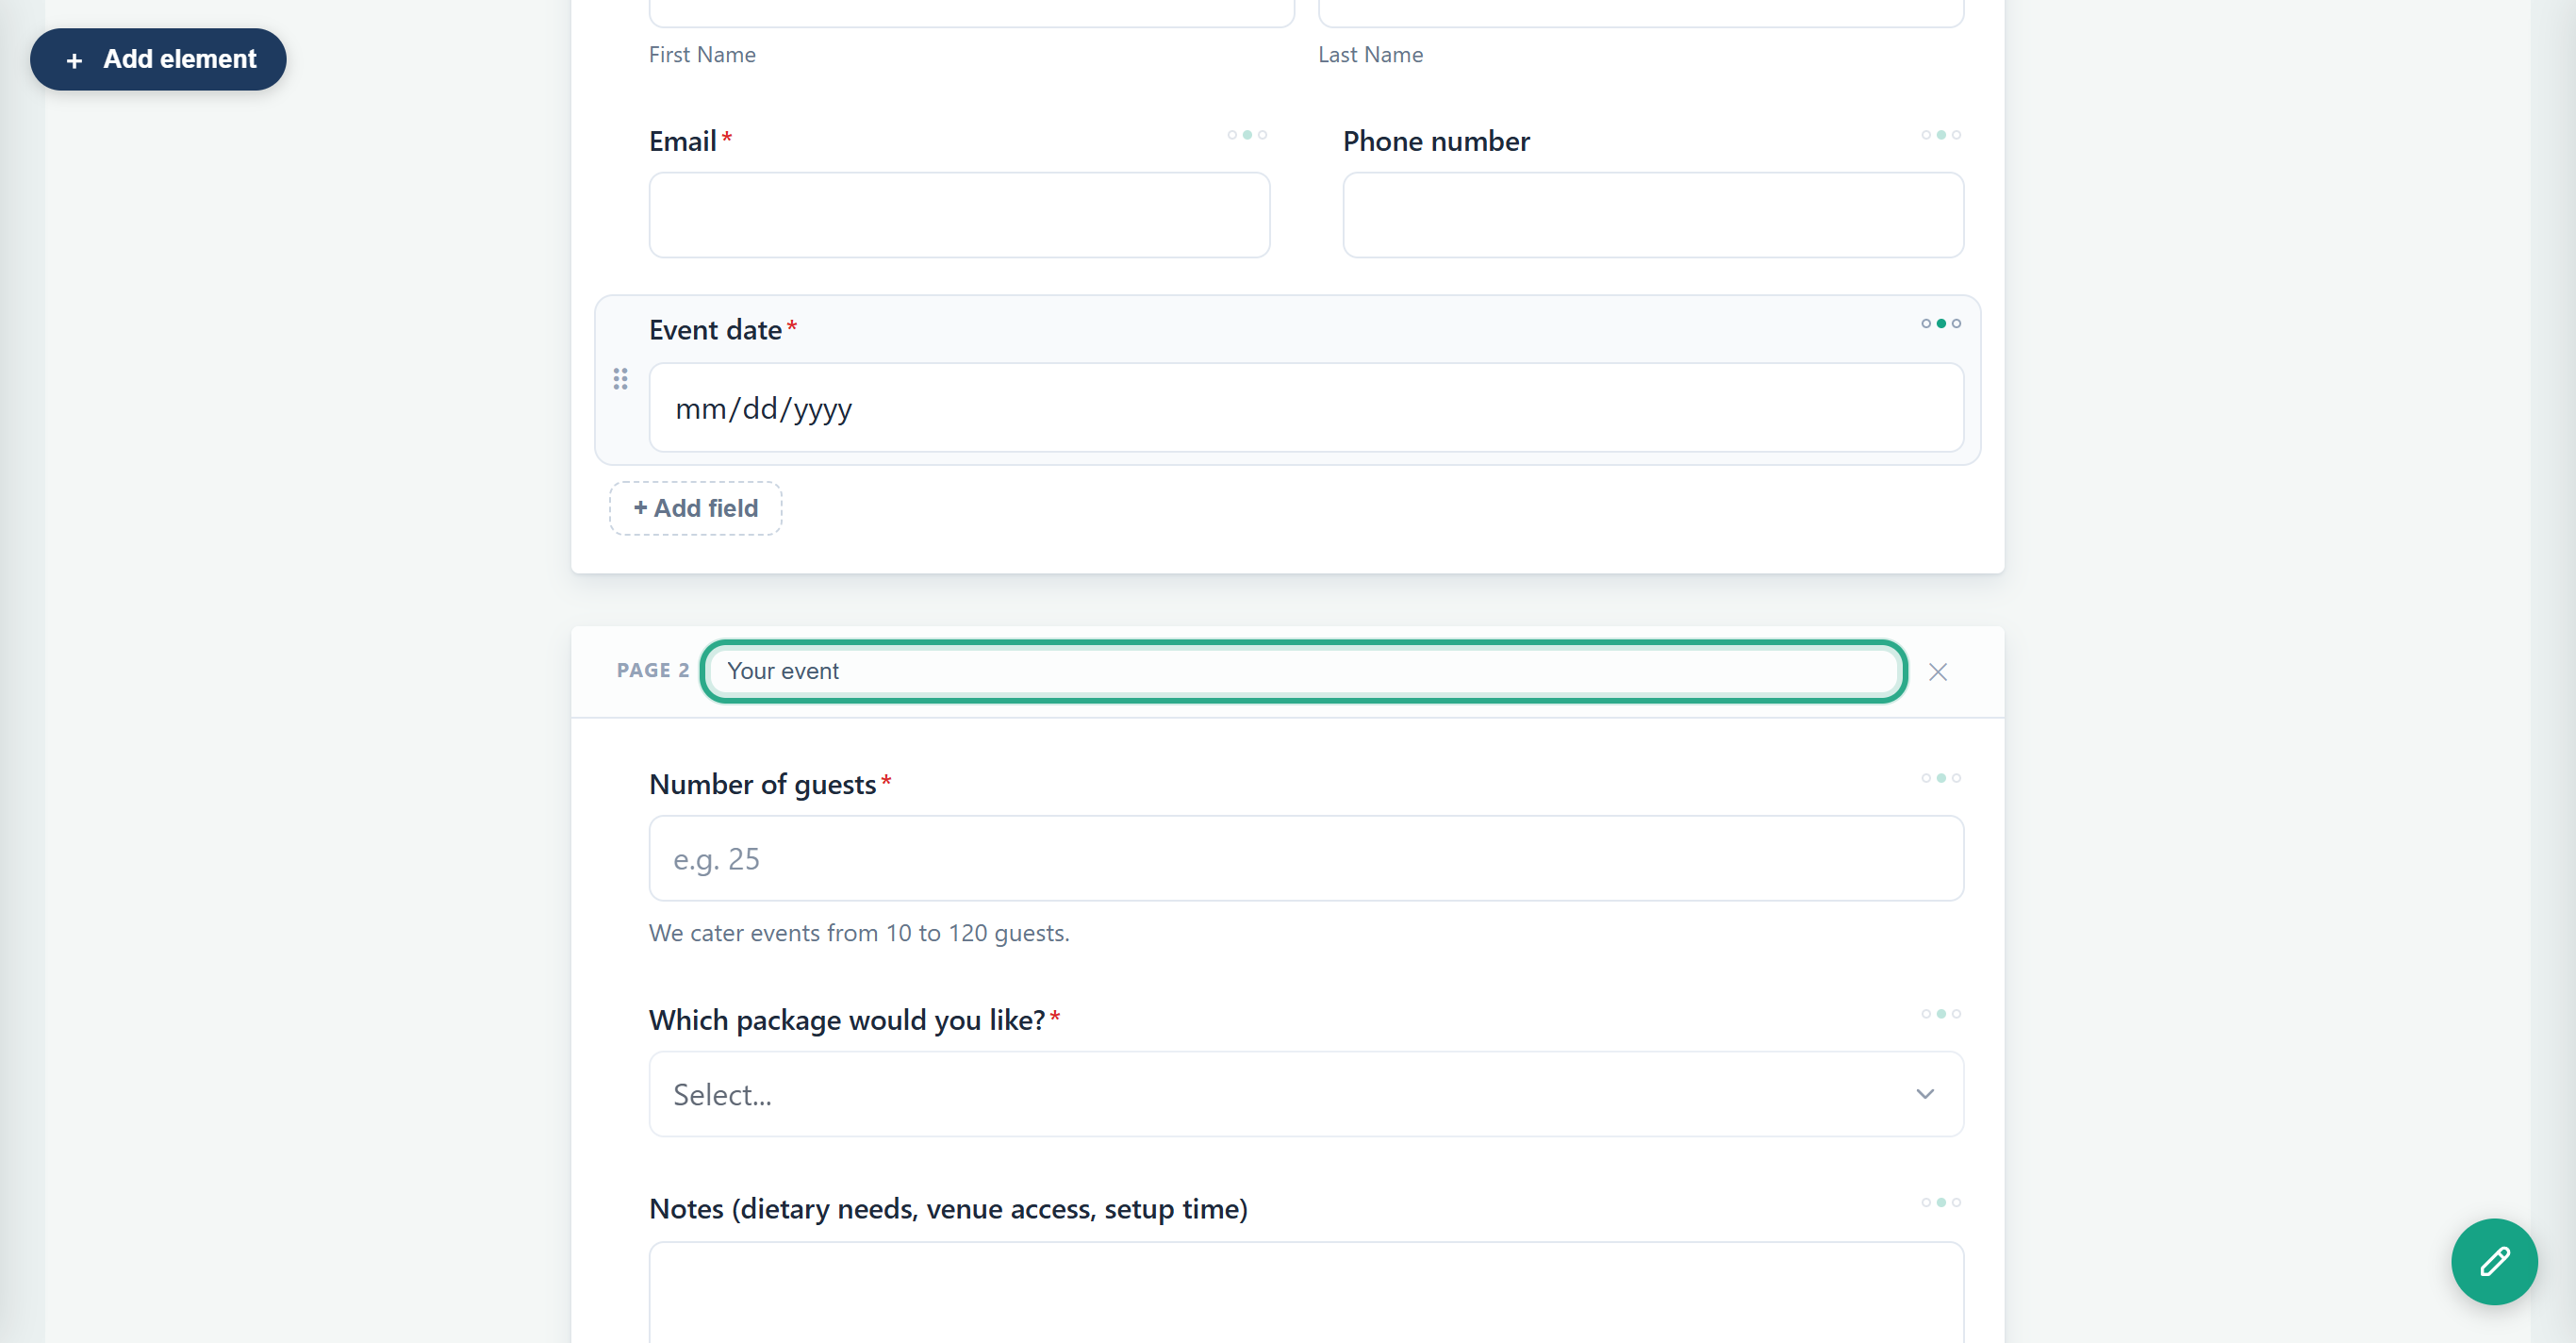 Page titles help people see where they are.
To move a field to another page, select it and click ⇄ (Move to page…). The menu lists the other pages as "Page N · title"; click one. The event fields move to Page 2 · Your event one at a time; here Number of guests, Which package would you like? and the notes are already there, and Event date is the last to go.
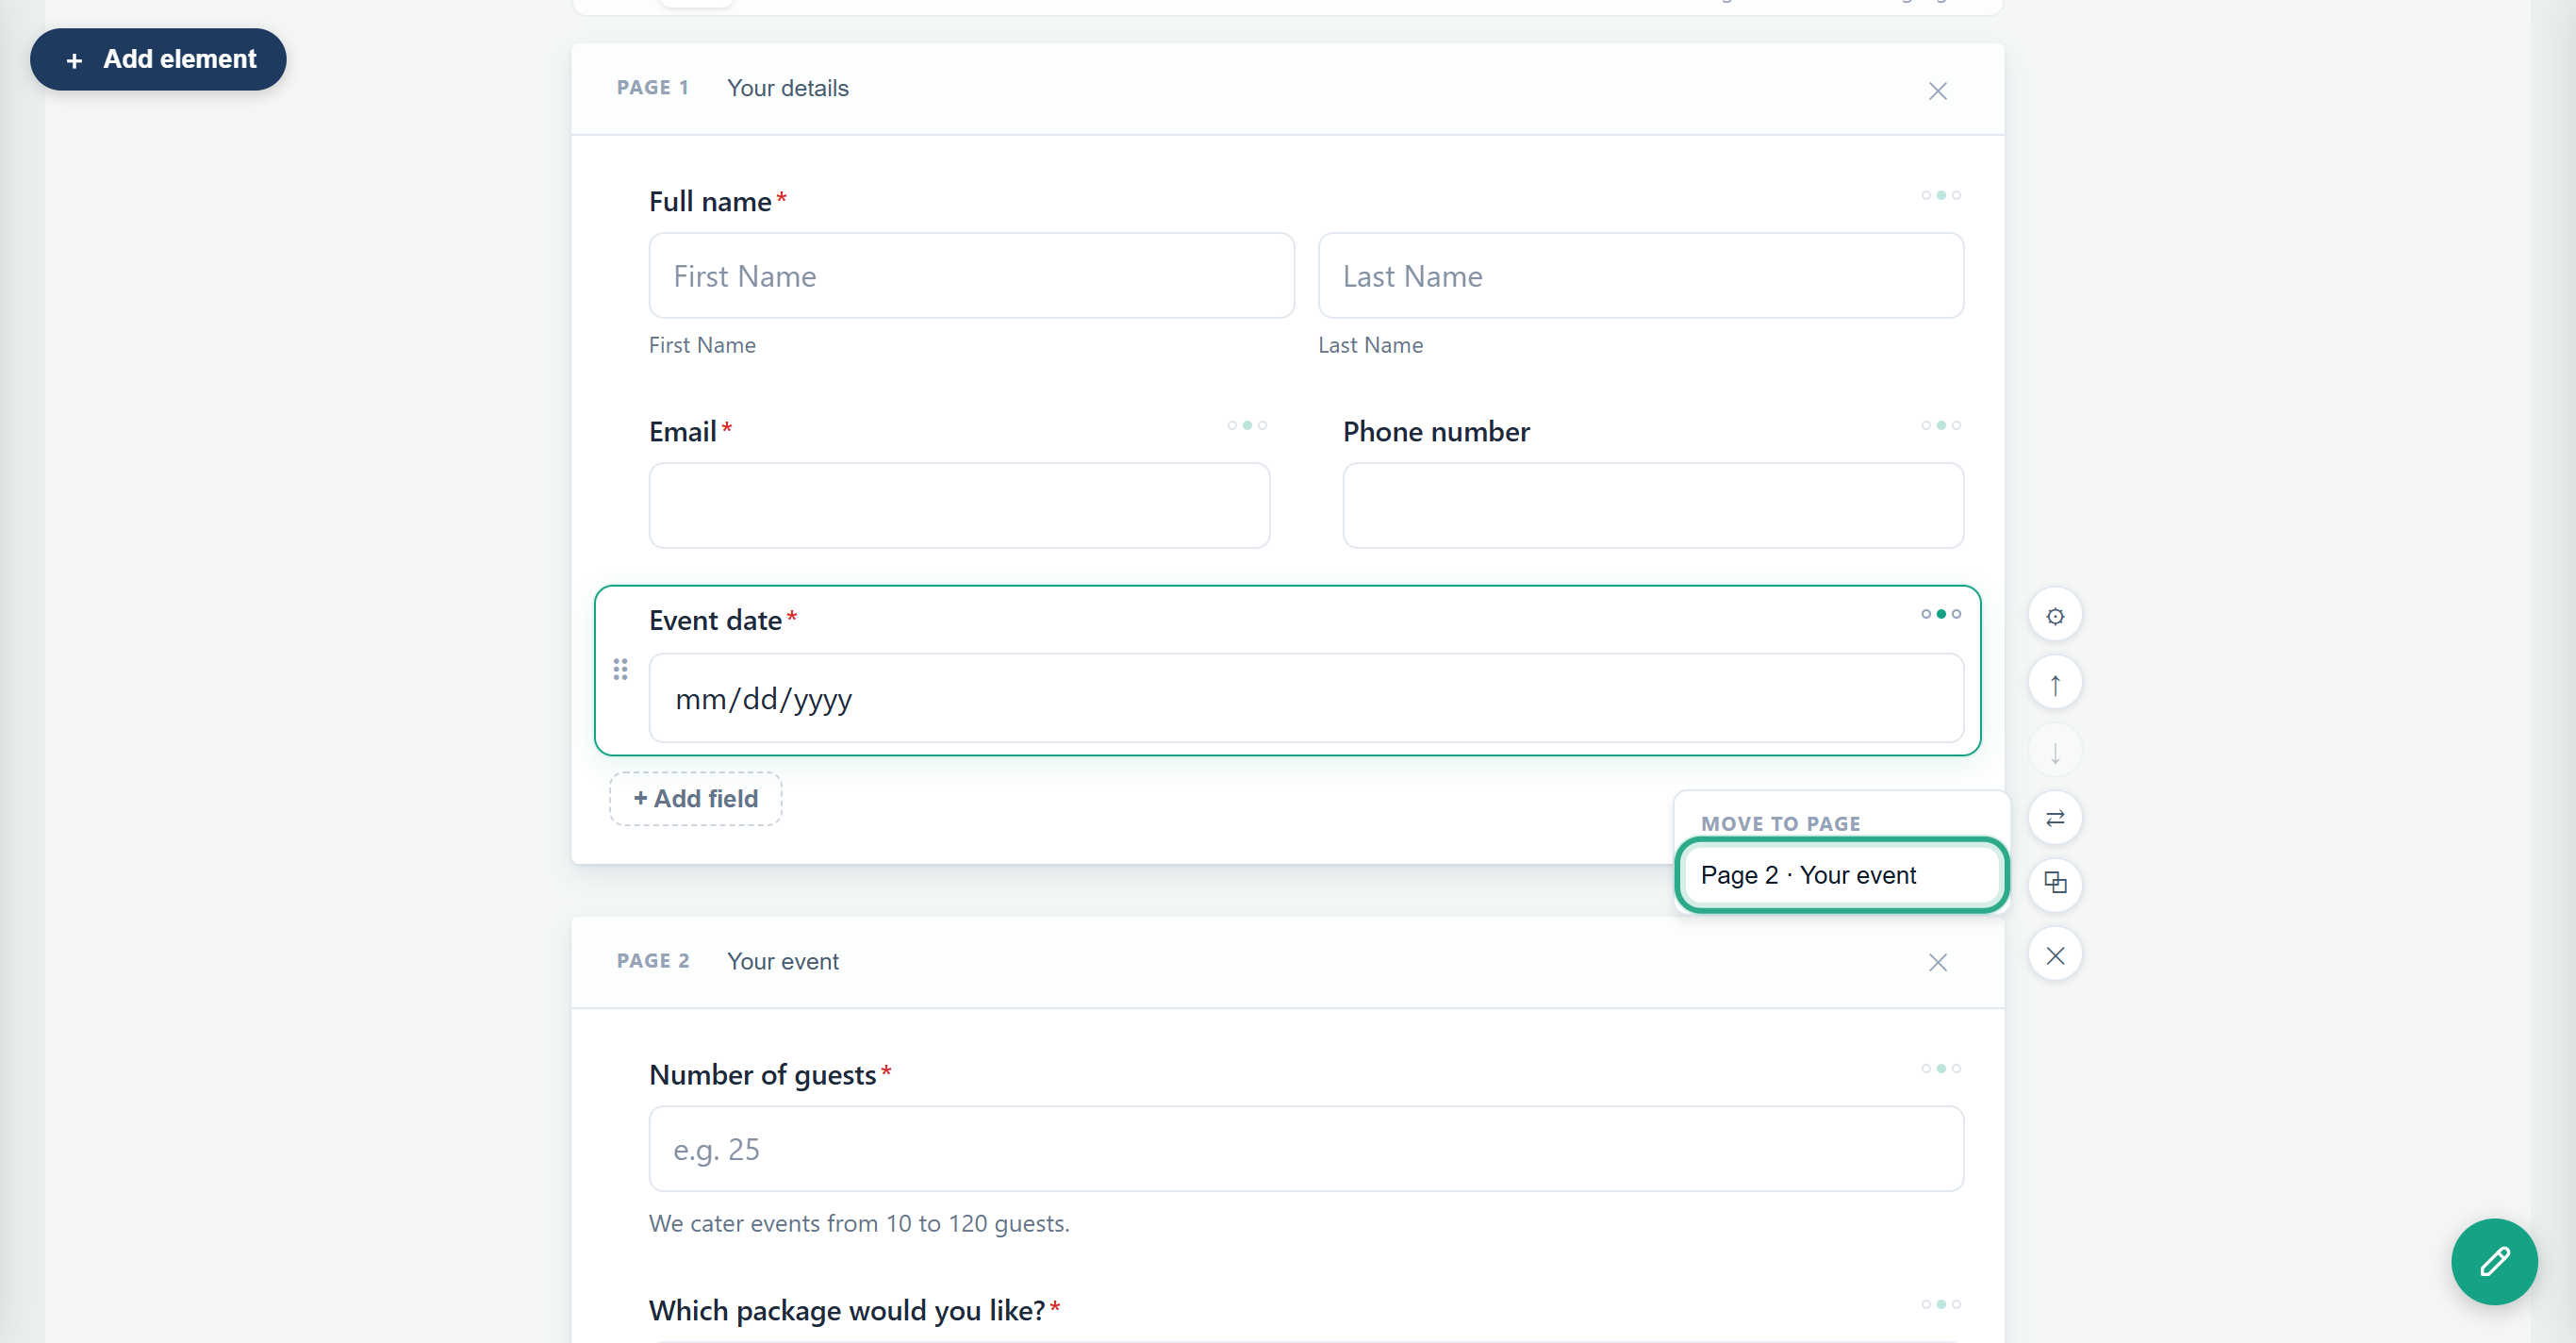 The Move to page menu only appears when the form has more than one page.
Check the new page. Use ↑/↓ to put the moved fields in order if needed.
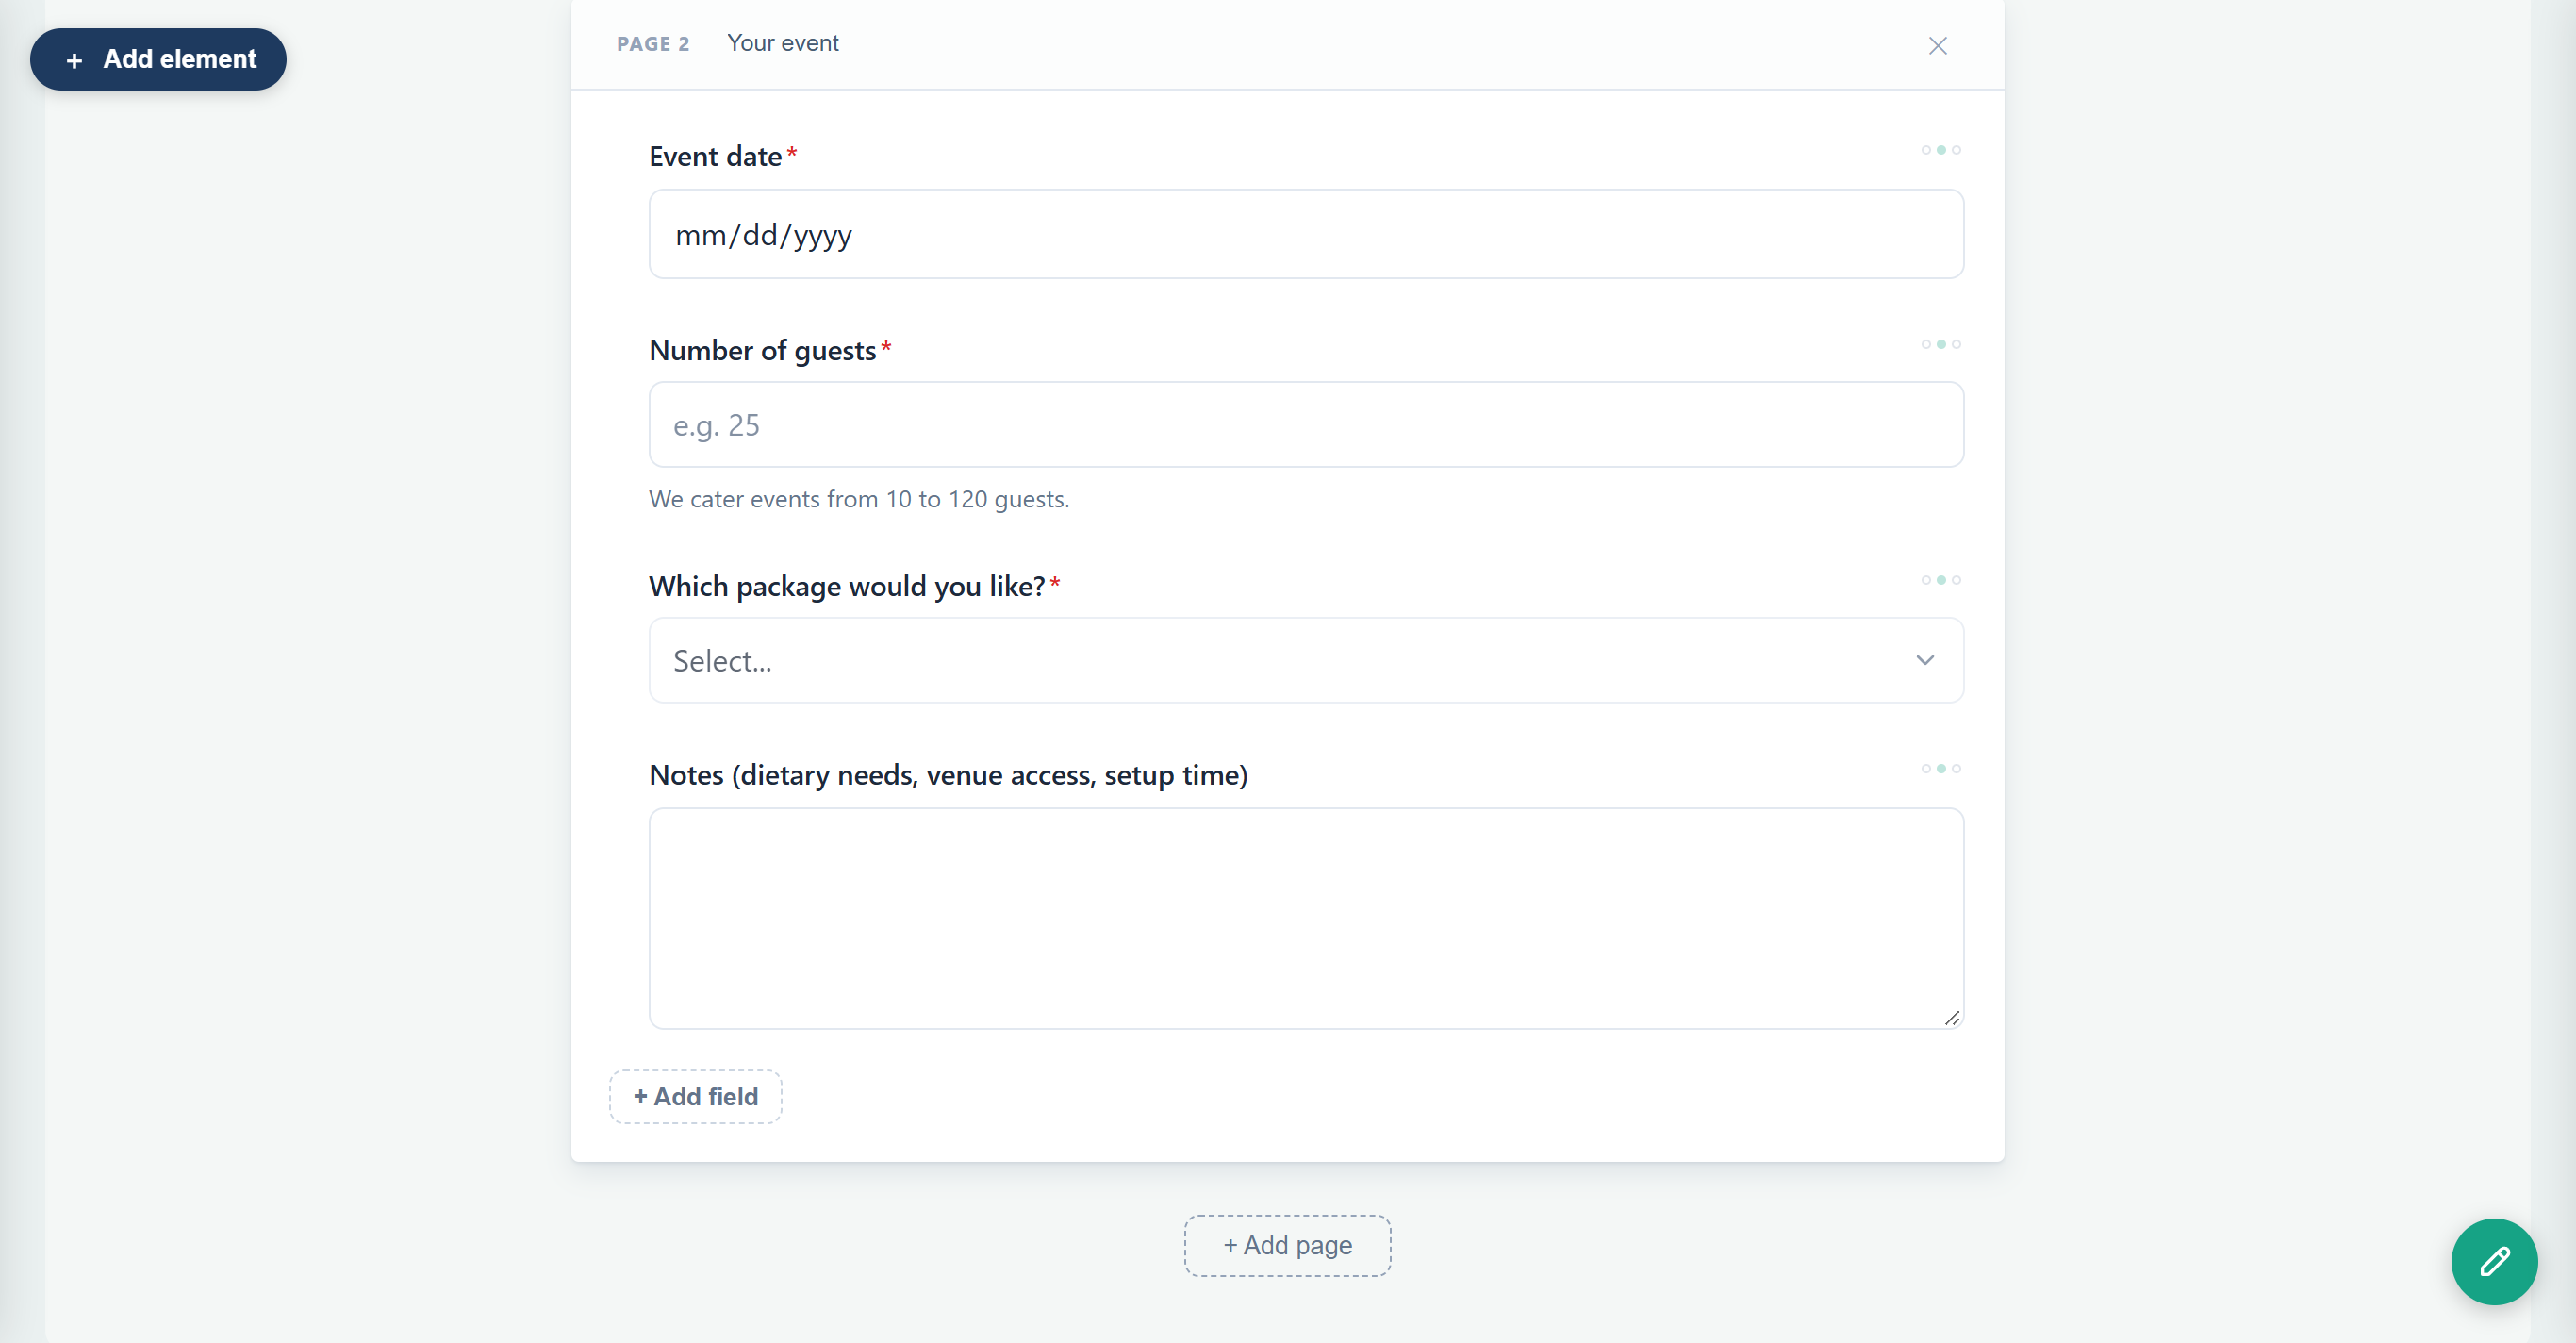 Page 2 now holds the event details.
Result
The form has two pages: contact details first, event details second. To remove a page, click ✕ (Delete page) in its header; this is only offered when the form has more than one page, and it deletes the page's fields too.
Task 7 — Publish, then change a published form
Step-by-step
When the form is ready, click Publish in the top bar. The button then reads Update, a Published status appears next to it, and the editor opens the Publish tab with the form's link (see Publish and share).
 The first publish creates the live form.
You can keep editing a published form on the Build tab. Deleting a field that is already live, deleting a page that holds live fields, or changing a live field's options (removing an option, for example) asks first: This question is already published. The message explains that new responses won't include the change, that responses you already received keep their original answers, and that integrations and webhooks using the question will see the change. Click Cancel to leave the field as it is, or Delete anyway (Change anyway for options) to go ahead. Renaming a field or an option doesn't ask.
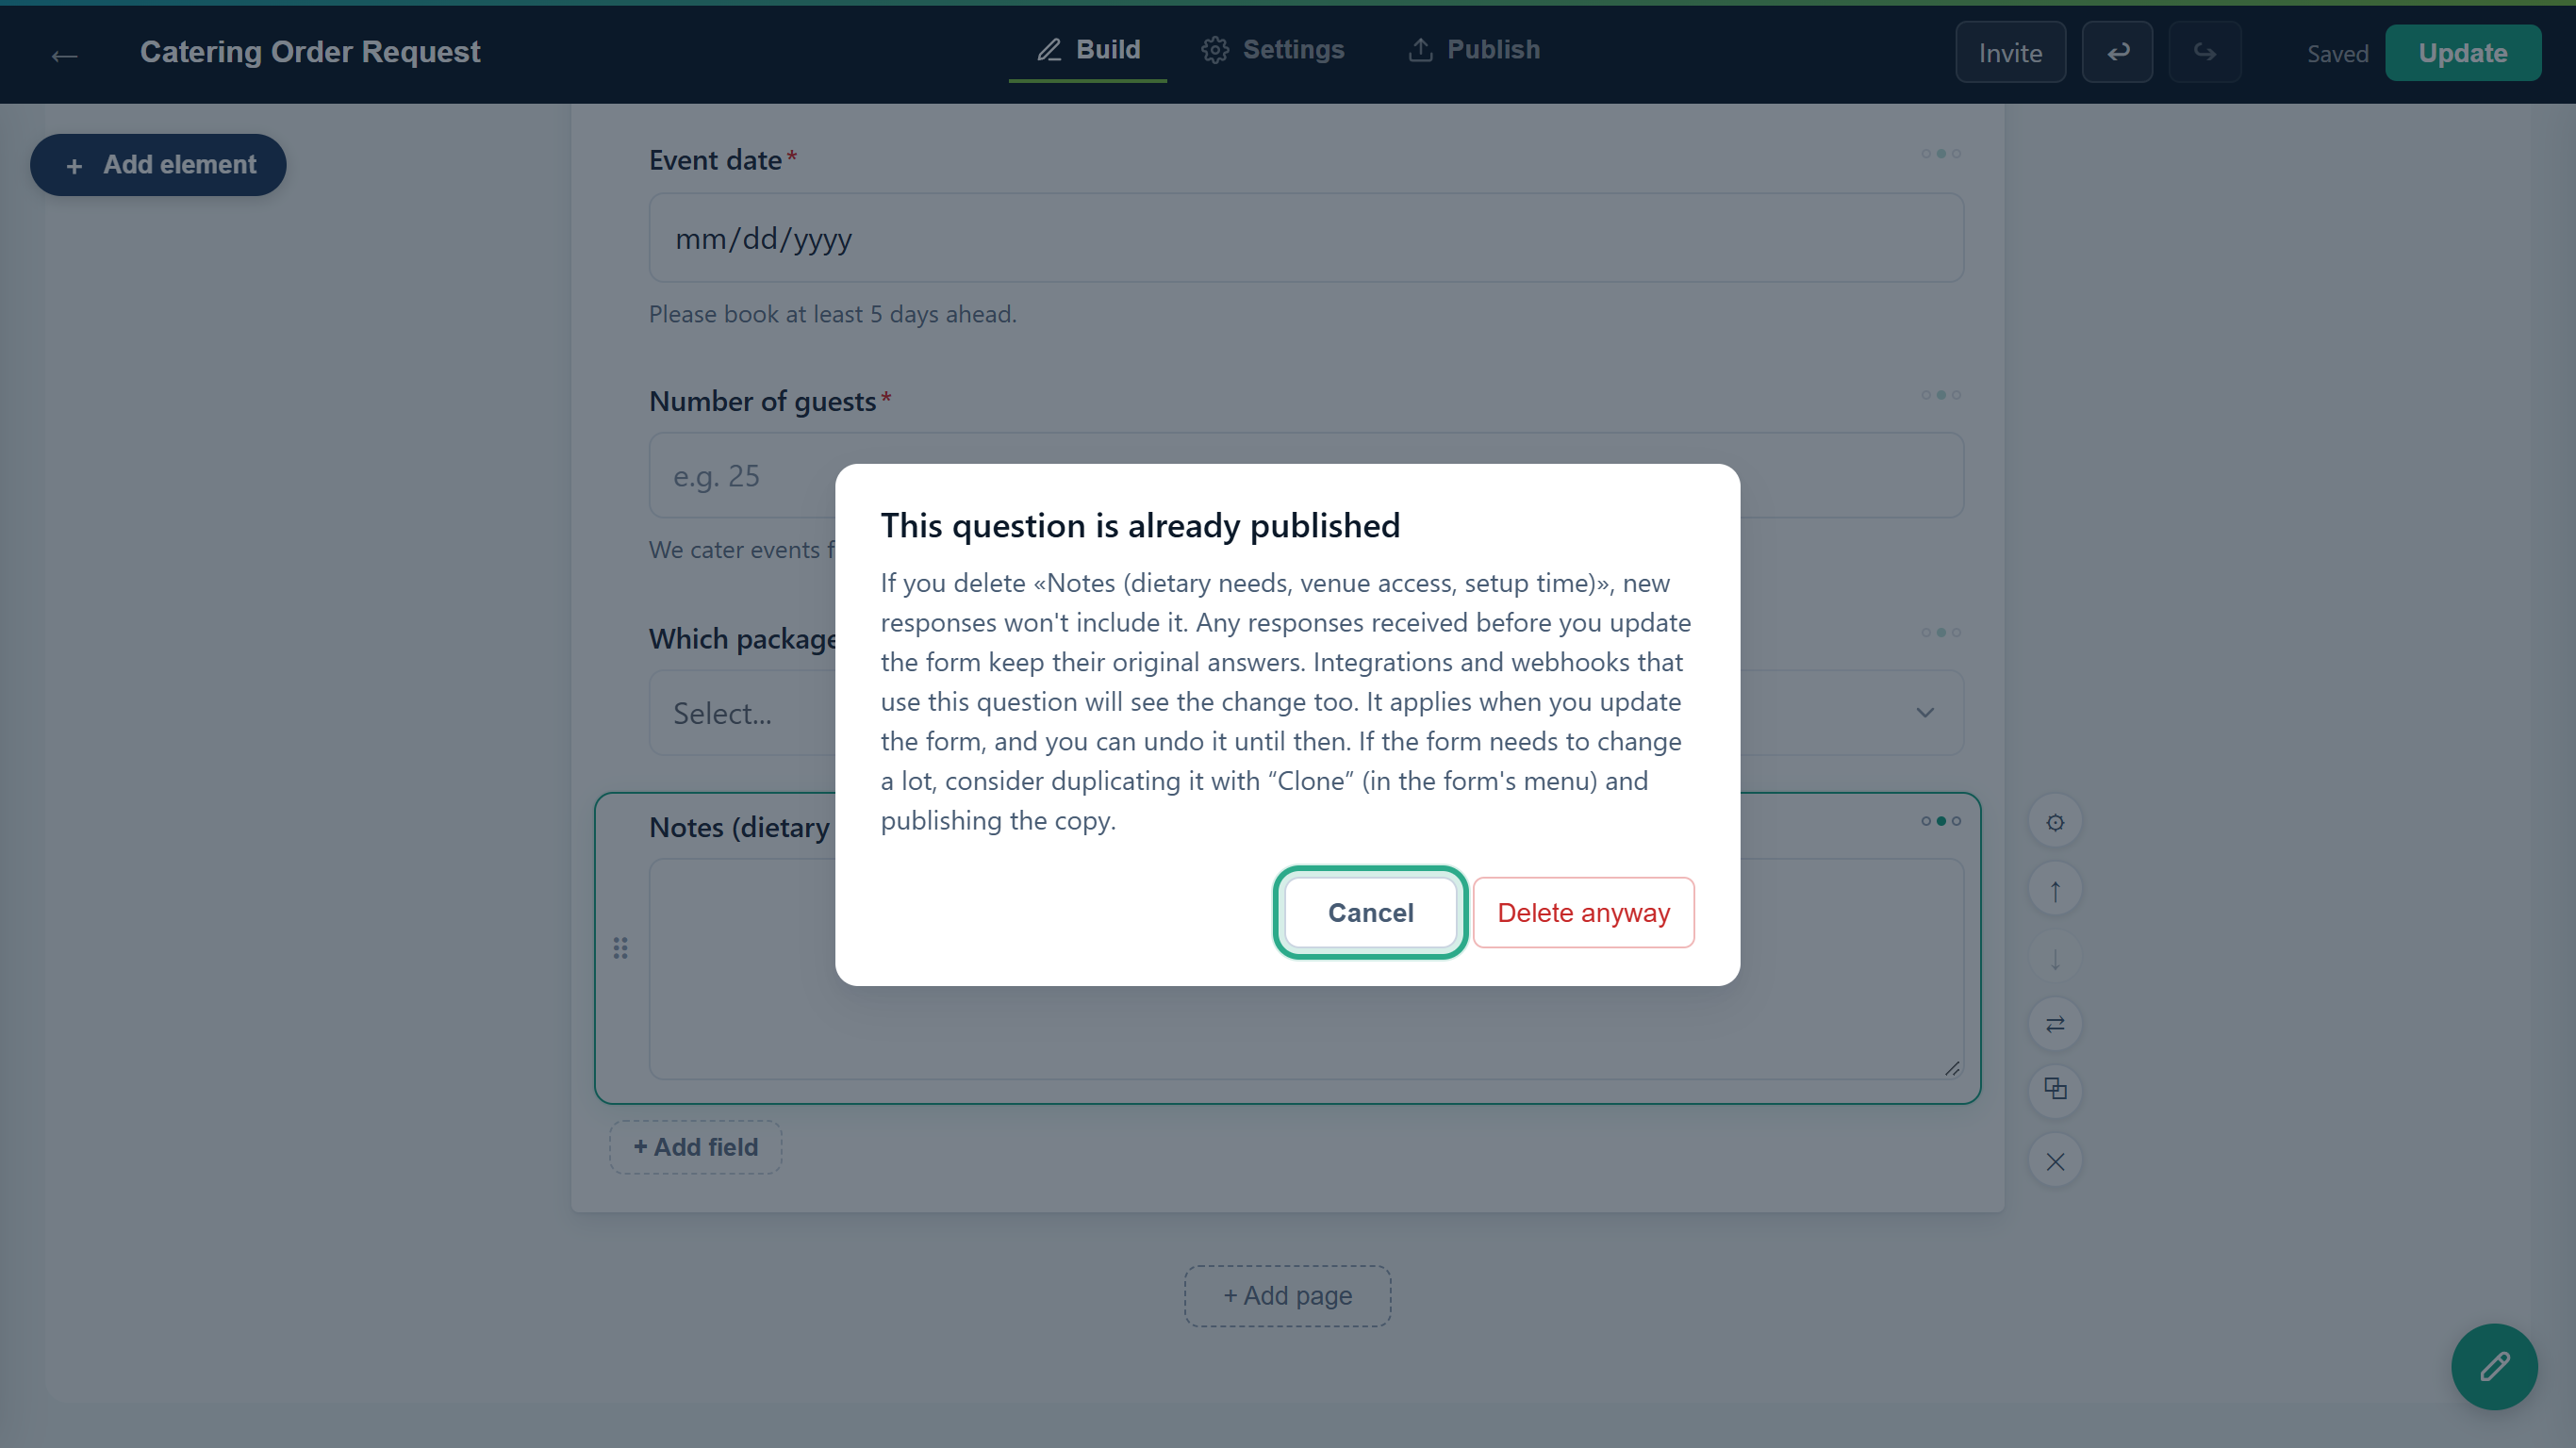 The warning shown before deleting a published field.
Changes to a published form stay in the draft until you push them live. Make your change (here, the help text Please book at least 5 days ahead. on Event date), wait for Saved and click Update.
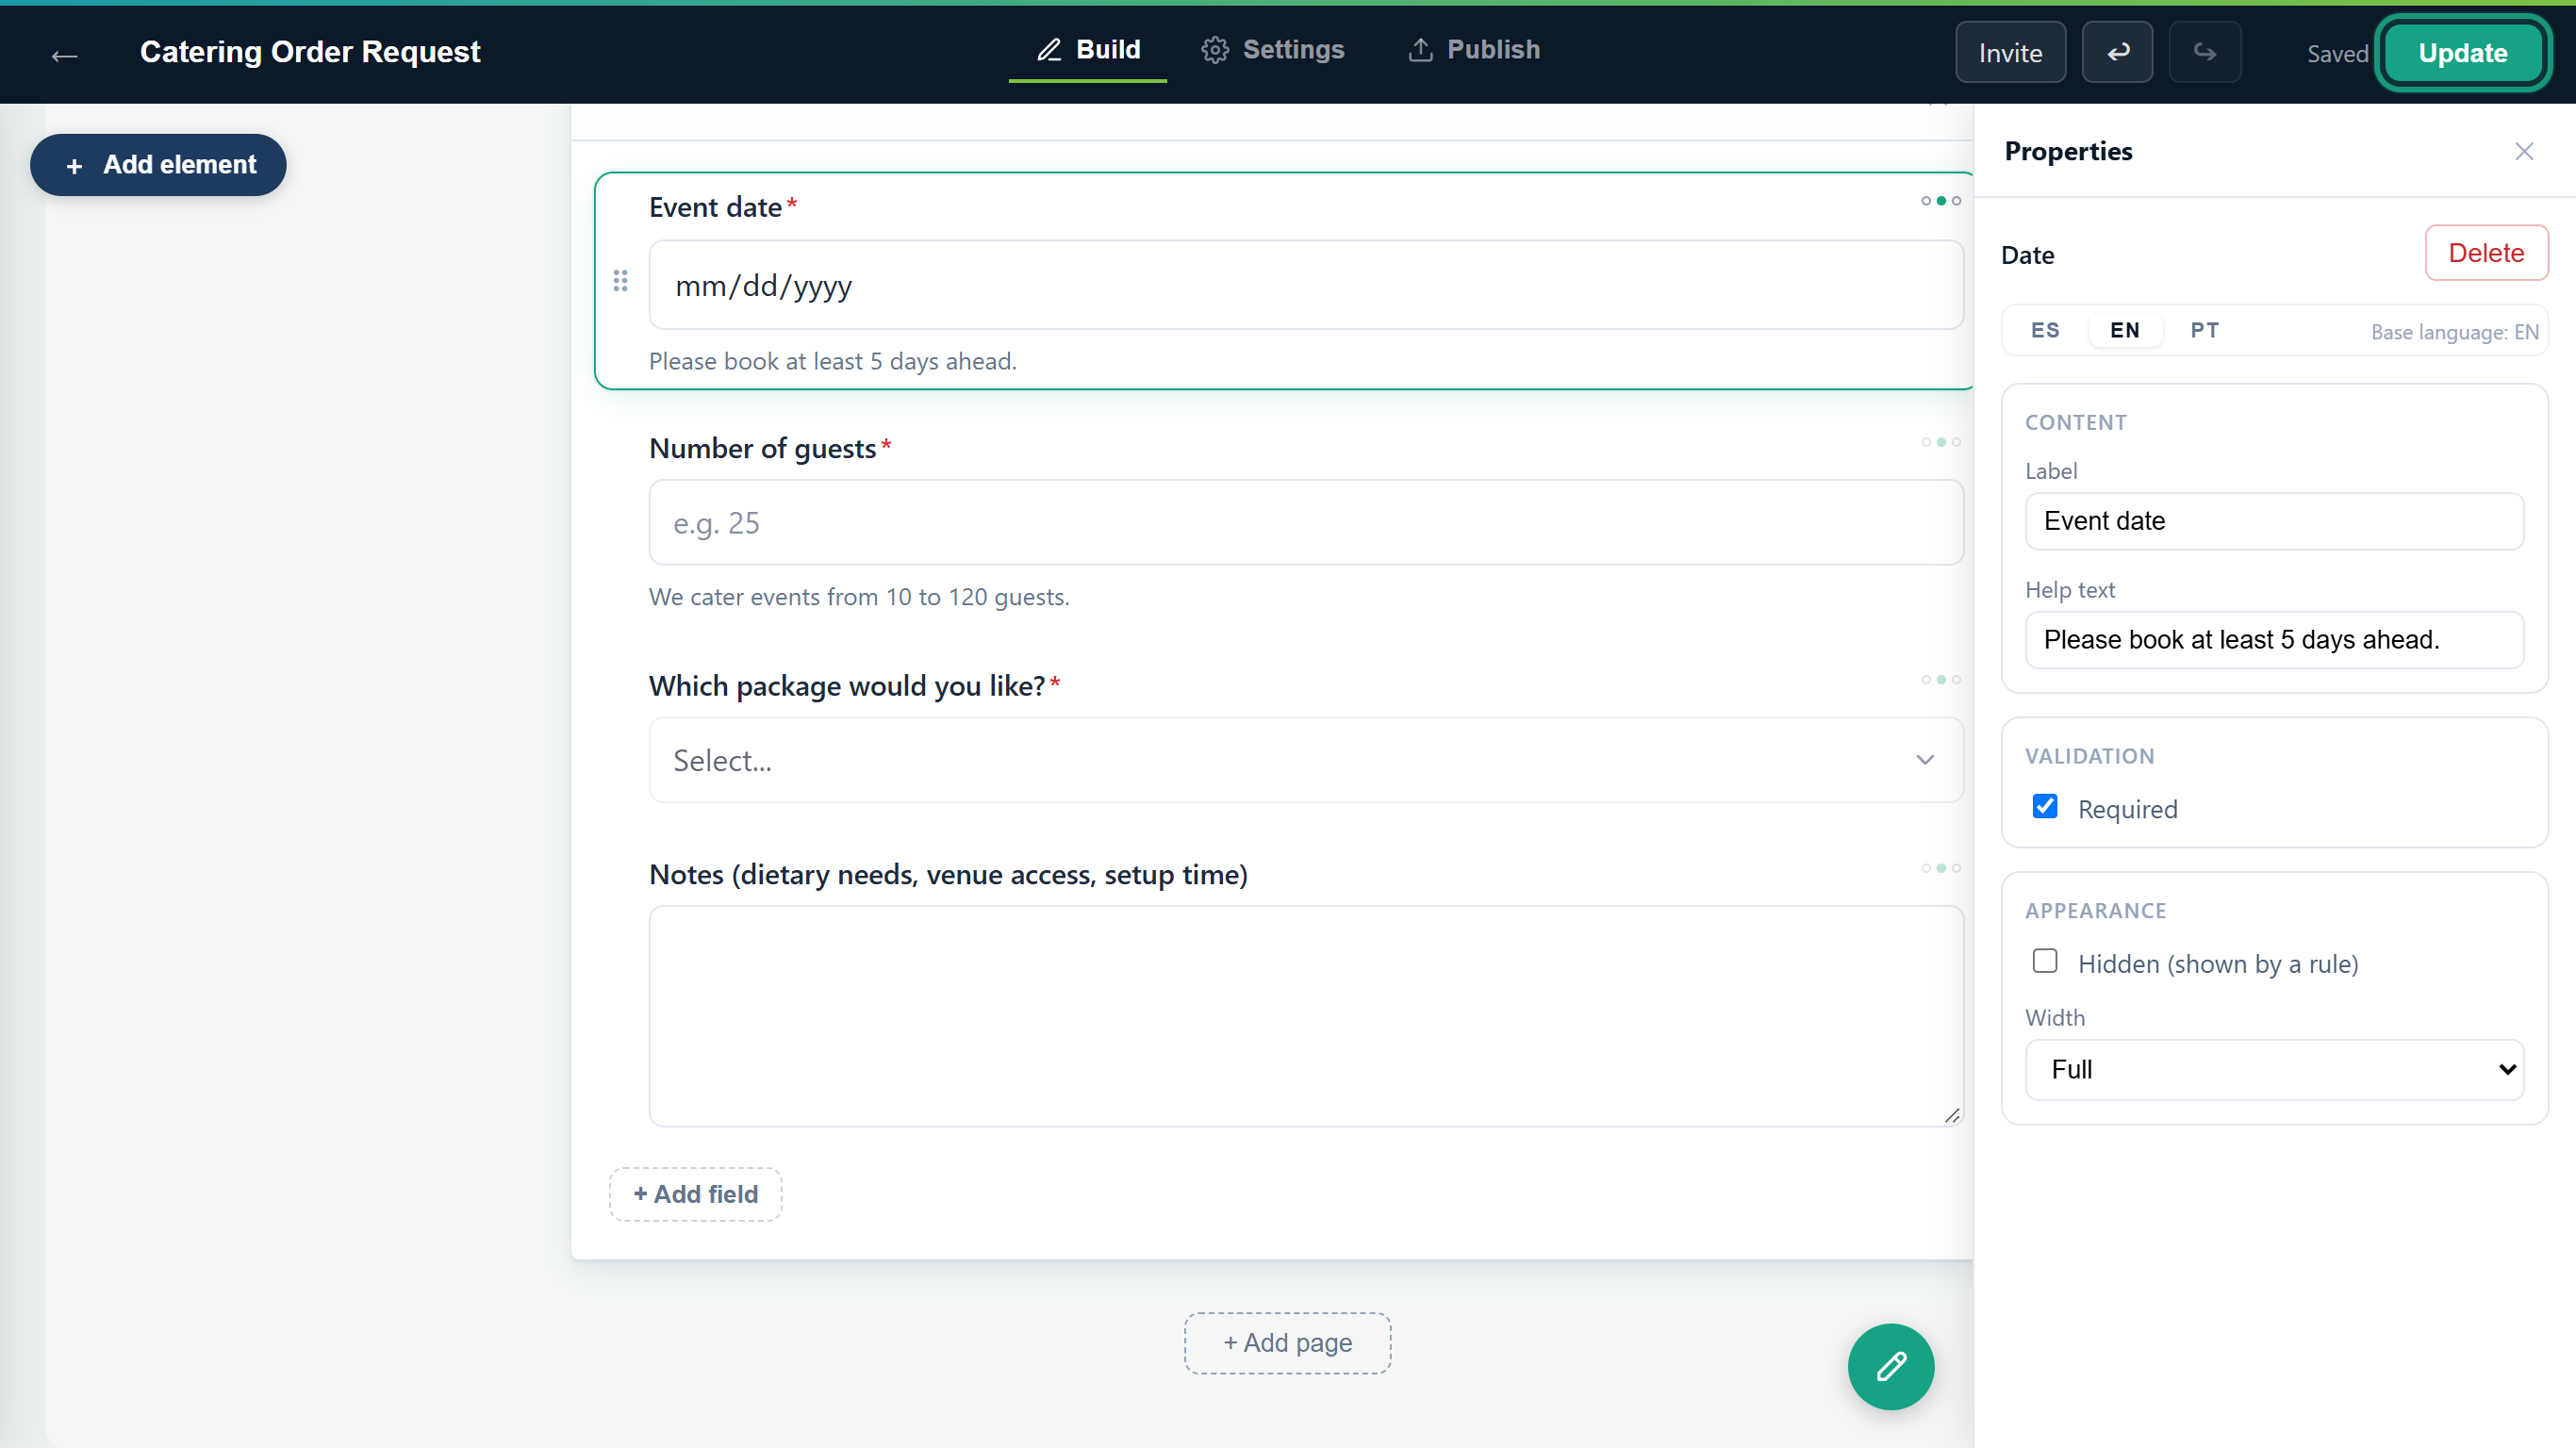 Nothing changes on the live form until you click Update.
The editor switches to the Publish tab and the status reads Published.
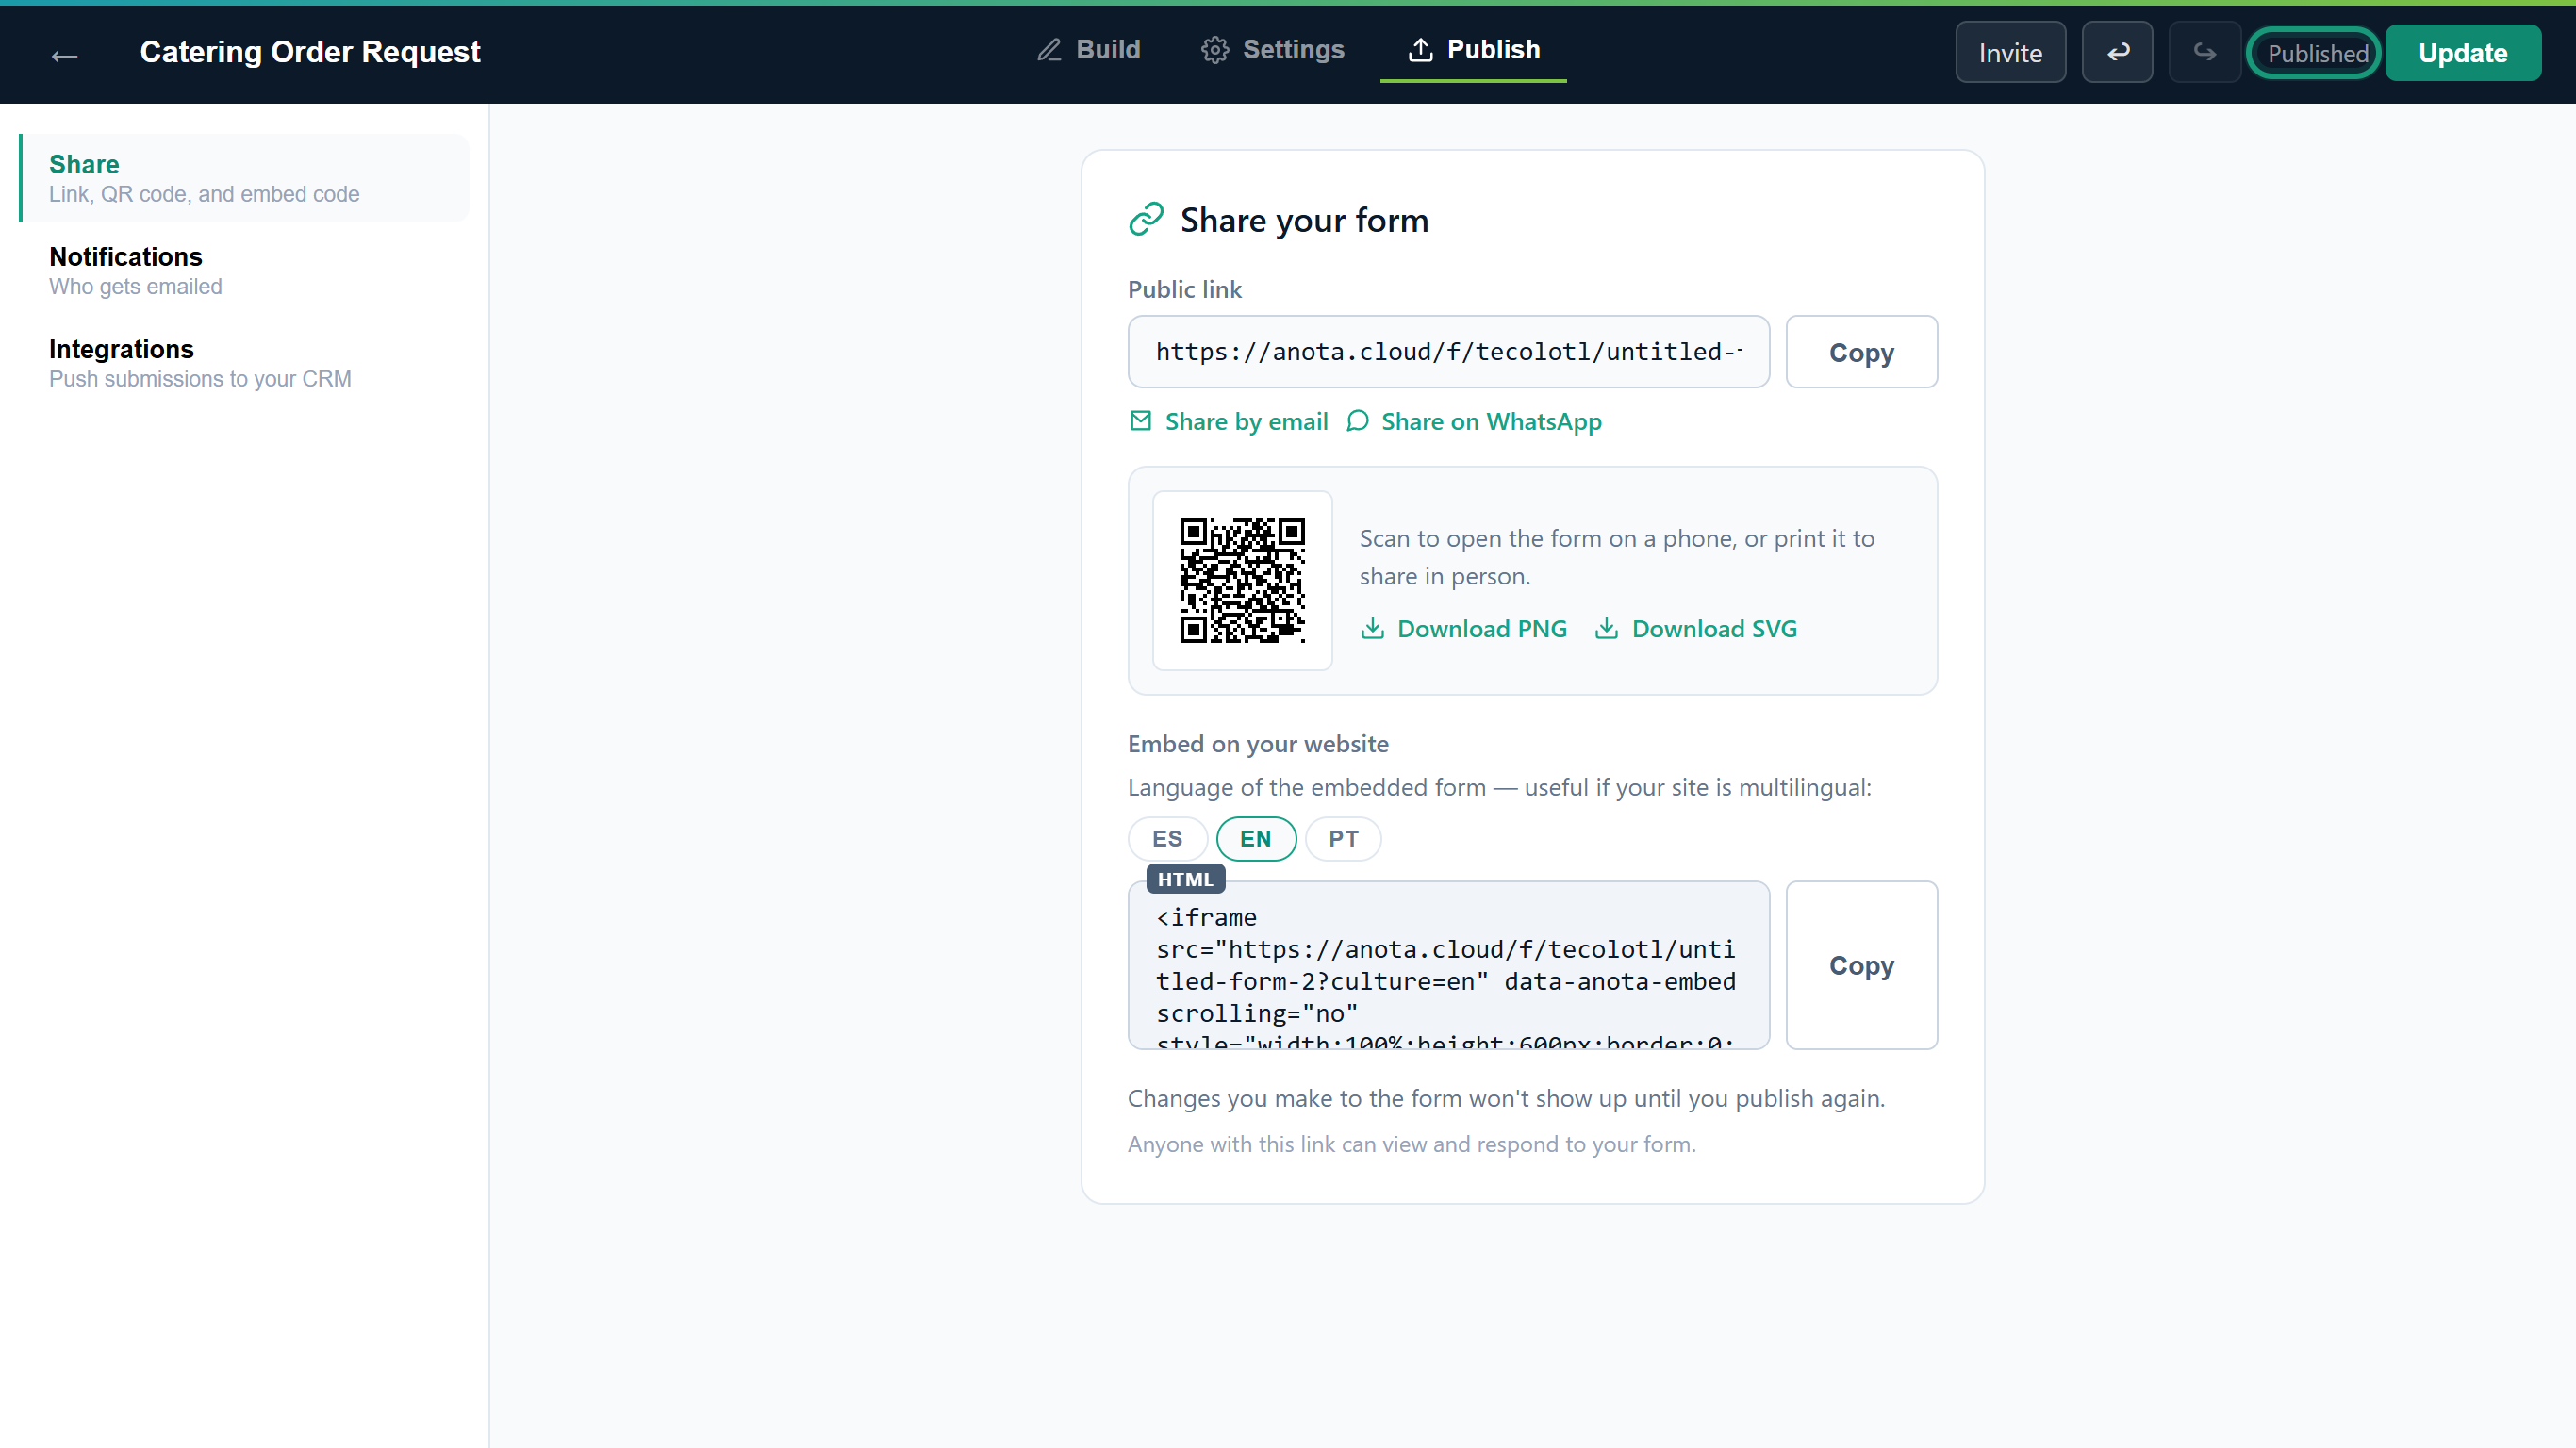 The live form now has your change. Existing submissions are kept.
Result
The public form shows the latest version. Every response is stored with the version of the form it was submitted with, so older responses keep their original questions. If a form needs big changes, consider cloning it (Clone in the form's ⋯ menu on Forms) and publishing the copy.
Changes made through the API or by Claude (MCP) follow a stricter rule: once a form has been published, existing fields can no longer be edited or deleted there, only new fields can be added. See Connect Claude and ChatGPT (MCP).
Laying out fields: the details
- Side by side by dragging: drop a field on the narrow band at the left or right edge of another field (about 40 px, or 15% of the field's width if that is smaller). The drop line turns vertical and the row shares its width equally: two fields become Half, three Third, four Quarter. A row holds at most four fields. Dropping anywhere else puts the field on its own row, and a field that leaves a shared row goes back to Full width.
- On a phone (screens up to 640 px wide), rows are shown stacked, one field per line, side-by-side drops are turned off, and the field actions sit inside the selected field.
- Card forms: these steps describe a Classic form. A Card form shows one card at a time in the editor instead; see Classic and Card layouts.
- The form's look: the pencil button labelled Design on the right edge of the canvas opens the Designer panel, the only place to set the theme (palette, colors, font, button style and logo). See Theme and appearance.
The Settings tab
- Form settings: Submit button text, Closed-form message, Close on date, Hidden field values and, when Stripe payments are available, Collect payment with Stripe on submit. See Theme and appearance and Products, orders and Stripe payments.
- Conditions: Conditional logic rules, with a counter showing how many rules the form has. See Conditional logic.
- Thank you page: the Thank-you message people see after submitting.
The Publish tab
Before the first publication, the Publish tab only shows a Publish button. Once the form is published, it has three sections:
- Share: link, QR code and embed code. See Publish and share.
- Notifications: who gets emailed about new submissions. See Email notifications.
- Integrations: send submissions to your CRM or another system. See Developers and API.
The PDF layout (one of 9 Templates) isn't set in the editor: choose it in the Submissions inbox detail view with the PDF layout button next to Download PDF (Editor and above). See Export to PDF.
Form states
| State | Description | Can it be reversed? |
|---|---|---|
| Draft | The form has never been published and has no public page. | You can keep editing it freely. |
| Published | A live public version exists. | Click Update to push new changes to the public version. |
| Disabled | The public page still loads but shows the closed-form message (default "This form is no longer accepting responses.") instead of the form. | Yes: choose Enable in the form's menu. |
| Archived | The form leaves the active list; its data is kept. | Yes: choose Restore on the Archived tab. A restored form returns as a draft. |
| Trash | The form is deleted but recoverable. | Yes: choose Restore on the Trash tab. |
The Disable/Enable, Archive, Clone, Rename and Move to trash actions are in each form's ⋯ menu on the Forms page.
Roles and permissions
| Role | Open the editor | Edit and publish forms |
|---|---|---|
| Owner | Yes | Yes |
| Admin | Yes | Yes |
| Editor | Yes | Yes |
| Viewer | No | No |
Troubleshooting
| Symptom | Likely cause | Resolution |
|---|---|---|
| Opening the editor shows an access denied page. | Your role is Viewer. | Ask an administrator to change your role to Editor or above. |
| My changes don't show on the public form. | Changes stay in the draft until you publish them. | Click Update in the top bar. |
| The status shows "Save failed — retrying". | The draft couldn't be saved, for example because the connection dropped. | Wait: anota retries on its own. If you click Update before it saves, you'll see "Not published: your latest changes could not be saved" and nothing is published. |
| "This form was edited somewhere else." | Someone else saved the same form after you opened it. | Click Reload the latest version, then repeat your change. |
| "This form was moved to trash and can no longer be edited." | The form was moved to trash while you had it open. | Restore it from the Trash tab on Forms, then open it again. |
| I deleted a field by mistake. | — | Click ↩ Undo in the top bar. On a published form the deletion only reaches the public form when you click Update. |
| Move to page… is missing from the field actions. | The form has only one page. | Add a page with + Add page. |
| Claude or the API can't edit or delete a field. | The form has been published, and published fields are locked for API and MCP changes. | Edit the field in the editor, or ask Claude to add a new field or clone the form. |
| I archived or deleted a form by mistake. | The form is on the Archived or Trash tab. | Open that tab and choose Restore. |
Related features
Was this page helpful?