Multilingual forms
Multilingual forms
Applies to: anota, all plans Roles required: Editor or above to add translations (the form builder is Editor+); Viewer or above to see responses Regulatory references: none
Overview
One anota form can hold its content in Spanish, English and Portuguese at the same time. You type each language's text yourself, on the ES / EN / PT tabs in the form builder, and visitors choose their language with a switcher at the top of the public form. You collect answers from people who speak different languages with one form and one set of responses.
This page follows one example from start to finish. Café Aurora wrote its Customer Feedback Survey in English and adds Spanish for its Spanish-speaking customers. A visitor fills it in in Spanish, and the team finds the response, and its language, in Submissions.
Key concepts
- Base language: the language the form's own texts are in, usually the one it was written in. It's shown as Base language: EN (or ES, PT) next to every set of language tabs. anota sets it when the form is created, and you can change it later in Settings > Form settings (Task 2). A blank form takes the language your anota interface is in at that moment. A form made from a template takes the template's language. A copy of a form keeps the original's base language.
- Language tabs (ES / EN / PT): choose which language you're editing. On the base-language tab you edit the original text. On the other tabs you type the translation; until you do, each box shows the base-language text in grey.
- Fallback: any text you don't translate is shown in the base language. A visitor who picks Spanish sees your Spanish text where there is some, and your base-language text everywhere else.
- anota's own texts: buttons such as Next and Back, the default submit button and thank-you texts, validation messages and the Powered by anota footer are written by anota. They always follow the visitor's language, whether or not you translated your own texts.
- Translation markers: three small dots at the top right of every field on the canvas, one per language, in the order ES, EN, PT. A filled dot means that language has text for the field.
- No automatic translation: anota doesn't translate for you. Visitors see only what you typed for their language.
Task 1 — See the form's base language
Prerequisites
- A role of Editor or above in the workspace (see Roles and permissions).
- The form open in the form editor.
Step-by-step
On the Build tab, click any field to select it. At the top of Properties, next to the ES, EN and PT tabs, you see Base language: and the form's base language. The tab of the base language is selected when the panel opens.
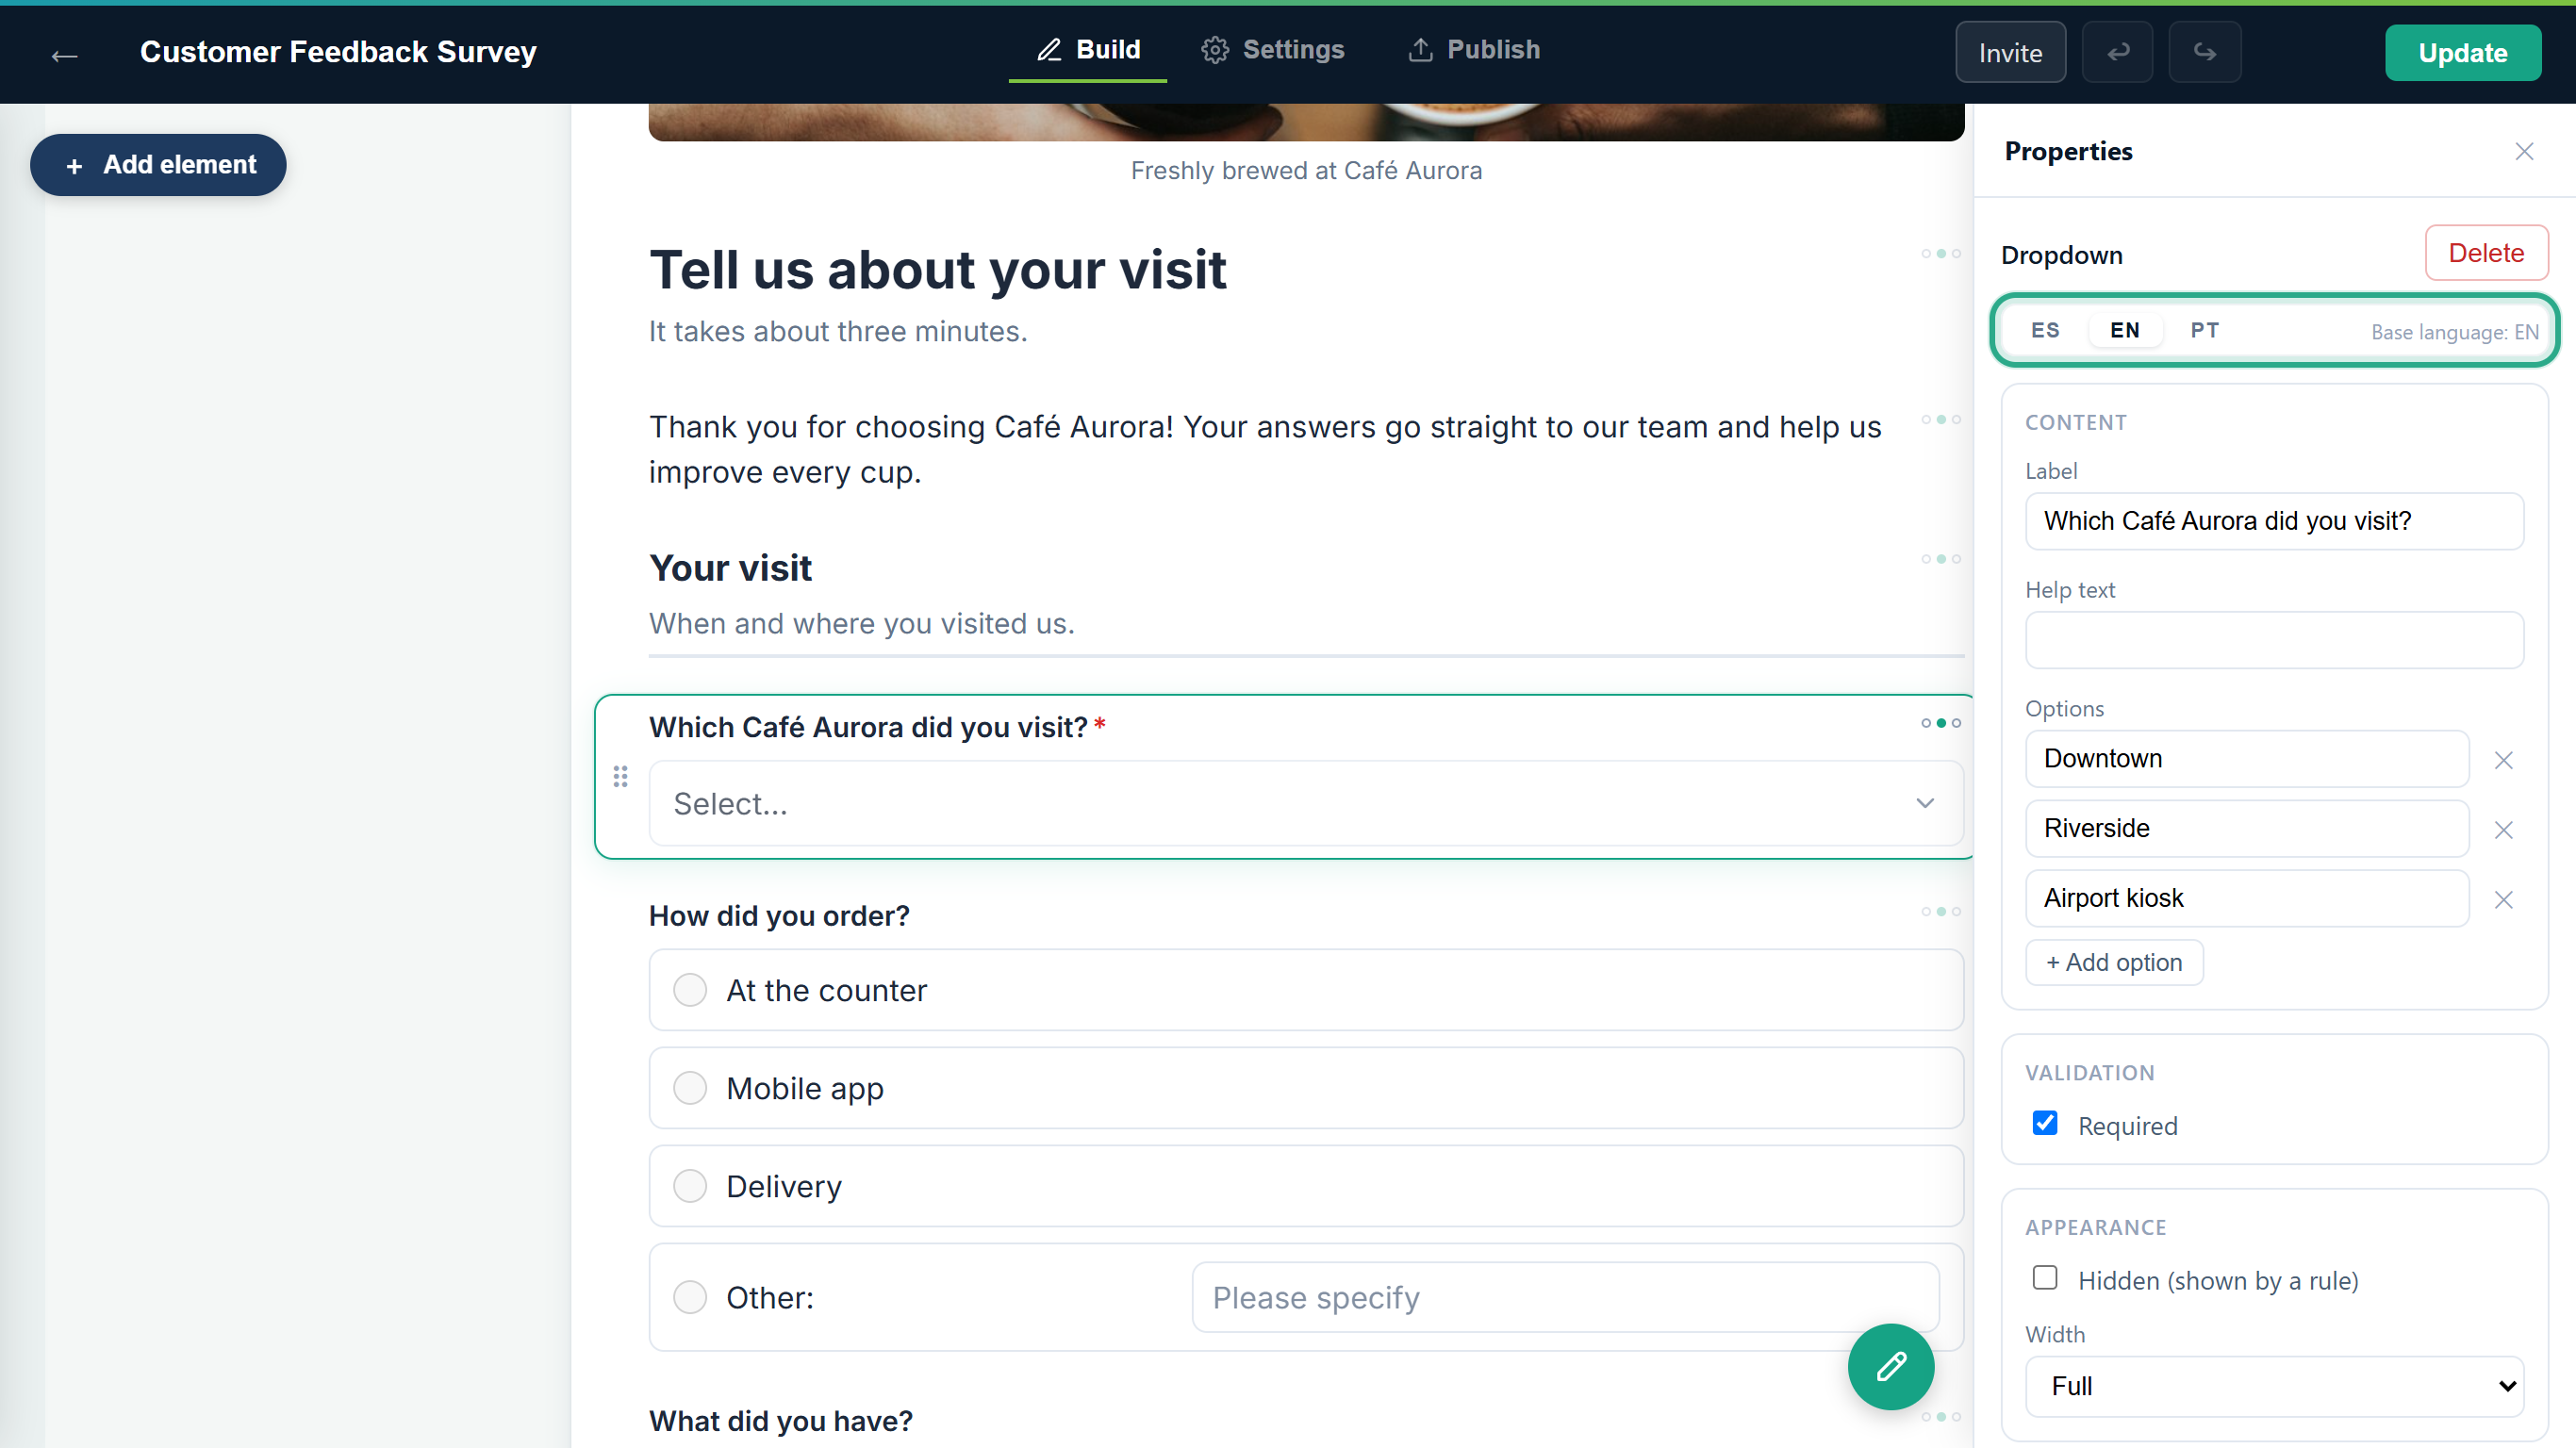 The Customer Feedback Survey was written in English, so its base language is EN.
Result
You know which language your texts are in now. Every other language is a translation of it.
Task 2 — Change the base language
Change the base language when a form written in one language should become a form in another, for example when most of your visitors turn out to speak Spanish. anota doesn't translate anything: the texts you already translated into the new language become the base texts, and your current base texts are kept as the translation of the old language. Texts that have no translation in the new language stay as they are.
Prerequisites
- A role of Editor or above in the workspace.
- Texts in the new language. In this example, the Customer Feedback Survey already has the Spanish texts added in Tasks 3 to 5, and many questions still have only English.
Step-by-step
Open the Settings tab and click Form settings. Base language is at the top, with the form's current base language selected and a Change button.
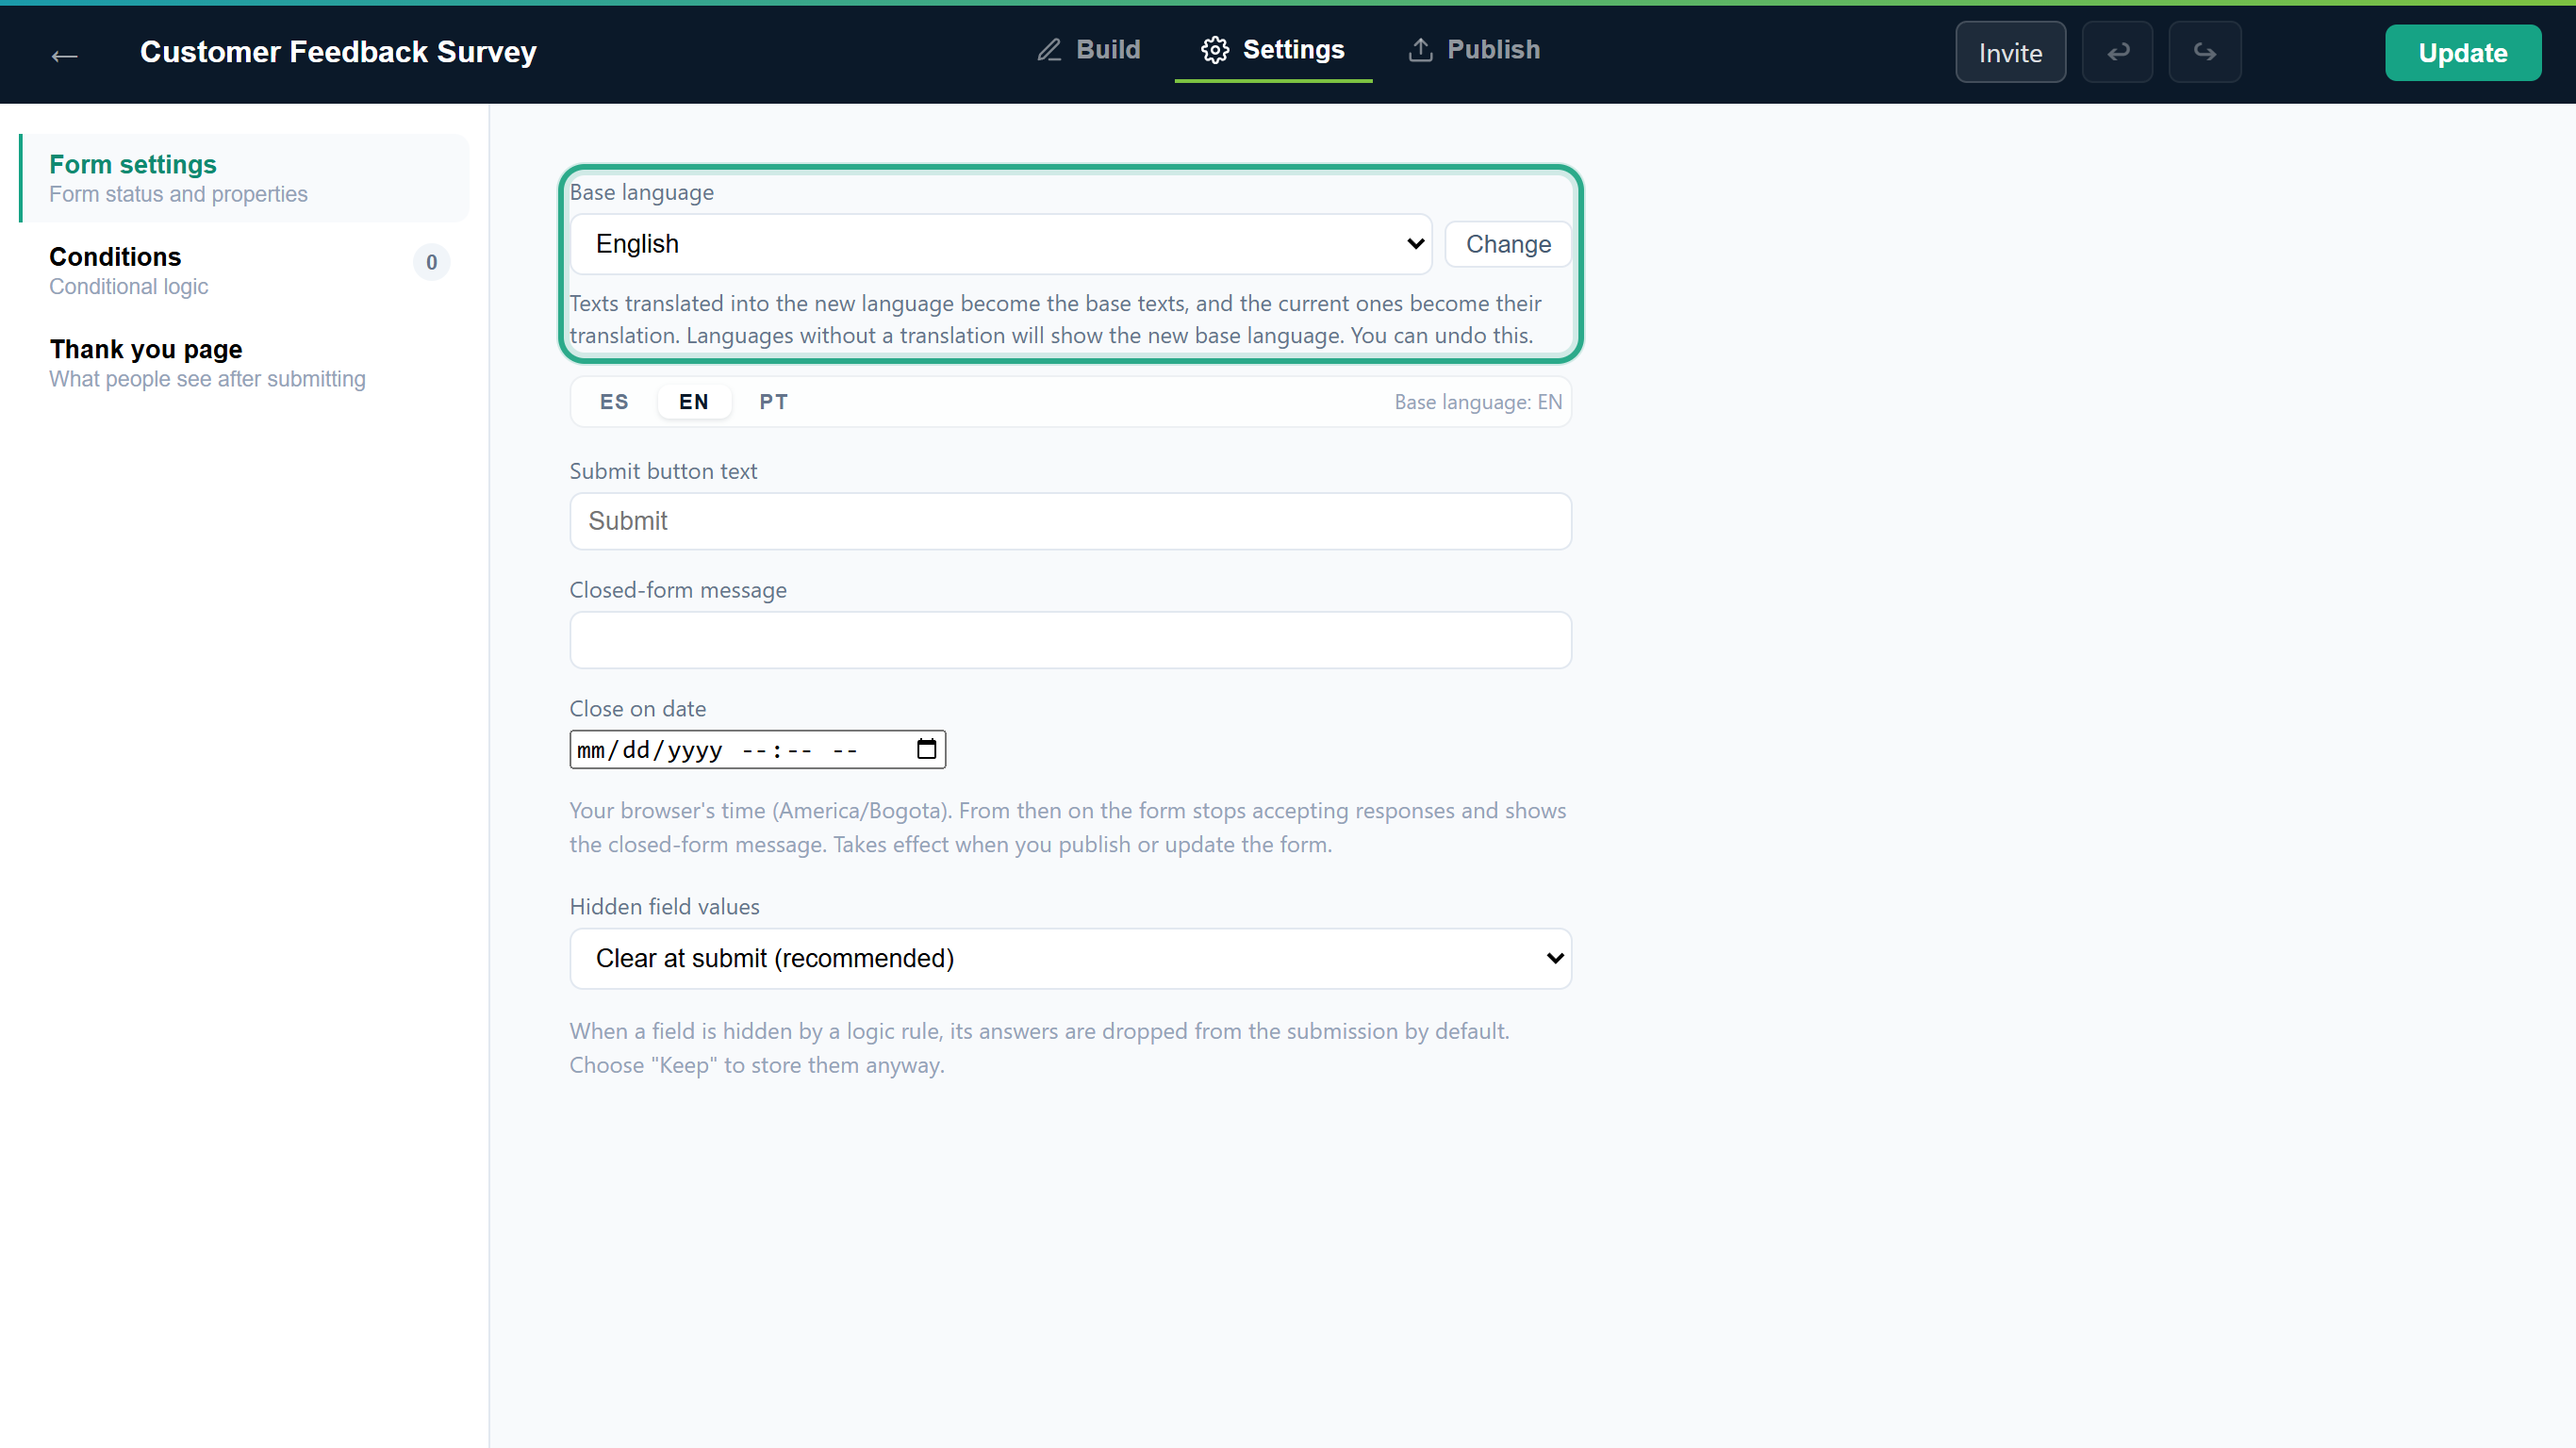 The note under the box sums up what a change does.
In Base language, pick the new language, here Español.
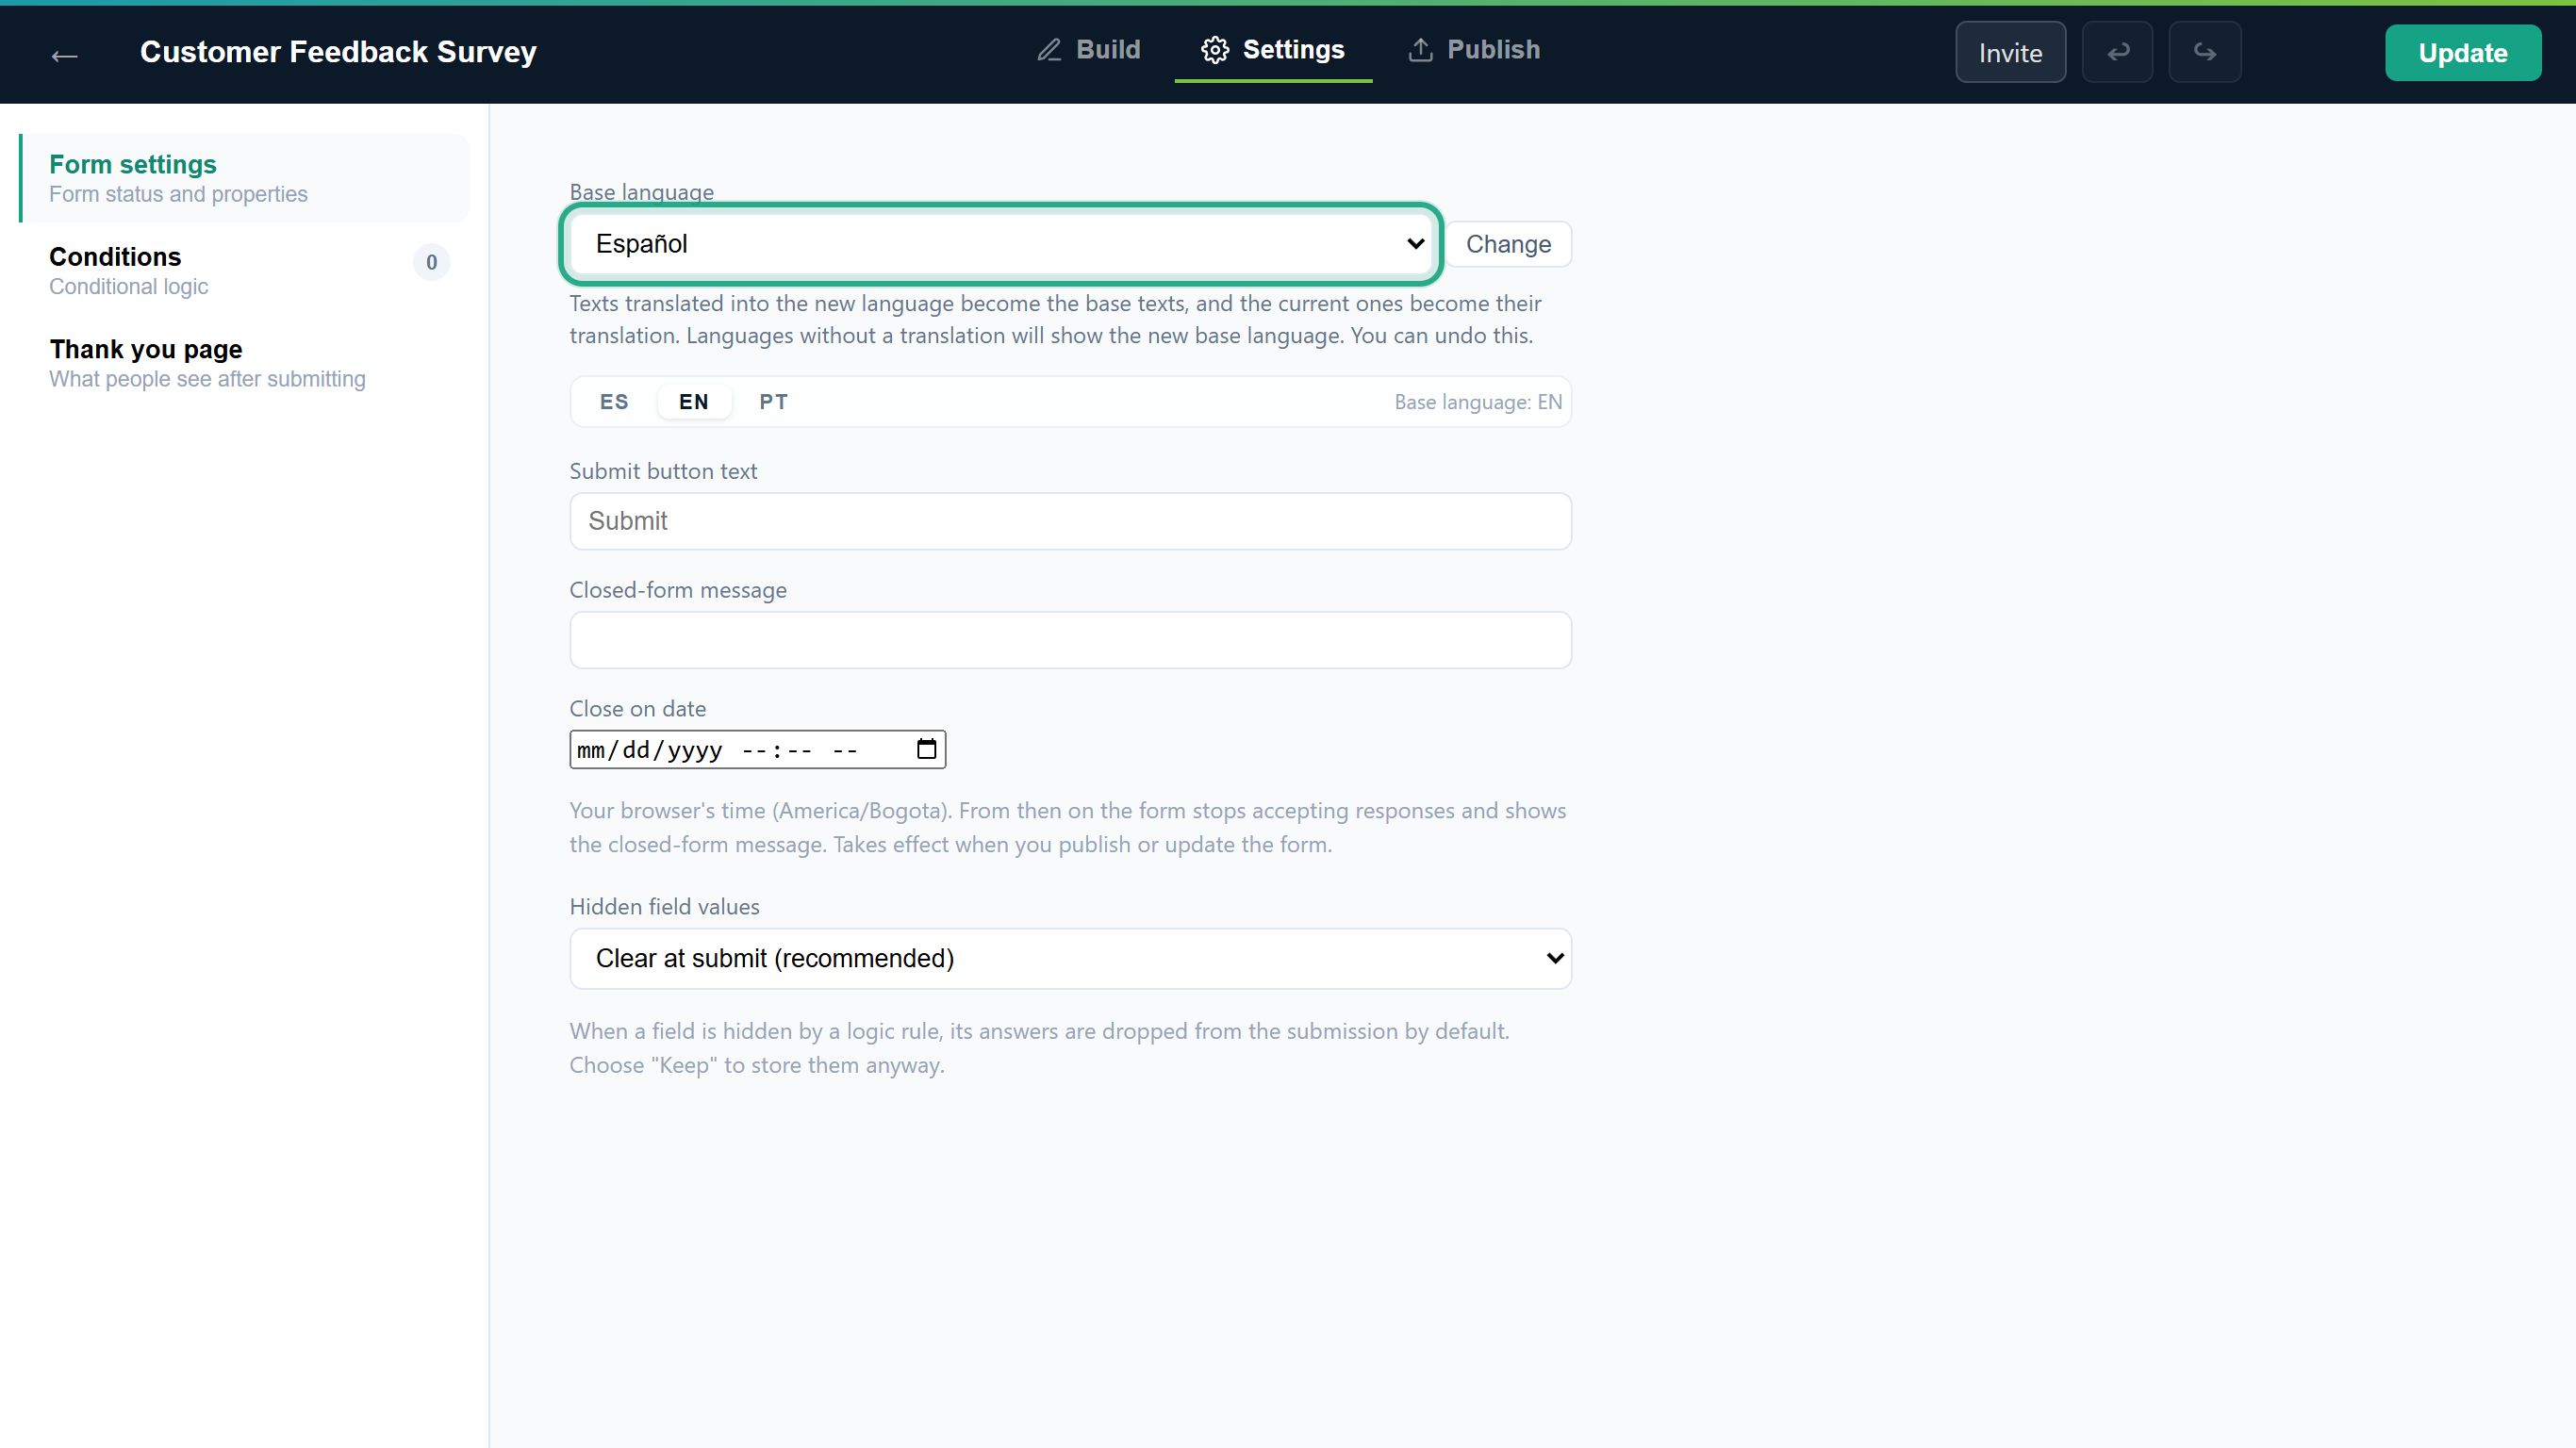 Nothing changes yet: the form's base language is still EN.
Click Change. The button can only be clicked when the language you picked isn't the current base language.
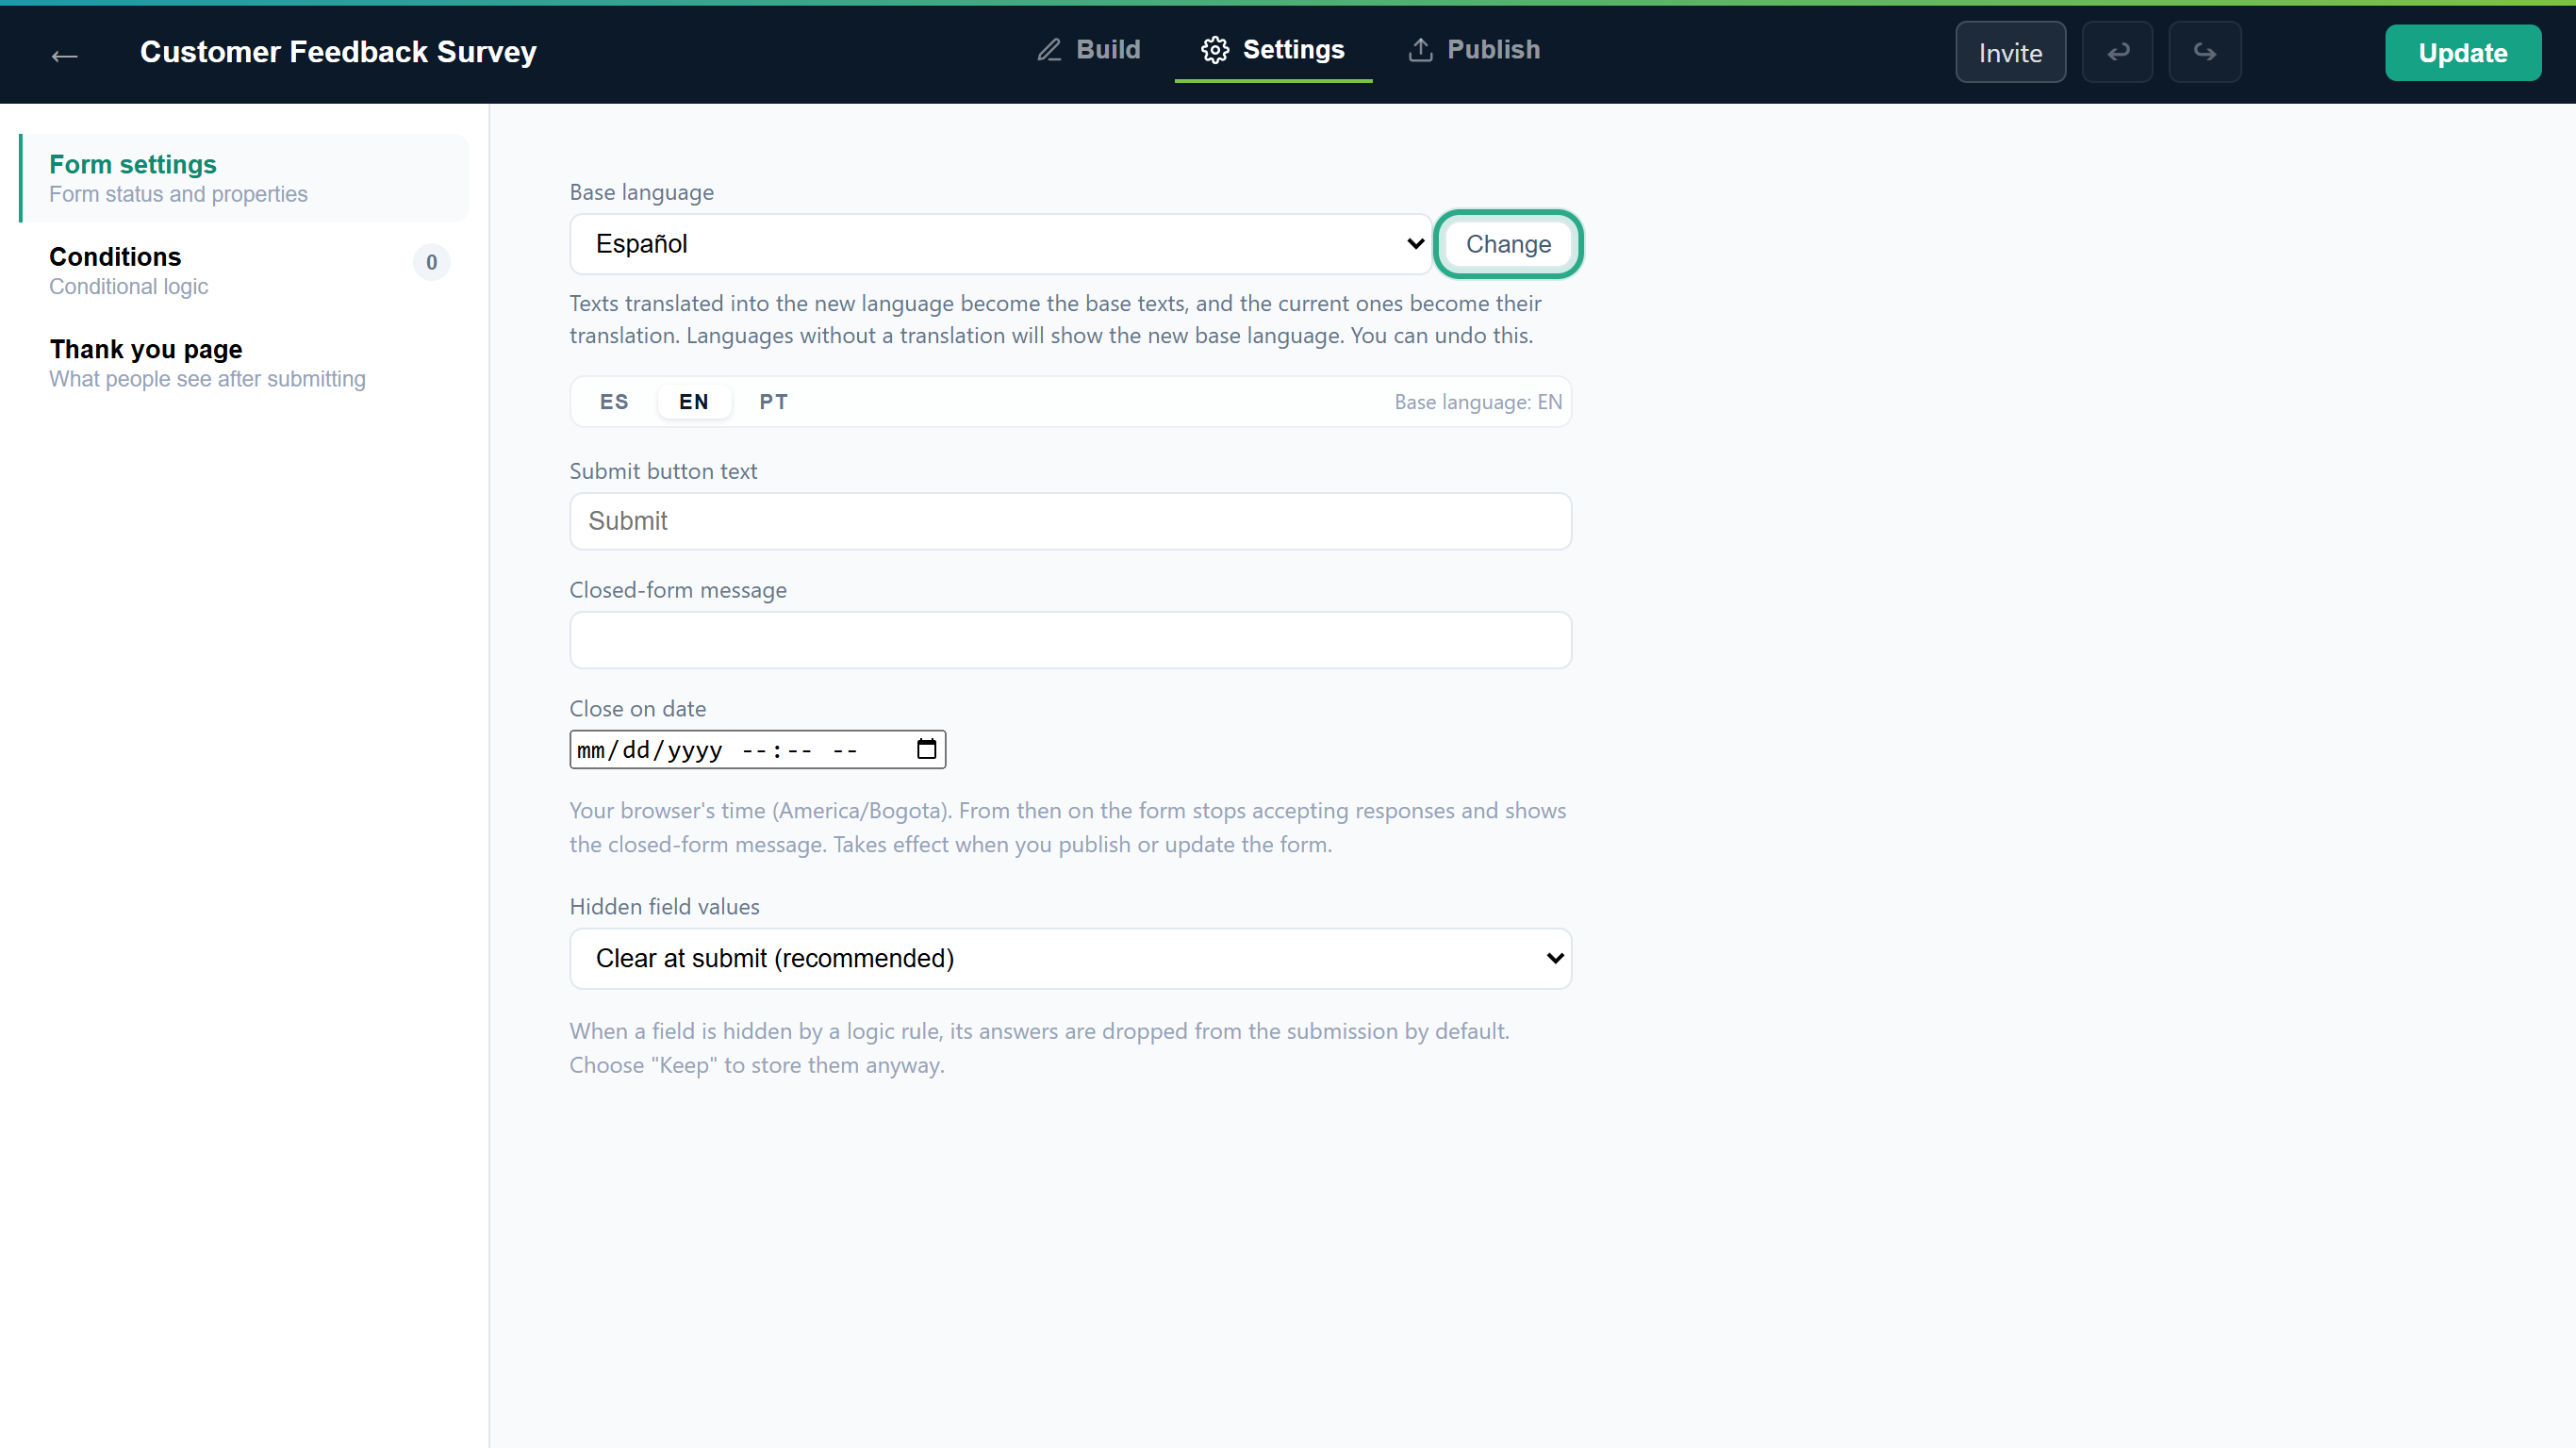 The change is one step, applied to the whole form at once.
Open the Build tab. The canvas shows the base language, so it now shows your Spanish texts: Cuéntanos sobre tu visita, the Spanish paragraph and ¿Qué Café Aurora visitaste?. Questions that had no Spanish text, such as Your visit and How did you order?, are still in English.
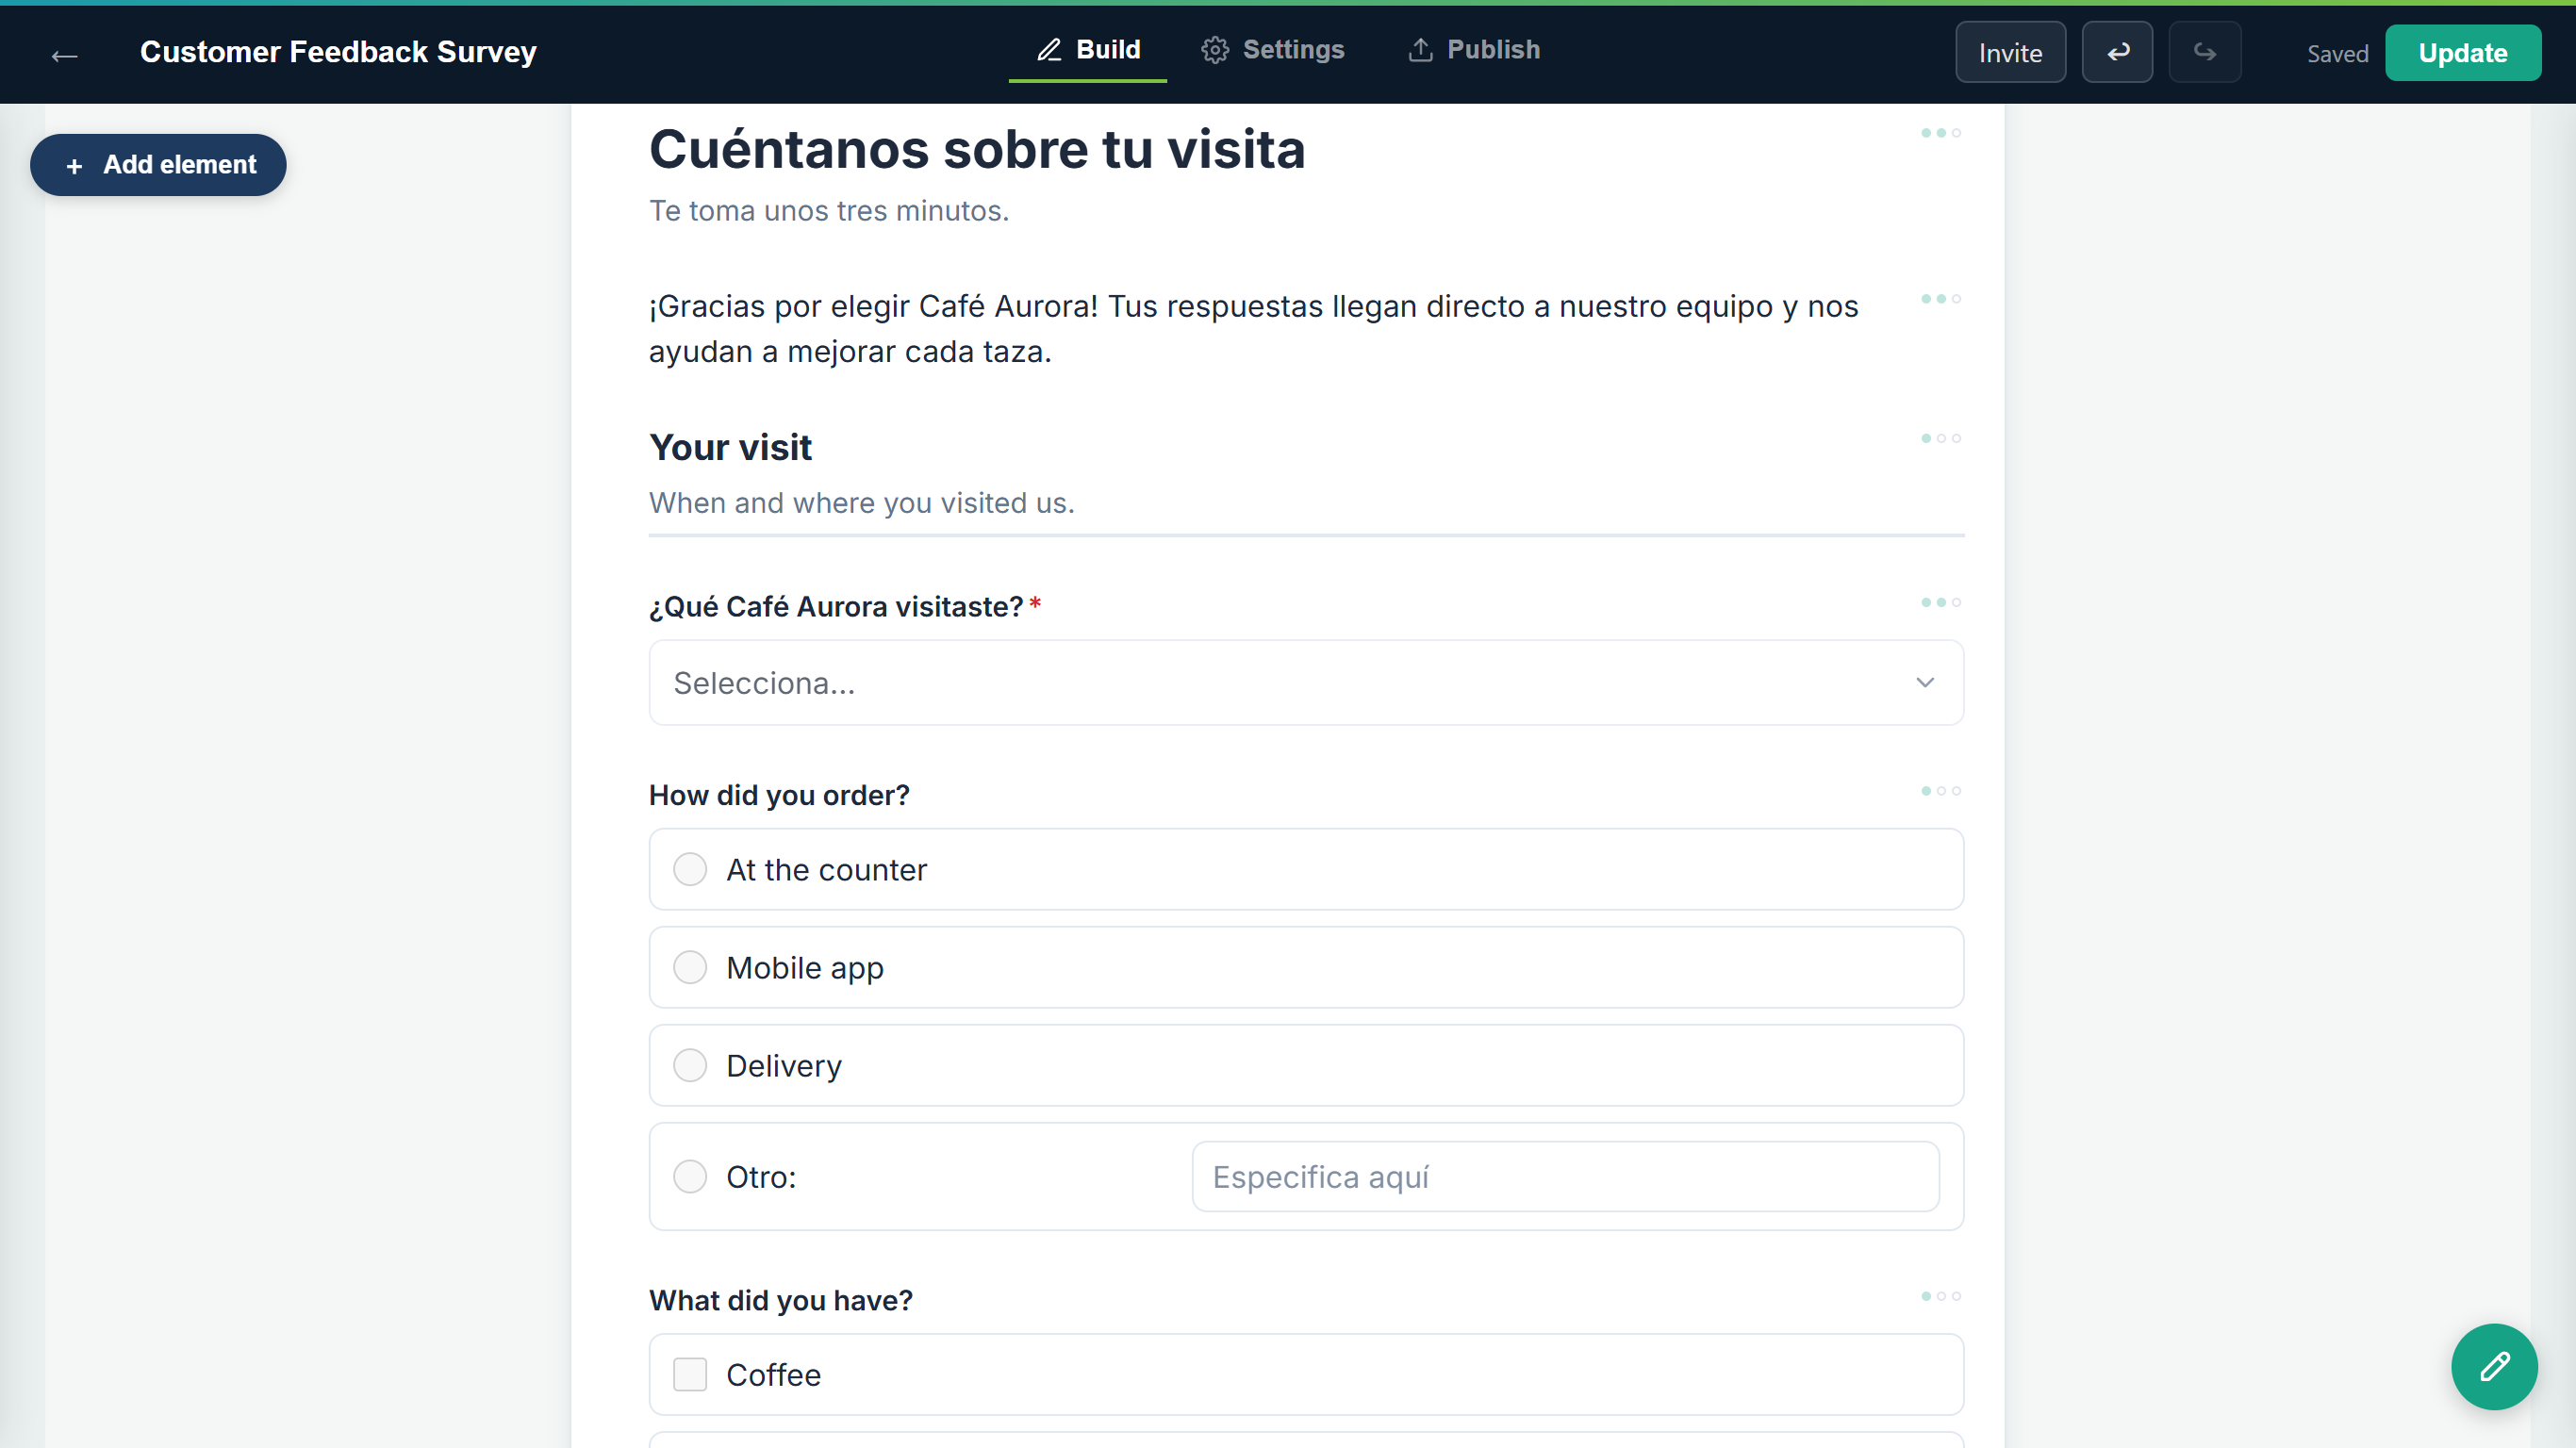 The Spanish texts are now the base texts. The English ones are kept as the EN translation.
Visitors who pick English still see every text in English. Visitors who pick Portuguese, or any language with no text of its own, now see Spanish where they saw English before.
To go back, click Undo (↩) in the top bar. The whole change is undone in one click, and the base language is EN again.
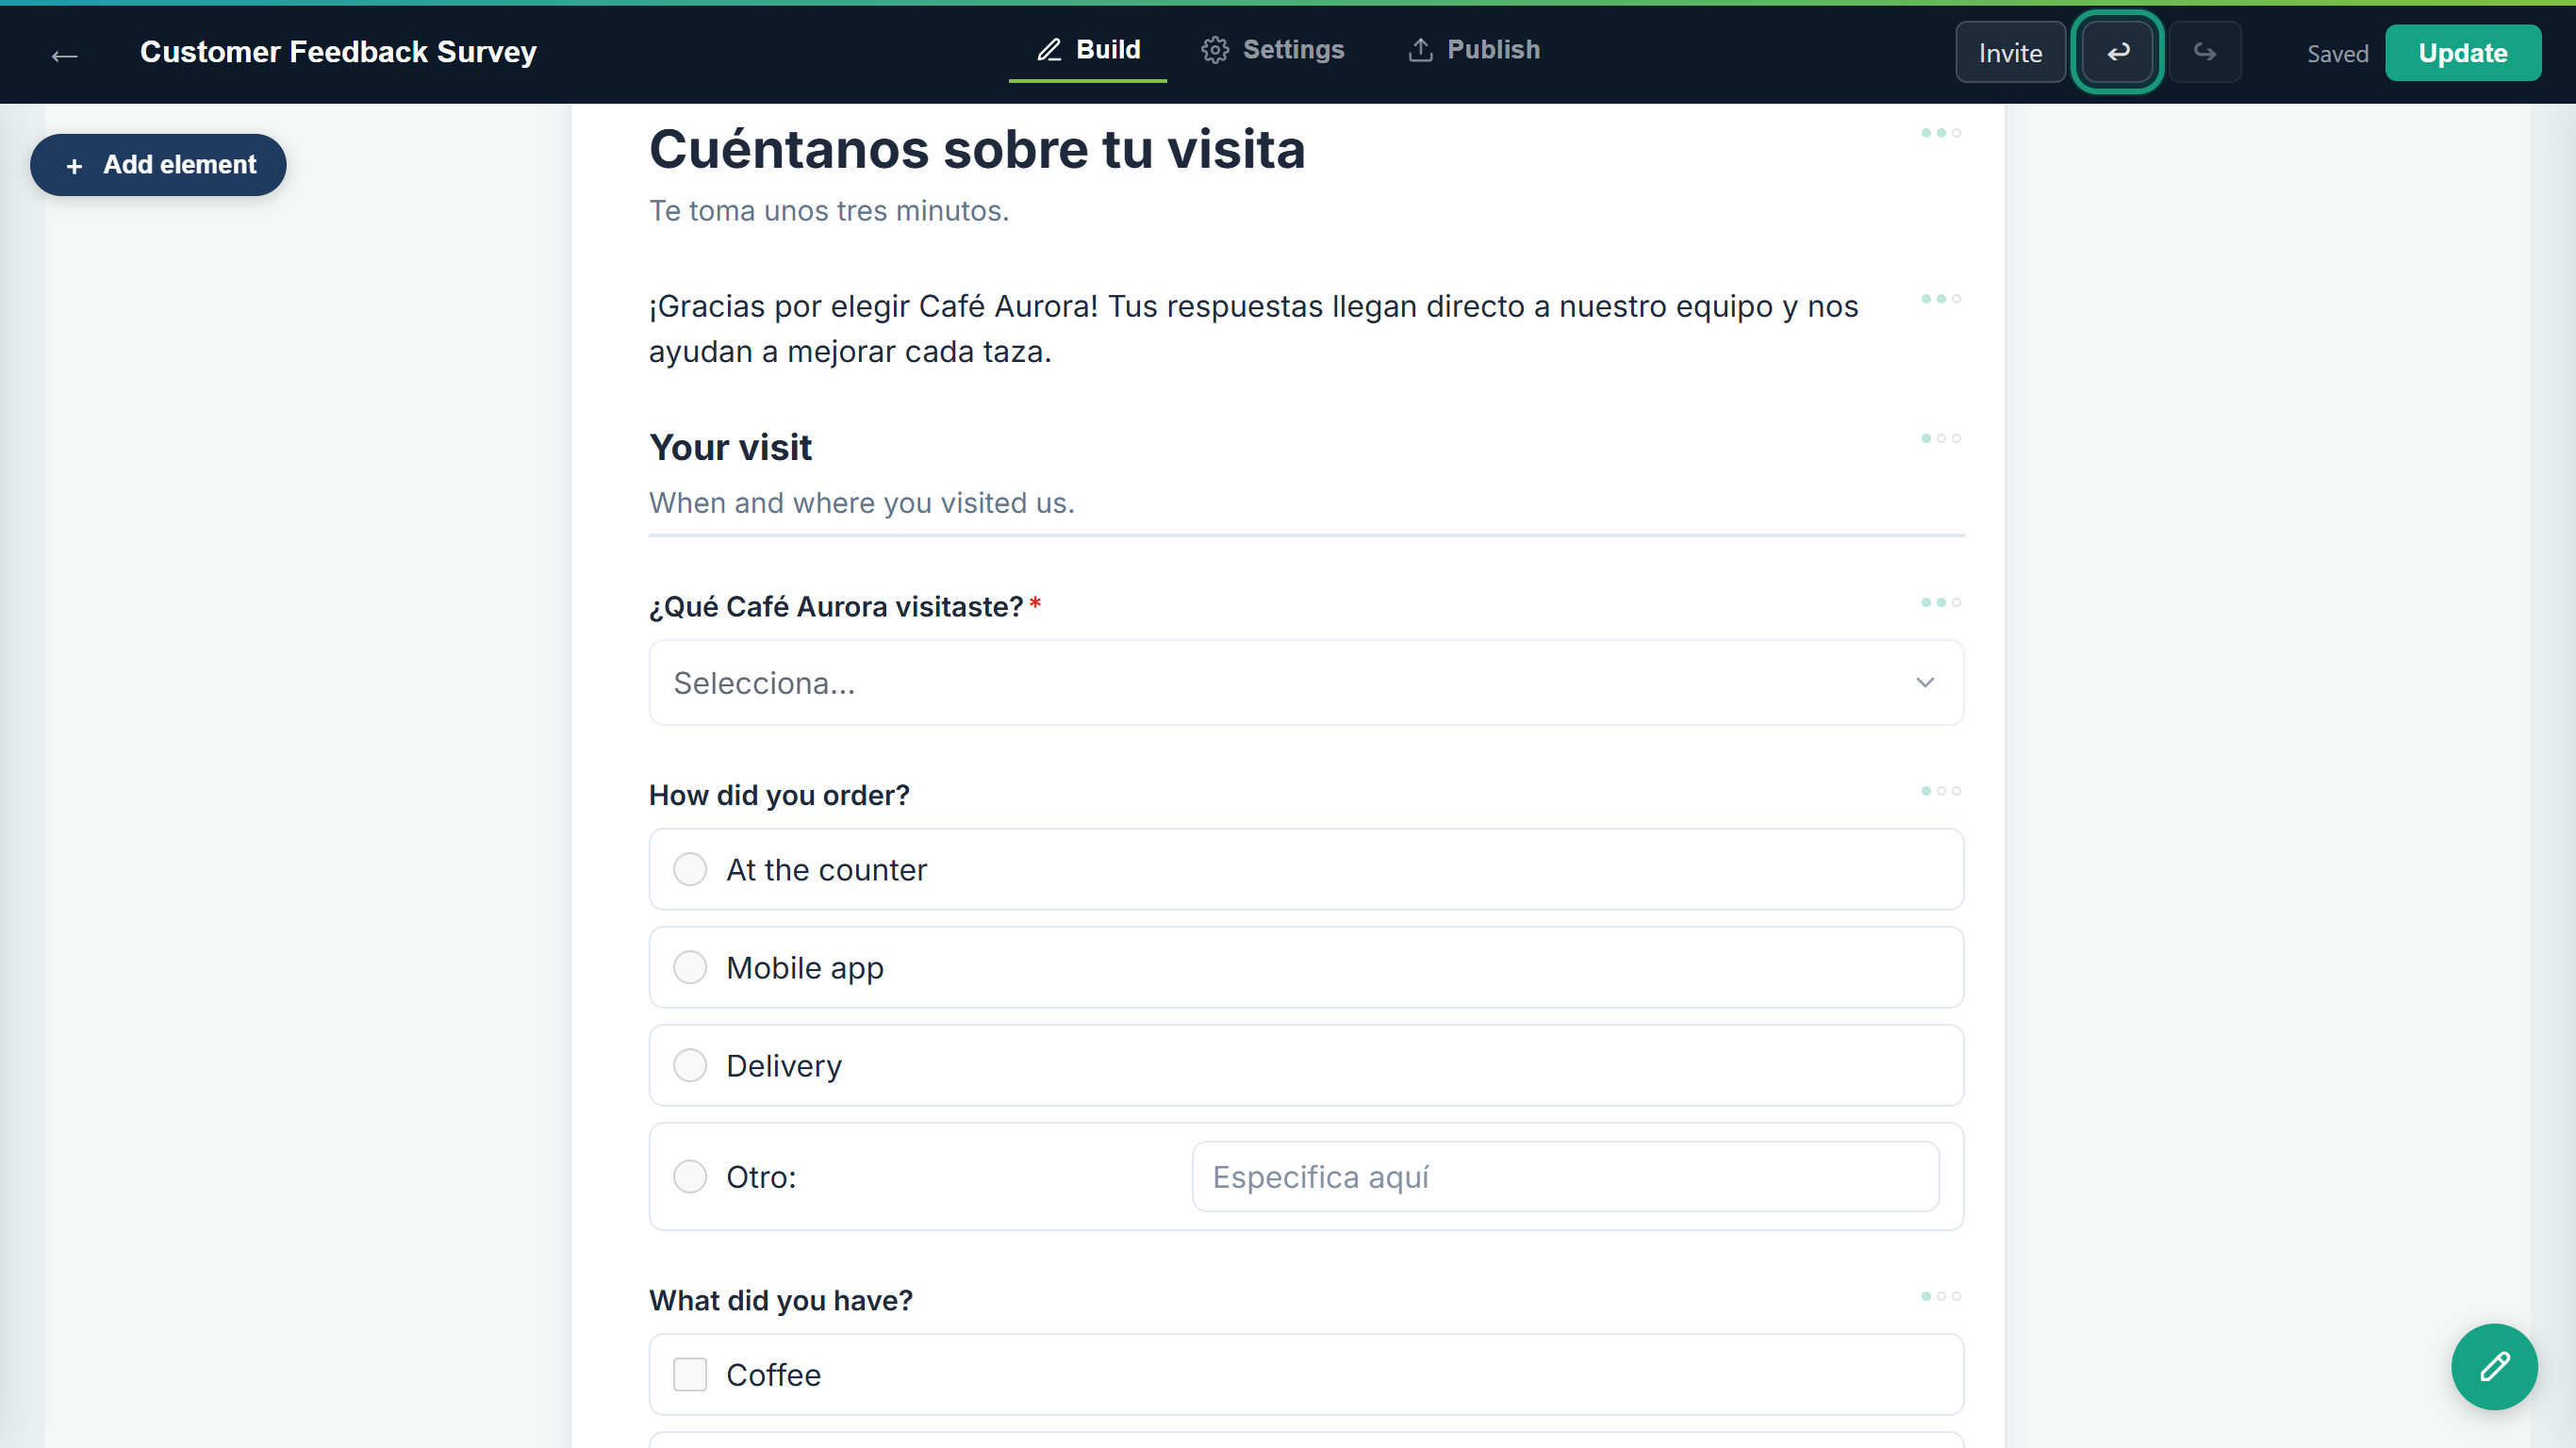 One click on Undo reverts the whole change.
Result
If you keep the change, the form has a new base language. Like every edit, it's saved to the draft: click Update to publish it (Task 7). Some texts have no translations and are never swapped: the form title, product names, a scale's left and right labels, matrix rows and columns, and the thank-you messages of logic rules. Check them after a change and retype them in the new language if you need to.
Task 3 — Translate a field
Step-by-step
With the field selected, click the language you want to add, here ES. The boxes of the panel are now empty, and each one shows the English text in grey as a guide.
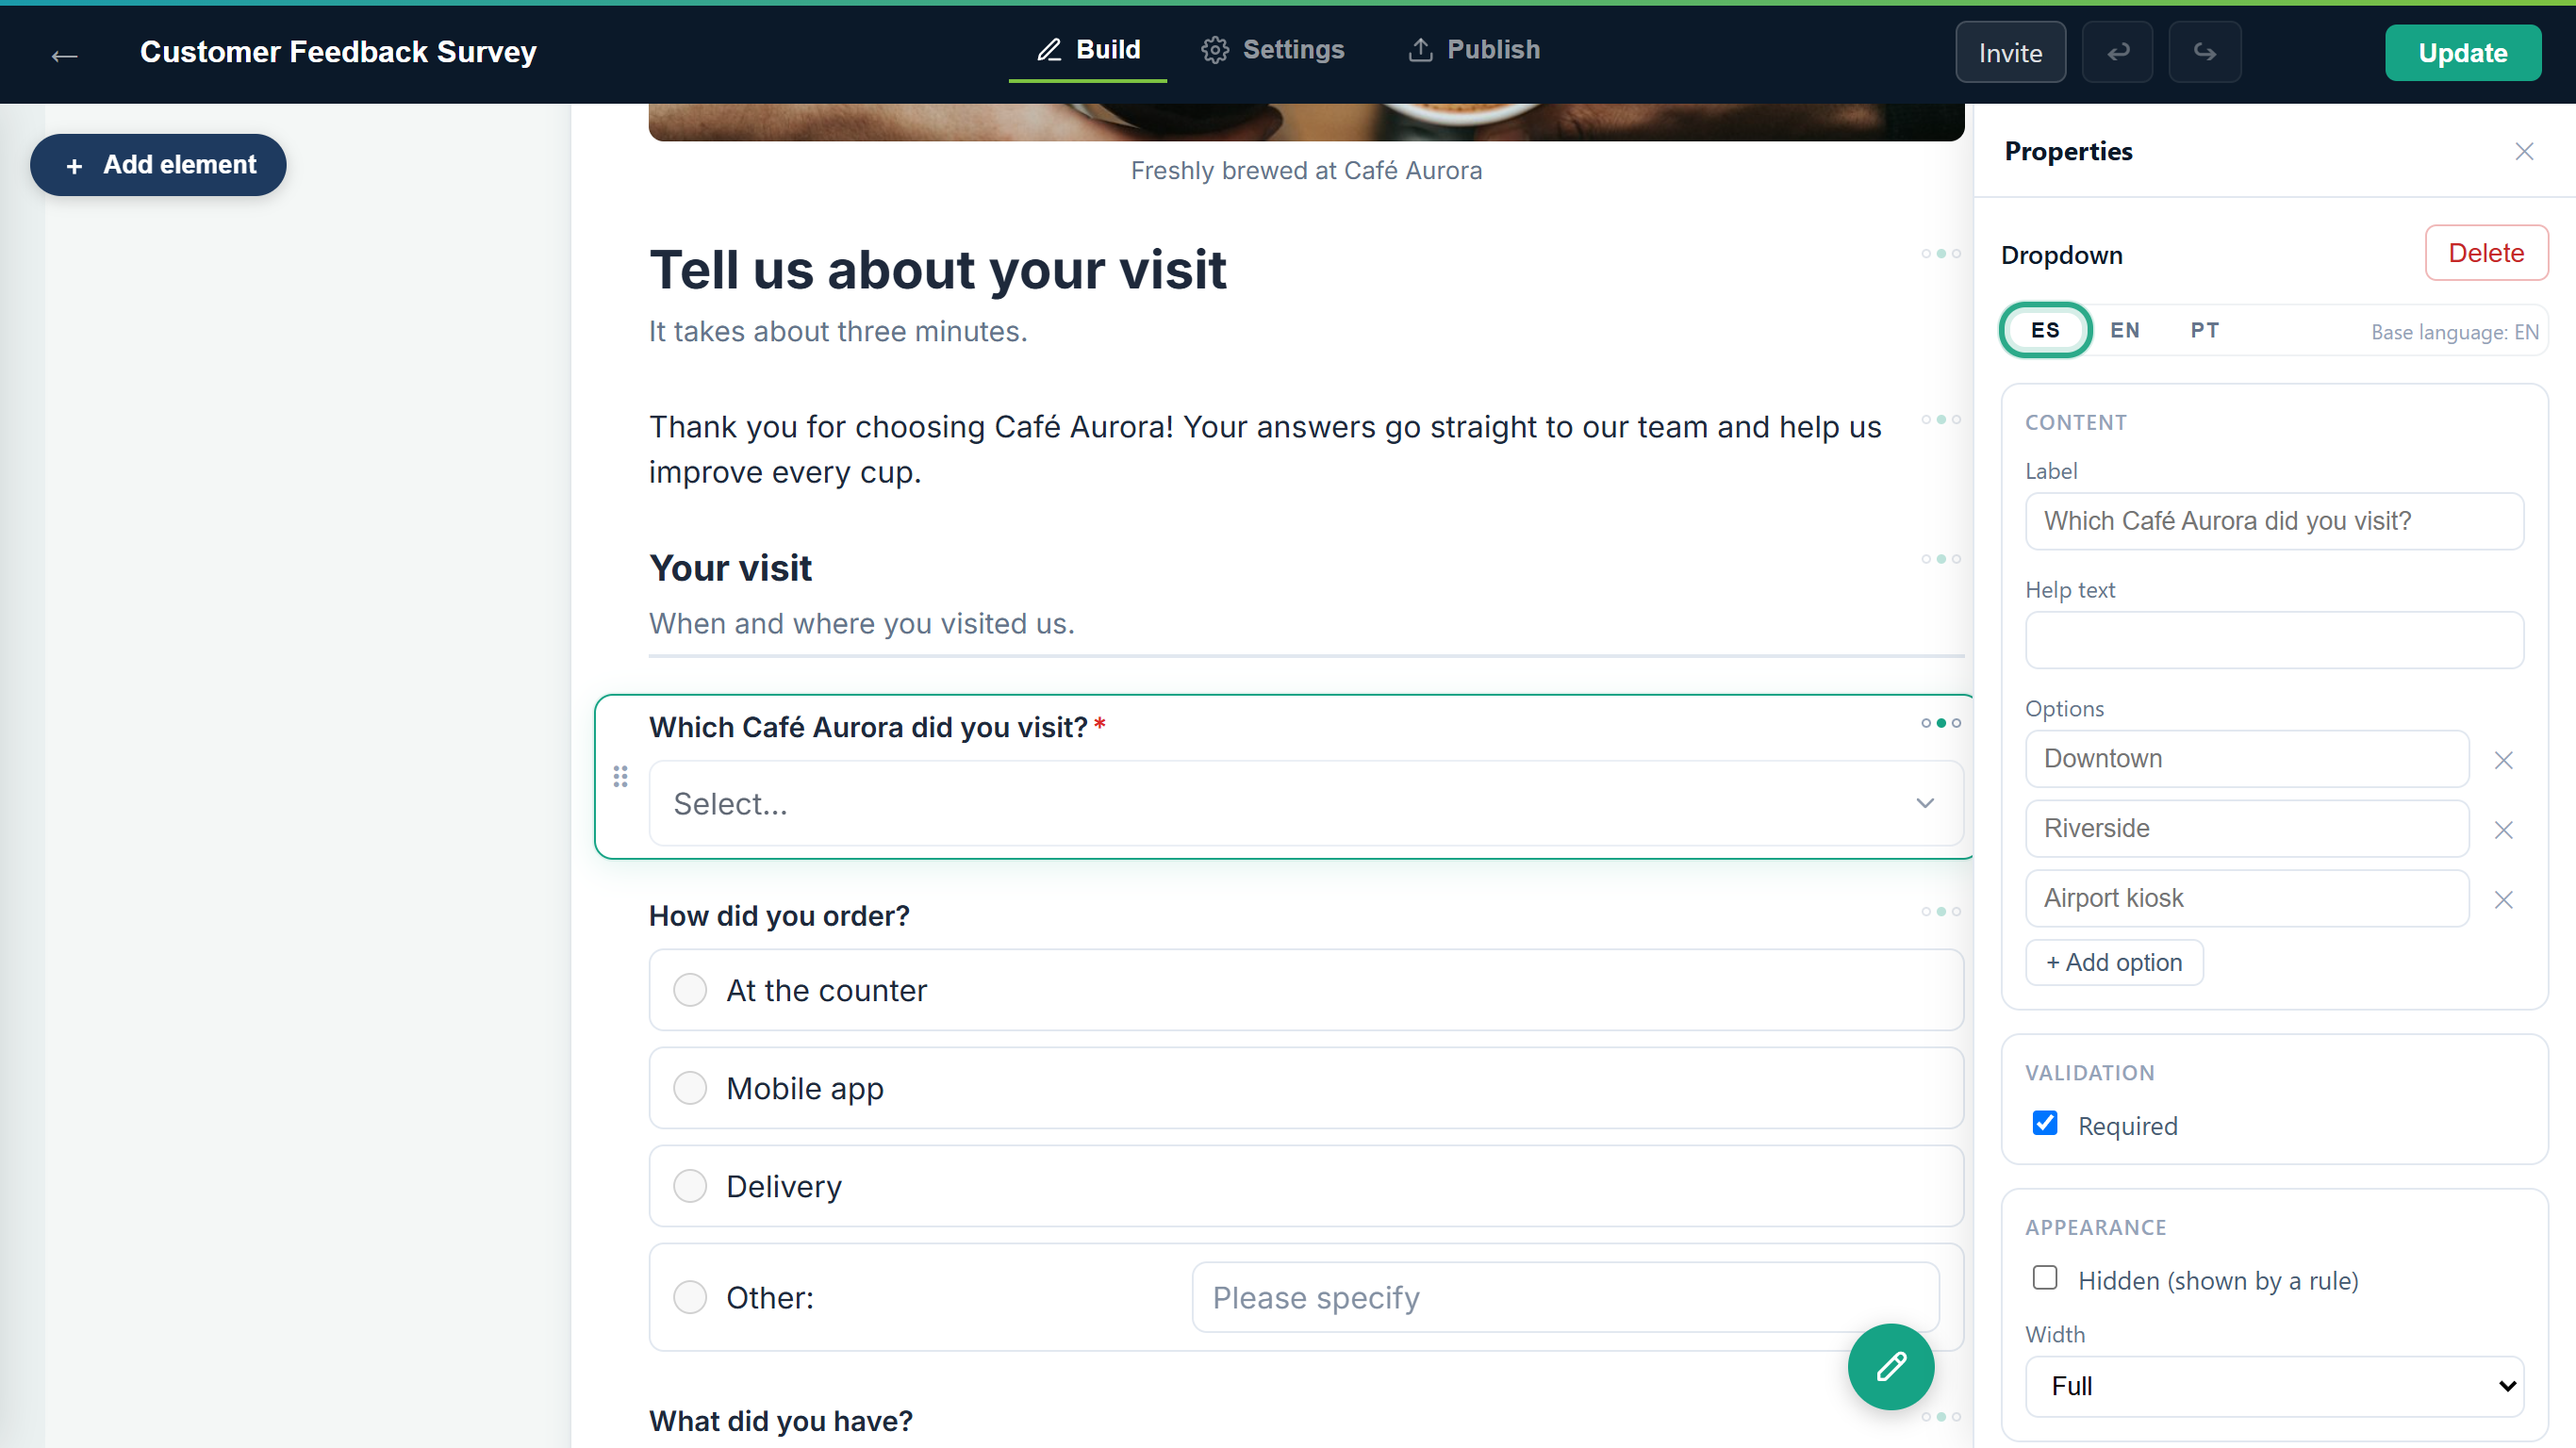 On a translation tab, grey text is the base-language text you're translating.
Type the translation of the question in Label: "¿Qué Café Aurora visitaste?". The canvas keeps showing the base language; the translation appears on the public form.
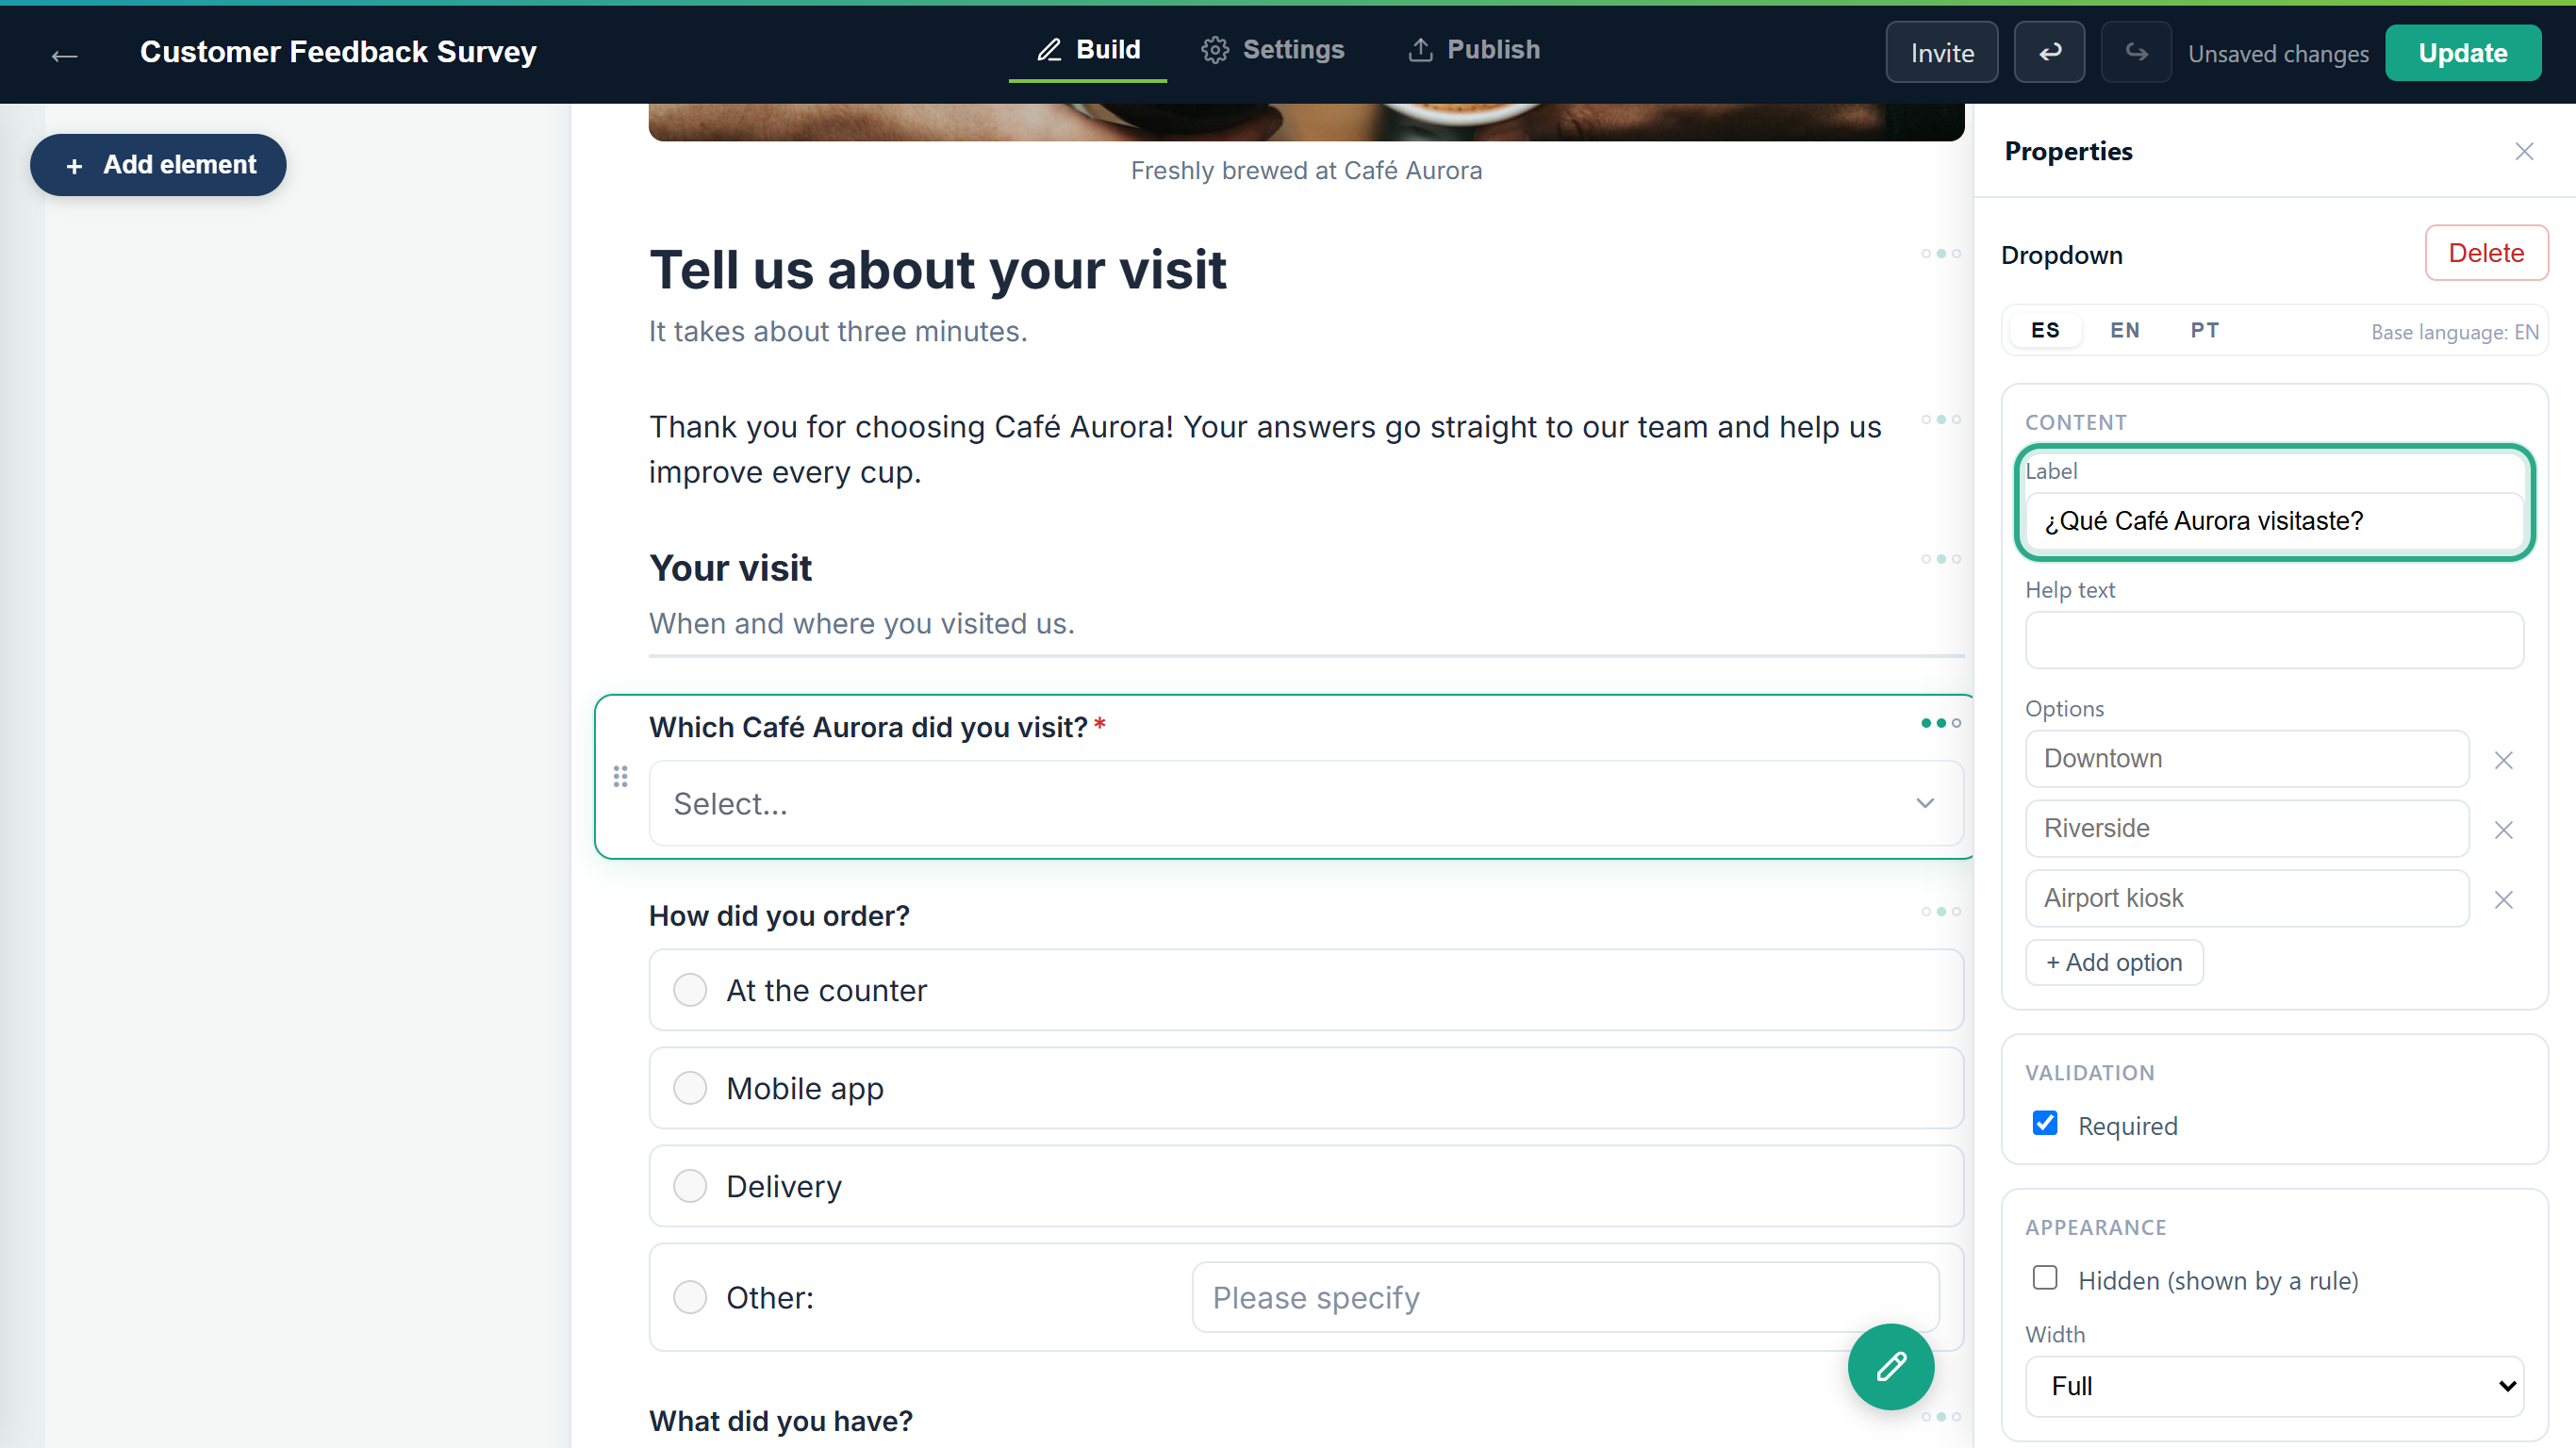 The label in Spanish.
For a Dropdown, Single choice or Multiple choice field, translate each answer under Options: "Centro", "Junto al río", "Quiosco del aeropuerto". Answers you leave empty show in the base language.
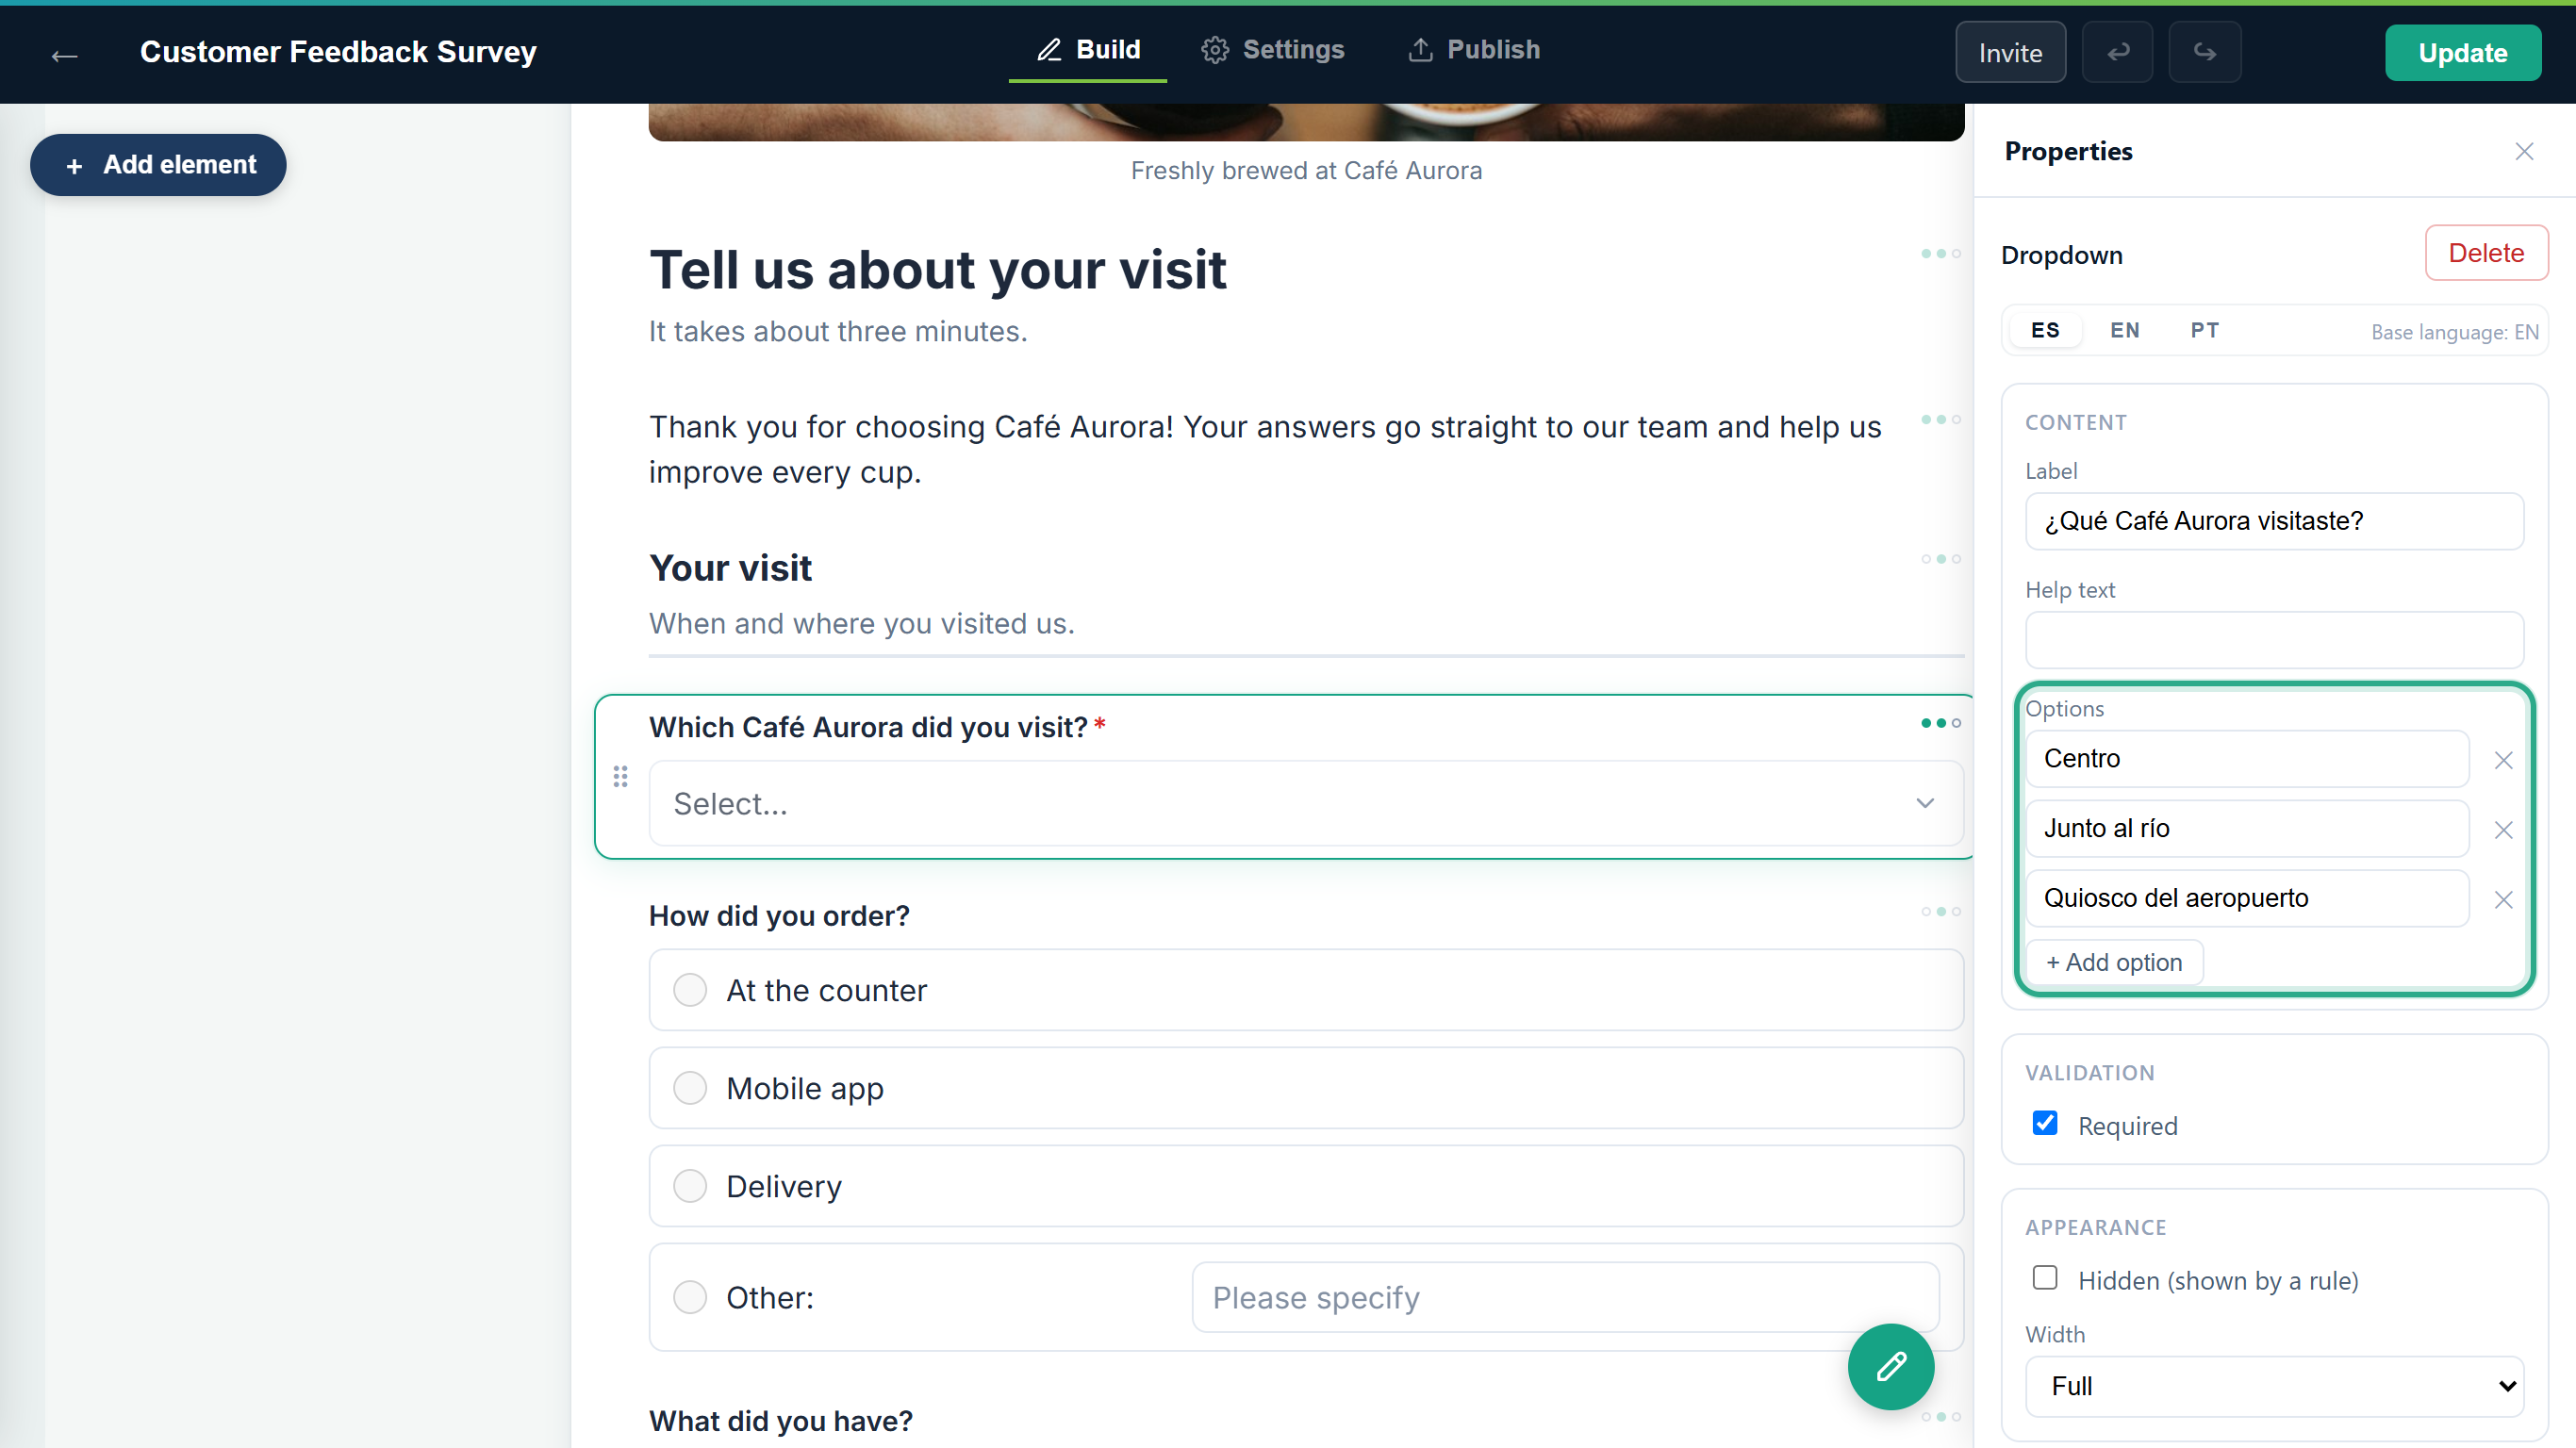 Each option has its own box. You only change the text; the option itself stays the same in every language.
Select the next field. The panel stays on the language you chose, so you can translate the form field by field. For the heading Tell us about your visit, type the Label "Cuéntanos sobre tu visita" and the Help text "Te toma unos tres minutos."
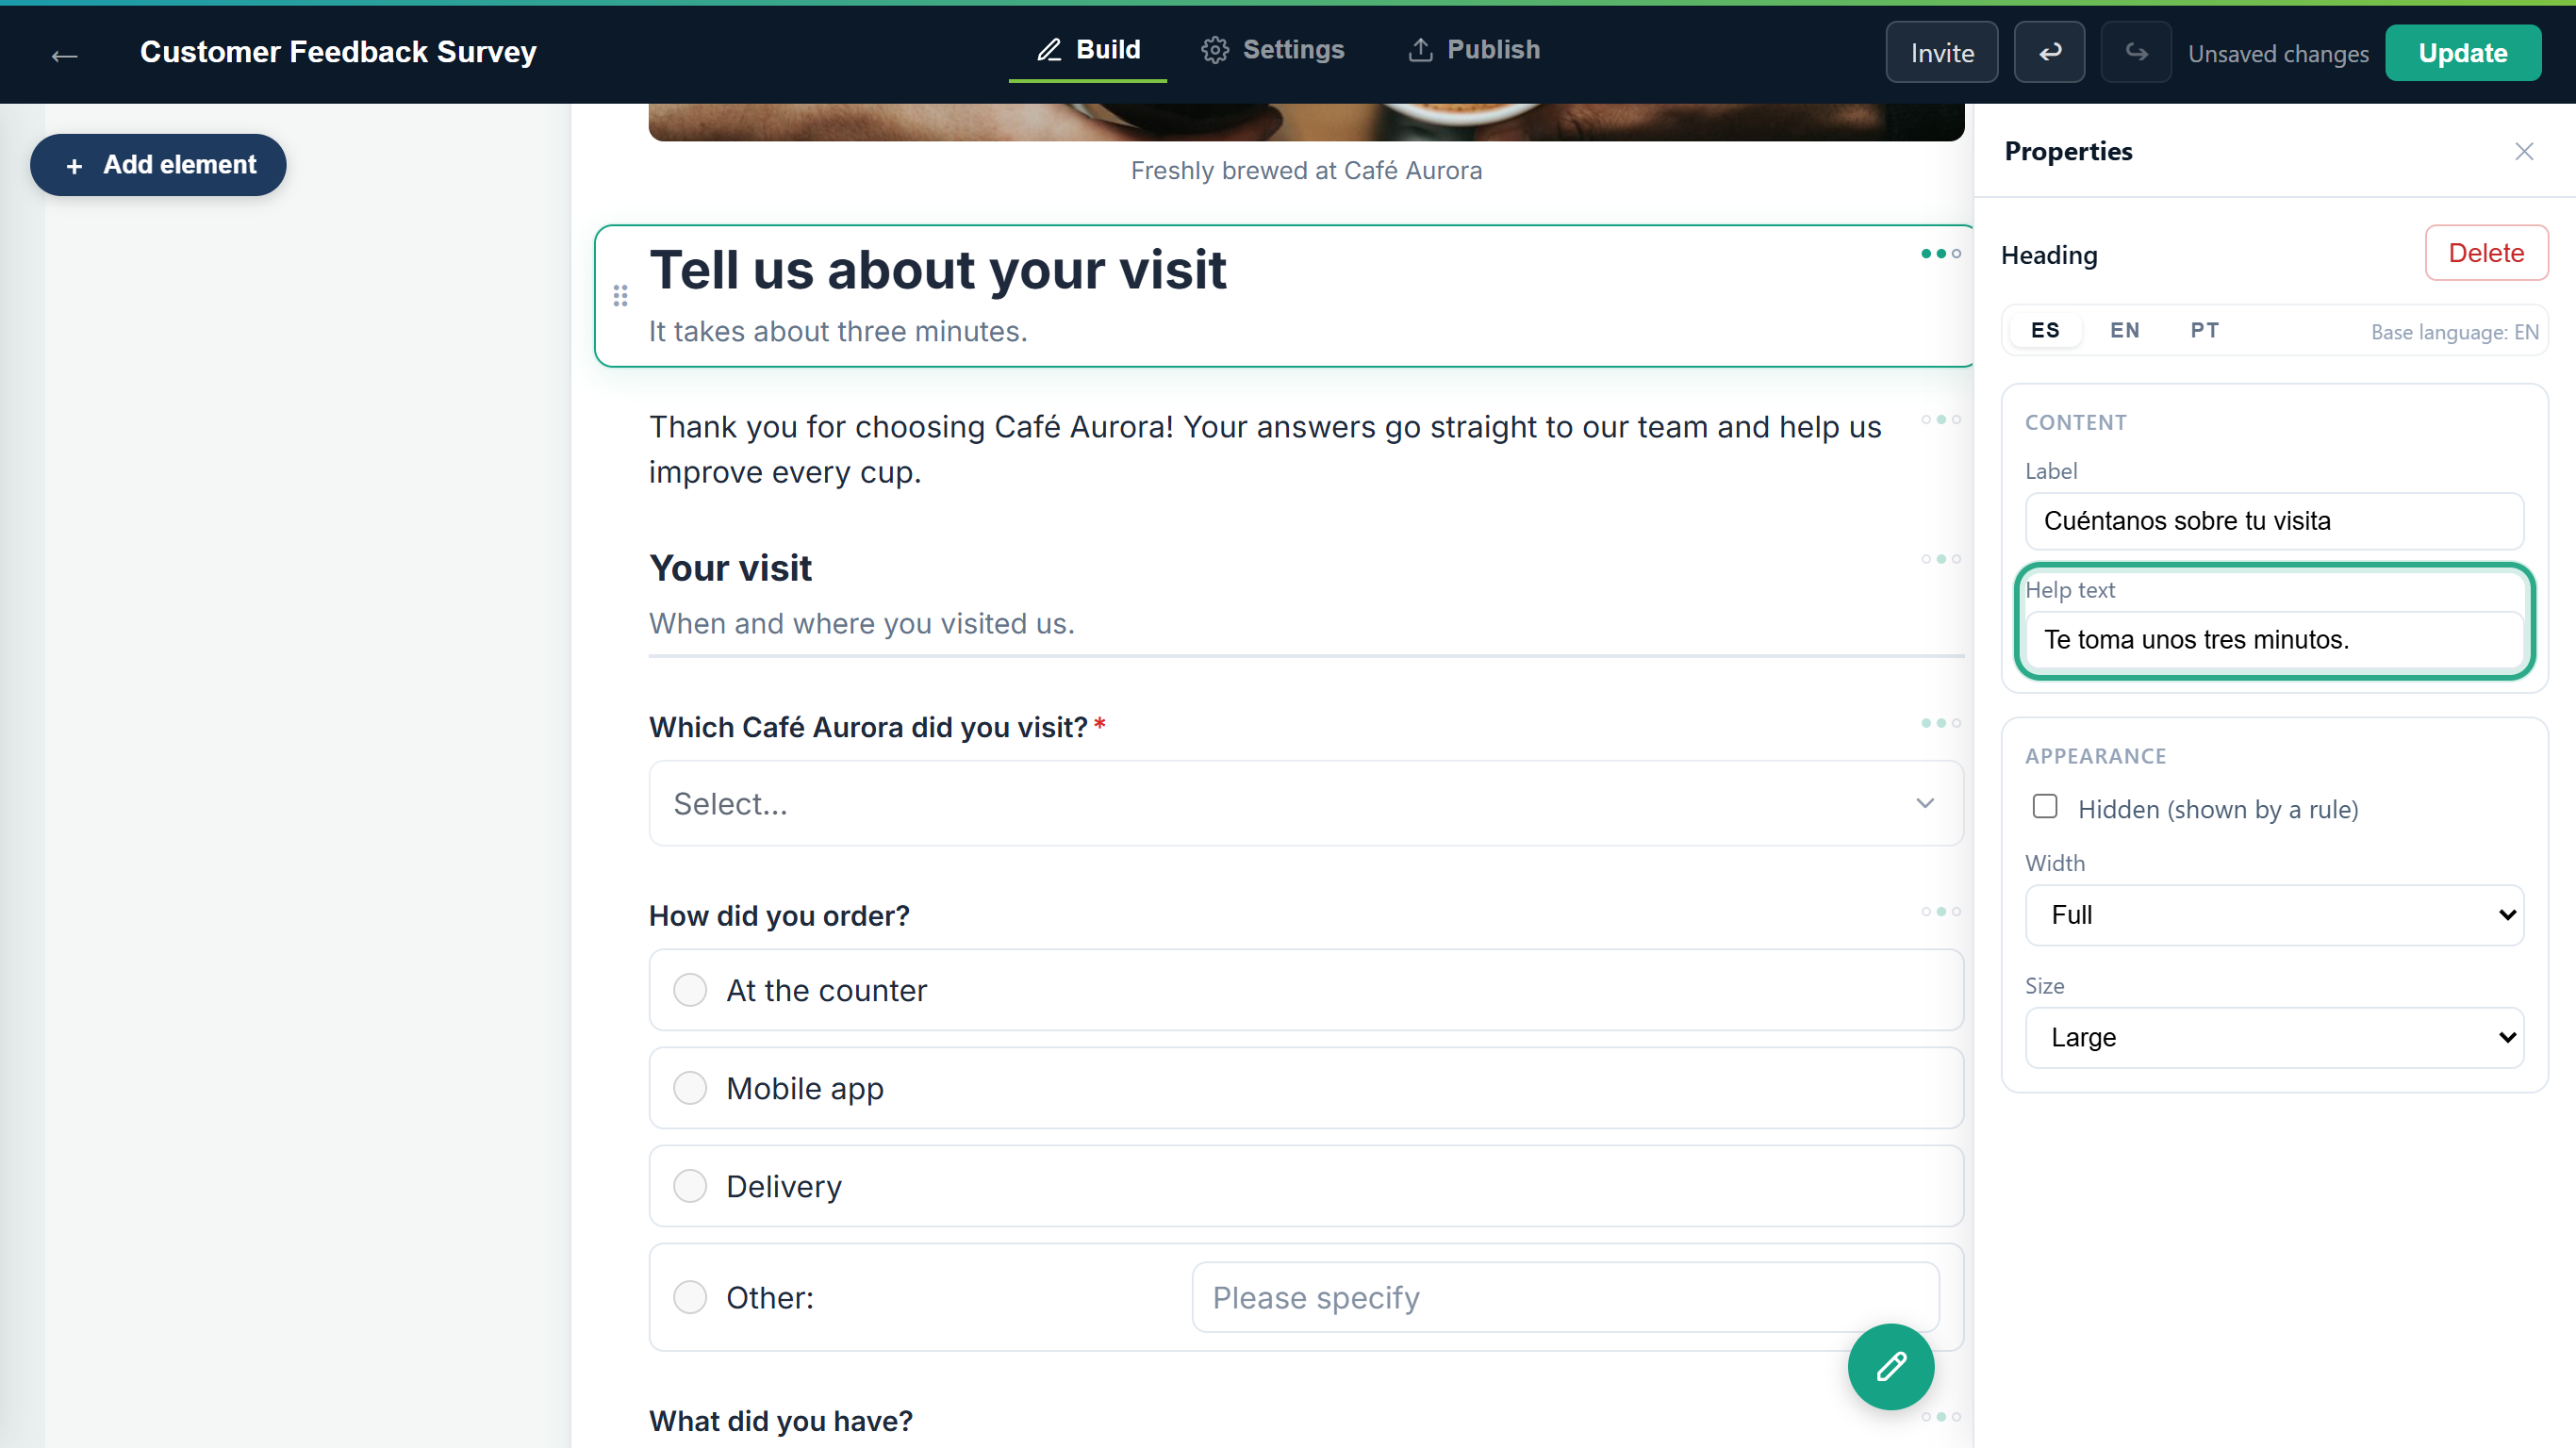 Headings and sections have a label and a help text to translate.
For a text field, translate the Placeholder too, the example shown inside the empty box. For Which drink did you order?, type the label "¿Qué bebida pediste?" and the placeholder "p. ej., flat white con avena".
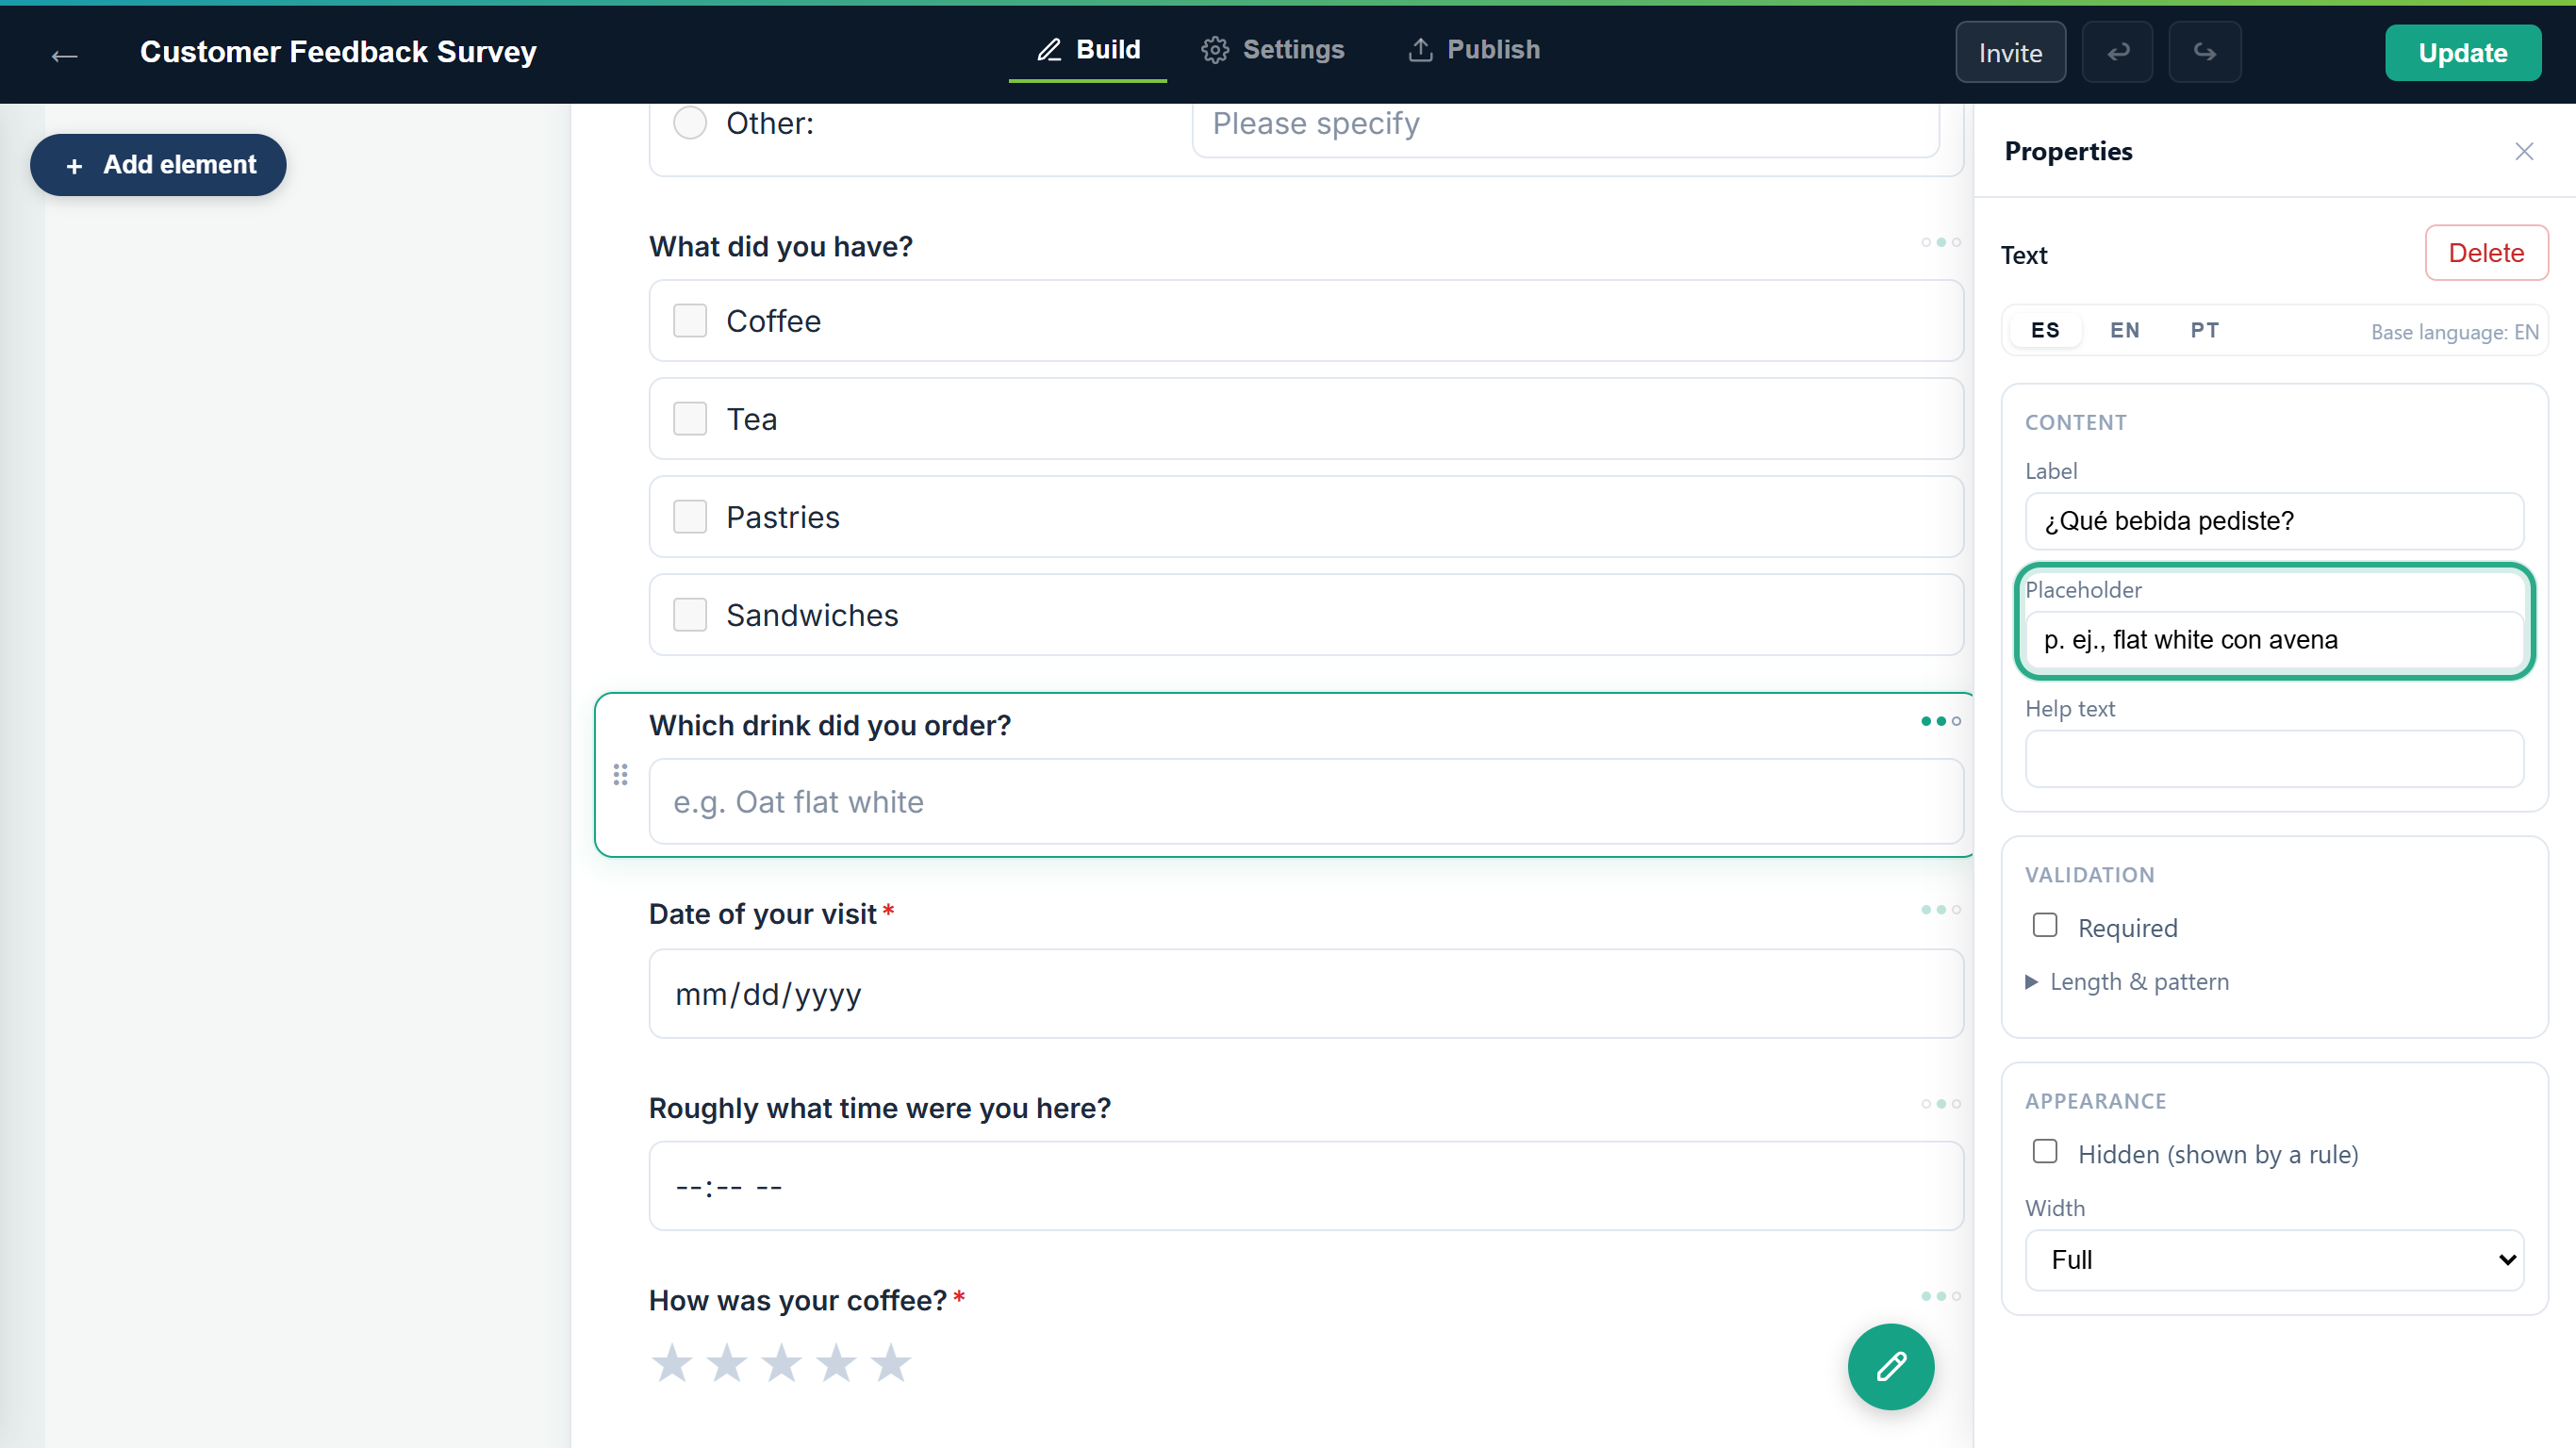 Placeholders are translatable on Short text, Long text, Email, Phone and Number fields.
For a Paragraph, the text to translate is in Text. Translations save automatically, like every other change in the editor.
Result
The field has Spanish text. What you can translate on each field is its Label, Placeholder, Help text, the options of choice fields and the text of a paragraph. Other texts, such as a scale's Left label and Right label, matrix rows and columns, and product names and descriptions, have no language tabs and show as you typed them in every language.
Task 4 — Spot what's still untranslated
Step-by-step
Look at the three dots at the top right of each field: ES, EN and PT. A filled dot means that language has text for the field. The base language is always filled. Point at a field (or select it) to see the dots clearly, and point at the dots to see a count such as Translations: 2/3.
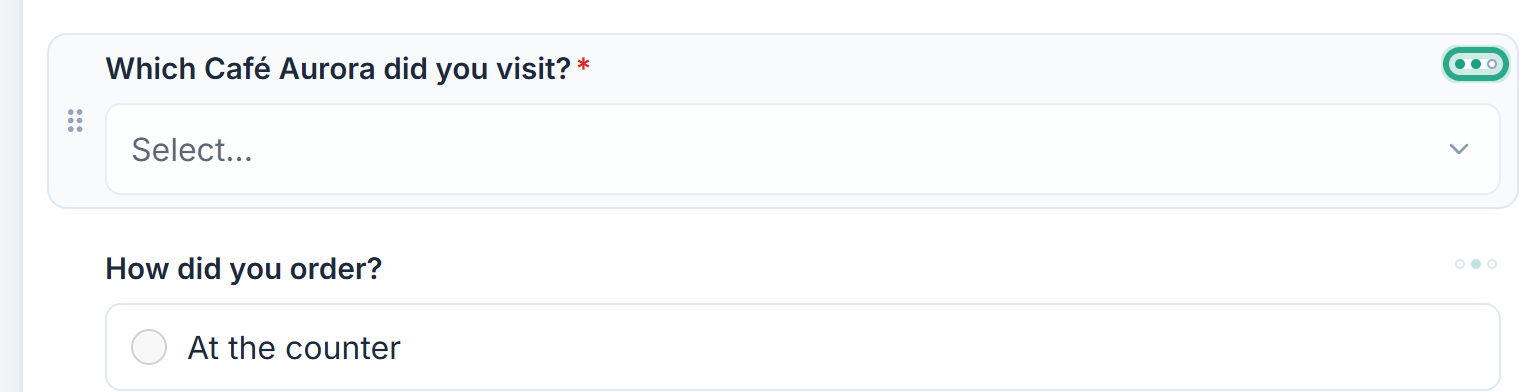 The dropdown has English and Spanish; How did you order? has only English, so Spanish visitors will see it in English.
A dot fills as soon as any text of the field is translated, so it tells you a language has been started, not that every box is done. Open the field to check the rest. In the Card layout the count reads Languages completed: 2/3.
Result
You can see at a glance which questions still show the base language to visitors.
Task 5 — Translate the submit button and the thank-you message
Step-by-step
Open the Settings tab. In Form settings, click ES and type the Spanish Submit button text: "Enviar mi opinión". The Closed-form message below can be translated the same way.
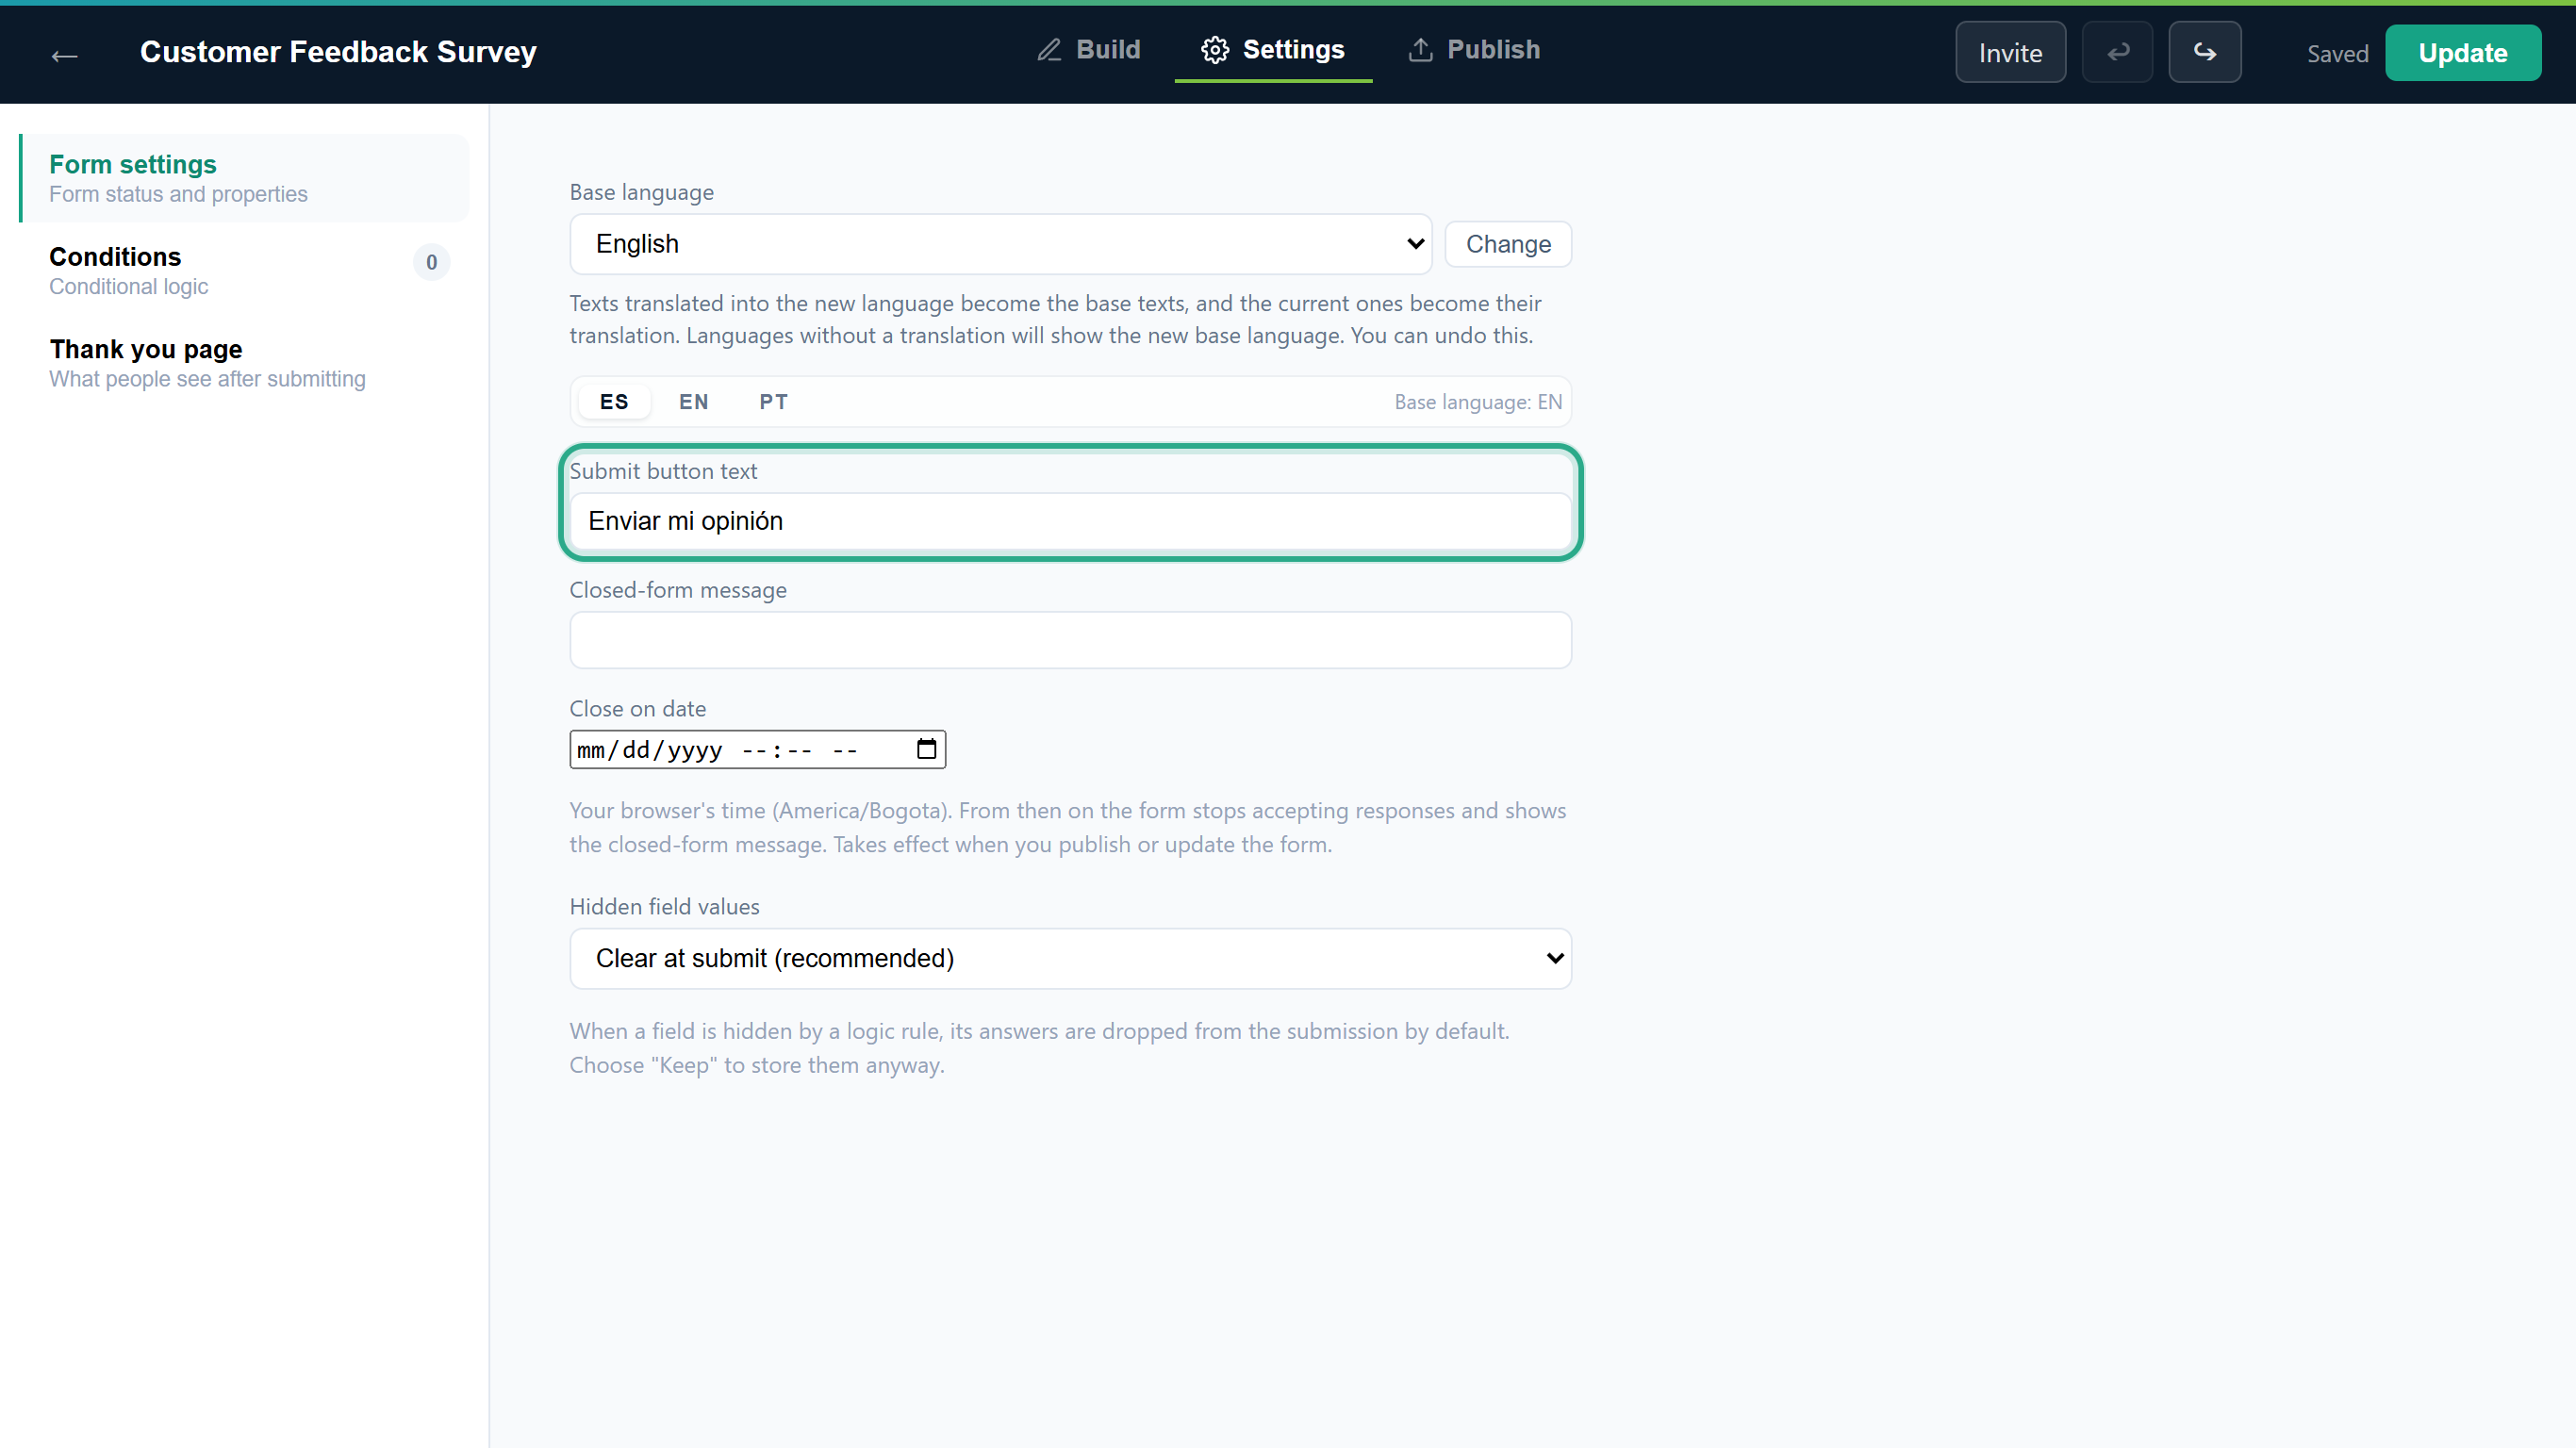 The Settings texts have their own ES / EN / PT tabs.
If the base-language Submit button text is empty, as here, the English button reads Submit and the Spanish one uses your translation. A language with no text at all shows anota's default in that language (Enviar in Spanish and Portuguese).
Click Thank you page, pick the base-language tab (EN) and write the Thank-you message: "Thanks for your feedback! Our team reads every answer."
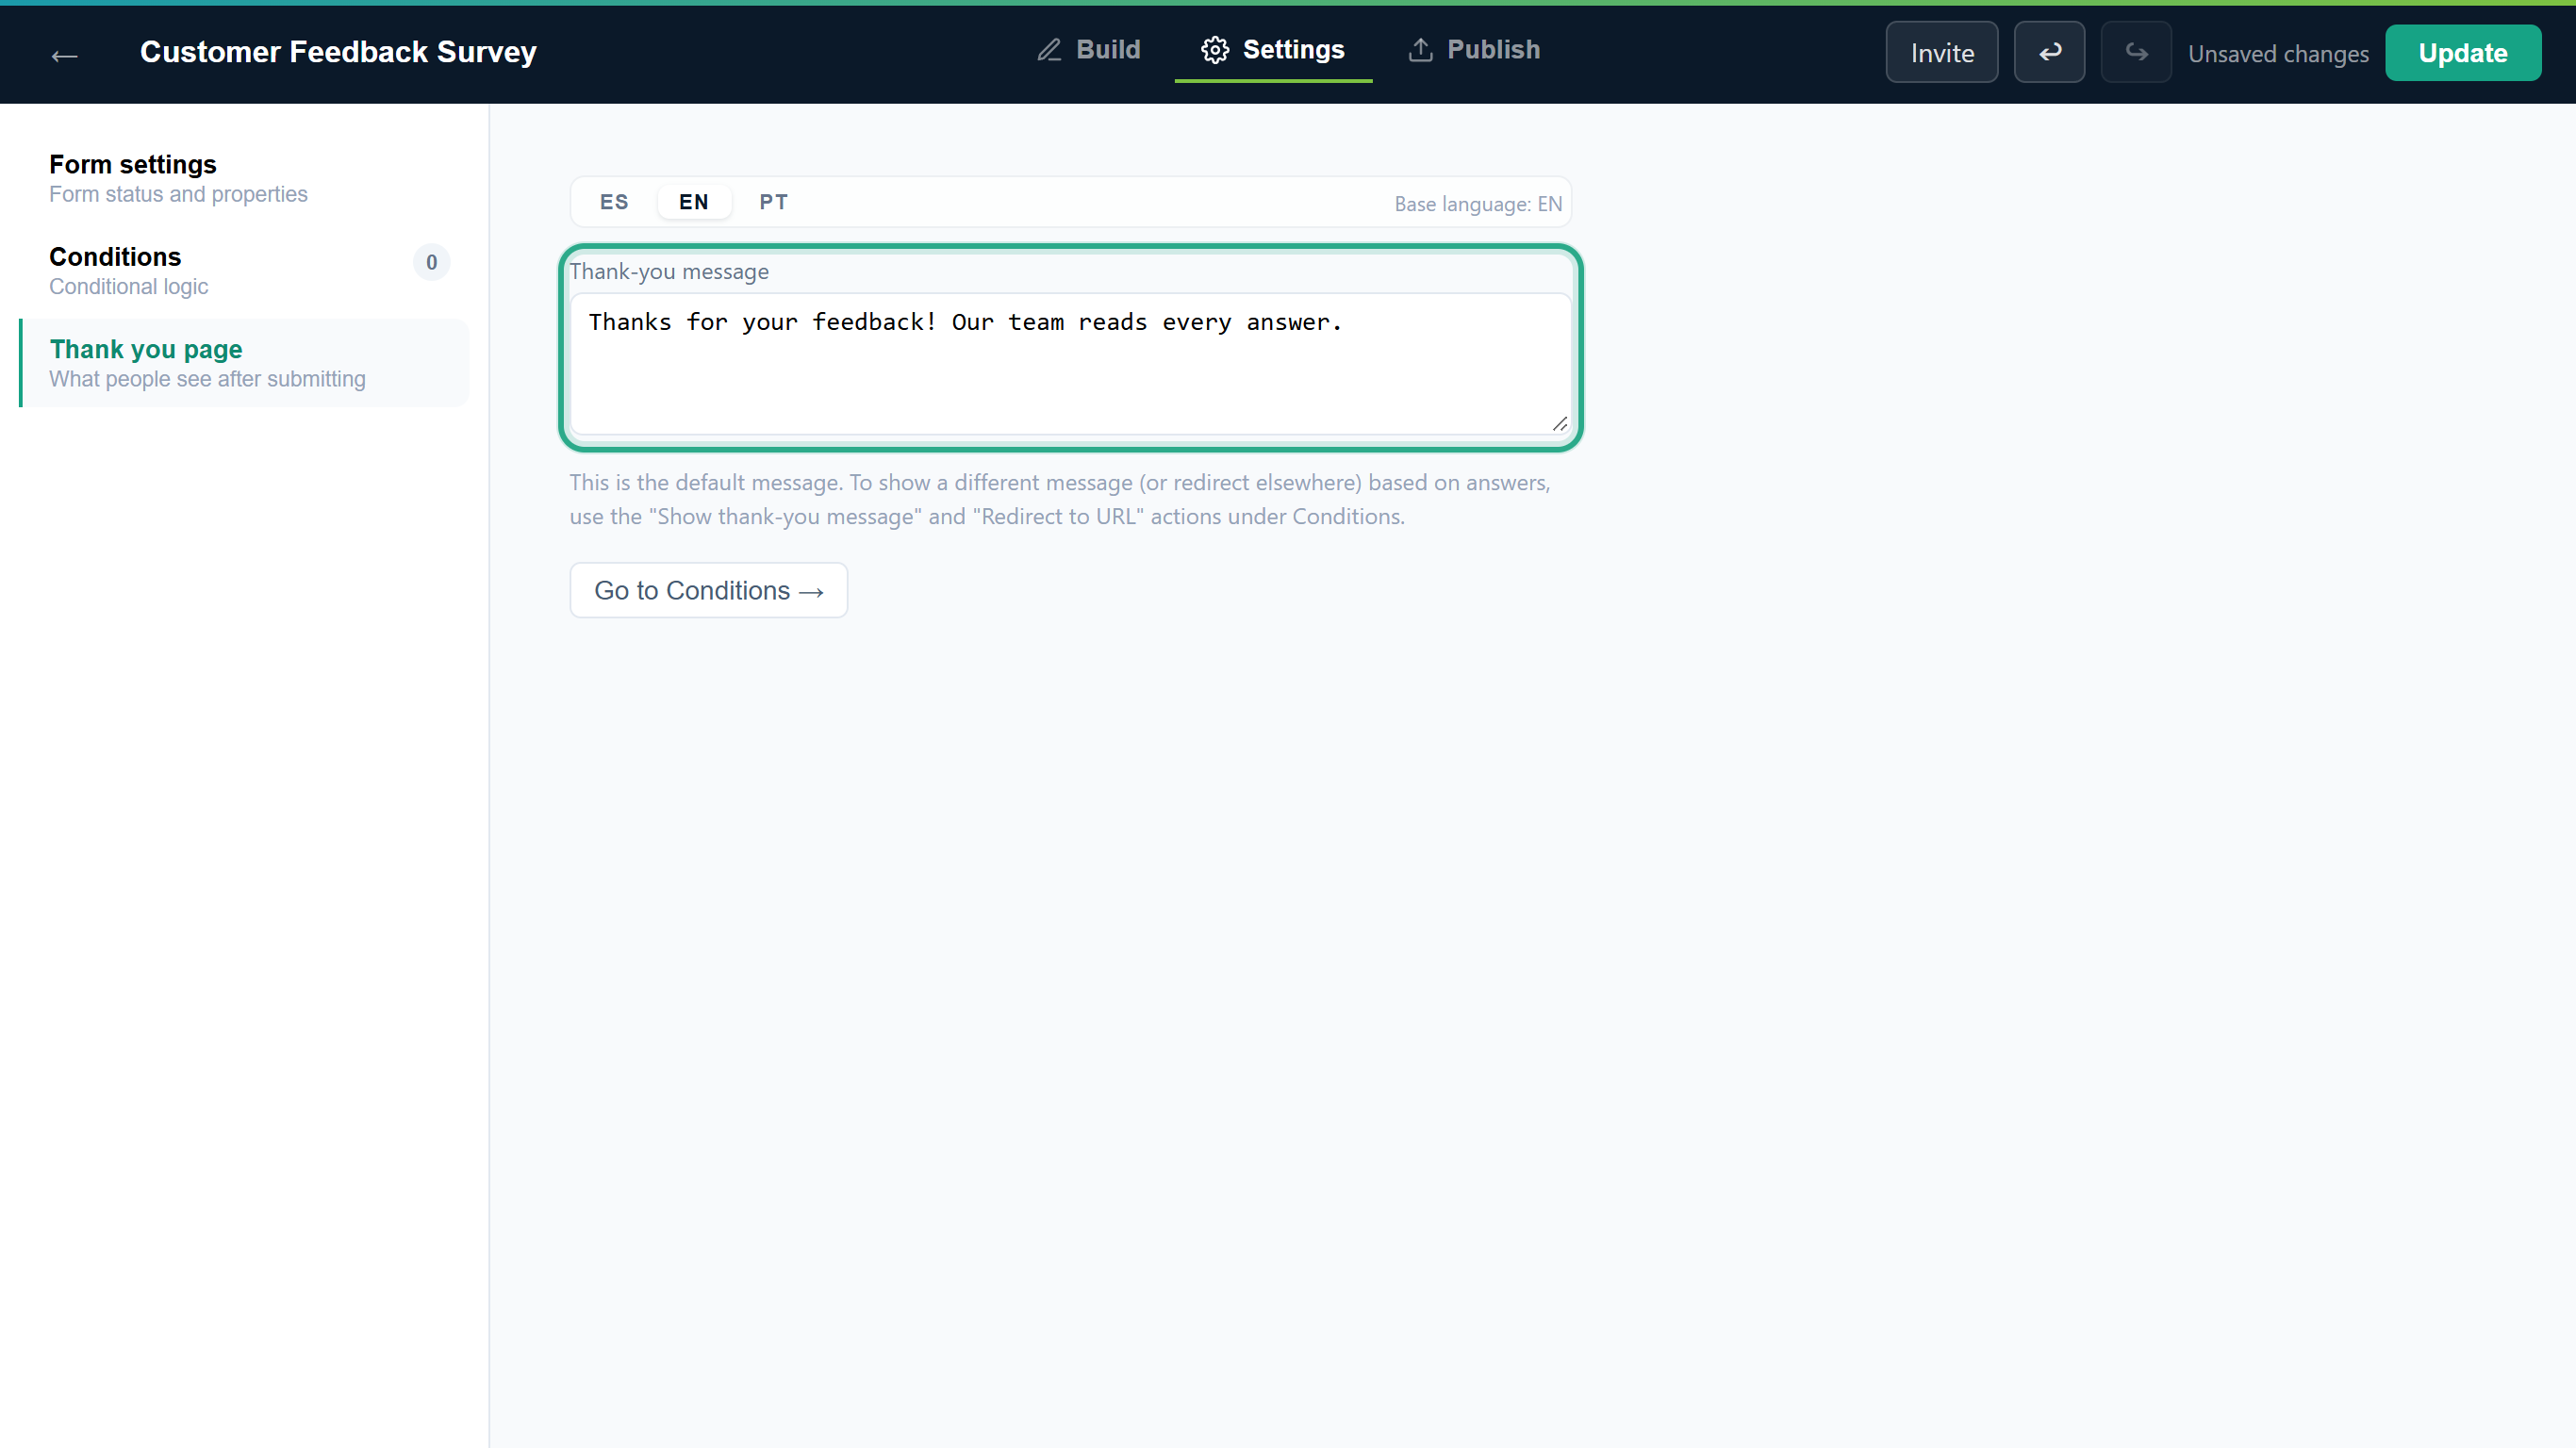 The message in the base language.
Click ES and write its translation: "¡Gracias por tu opinión! Nuestro equipo lee cada respuesta."
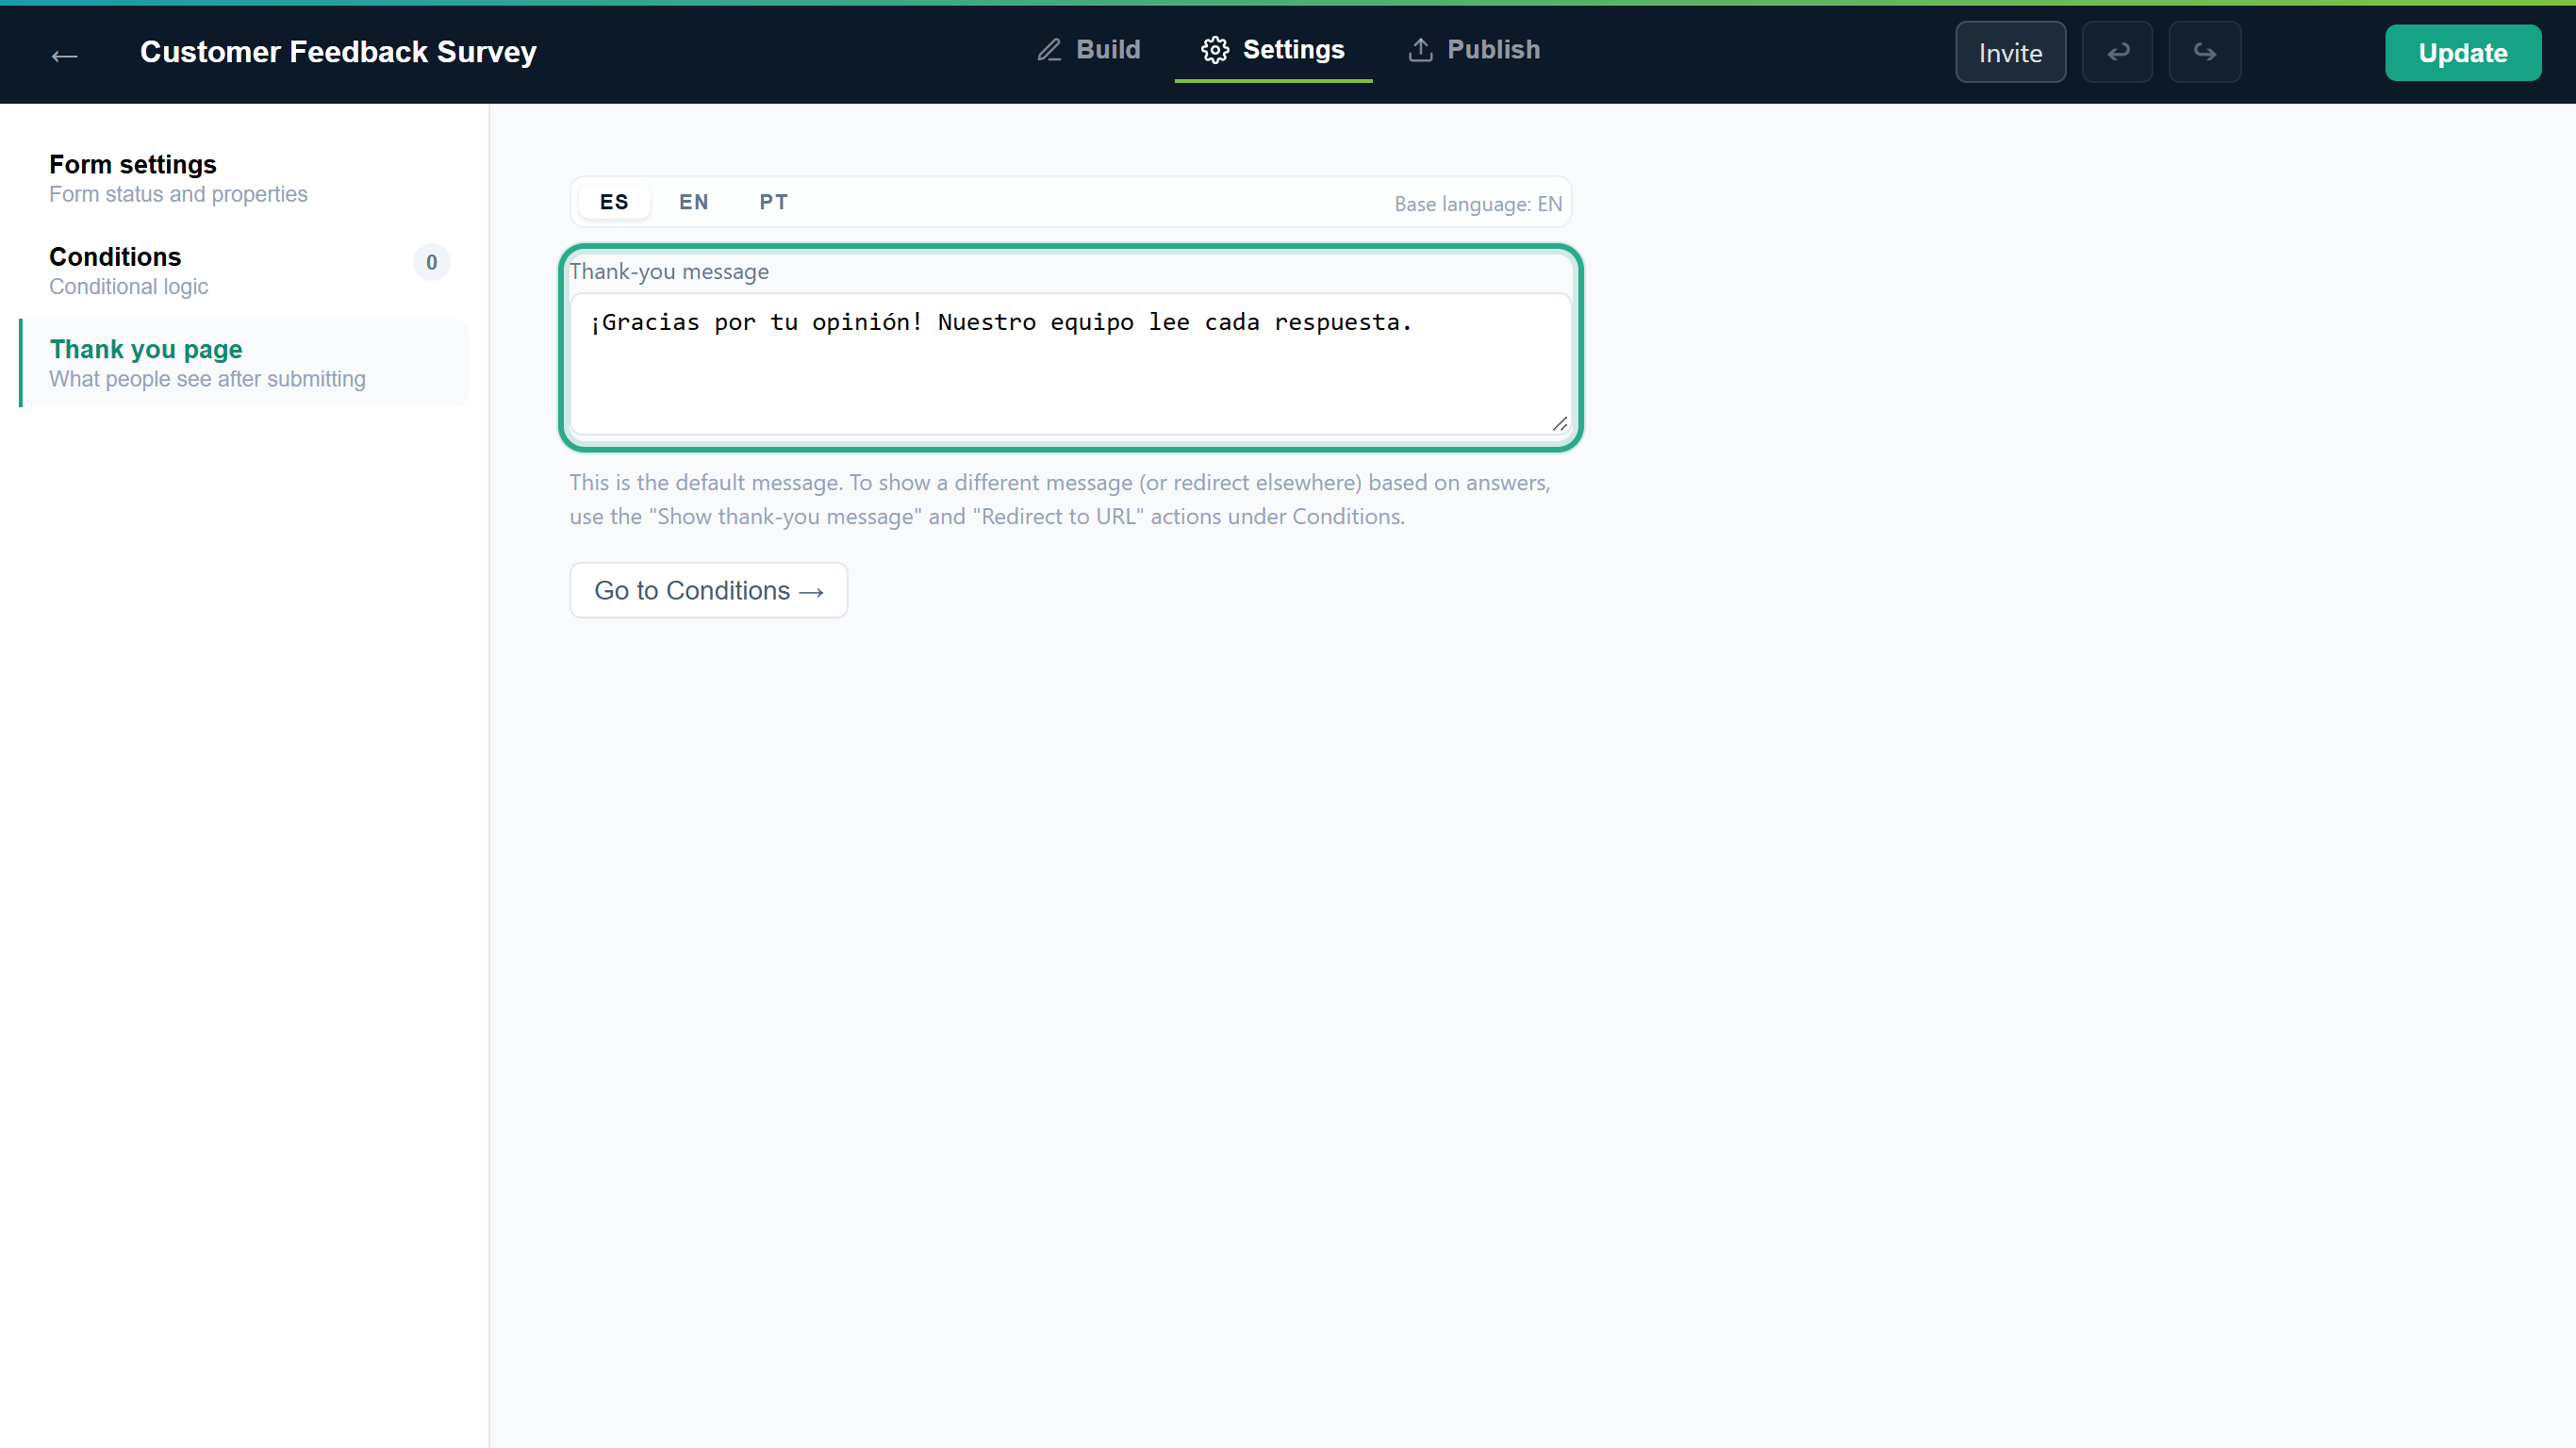 With no text in a language, visitors get the base-language message; with no message at all, anota's default "Thank you! Your submission has been received." in their language.
Result
The submit button and the thank-you screen speak Spanish to Spanish visitors. A thank-you message that a conditional logic rule shows (Show thank-you message) has no language tabs: it shows as you typed it in every language.
Task 6 — Translate page titles
Page titles only matter on a form with more than one page, so this task uses Café Aurora's two-page Catering Order Request.
Step-by-step
On the Build tab, click a language above the pages, next to Page titles — base language:. Each page's title box switches to that language. Empty boxes show the base-language title in grey.
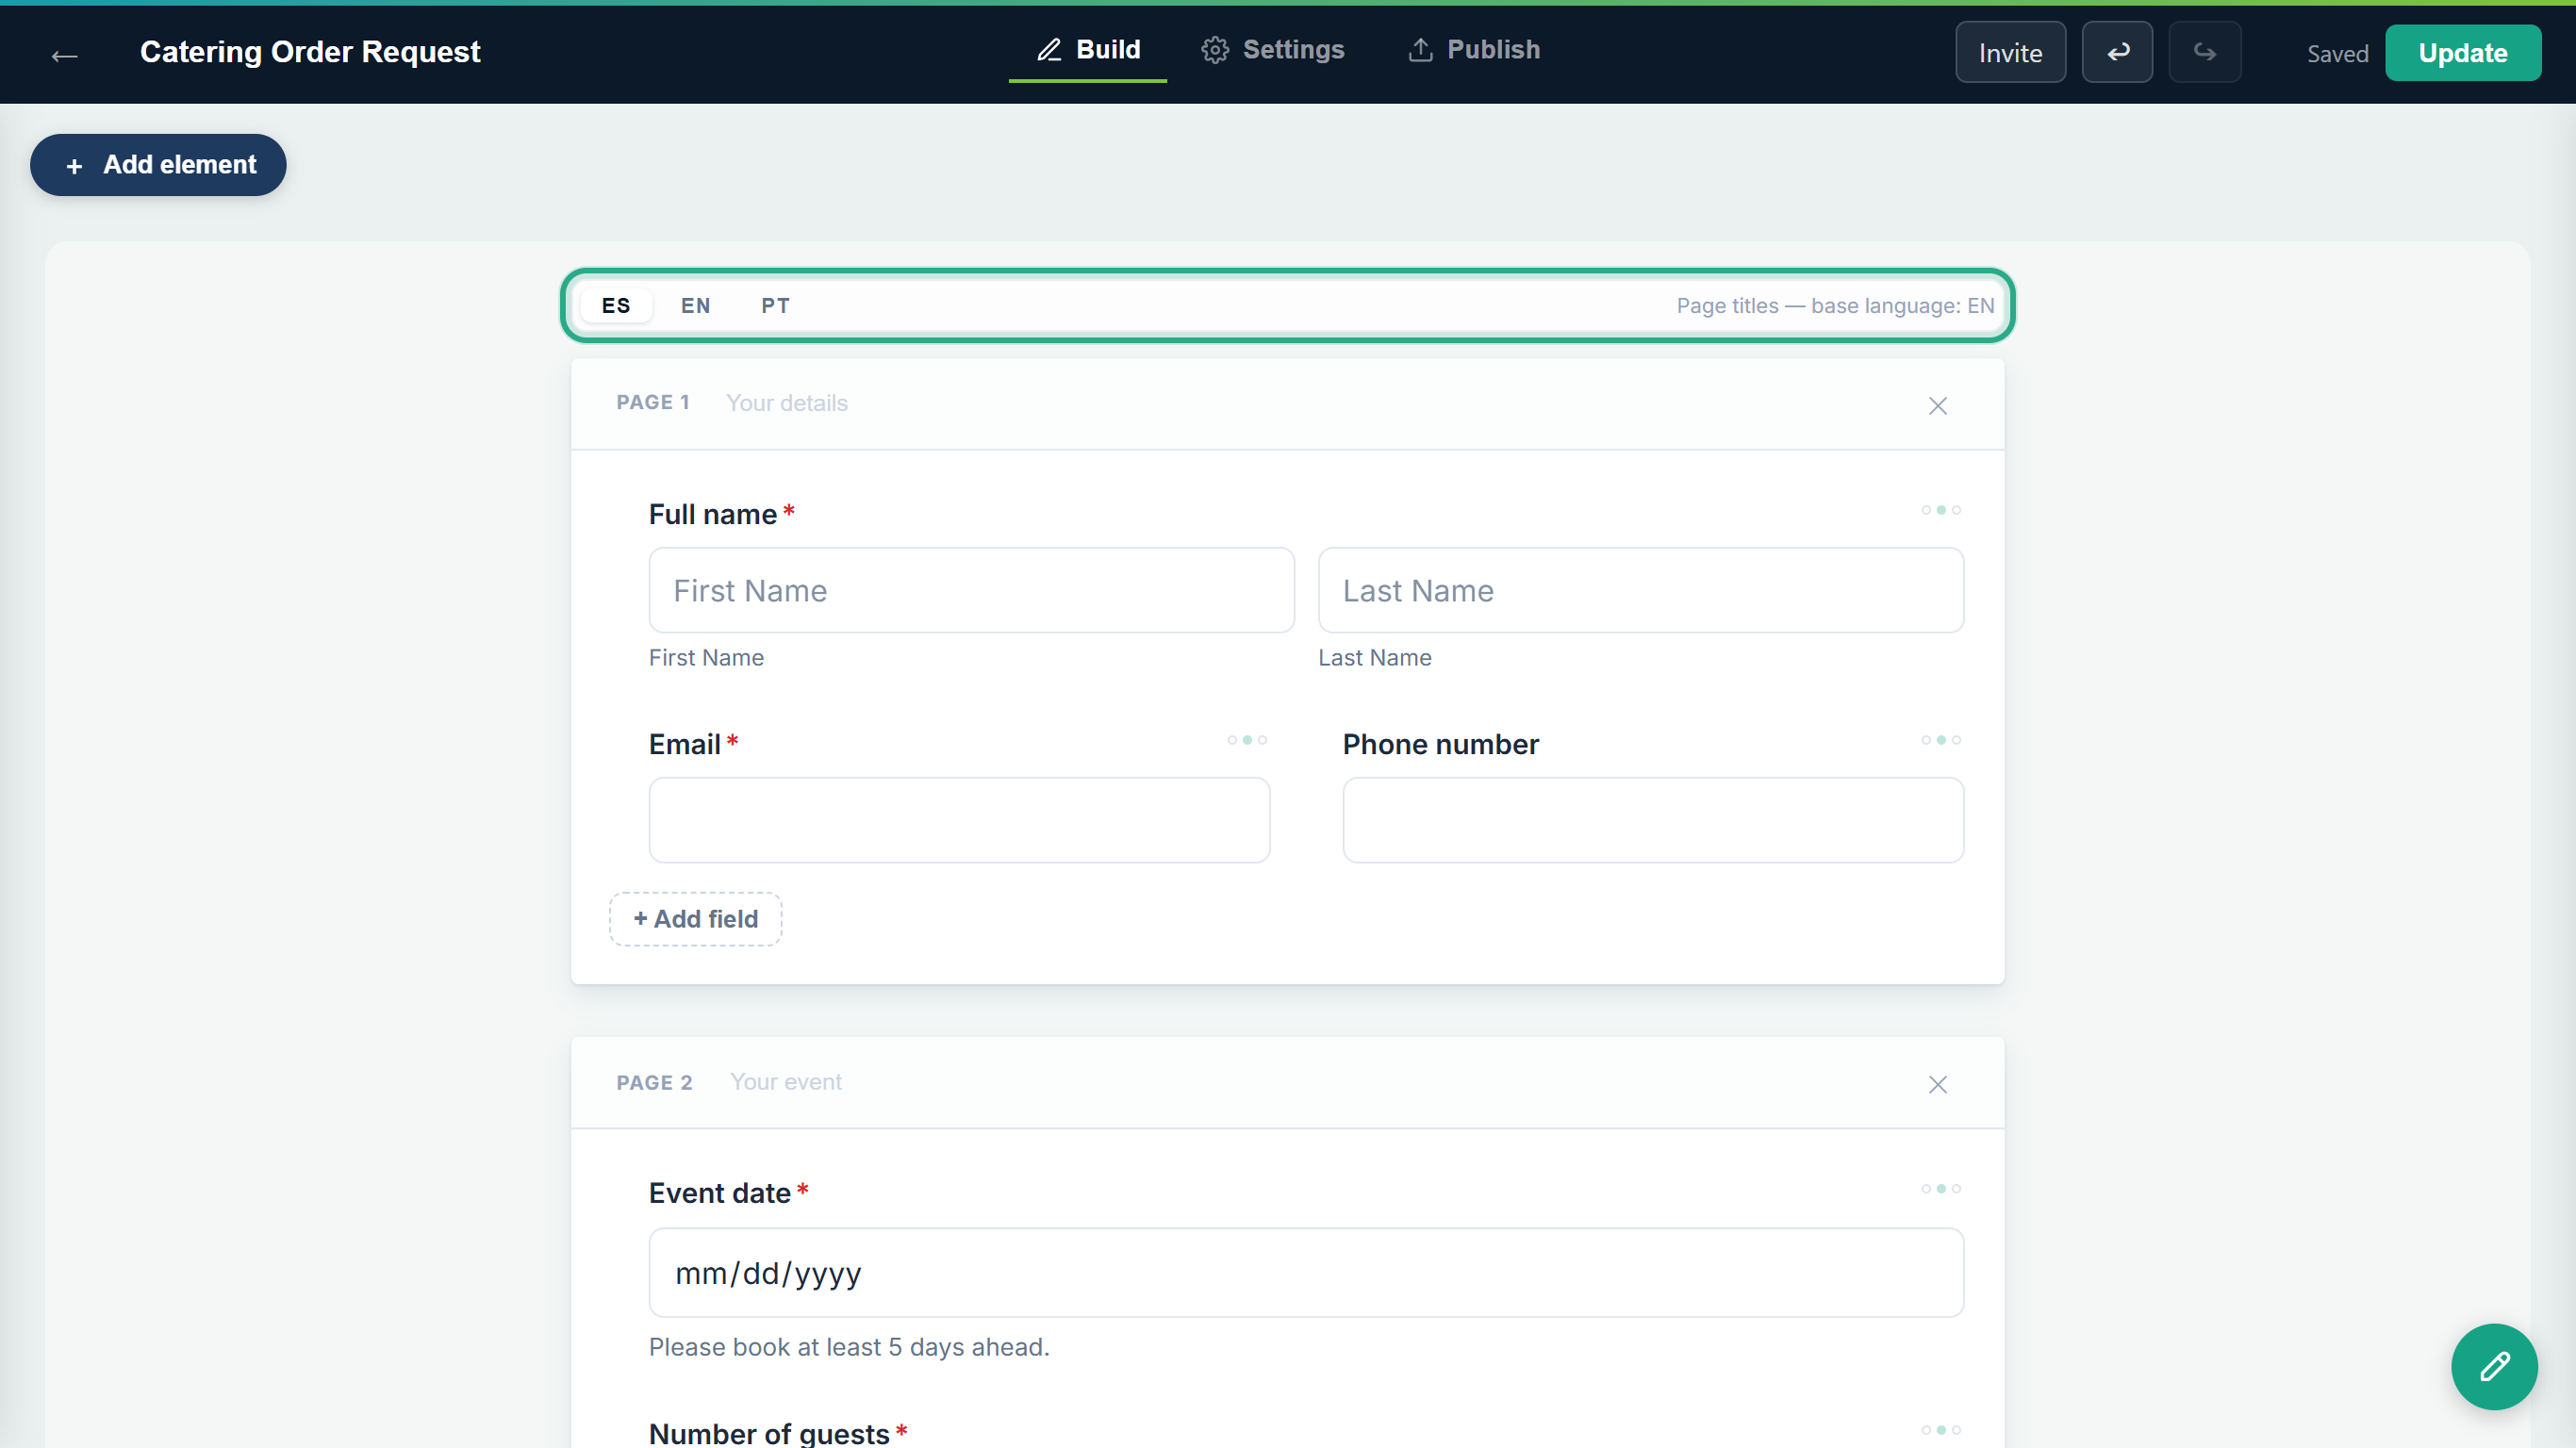 The page-title tabs sit above the first page of the canvas, separate from the field tabs in Properties.
Type each page's title in that language: "Tus datos" for Your details and "Tu evento" for Your event.
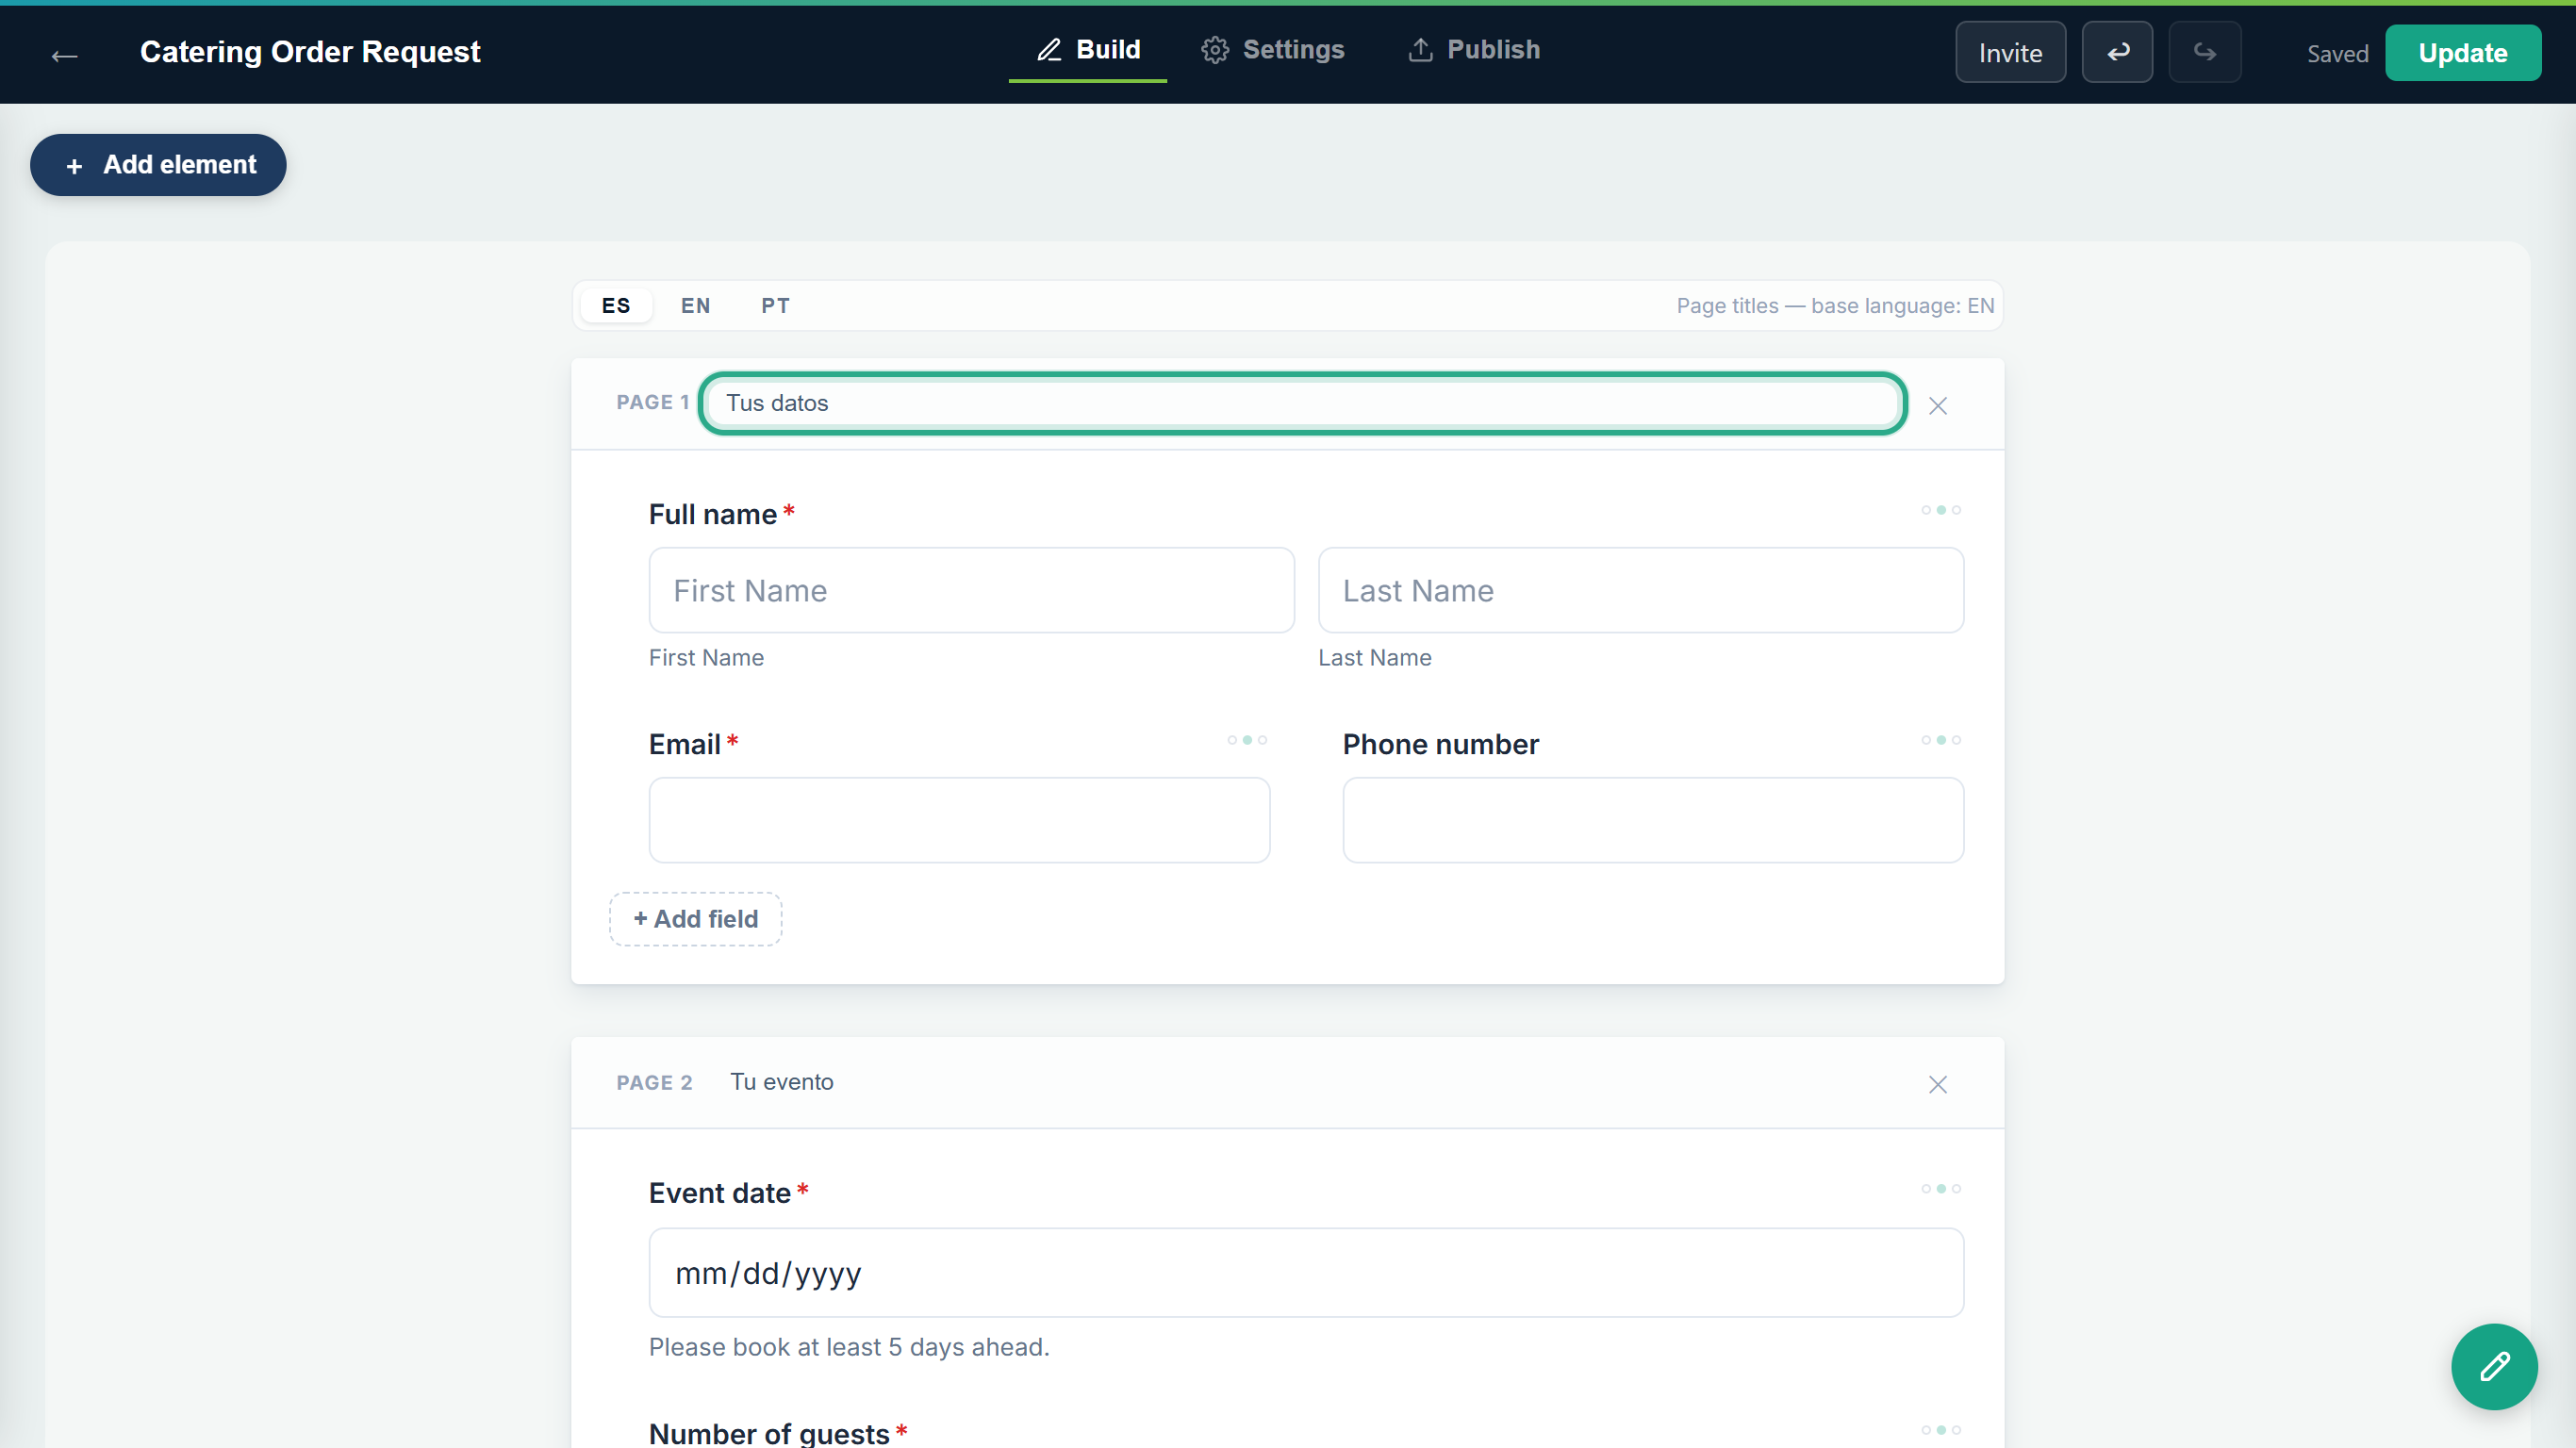 Click EN again to go back to the base-language titles.
Result
Spanish visitors see the page titles in Spanish as they move through the pages. The form's own title (Catering Order Request, Customer Feedback Survey) can't be translated in the editor: it shows as you typed it in every language.
Task 7 — Publish the translations
Step-by-step
Click Update in the top bar (Publish if the form has never been published). Translations are saved to the draft; visitors see them only after you publish.
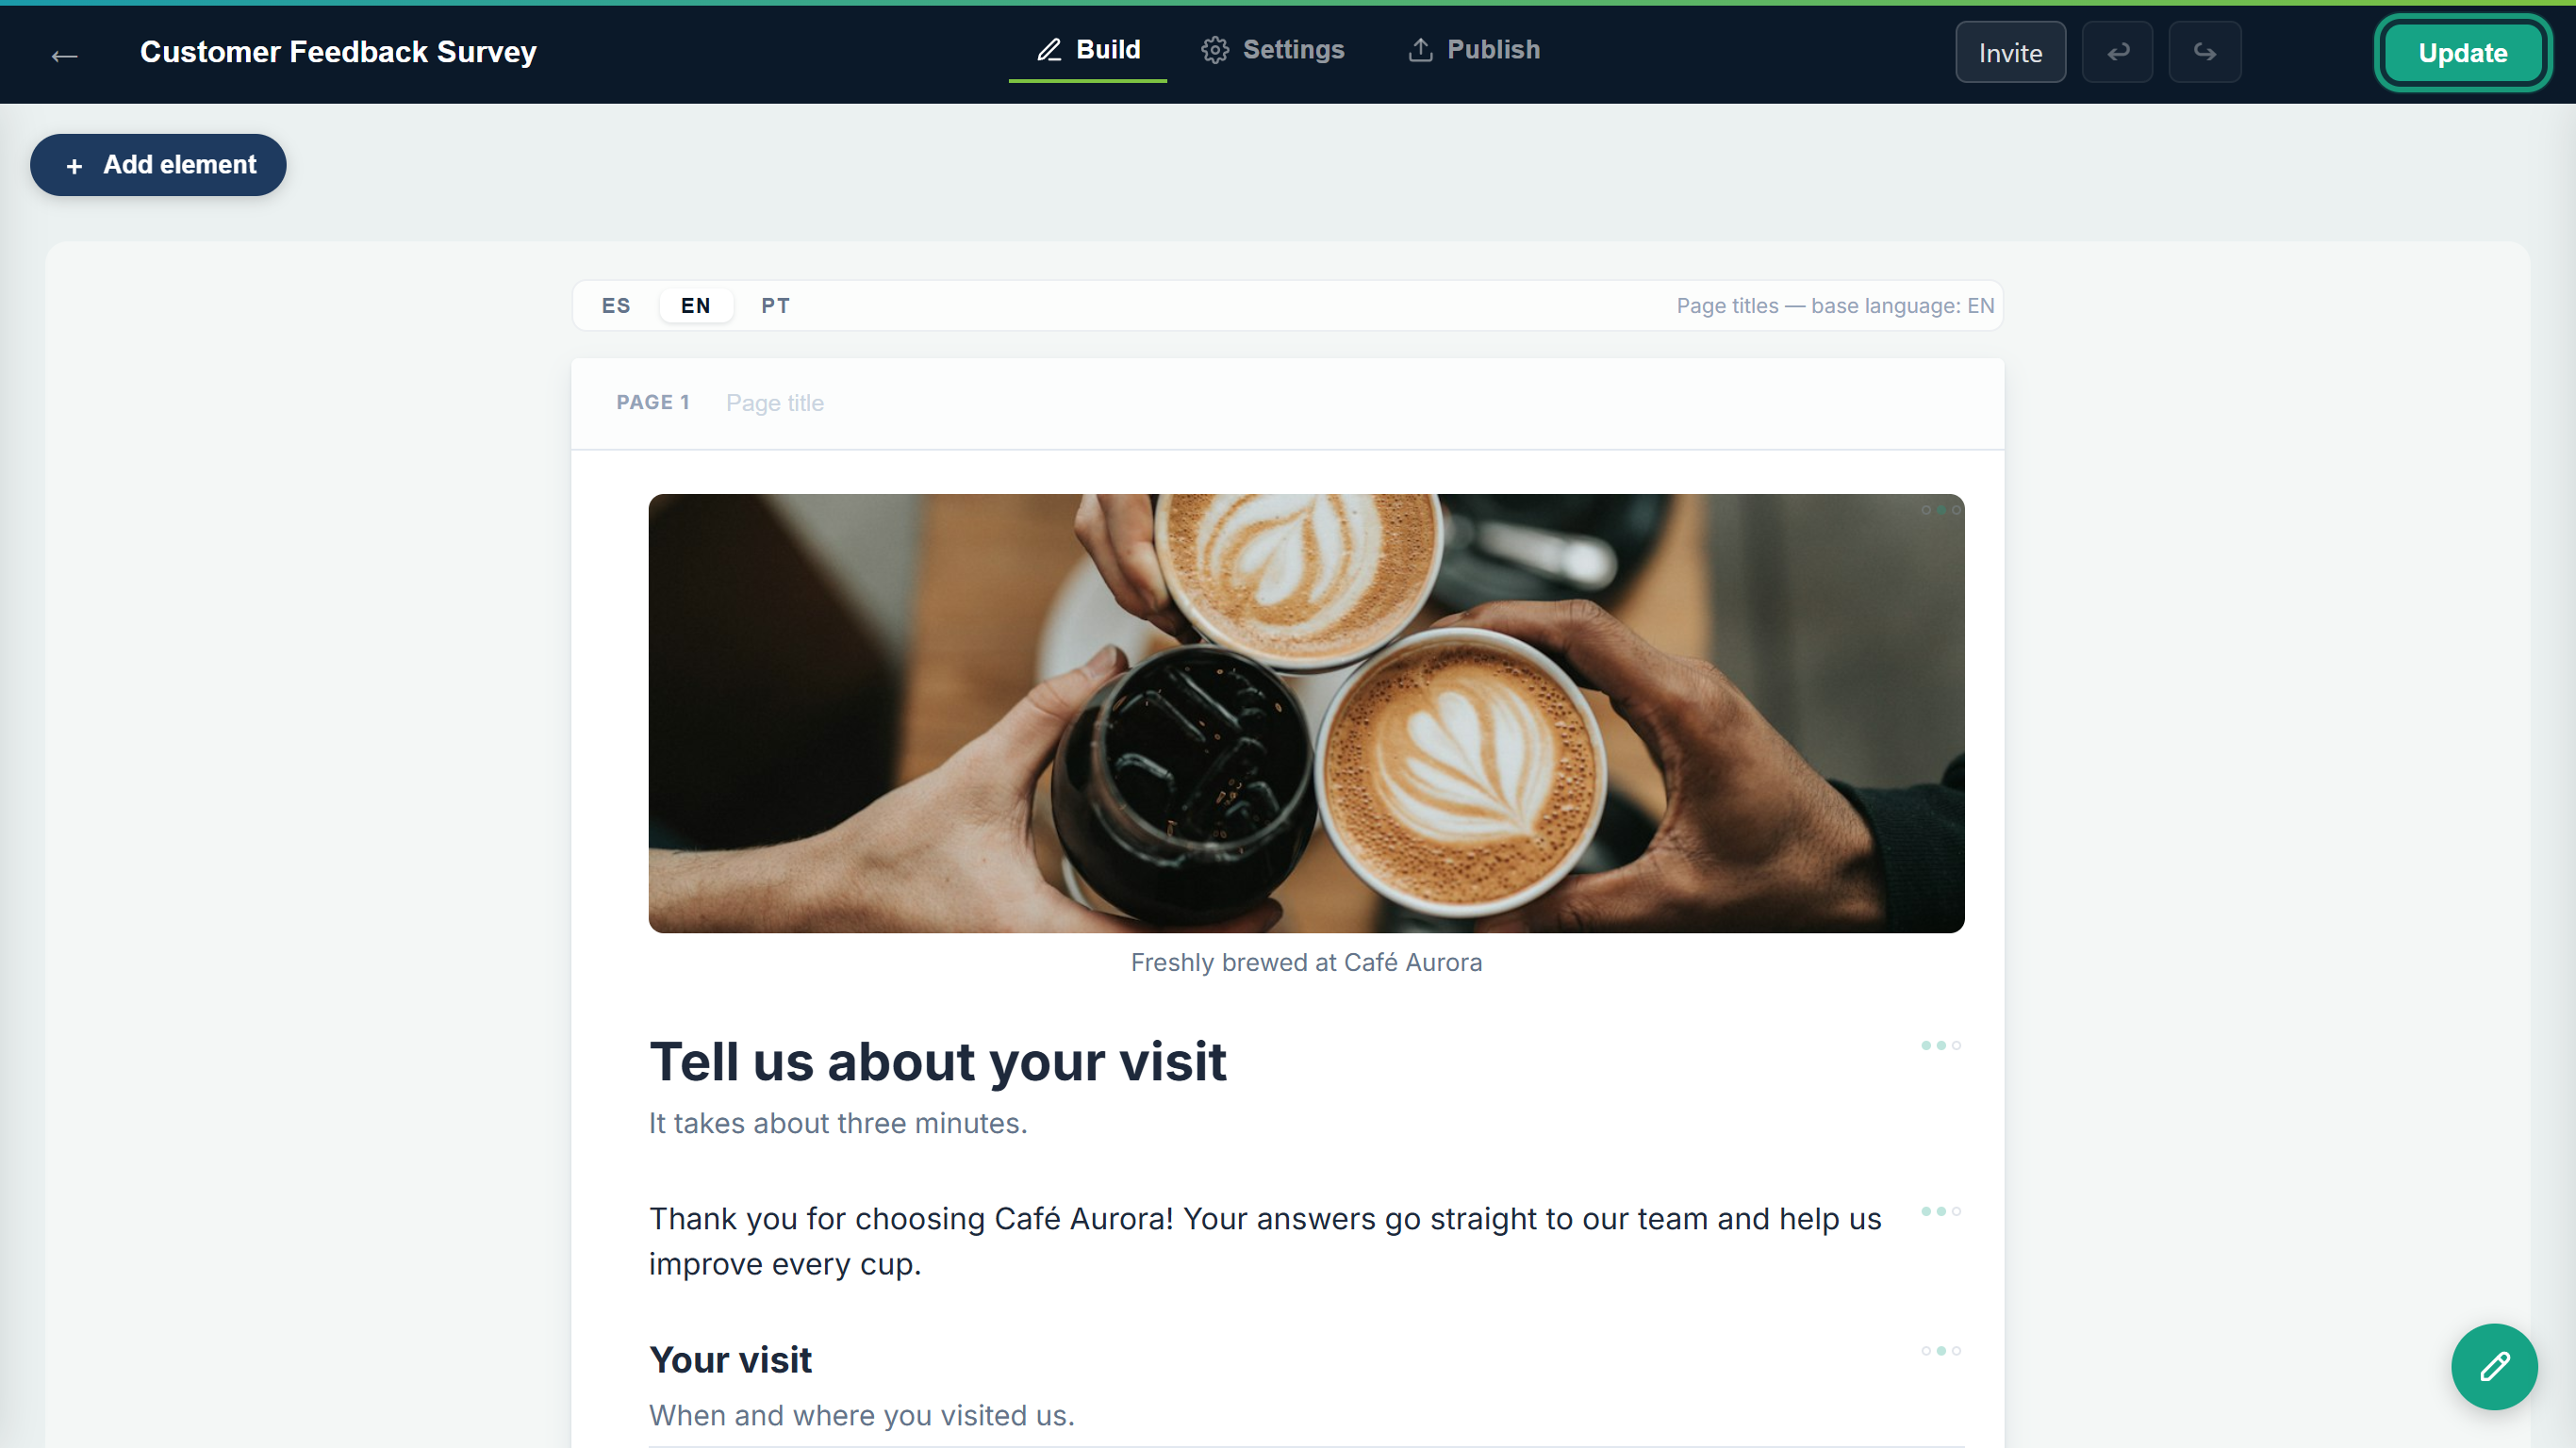 Publish again every time you add or change a translation.
Result
The translated form is live at the same link as before. One link serves every language; add ?culture=es, ?culture=en or ?culture=pt to the end of it to open the form in one language.
Task 8 — Check the form in each language
How anota chooses the visitor's language
When someone opens the public link, the form uses:
- first, the language set in the link itself, if it ends in
?culture=es,?culture=enor?culture=pt(embed codes use this, see Task 9); - then, the language the visitor last picked with the switcher at the top of a form (their browser remembers it for a year);
- then, the language of the visitor's browser, if it's Spanish, English or Portuguese;
- otherwise, Spanish.
The form's base language doesn't take part in this choice. It only decides which text fills the gaps you haven't translated.
Step-by-step
Open the form's public link (on the Publish tab, under Share). A visitor whose browser is in English sees your English form, and the ES / EN / PT switcher at the top right, with the current language highlighted. Click ES.
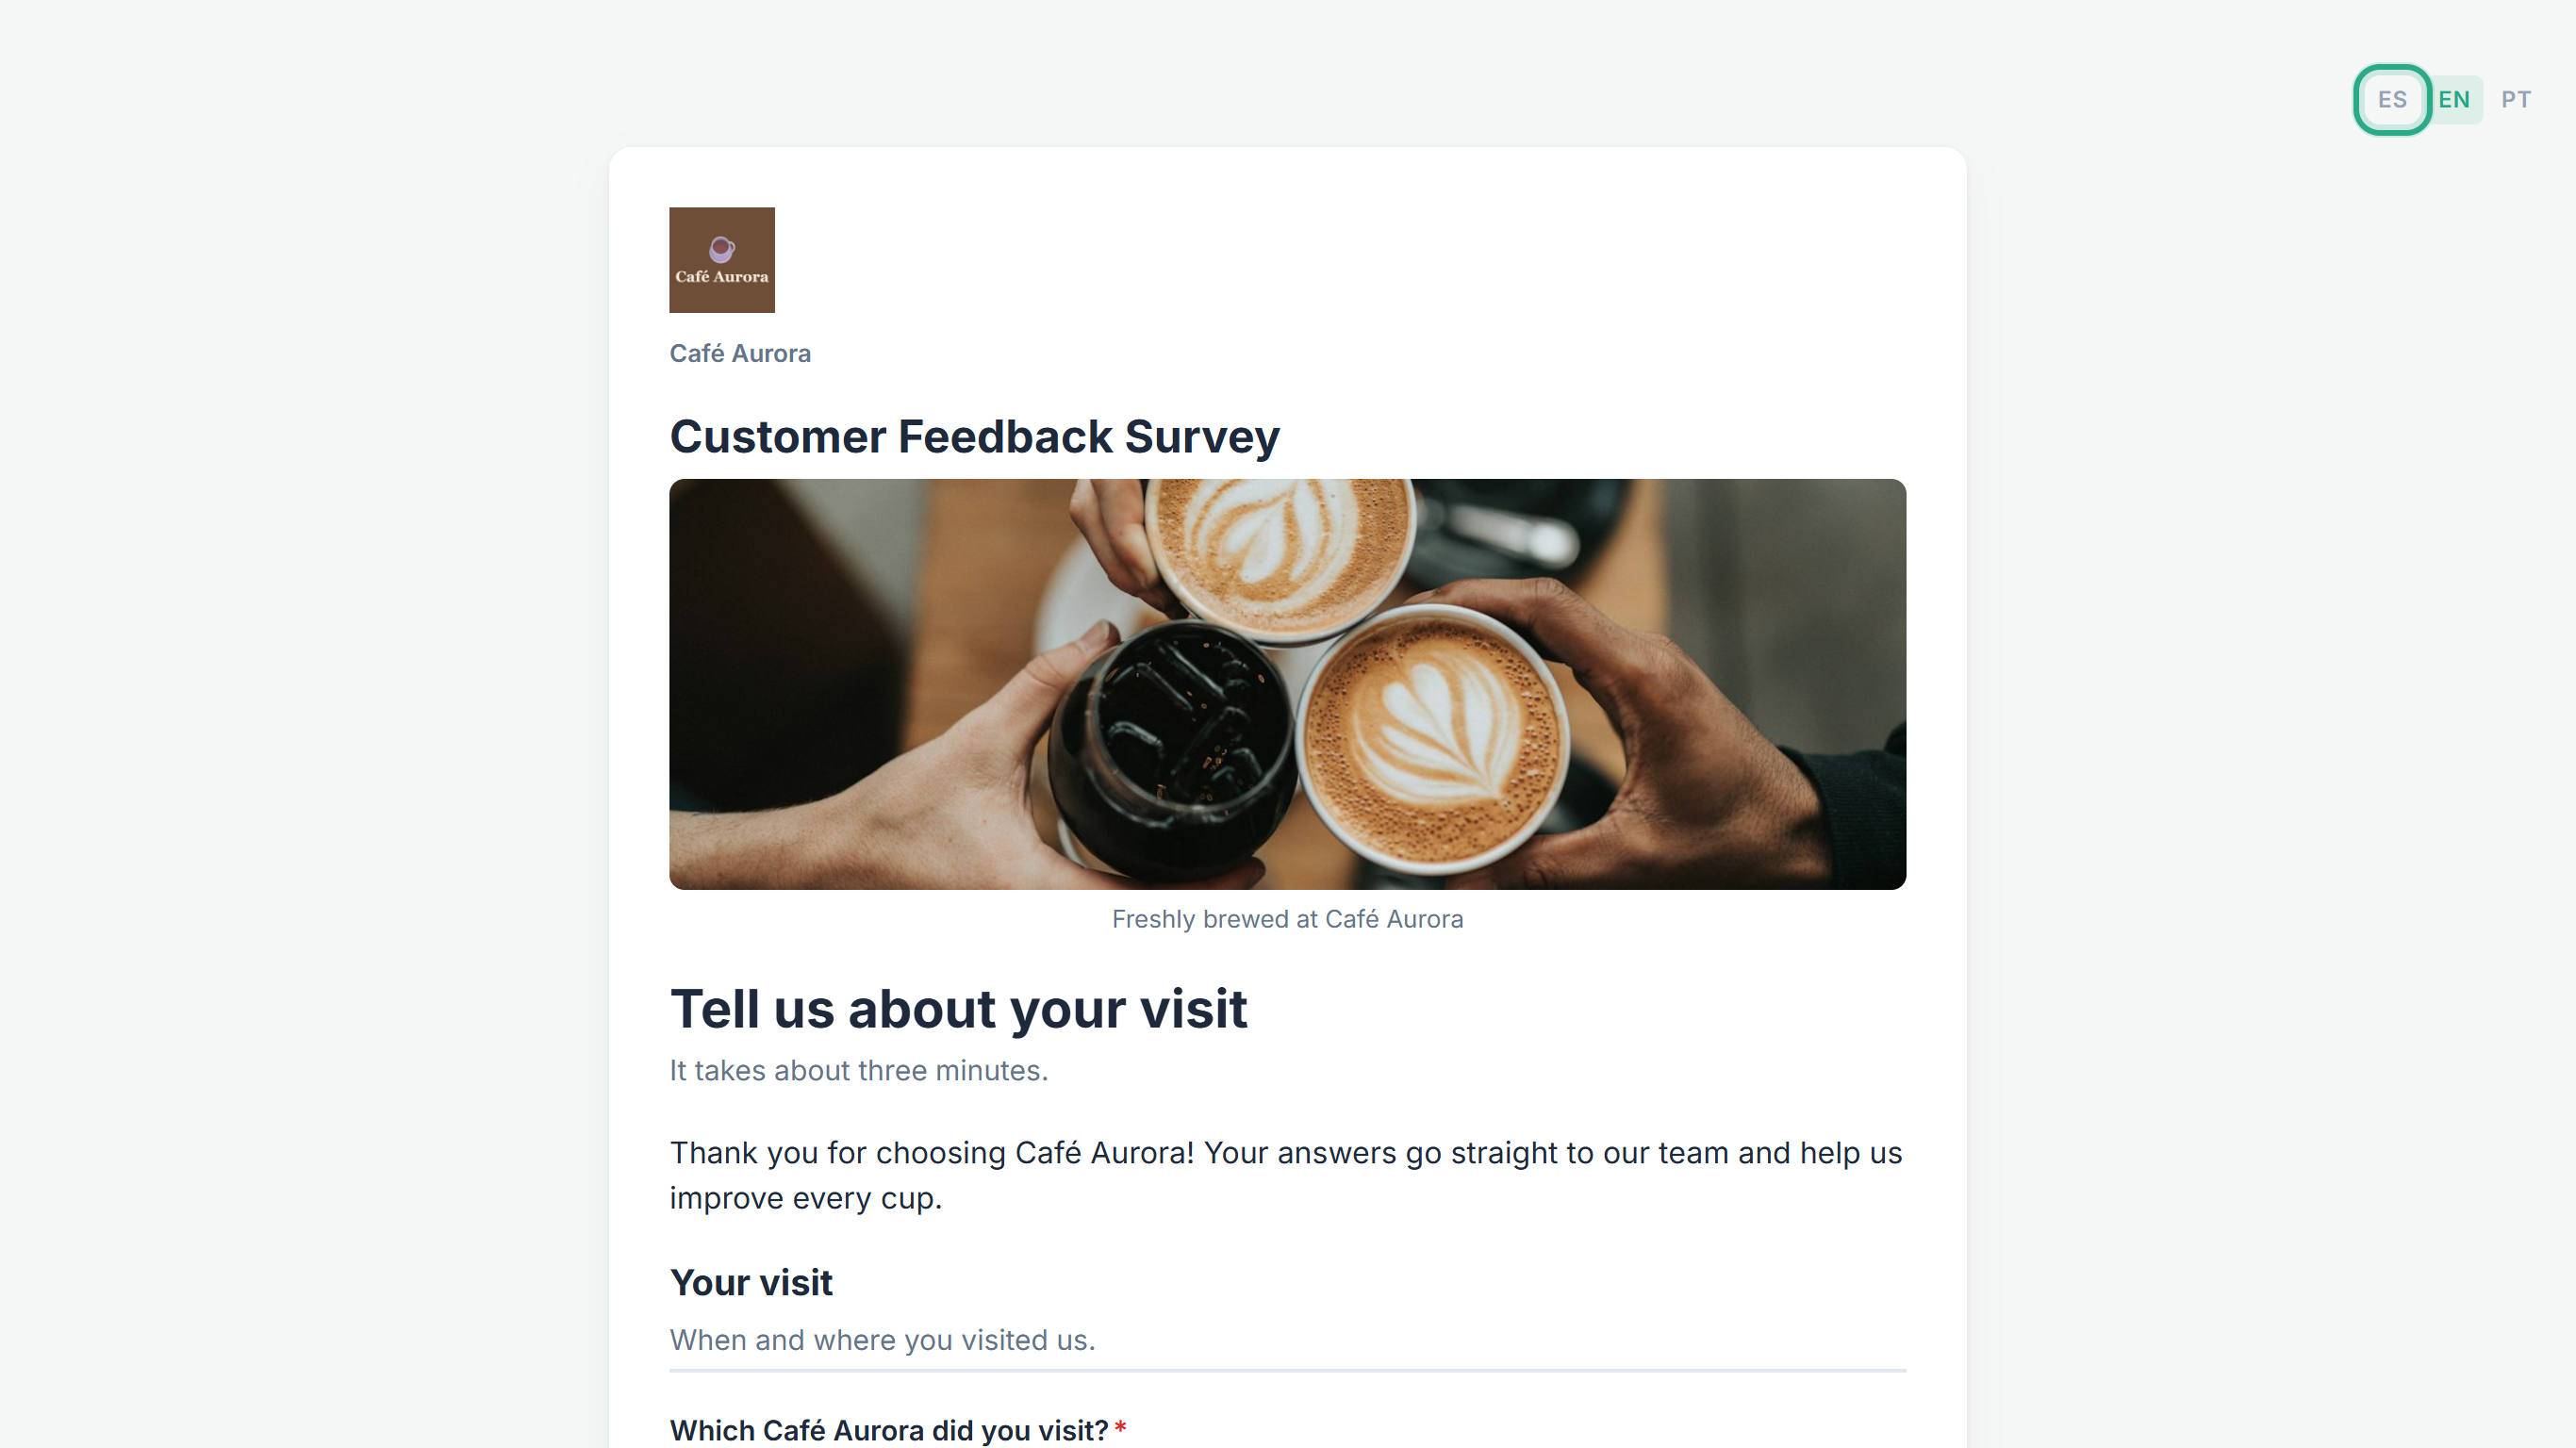 The switcher is on every public form opened from its link. Embedded forms don't show it (see Task 9).
The form reloads in Spanish: the heading, its help text and the paragraph are the texts you translated. The form title stays Customer Feedback Survey, and the image caption stays in English because it wasn't translated.
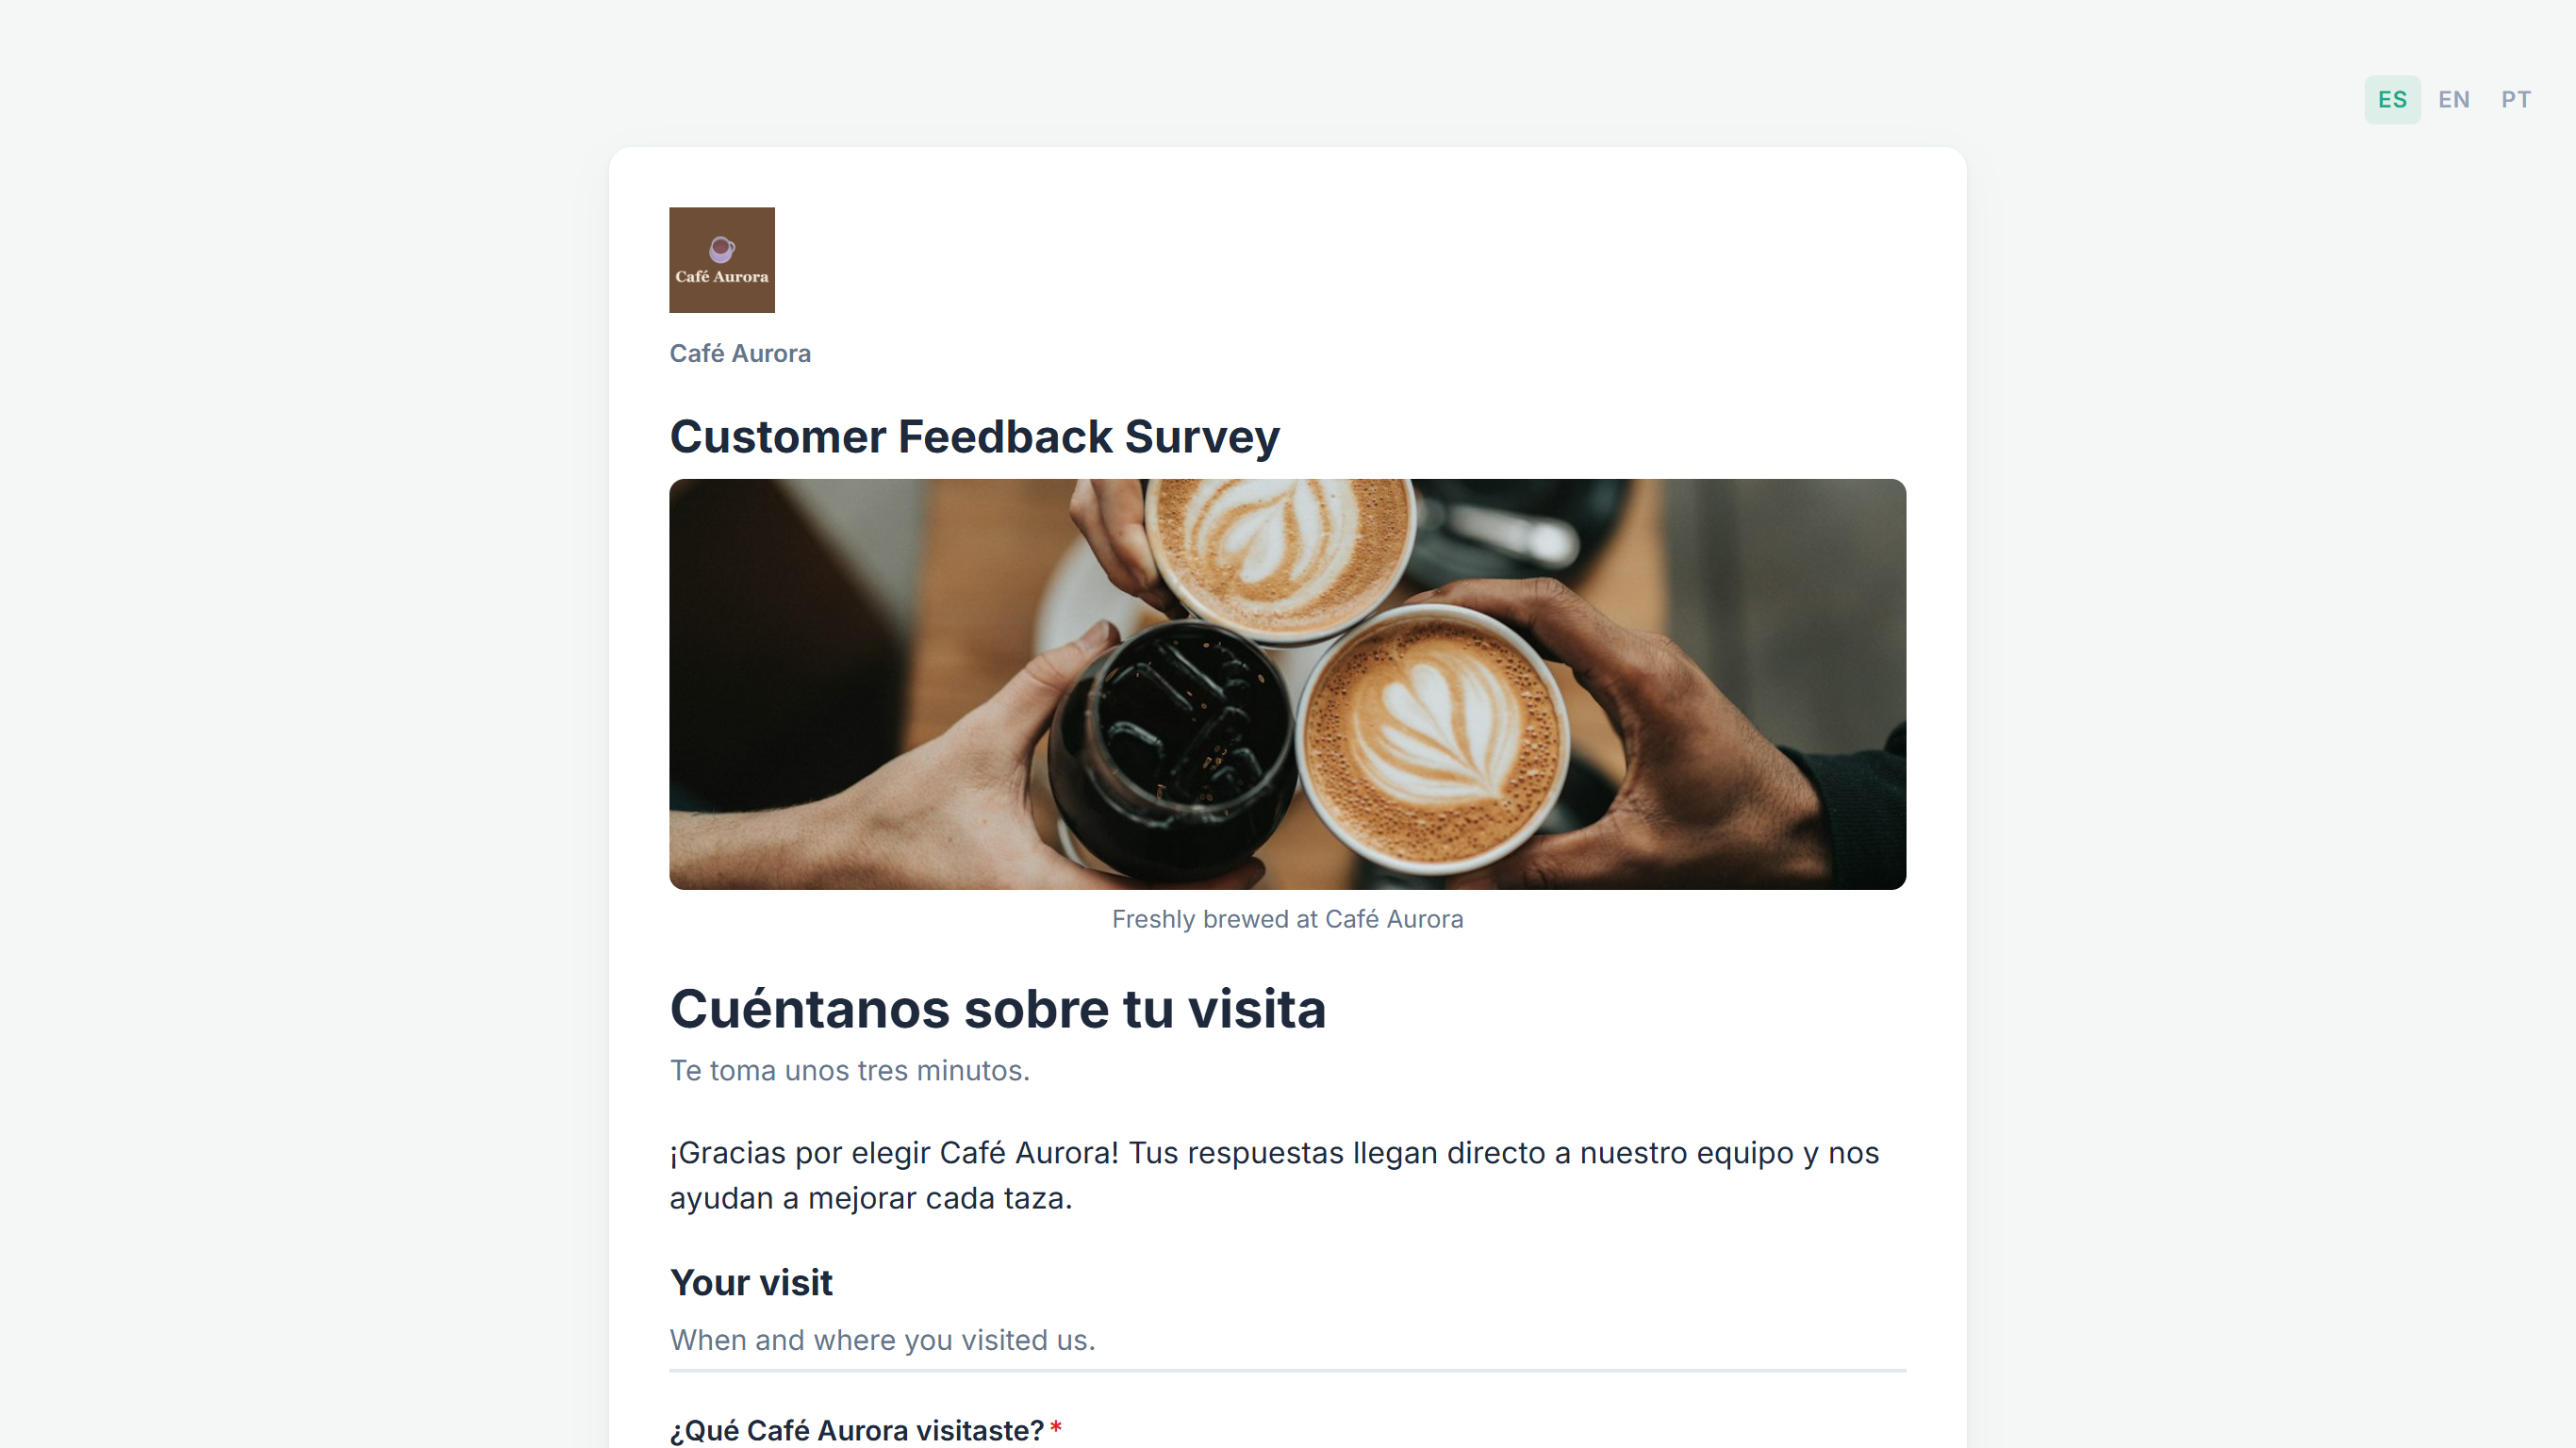 Your Spanish texts replace the English ones where they exist.
Scroll down. ¿Qué Café Aurora visitaste? is in Spanish, but How did you order? and What did you have? were never translated, so they fall back to English. anota's own texts are already in Spanish: Selecciona... in the dropdown, and Otro: with Especifica aquí for the "Other" answer.
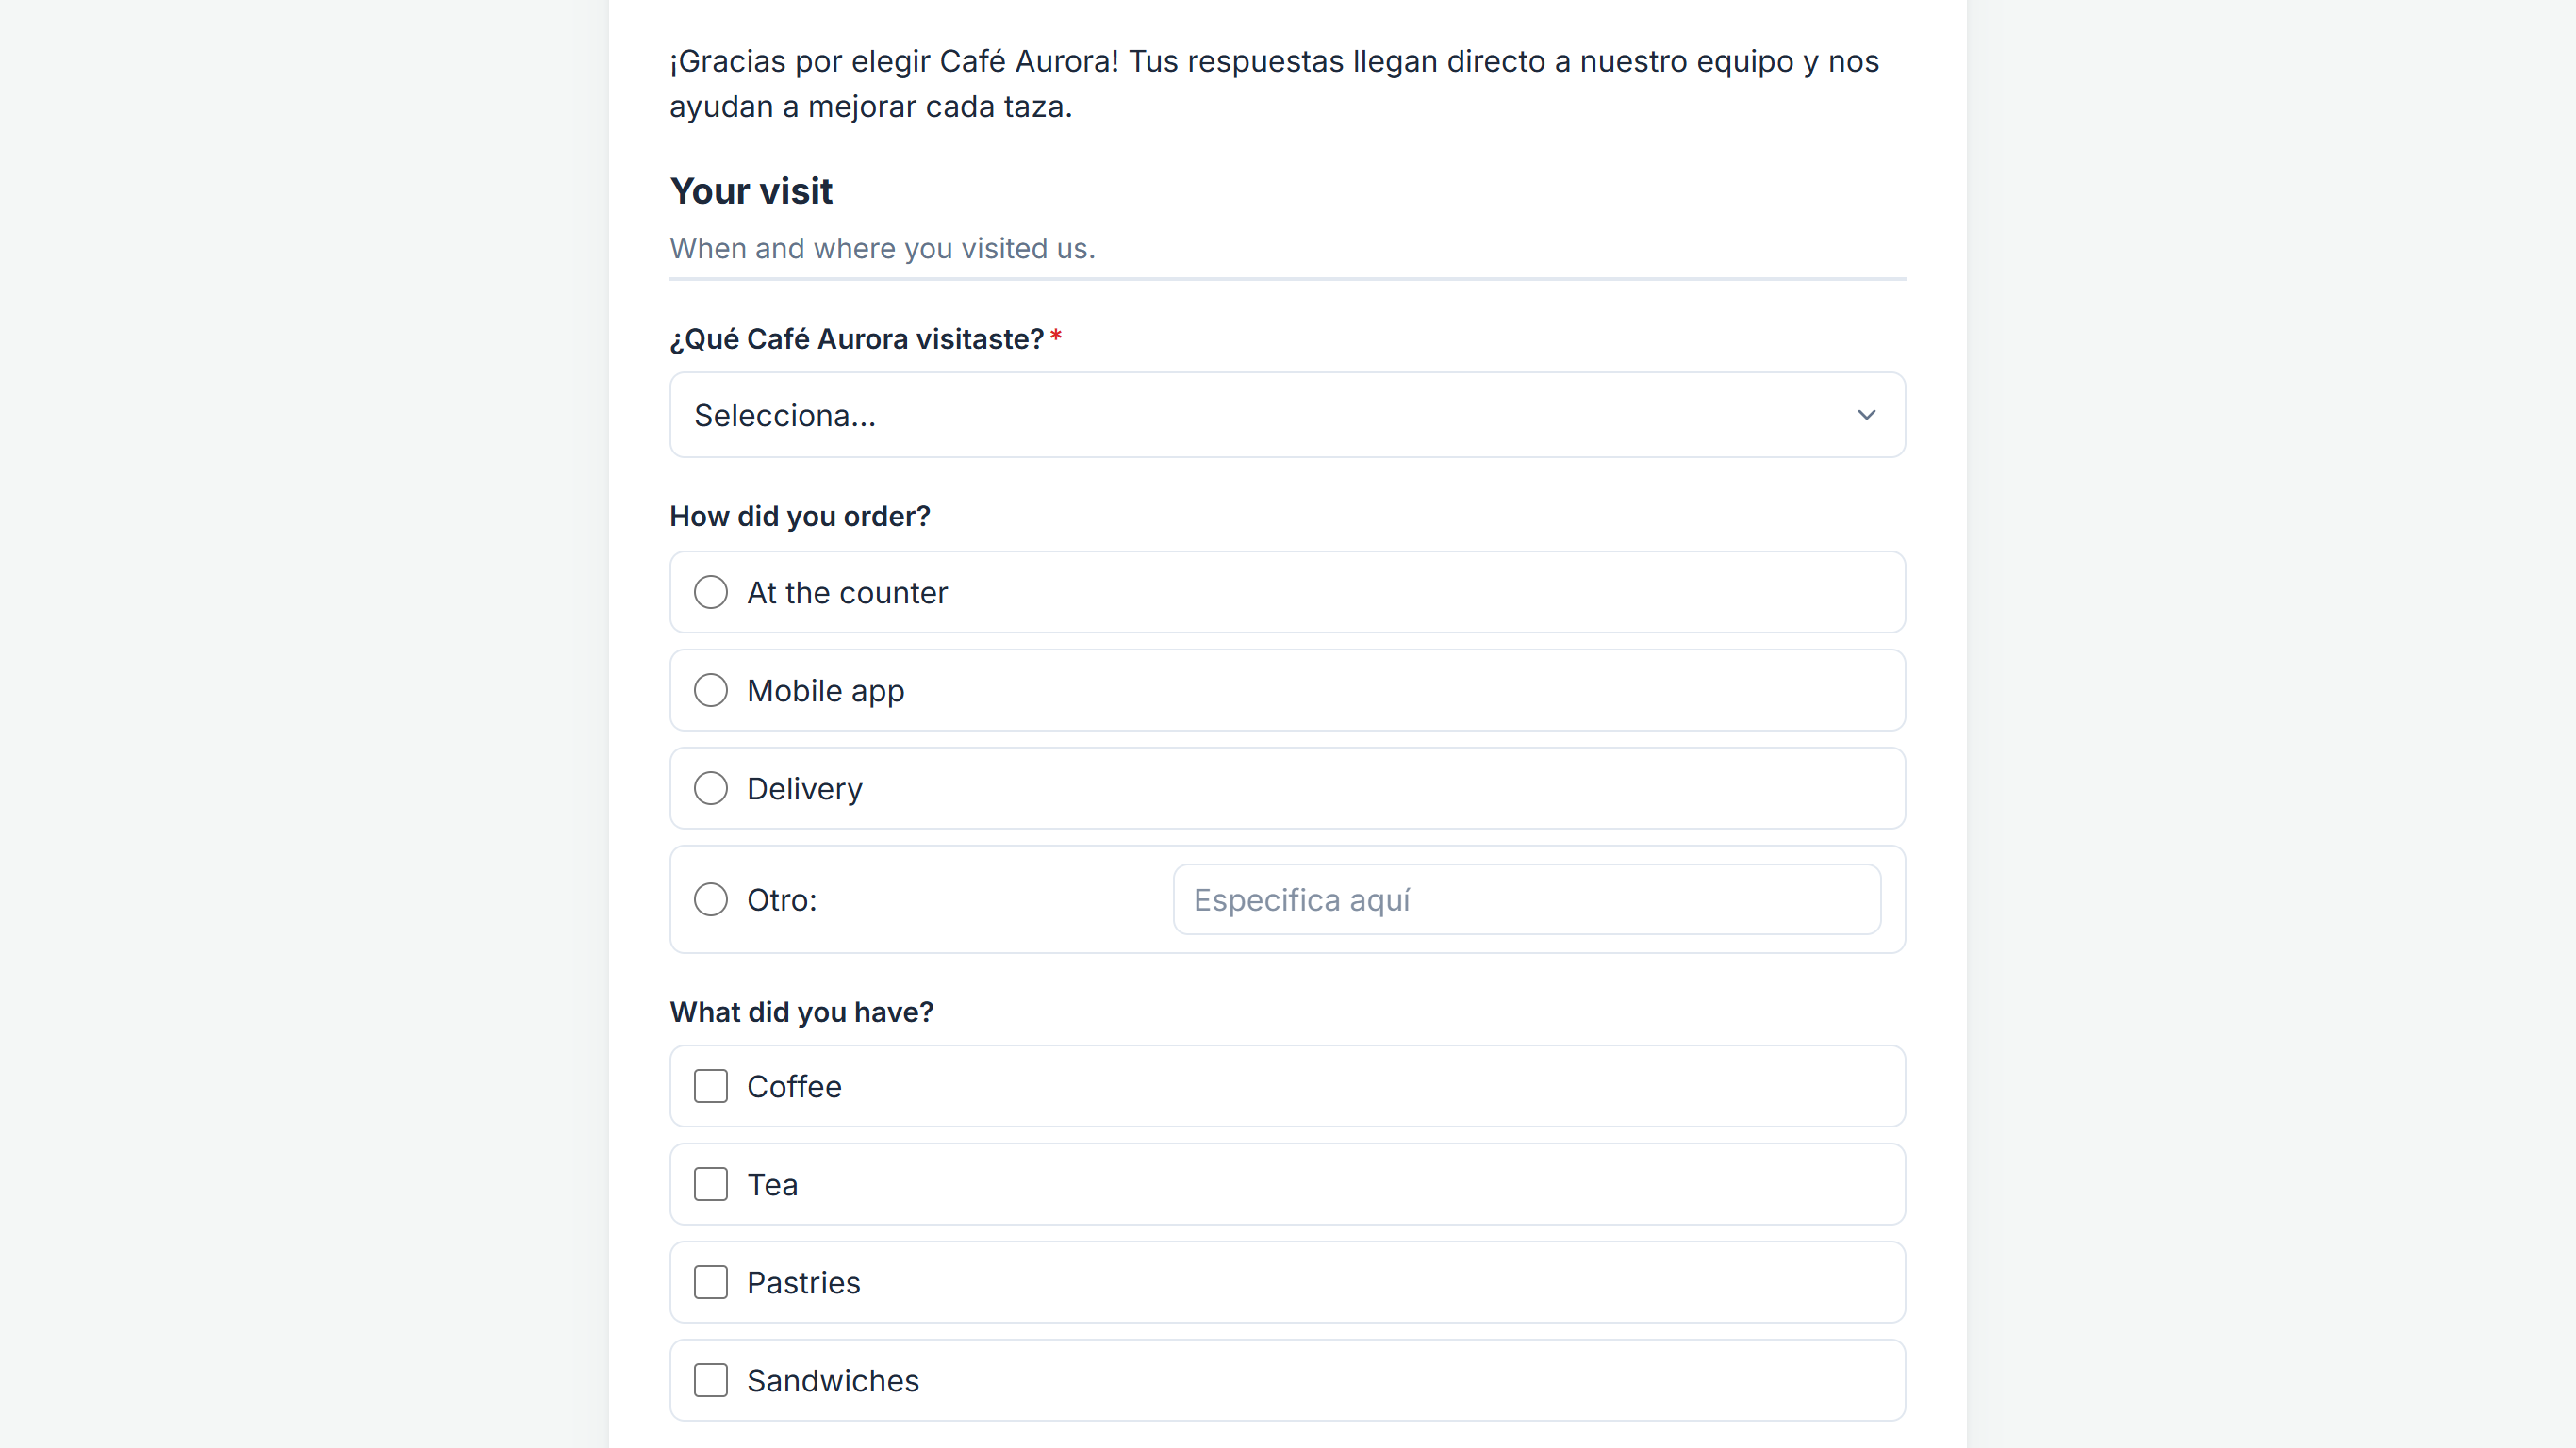 Untranslated questions show in the base language; anota's own texts follow the visitor's language.
At the end of the form, the button reads Enviar mi opinión, your translated Submit button text. The signature pad (Firma aquí, Borrar) and the footer (Creado con anota) are anota's own texts in Spanish; the product names are in English because product fields can't be translated.
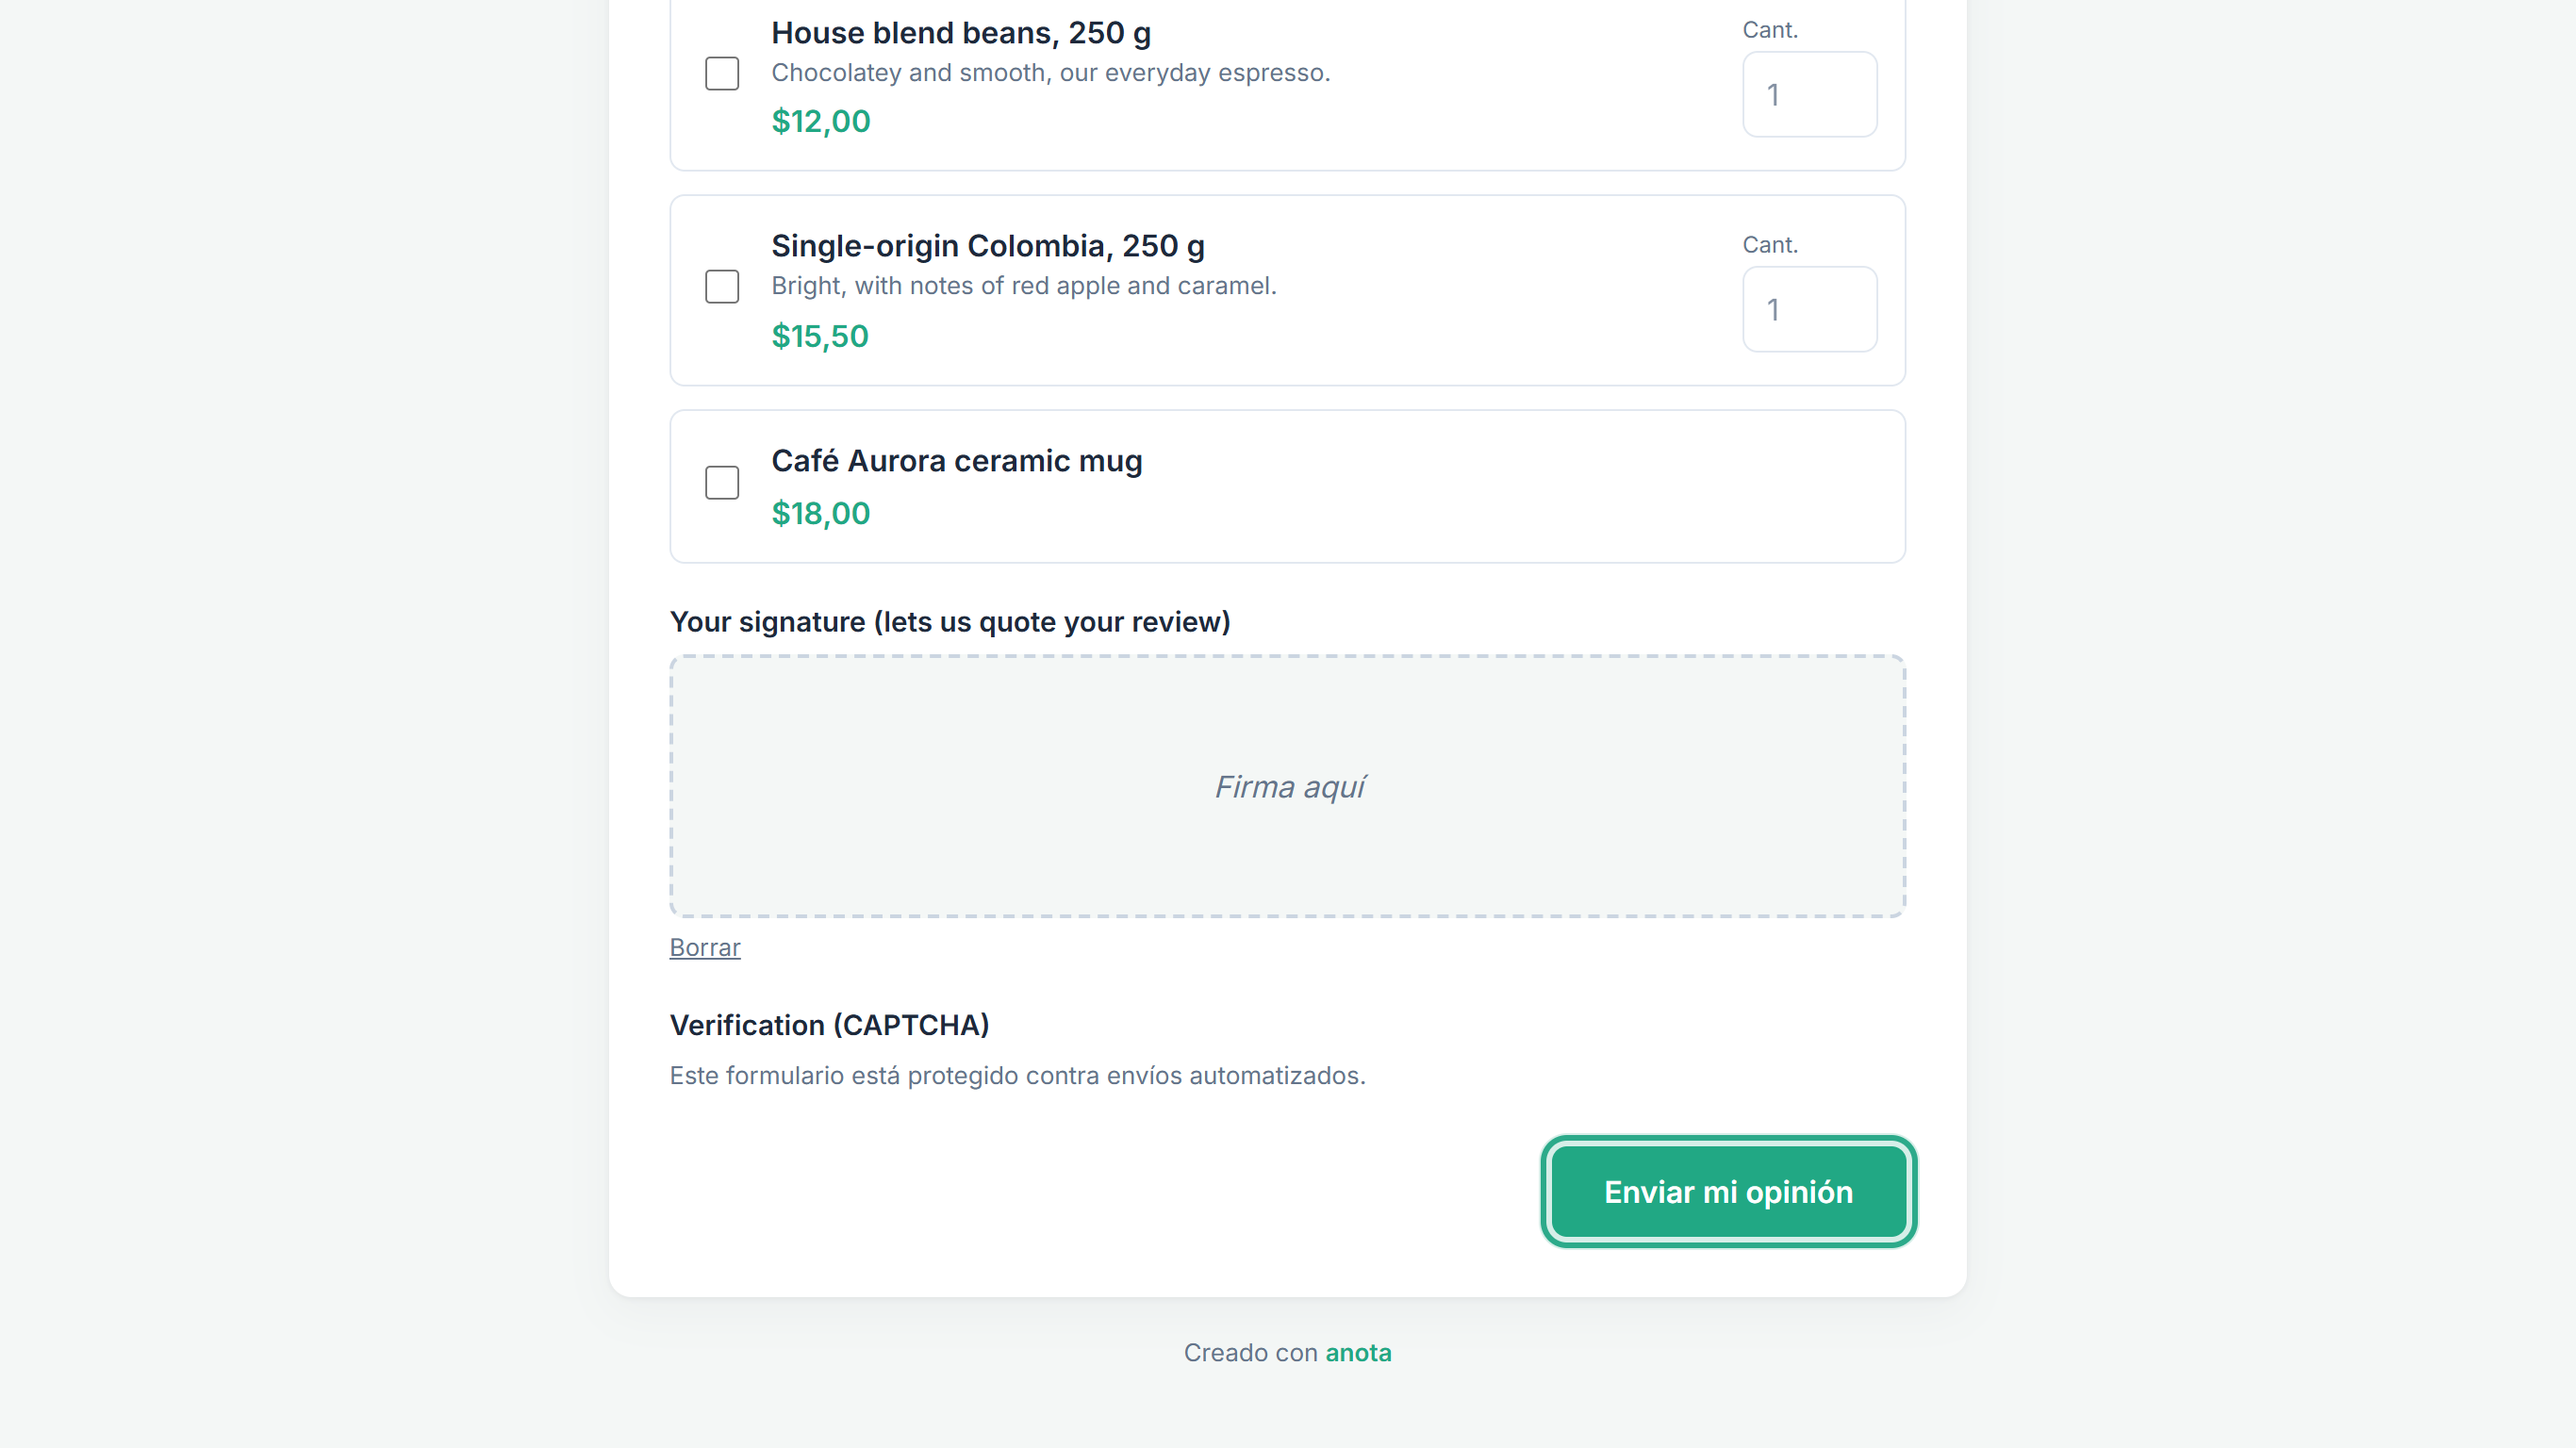 The translated submit button.
After sending, the visitor sees the thank-you screen in Spanish: anota's heading ¡Gracias! and your translated Thank-you message.
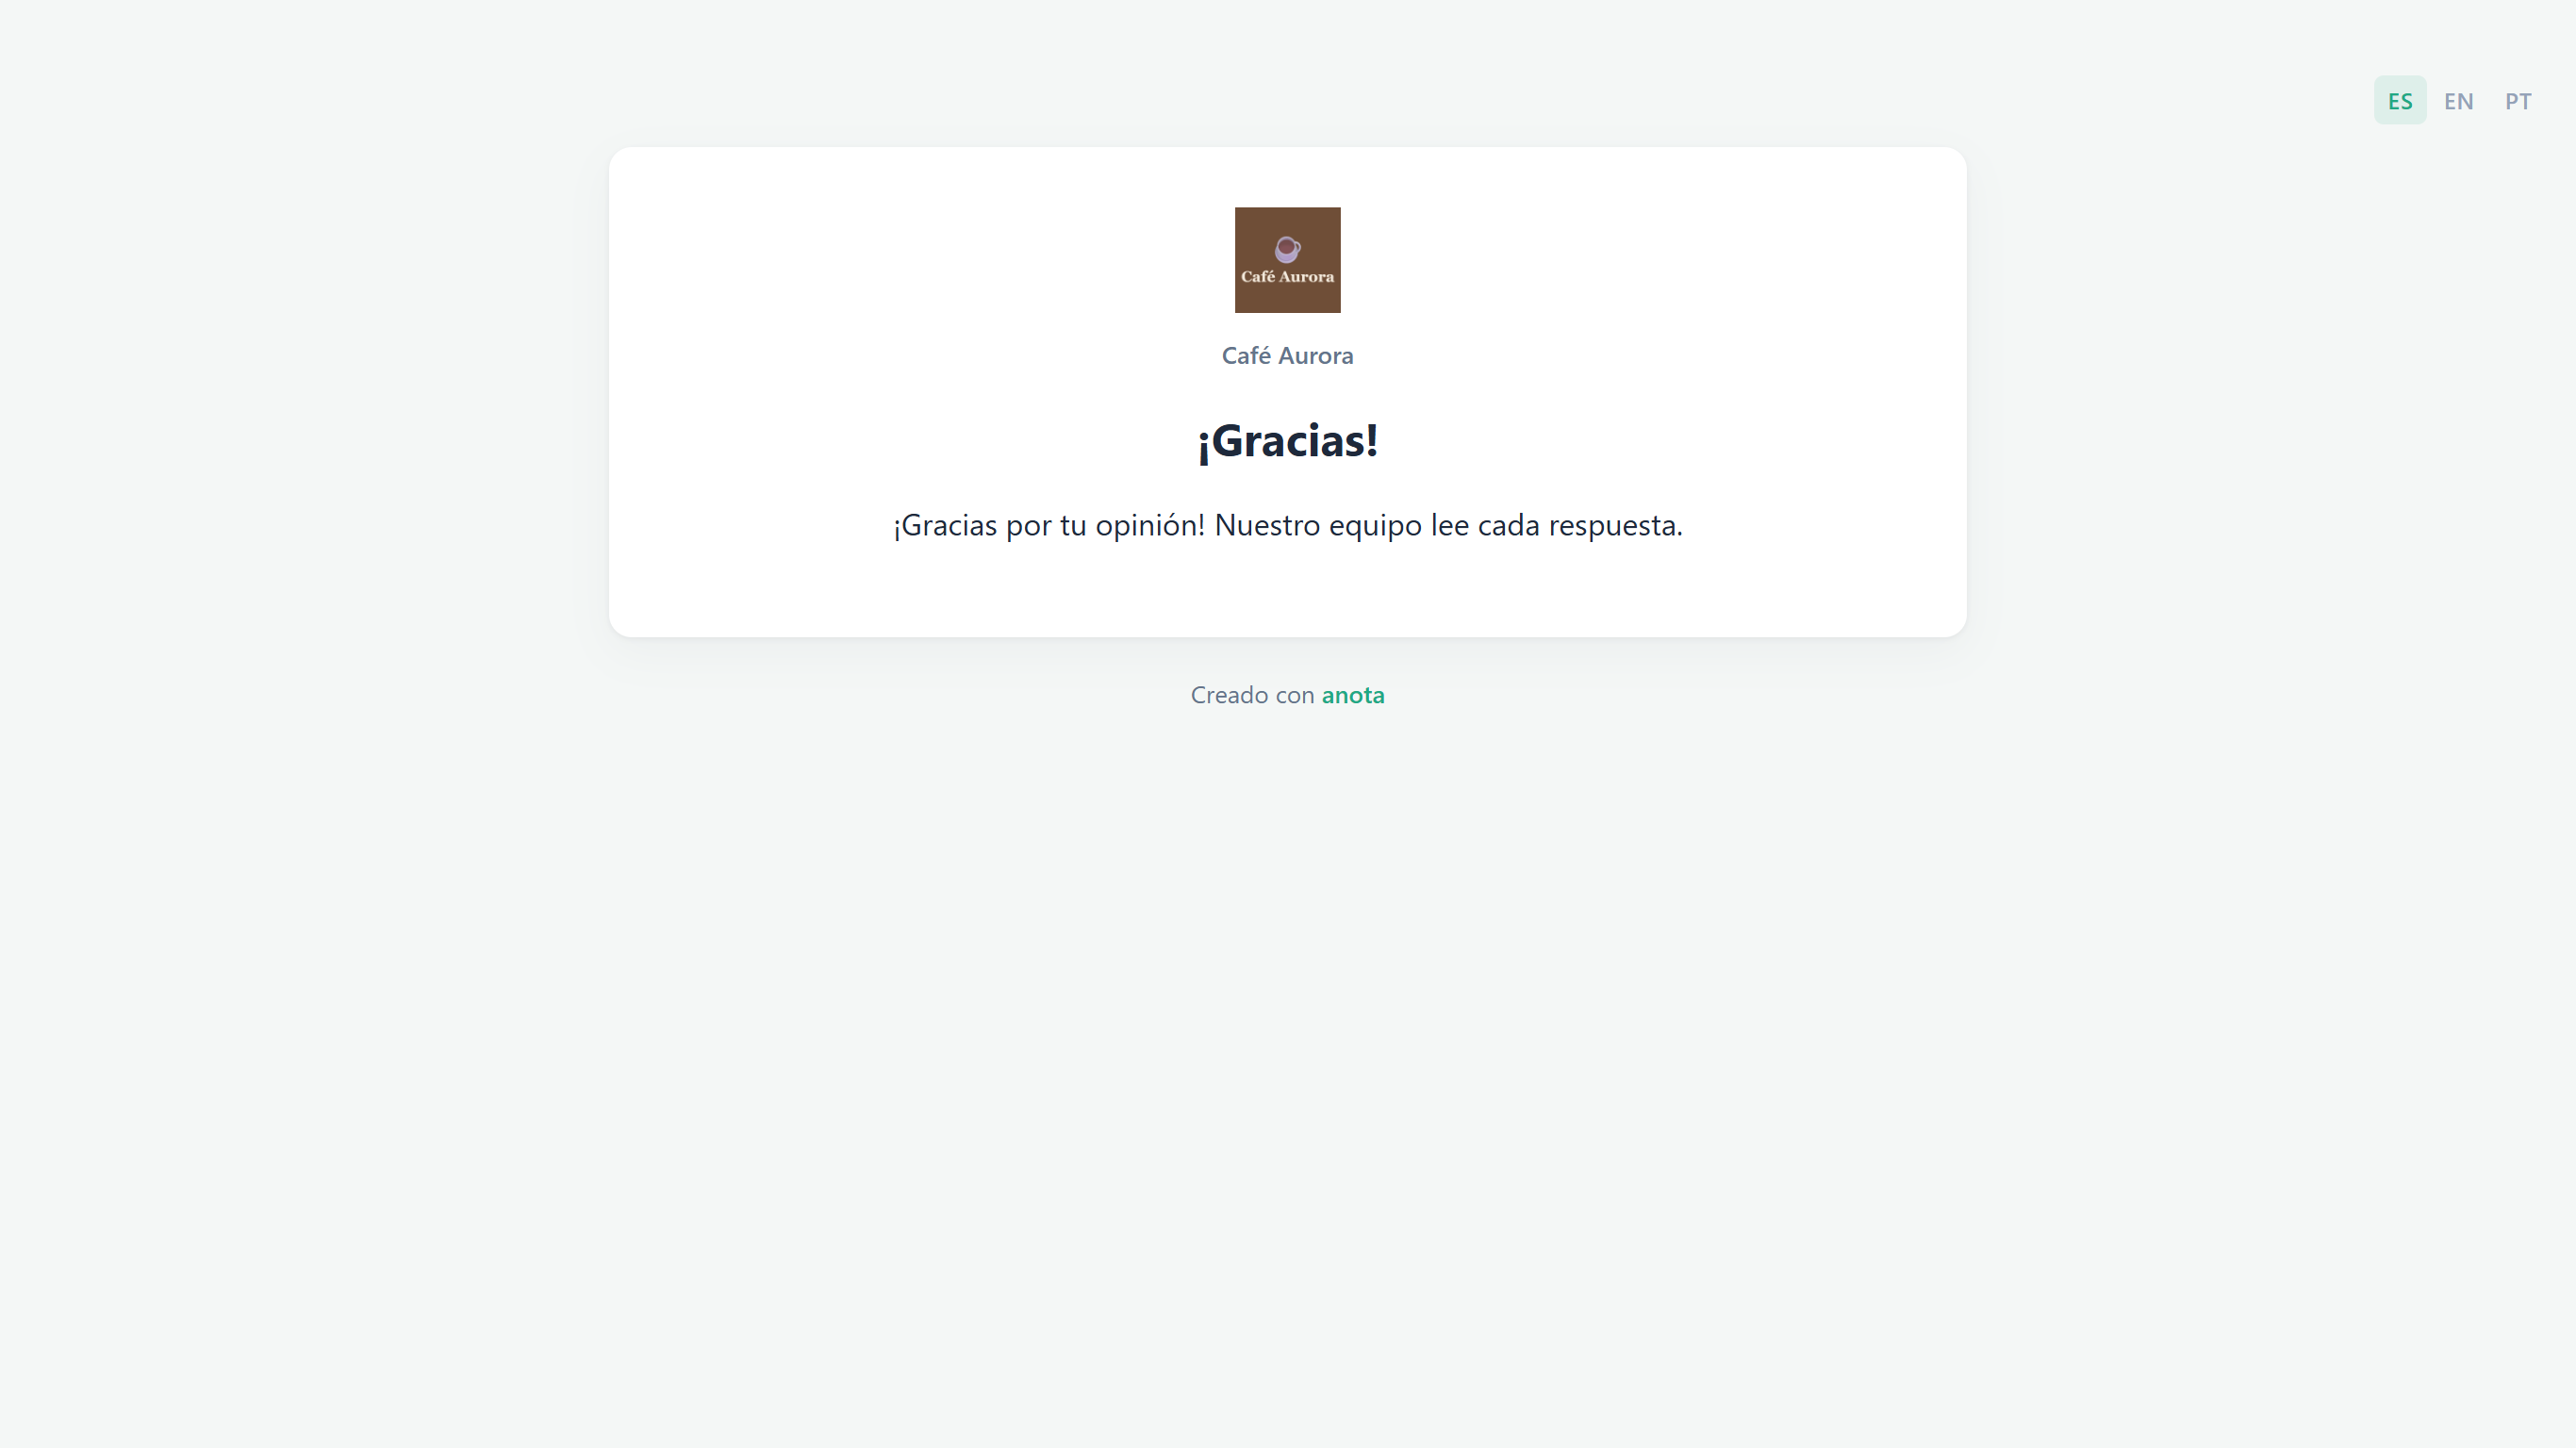 The thank-you screen keeps the visitor's language.
Result
You've seen the form as a Spanish-speaking visitor sees it. To check Portuguese, click PT in the switcher; where you haven't written Portuguese, the form shows your base-language text with anota's own texts in Portuguese.
Task 9 — Embed the form in one language
When you embed a form on your website, the embedded form has no language switcher, because your page already decides the language. You pick it when you copy the code.
Step-by-step
On the Publish tab, under Share, go to Embed on your website. Under "Language of the embedded form — useful if your site is multilingual:", click the language of the page you'll paste the code into, for example EN, then click Copy. The code's link ends in
?culture=en, so the embedded form always opens in English. ES and PT work the same way, with?culture=esand?culture=pt.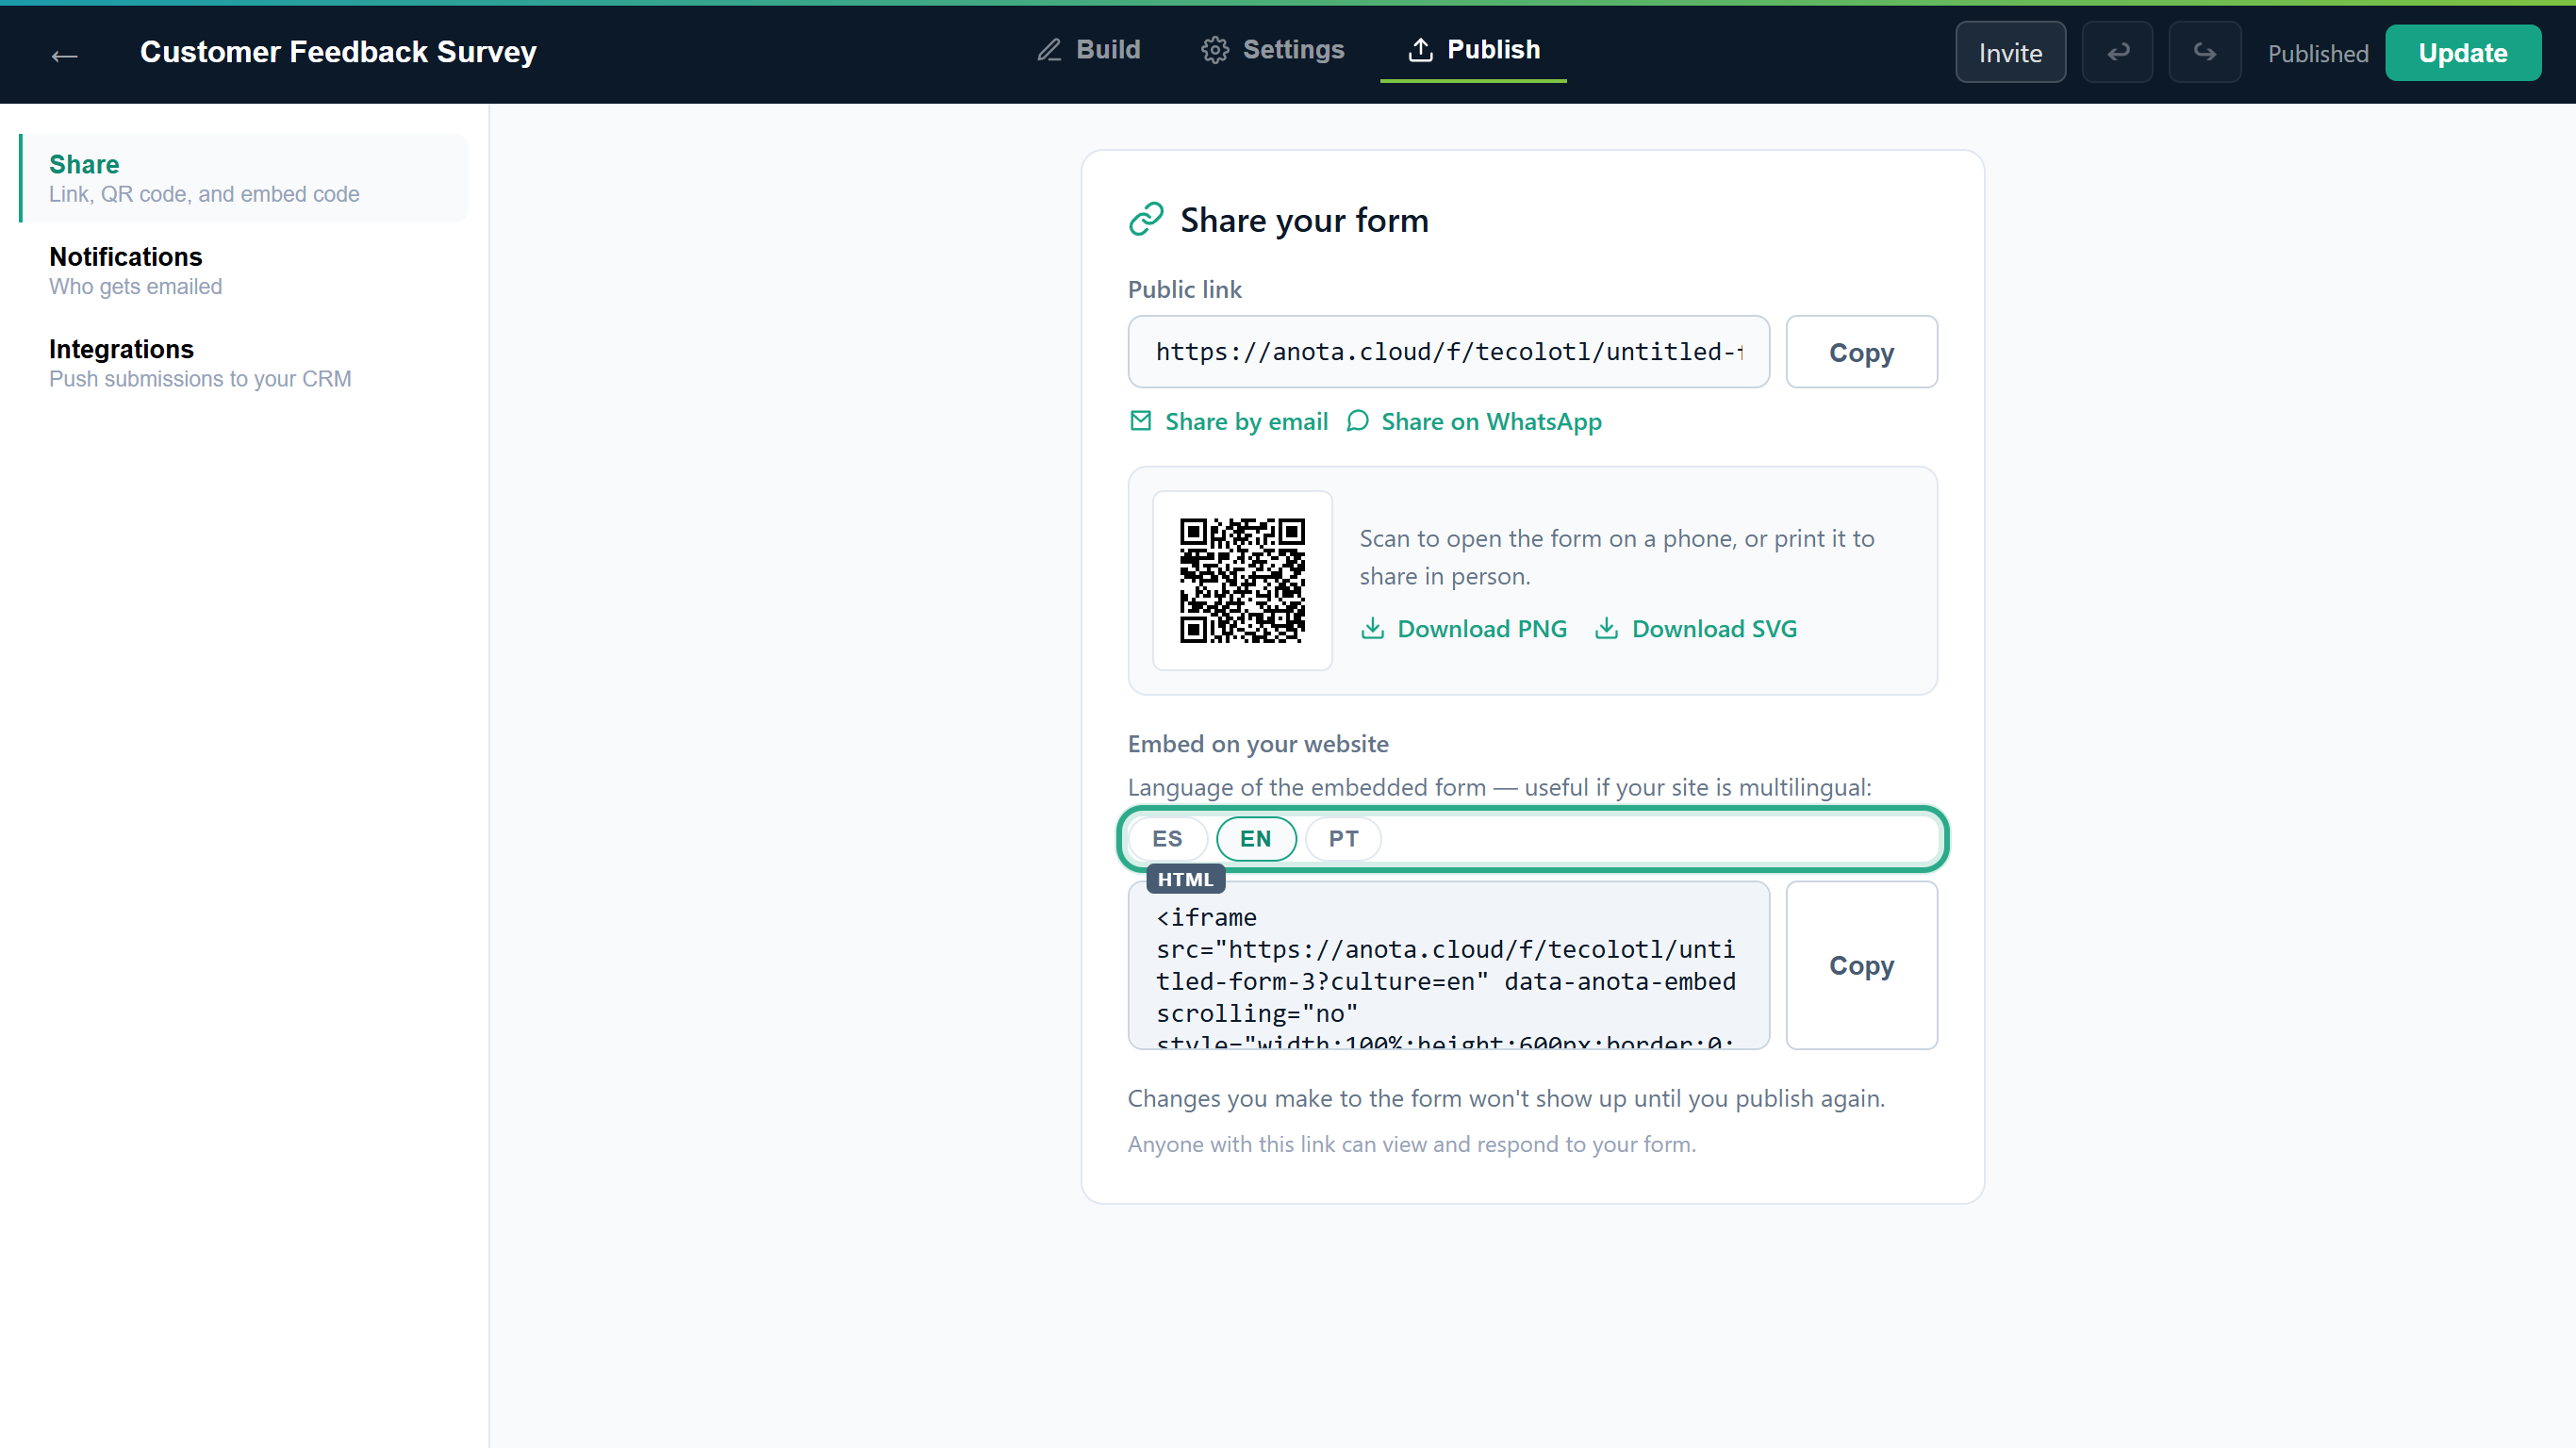 For a site in several languages, copy one code per language and paste each one on the matching page.
Result
The embedded form shows in the language you chose, Spanish included, whatever the visitor's browser language. See Publish and share for the rest of the embed options.
Task 10 — See which language a response came in
Step-by-step
On Forms, click View submissions in the form's row, then click the response. The answers are listed under your base-language questions, whatever language the visitor used: Camila answered in Spanish, but you read Which Café Aurora did you visit? and Downtown. What the visitor typed, such as "Flat white con avena", is kept exactly as written.
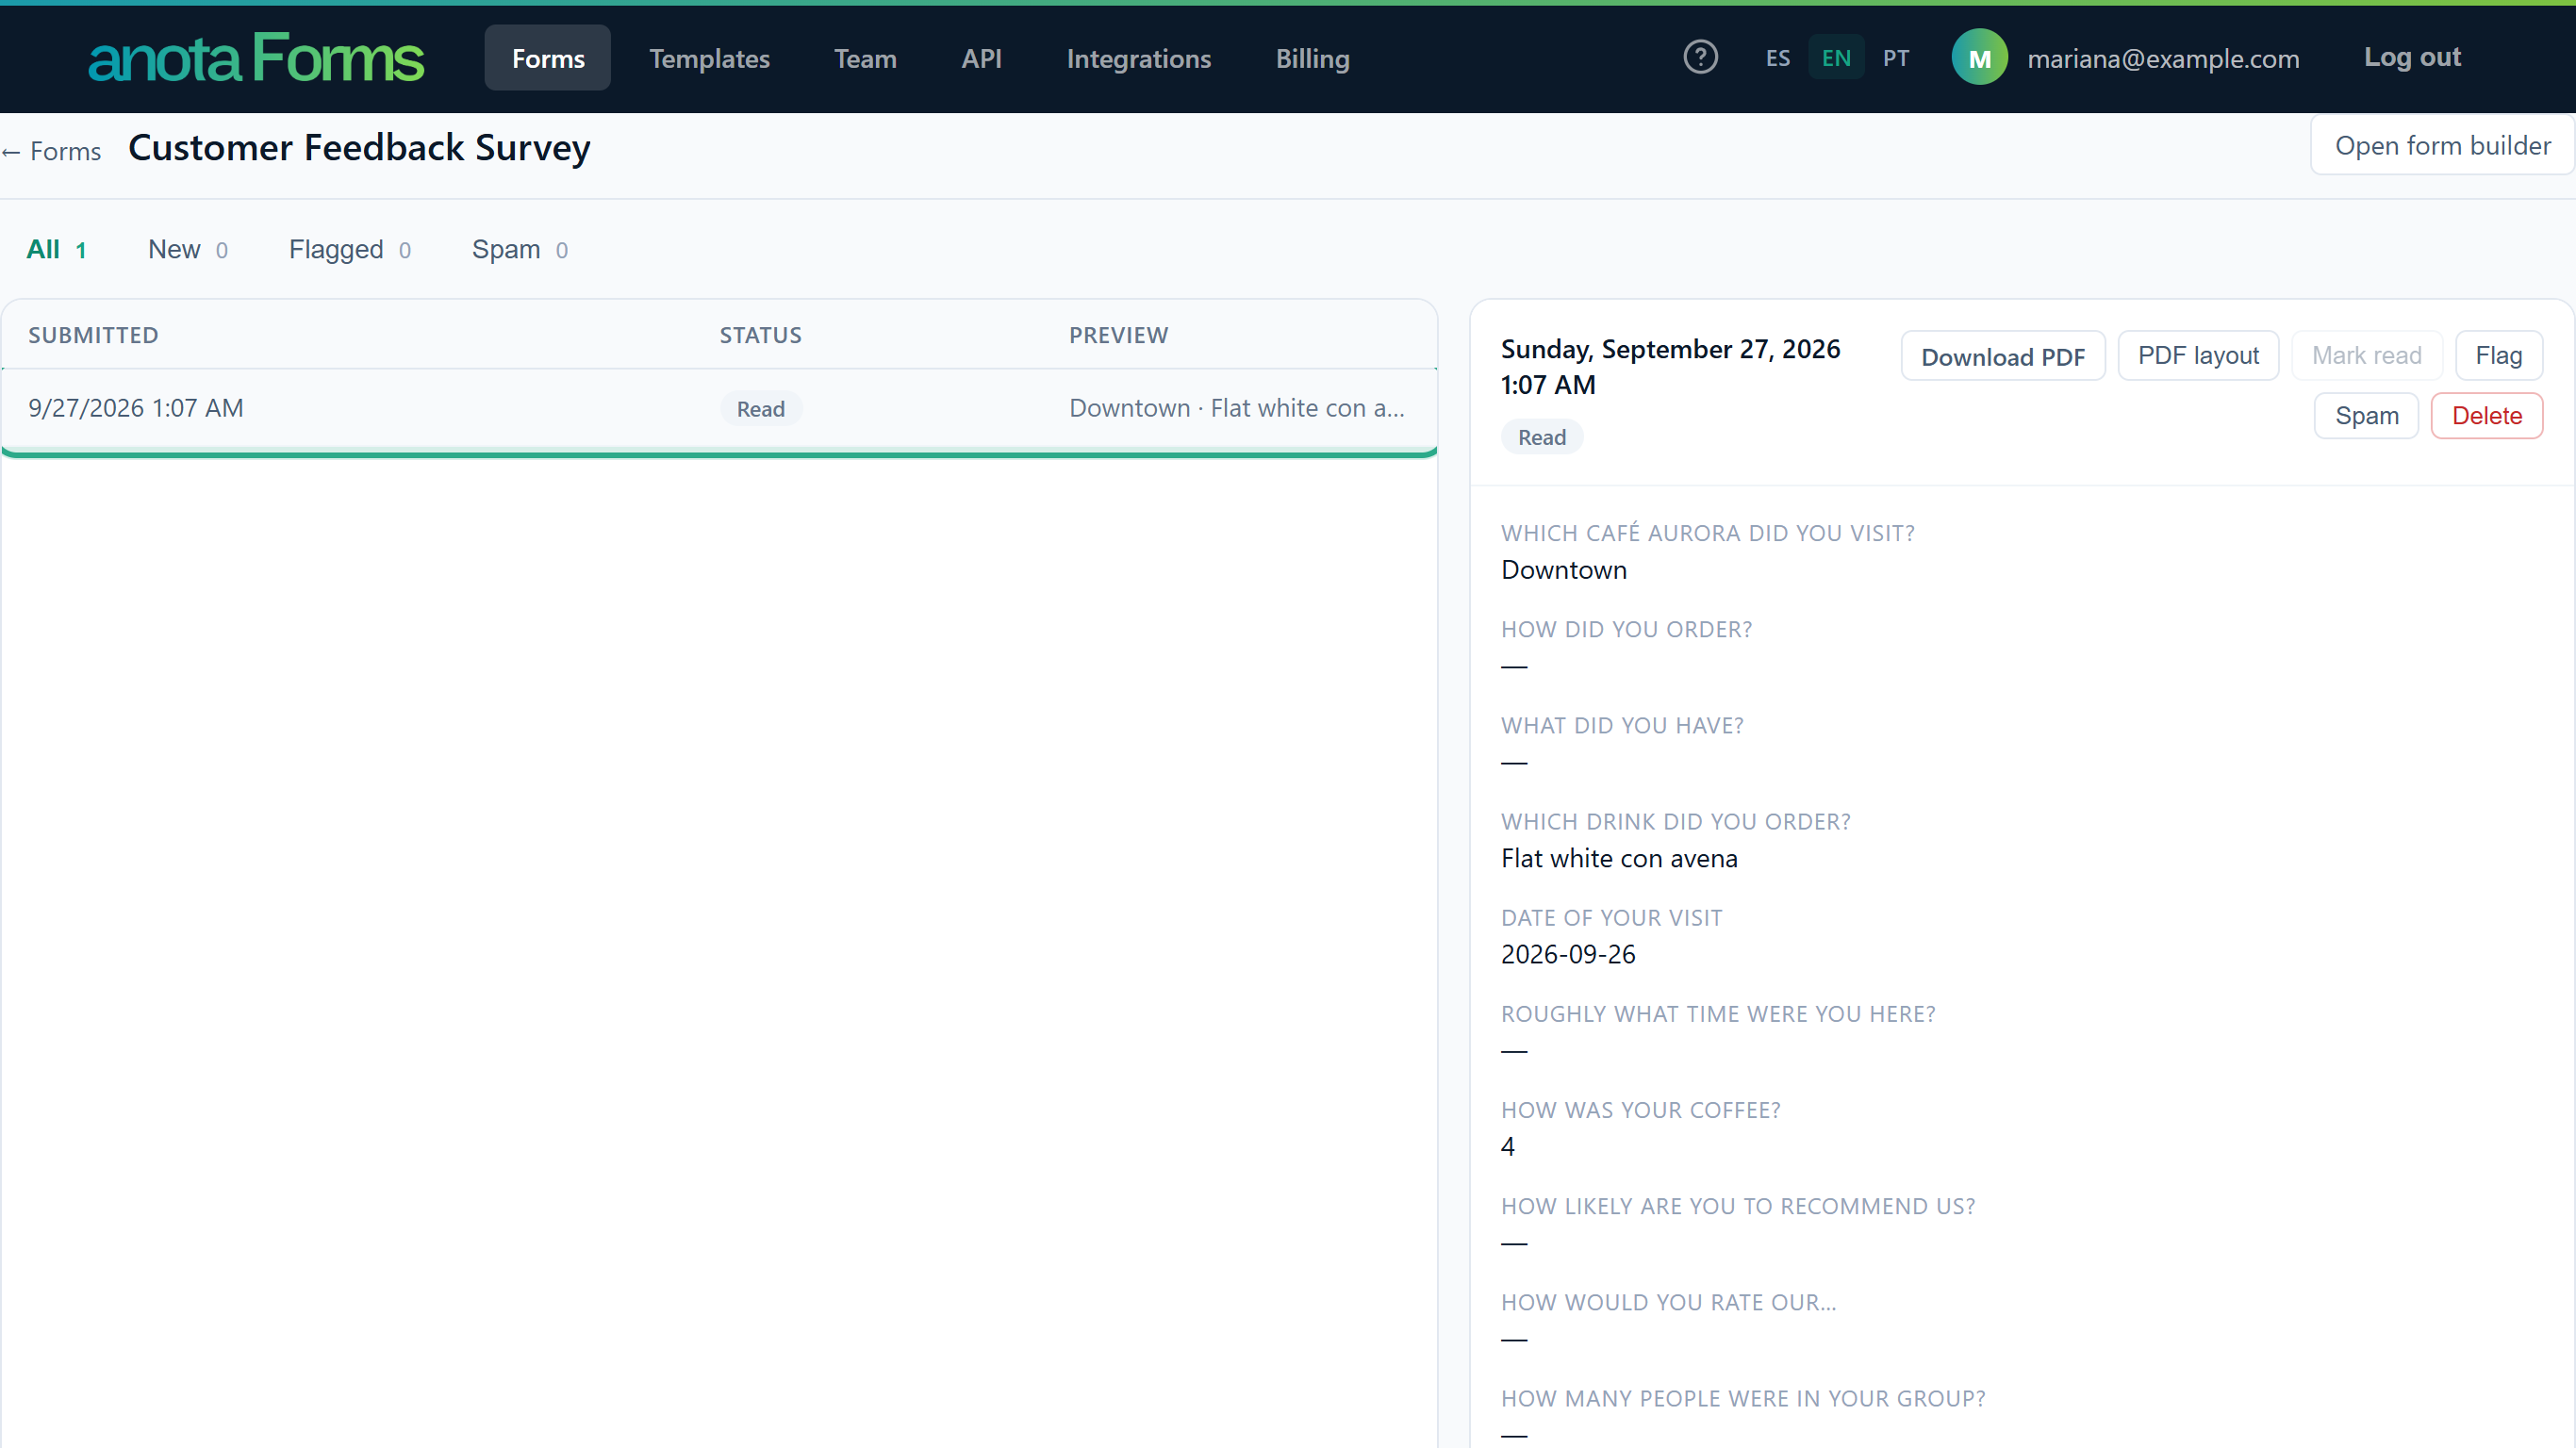 Choice answers show in the base language, so all responses read the same way.
Scroll to the end of the response and click Submission details. The last value of the technical details,
"lang":"es", is the language the visitor filled the form in:esSpanish,enEnglish,ptPortuguese.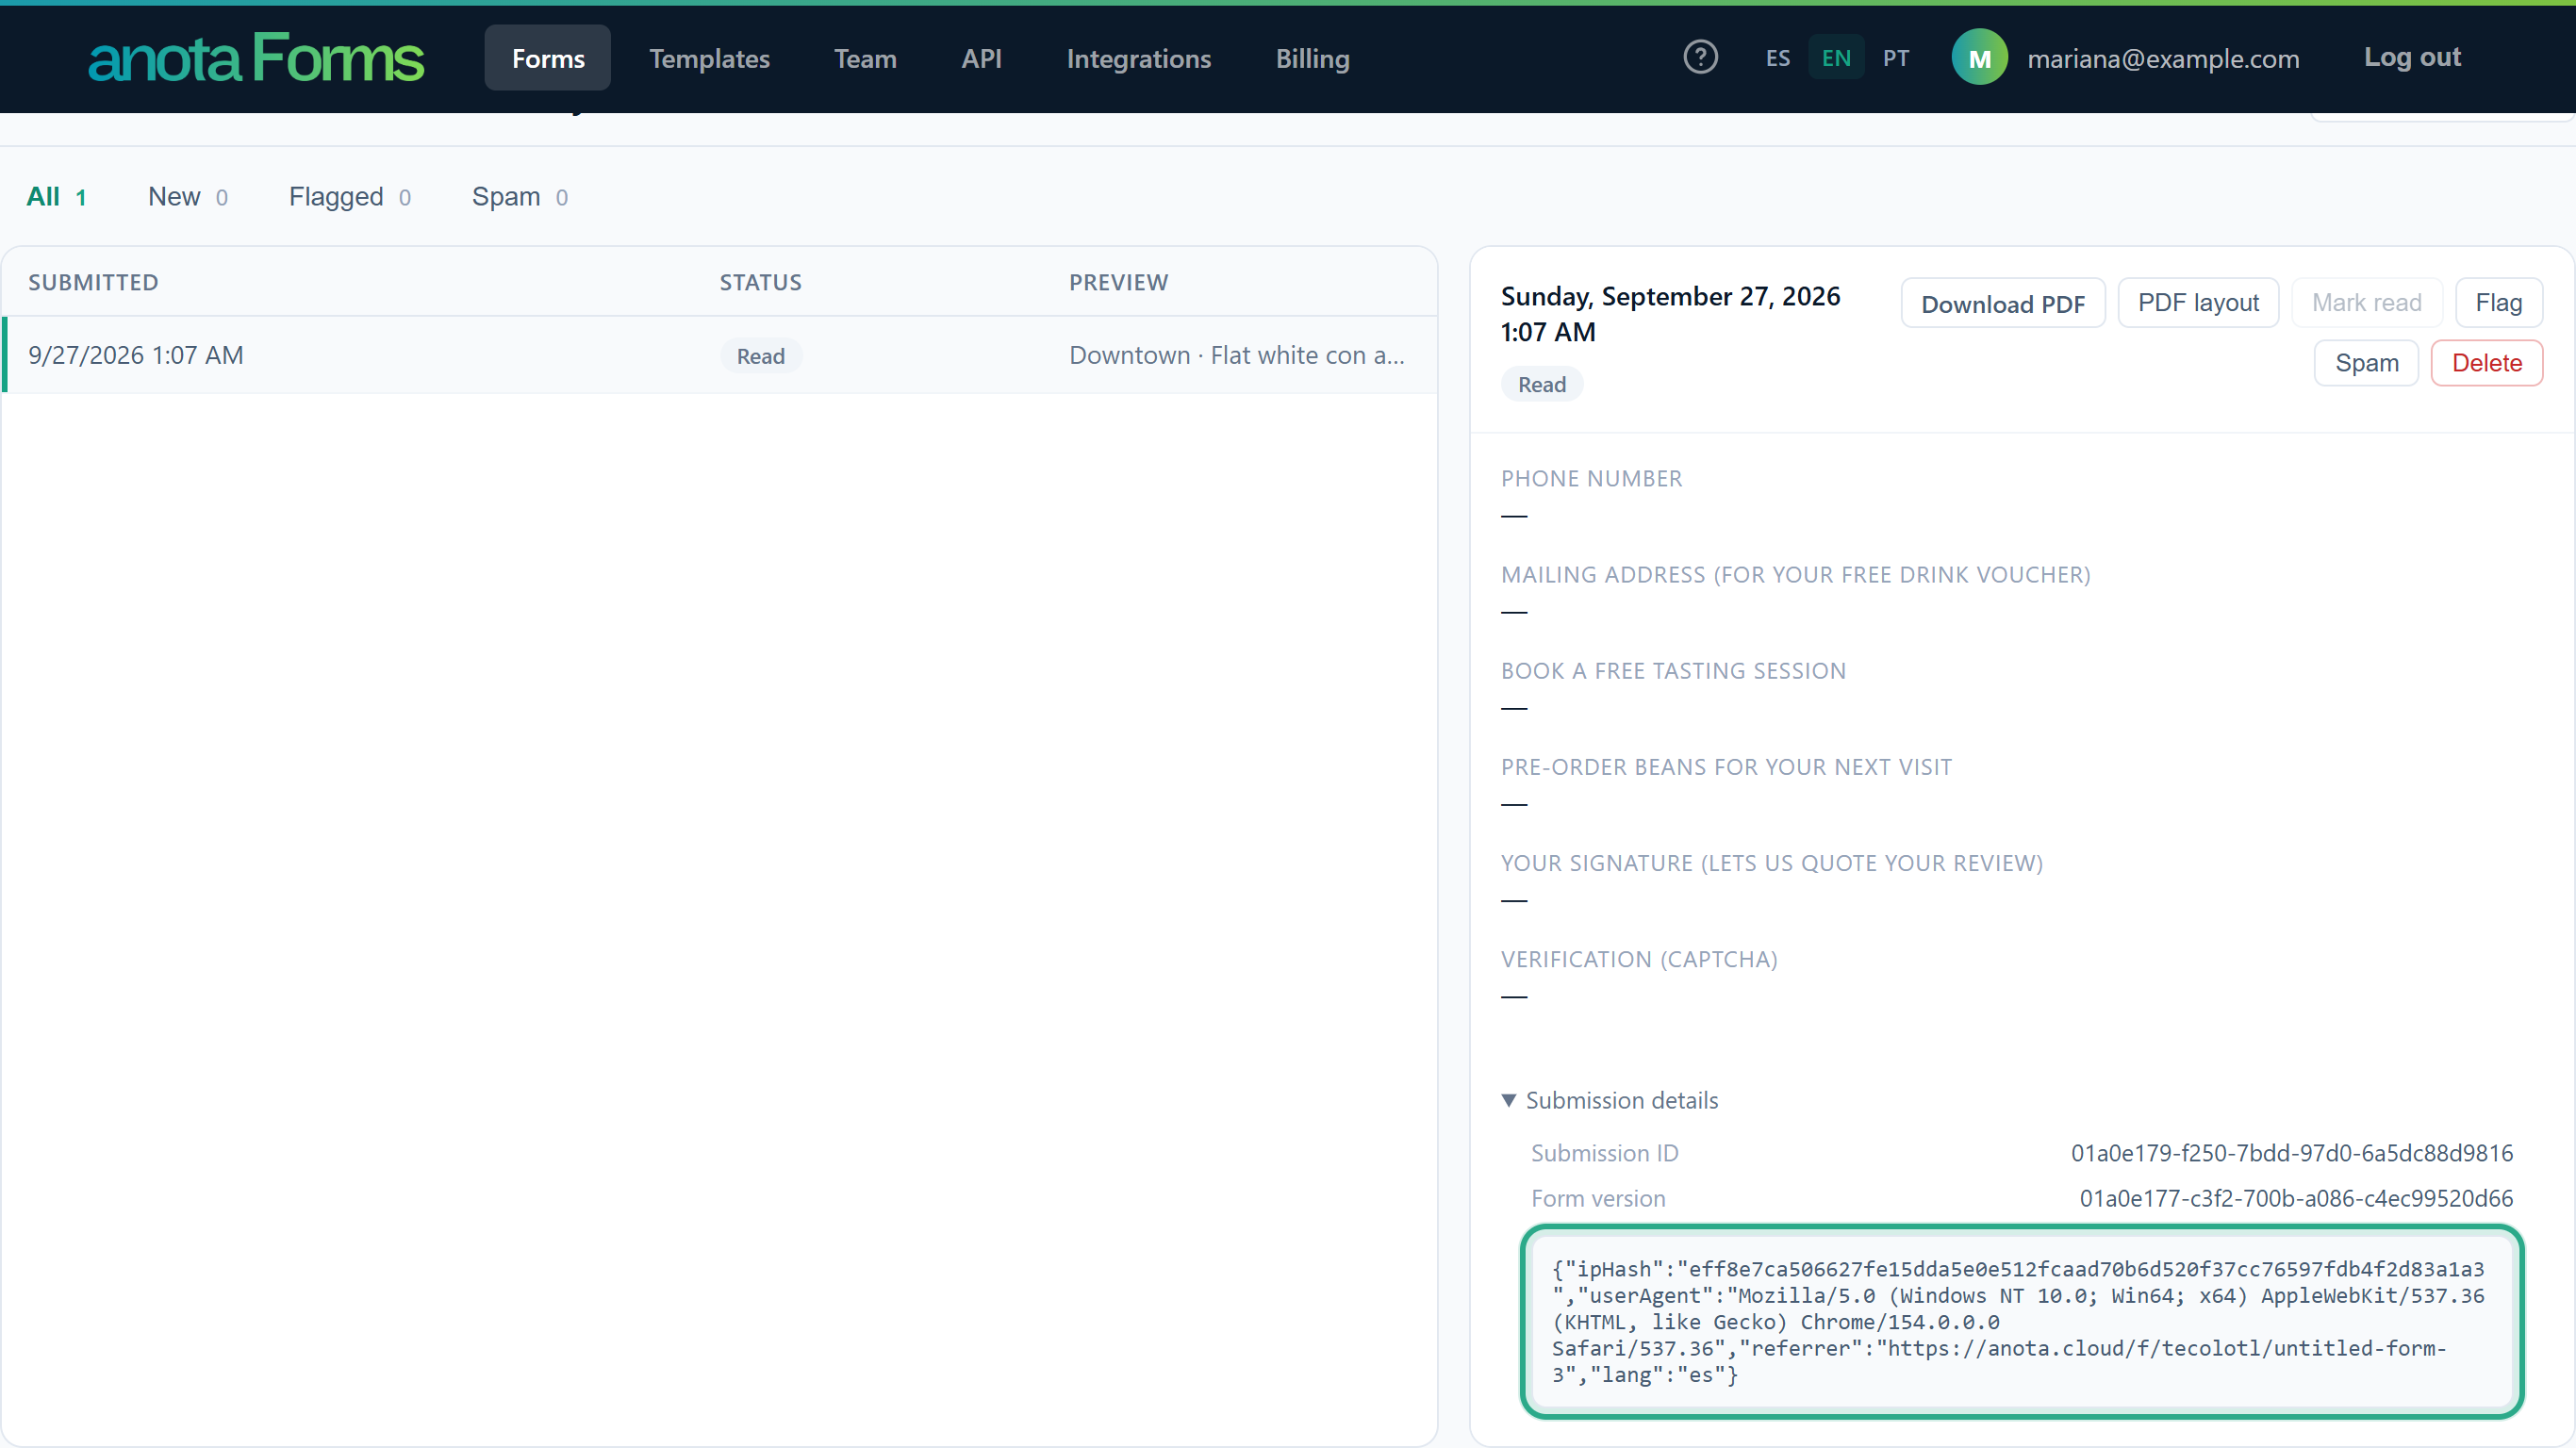
"lang":"es": this response was filled in in Spanish.
Result
You know which language each visitor used. Responses created through the API or the Claude connector have no lang value.
Which language emails and PDFs use
| Document | Language |
|---|---|
| The response in Submissions | Your base-language questions and options. |
| Download PDF in Submissions | The base language. |
| The notification email to your team, and its PDF | The base language, so the headings match the questions you wrote. |
| The confirmation email to the visitor (autoresponder), and its PDF | The language the visitor filled the form in, with your translated questions and answers. If that language wasn't recorded, the base language. |
The subject and message you write for an email aren't translated: they're sent as written, whatever the language. See Email notifications.
Translations and the Claude connector
The Claude connector creates and edits forms. When Claude creates a form, it sets the base language to the language it writes the form in. It can't read or write translations: add them in The form editor as shown above.
Field reference
| Text | Where | Translatable | Notes |
|---|---|---|---|
| Label | Build tab > Properties | Yes | Questions, headings, sections and image captions. |
| Placeholder | Build tab > Properties | Yes | Short text, Long text, Email, Phone and Number fields. |
| Help text | Build tab > Properties | Yes | Questions, headings and sections. |
| Options | Build tab > Properties | Yes | Dropdown, Single choice and Multiple choice. |
| Paragraph text | Build tab > Properties | Yes | The Text box of a Paragraph. |
| Page titles | Build tab, tabs above the pages | Yes | One title per page and language. |
| Base language | Settings > Form settings | No | The language of the base texts. Change swaps them with the translations in the language you pick. |
| Submit button text | Settings > Form settings | Yes | Empty: anota's default in the visitor's language. |
| Closed-form message | Settings > Form settings | Yes | Empty: "This form is no longer accepting responses." in the visitor's language. |
| Thank-you message | Settings > Thank you page | Yes | Empty: "Thank you! Your submission has been received." in the visitor's language. |
| Form title | Top bar of the editor | No | Shows as typed in every language. |
| Scale left and right labels, matrix rows and columns, product names and descriptions | Build tab > Properties | No | Show as typed in every language. |
| Thank-you message of a logic rule | Settings > Conditions | No | Shows as typed in every language. |
| Email subject and message | Publish > Notifications | No | Sent as written. |
Roles and permissions
| Role | Fill in the form in any language | Add and edit translations | See the response language |
|---|---|---|---|
| Owner, Admin, Editor | Yes | Yes | Yes |
| Viewer | Yes | No | Yes |
For the full permission matrix, see Roles and permissions.
Troubleshooting
| Symptom | Likely cause | Resolution |
|---|---|---|
| A visitor switched language but some questions stay in the base language. | Those fields have no text in that language. anota doesn't translate automatically. | Check the dots on the canvas (Task 4), select each field, click the language tab and type the translation. Then click Update. |
| I translated a field, but the public form shows the old text. | Translations are saved to the draft. | Click Update in the top bar. |
| The dot for a language is filled, but some texts of the field still show in the base language. | A dot fills when any text of the field is translated. | Select the field and check every box on that language's tab, including each option. |
| The buttons and error messages are in Spanish, but my questions are in English. | The visitor's language is Spanish and your questions have no Spanish text. anota's own texts always follow the visitor's language. | Translate the questions into Spanish, or have the visitor click EN in the switcher. |
| The form opens in Spanish for a visitor whose browser is in French or German. | anota uses Spanish when the visitor's language isn't Spanish, English or Portuguese. | Share a link ending in ?culture=en (or pt), or let the visitor use the switcher. |
| The embedded form has no language switcher. | Embedded forms hide it on purpose. | Pick the language under Embed on your website before you copy the code (Task 9). |
| I changed the base language, but some texts are still in the old language. | Only texts that have a translation in the new language are swapped. The form title, product names, scale labels, matrix rows and columns and logic-rule thank-you messages have no translations and never change. | Retype those texts in the new language on the Build tab, or click Undo to go back (Task 2). |
| Visitors in another language now see a different language than before. | After a base-language change, texts with no translation in the visitor's language fall back to the new base language. | Add translations for that language, or change the base language back. |
| I changed the base language, but the public form hasn't changed. | The change is saved to the draft. | Click Update in the top bar. |
| The form's title stays in the base language. | The form title can't be translated in the editor. | Use a title that works in all your languages, or put the translated title in a Heading field, which can be translated. |
Related features
- The form editor
- Theme and appearance: the submit button, closed-form and thank-you texts.
- Publish and share: the public link and the embed code.
- Conditional logic
- Email notifications
- Signatures and file uploads
- Products, orders and payments
Was this page helpful?