Signatures and file uploads
Signatures and file uploads
Applies to: anota, all plans (upload space depends on the plan) Roles required: Editor or above to add the fields; anyone can fill them in on a published form; Viewer or above to see and download them in Submissions Regulatory references: none
Overview
The Signature field lets people sign your form with a mouse, a trackpad or a finger. The File upload field lets them attach files from their device. Use them when a process needs proof of agreement (consent, terms, a waiver) or a supporting document (an ID, a certificate, a photo, a receipt). Form builders add and set up the fields in the editor. Respondents complete them on the public form, and your team finds the signature and the files with each response in Submissions.
This page follows one example from start to finish, with the screen you should see at every step and the button or field to use outlined in green. Café Aurora adds a file upload and a signature to its Barista Workshop Registration form, a visitor signs and uploads, and the team checks the result in Submissions and in the PDF.
Key concepts
- Signature field: a pad marked Sign here where the respondent draws a signature. It is saved with the response as an image.
- File upload field: a file picker. The respondent chooses one or more files from their device, and anota checks each one when the form is sent.
- Max files: how many files one respondent can attach to the field (1 to 10; 1 when you add the field).
- Max size (MB): the largest file anota accepts in the field, per file (1 to 50 MB; 10 MB when you add the field). The public form shows it under the picker, for example "Max 5 MB per file".
- Required: a Validation option. When it's on, the form can't be sent until the field is completed.
- Upload space: attached files count toward your plan's storage (see Upload space and limits).
Task 1 — Add a File upload field and set its limits
Prerequisites
- A role of Editor or above in the workspace (see Roles and permissions).
- The form open in the form editor.
Step-by-step
Select the field that the new one should follow (here Anything we should know?), click Add element, and in the Form elements panel click File upload under Uploads & more. You can also drag it onto the form.
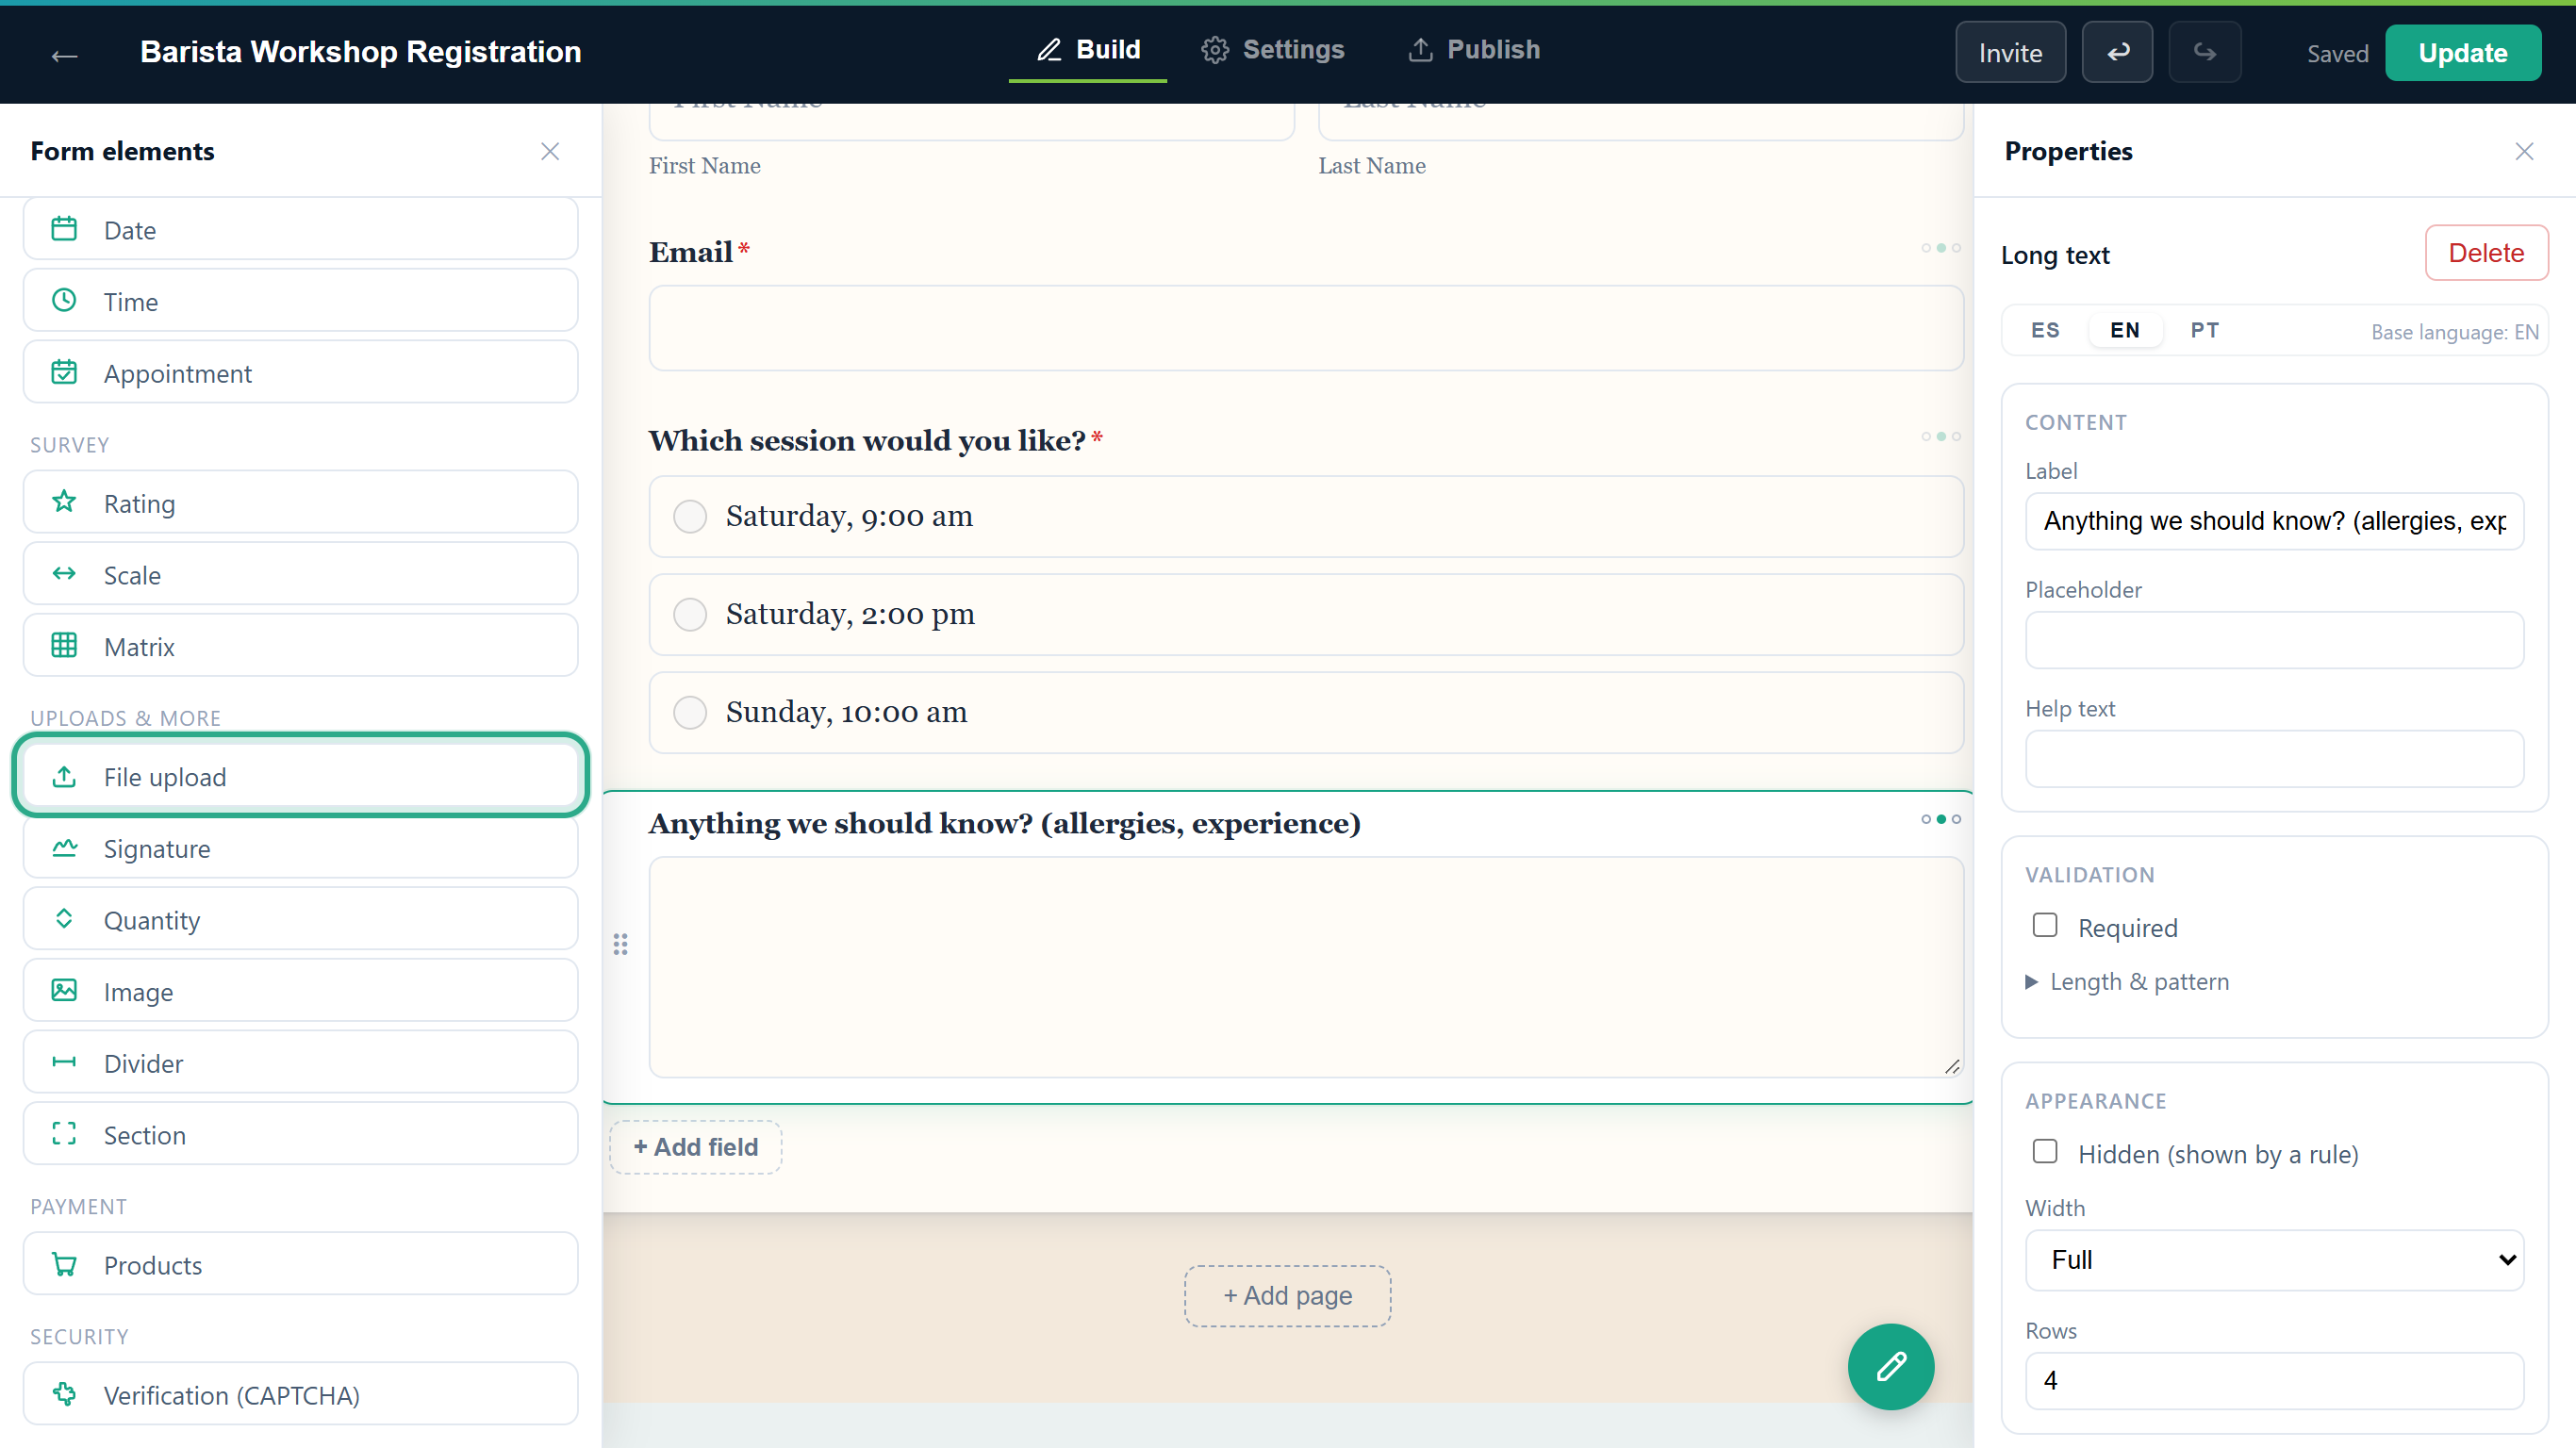 File upload and Signature are both in Uploads & more.
The field appears below the selected one and Properties opens on the right. Under Content, type the question in Label: here "Upload a photo of your ID or experience certificate".
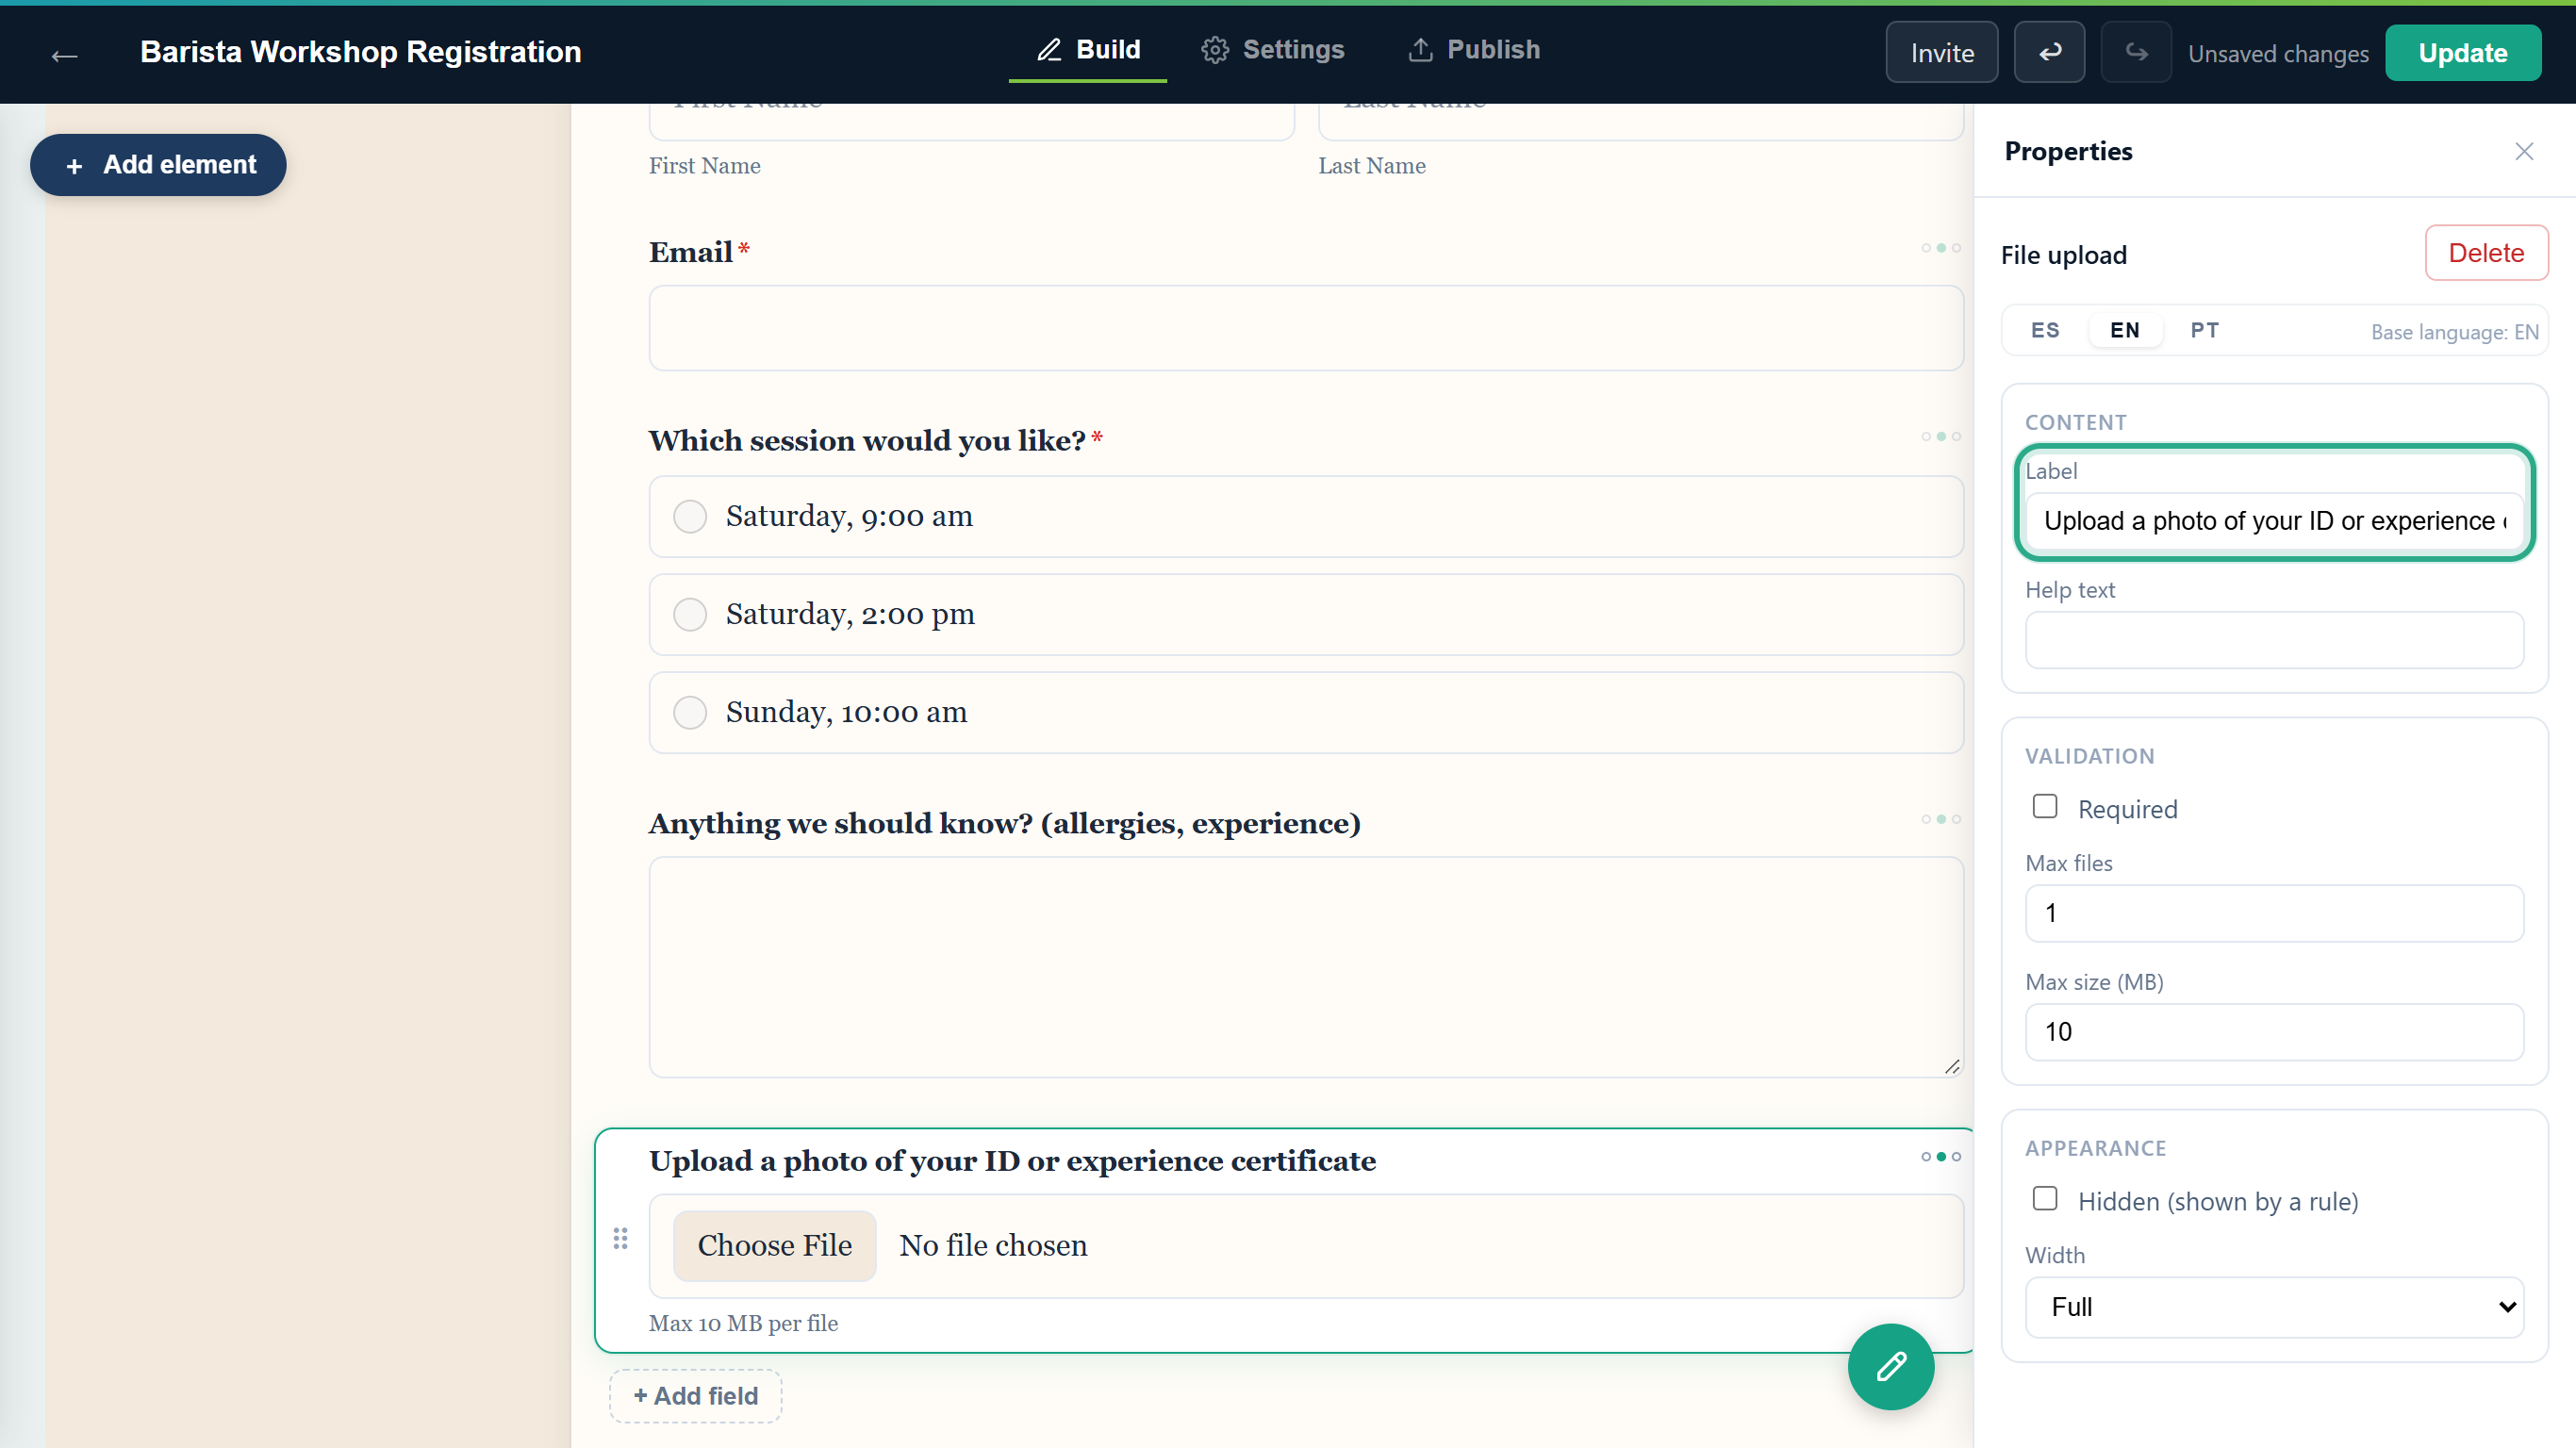 A new File upload field accepts 1 file of up to 10 MB.
In Help text, tell people what to send: "A clear photo or a PDF. Up to 2 files." The public form shows the size limit but not the number of files, so the help text is a good place to mention it.
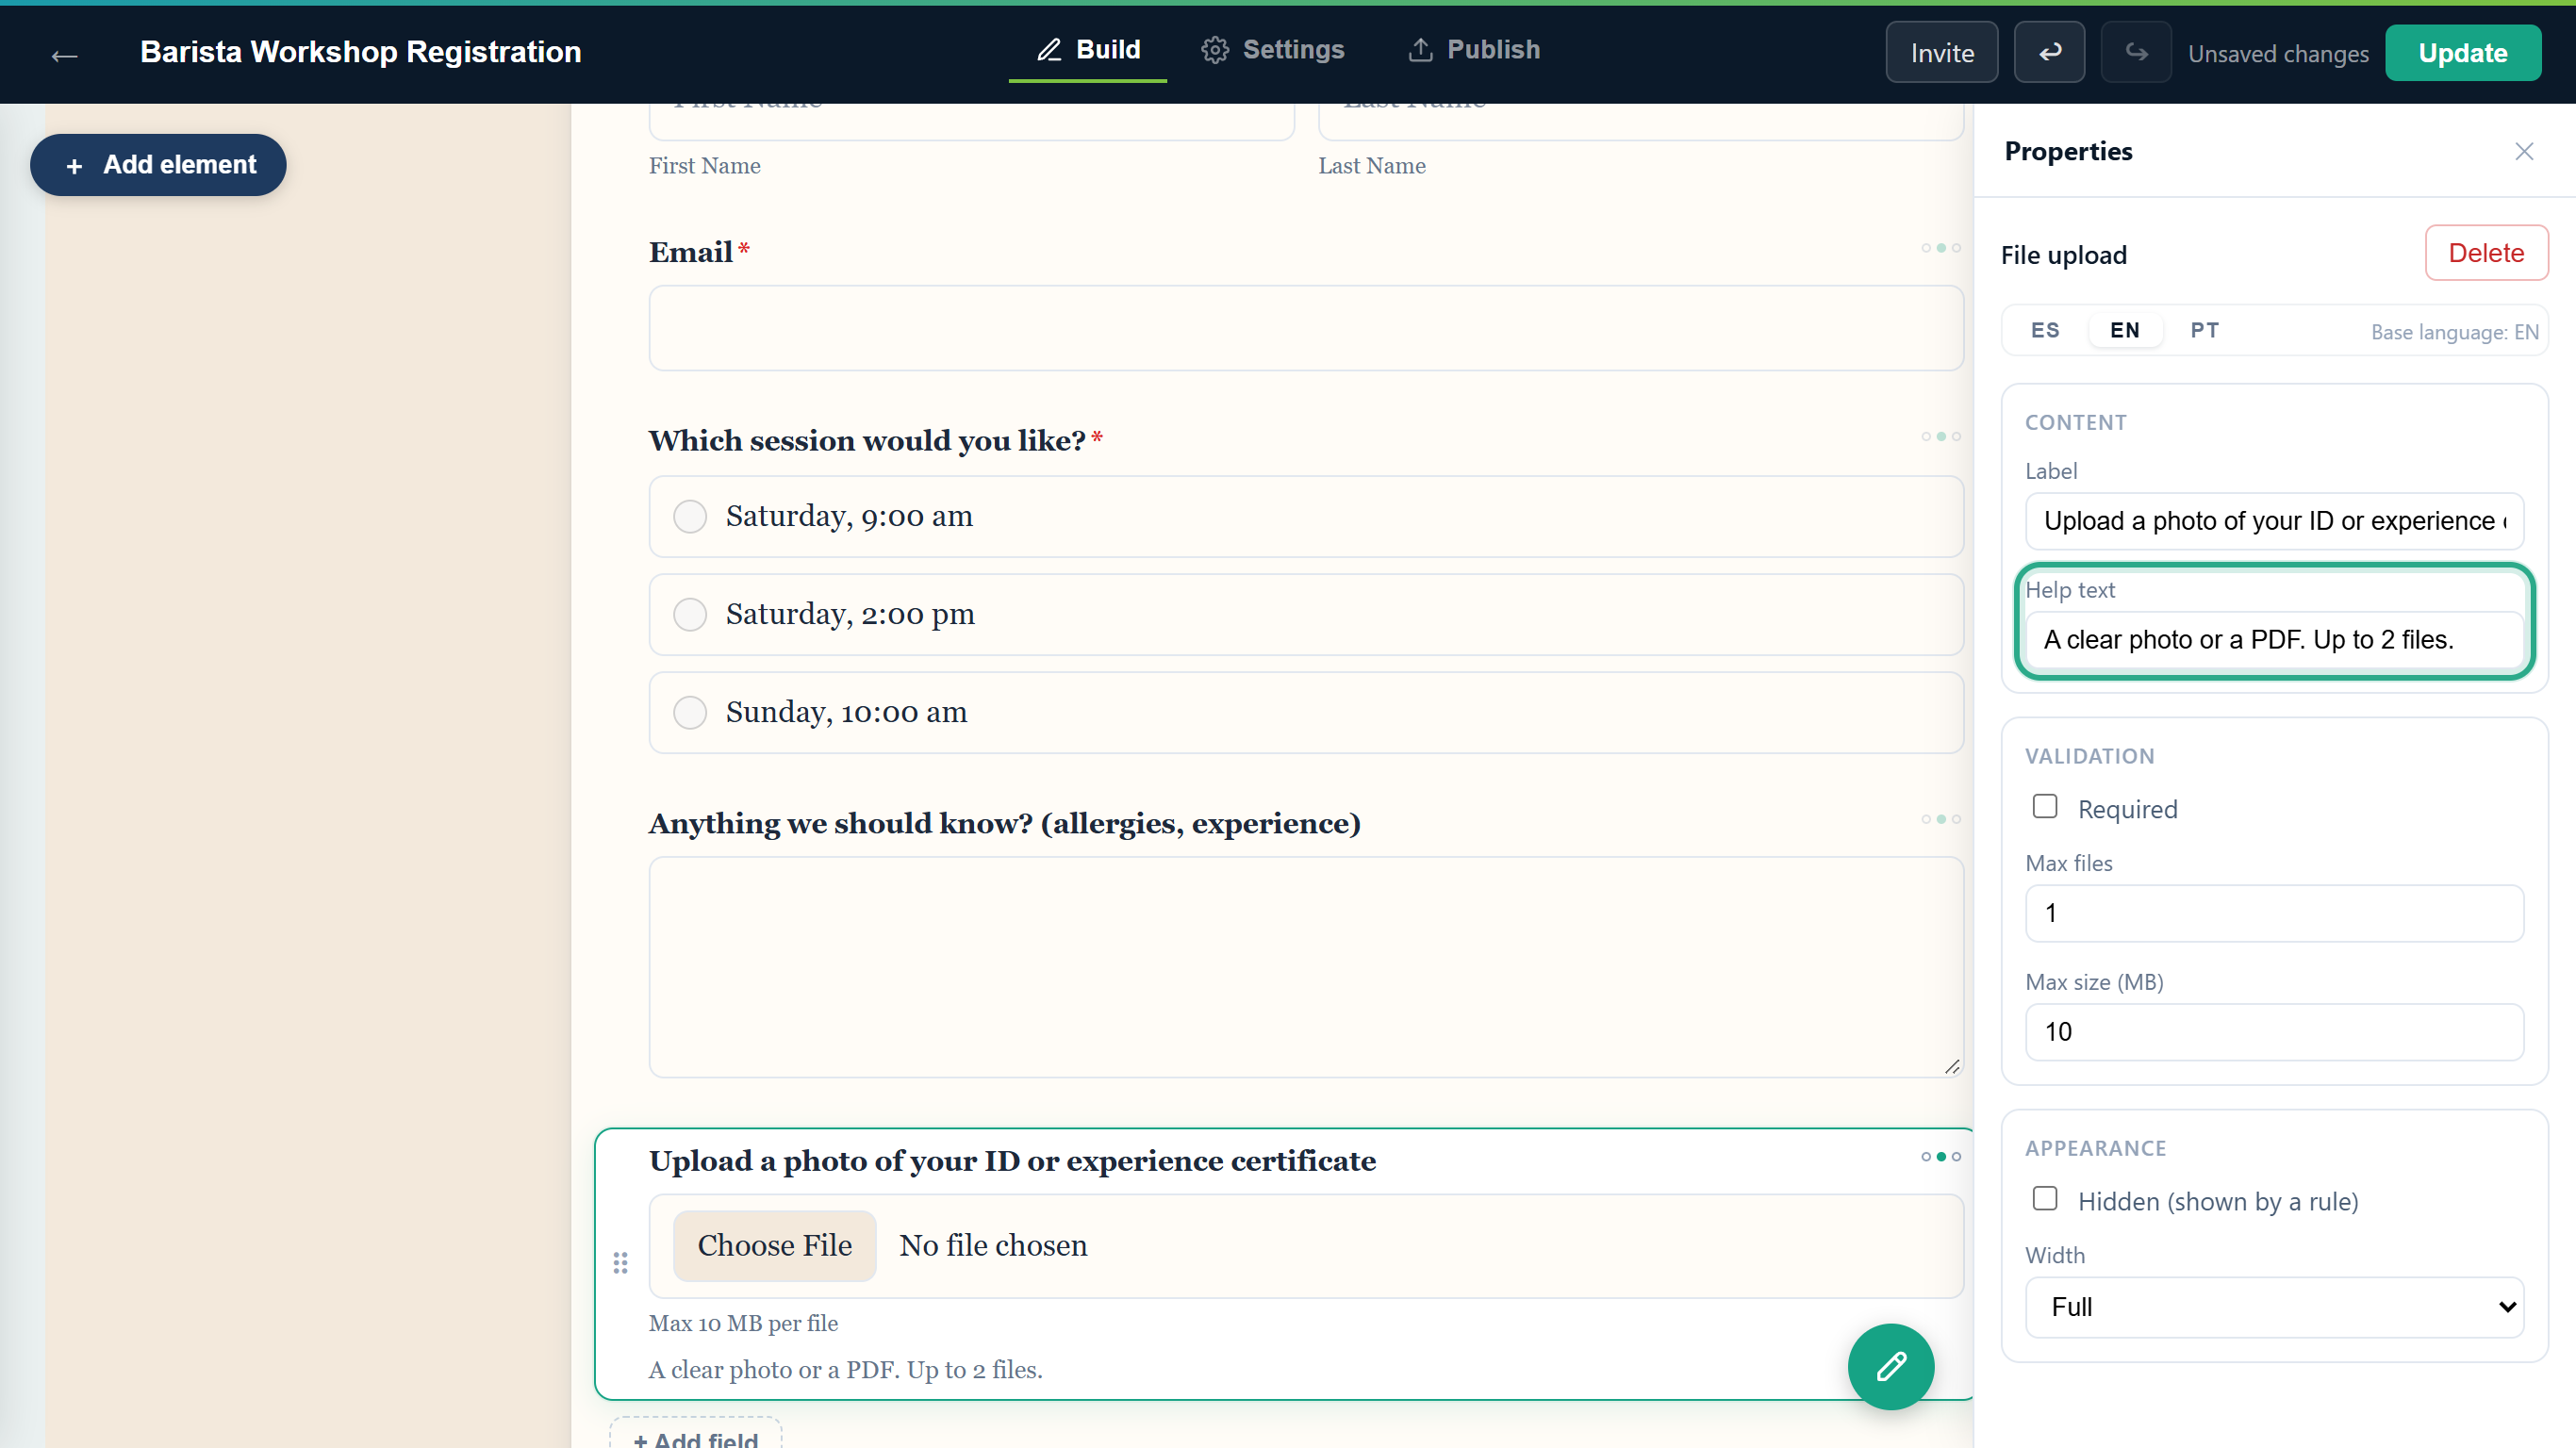 The help text appears under the field on the form.
Under Validation, set Max files (here 2) and Max size (MB) (here 5). Tick Required if every respondent must attach something; this example leaves it off.
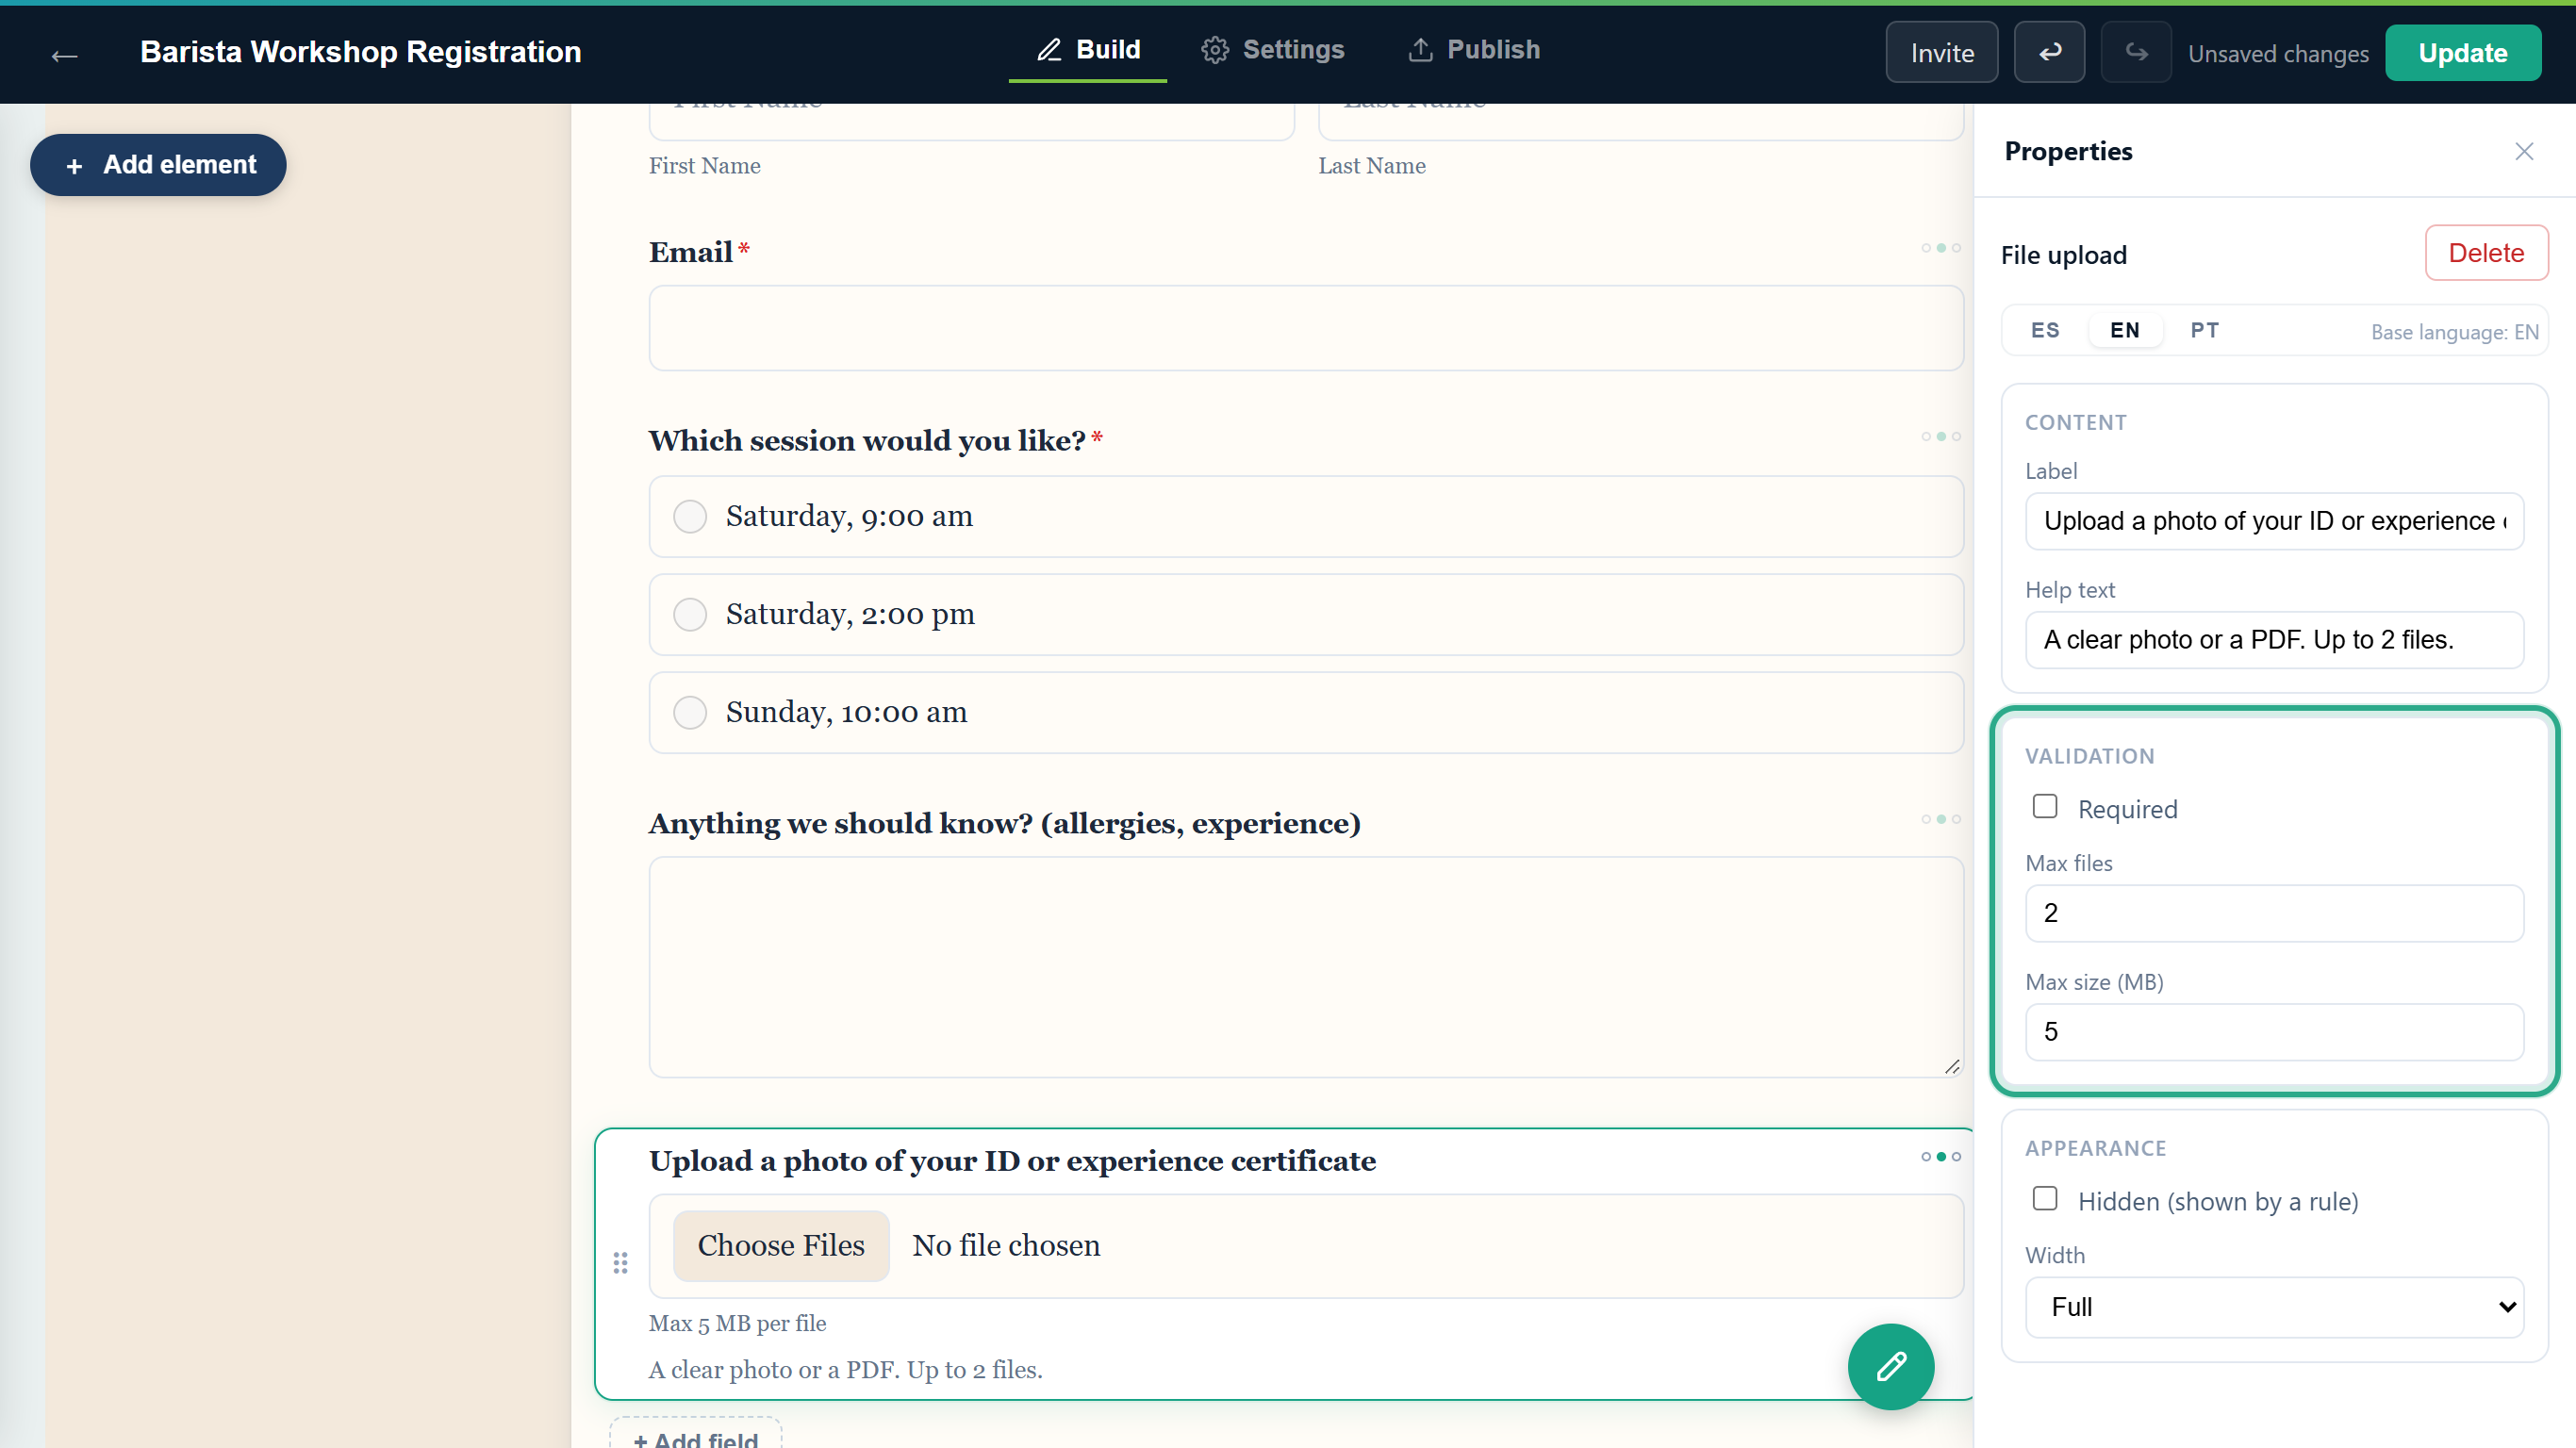 Max files goes from 1 to 10, and Max size from 1 to 50 MB.
Click an empty part of the page to see the field as respondents will. The picker now accepts several files (Choose Files), and the hint under it reads Max 5 MB per file.
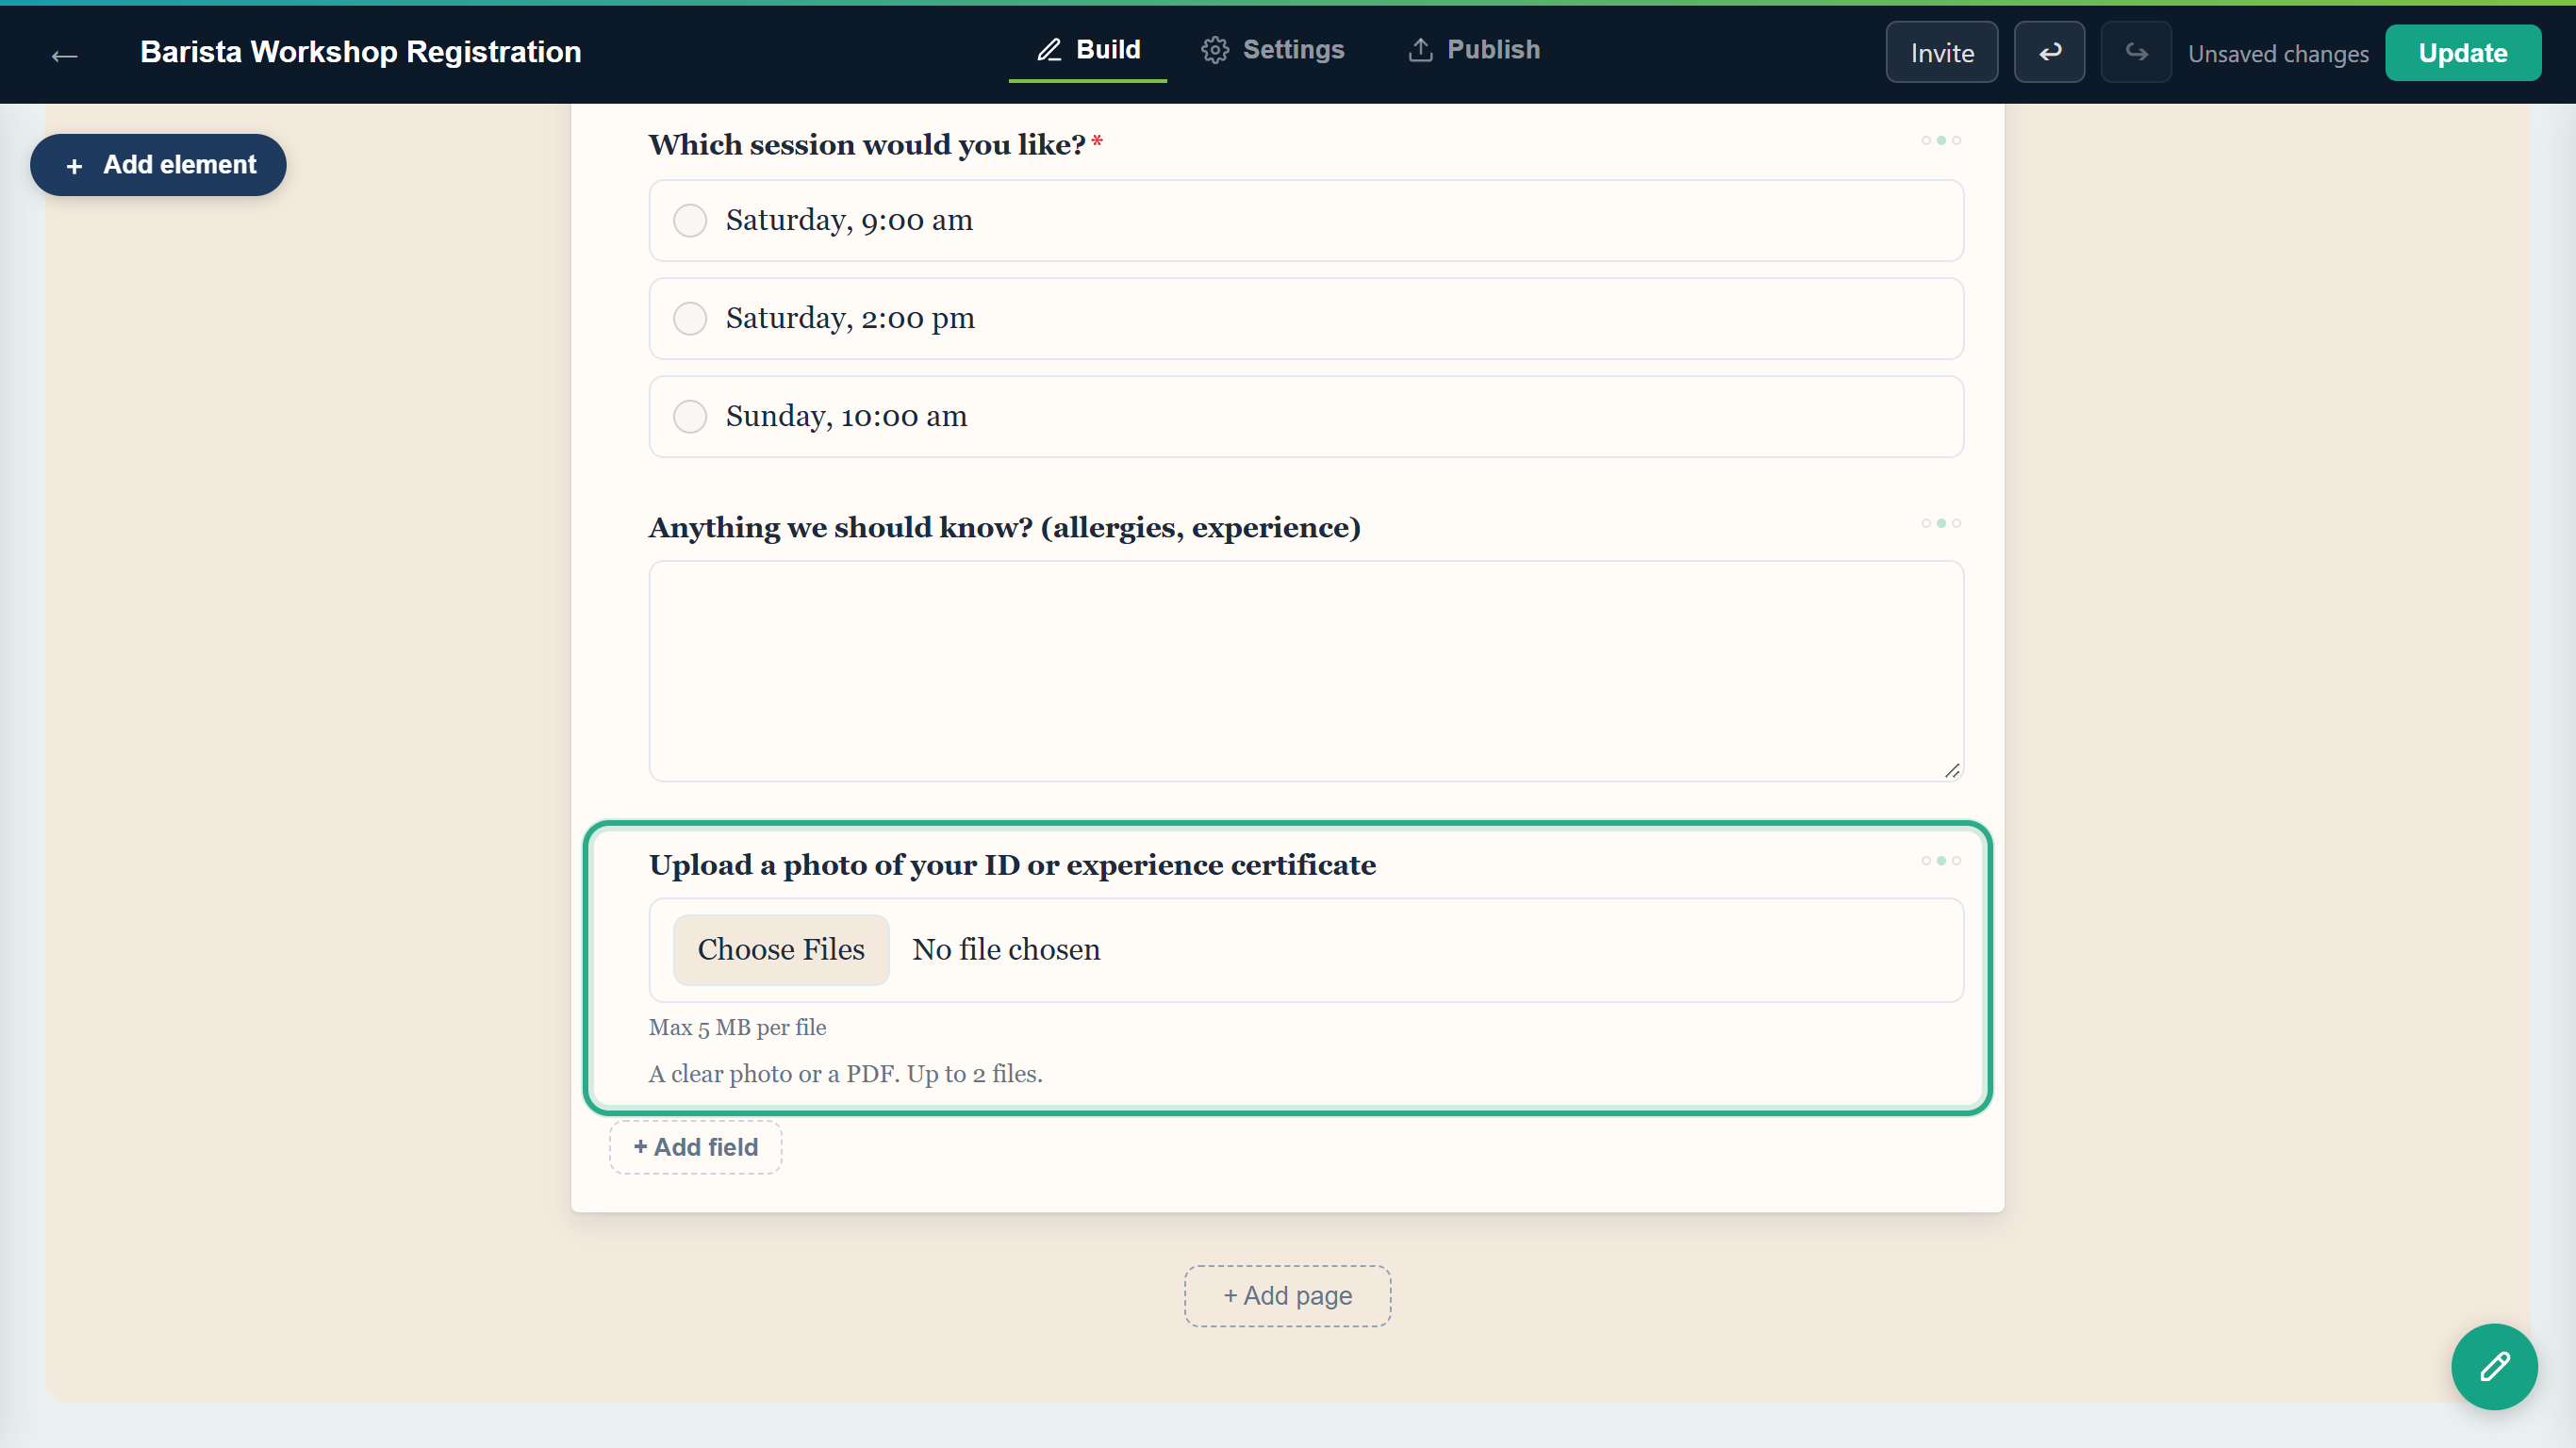 The Choose File(s) button and No file chosen are the browser's own text, so they follow the visitor's browser language.
Result
The form has a File upload field that takes up to 2 files of 5 MB each. You can't choose the accepted file types in the editor; see Which files are accepted.
Task 2 — Add a Signature field
Step-by-step
With the File upload field selected, click Add element and then Signature under Uploads & more.
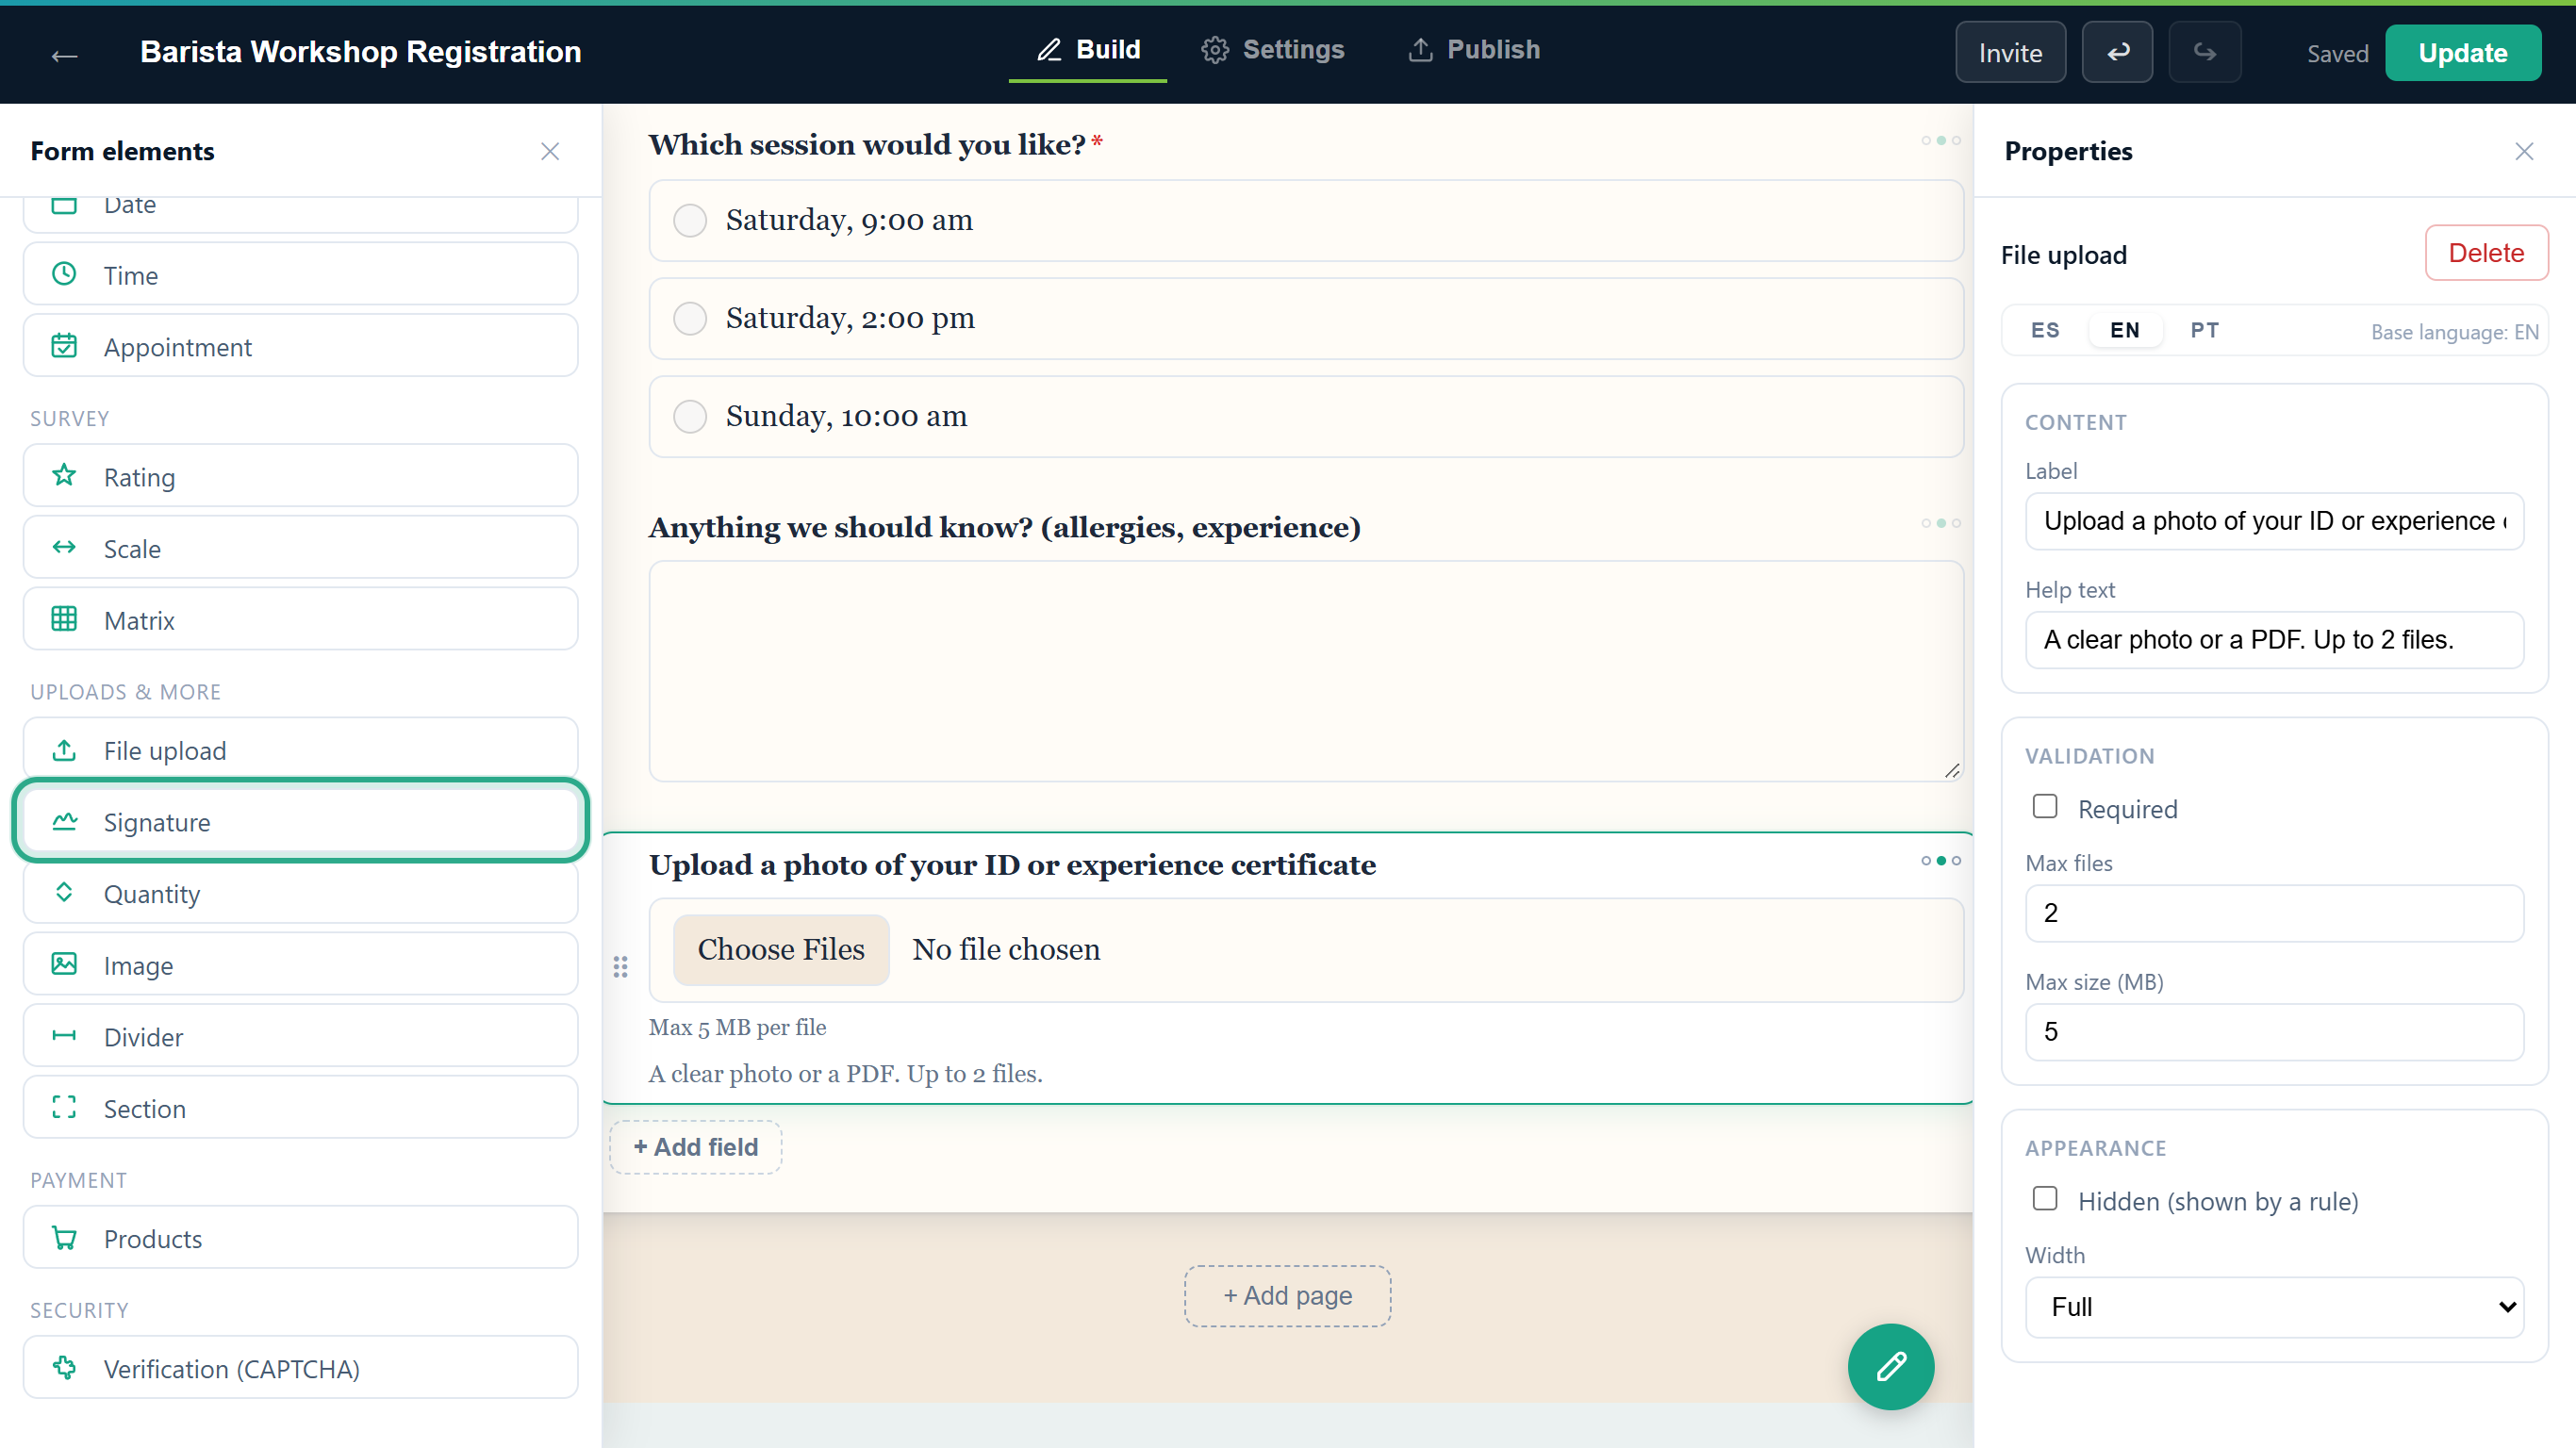 The new field is added below the selected one.
In Properties, type the Label ("Your signature") and a Help text that says what signing means ("By signing, you accept the workshop terms and agree that we may photograph the session."). Under Validation, tick Required so nobody can register without signing.
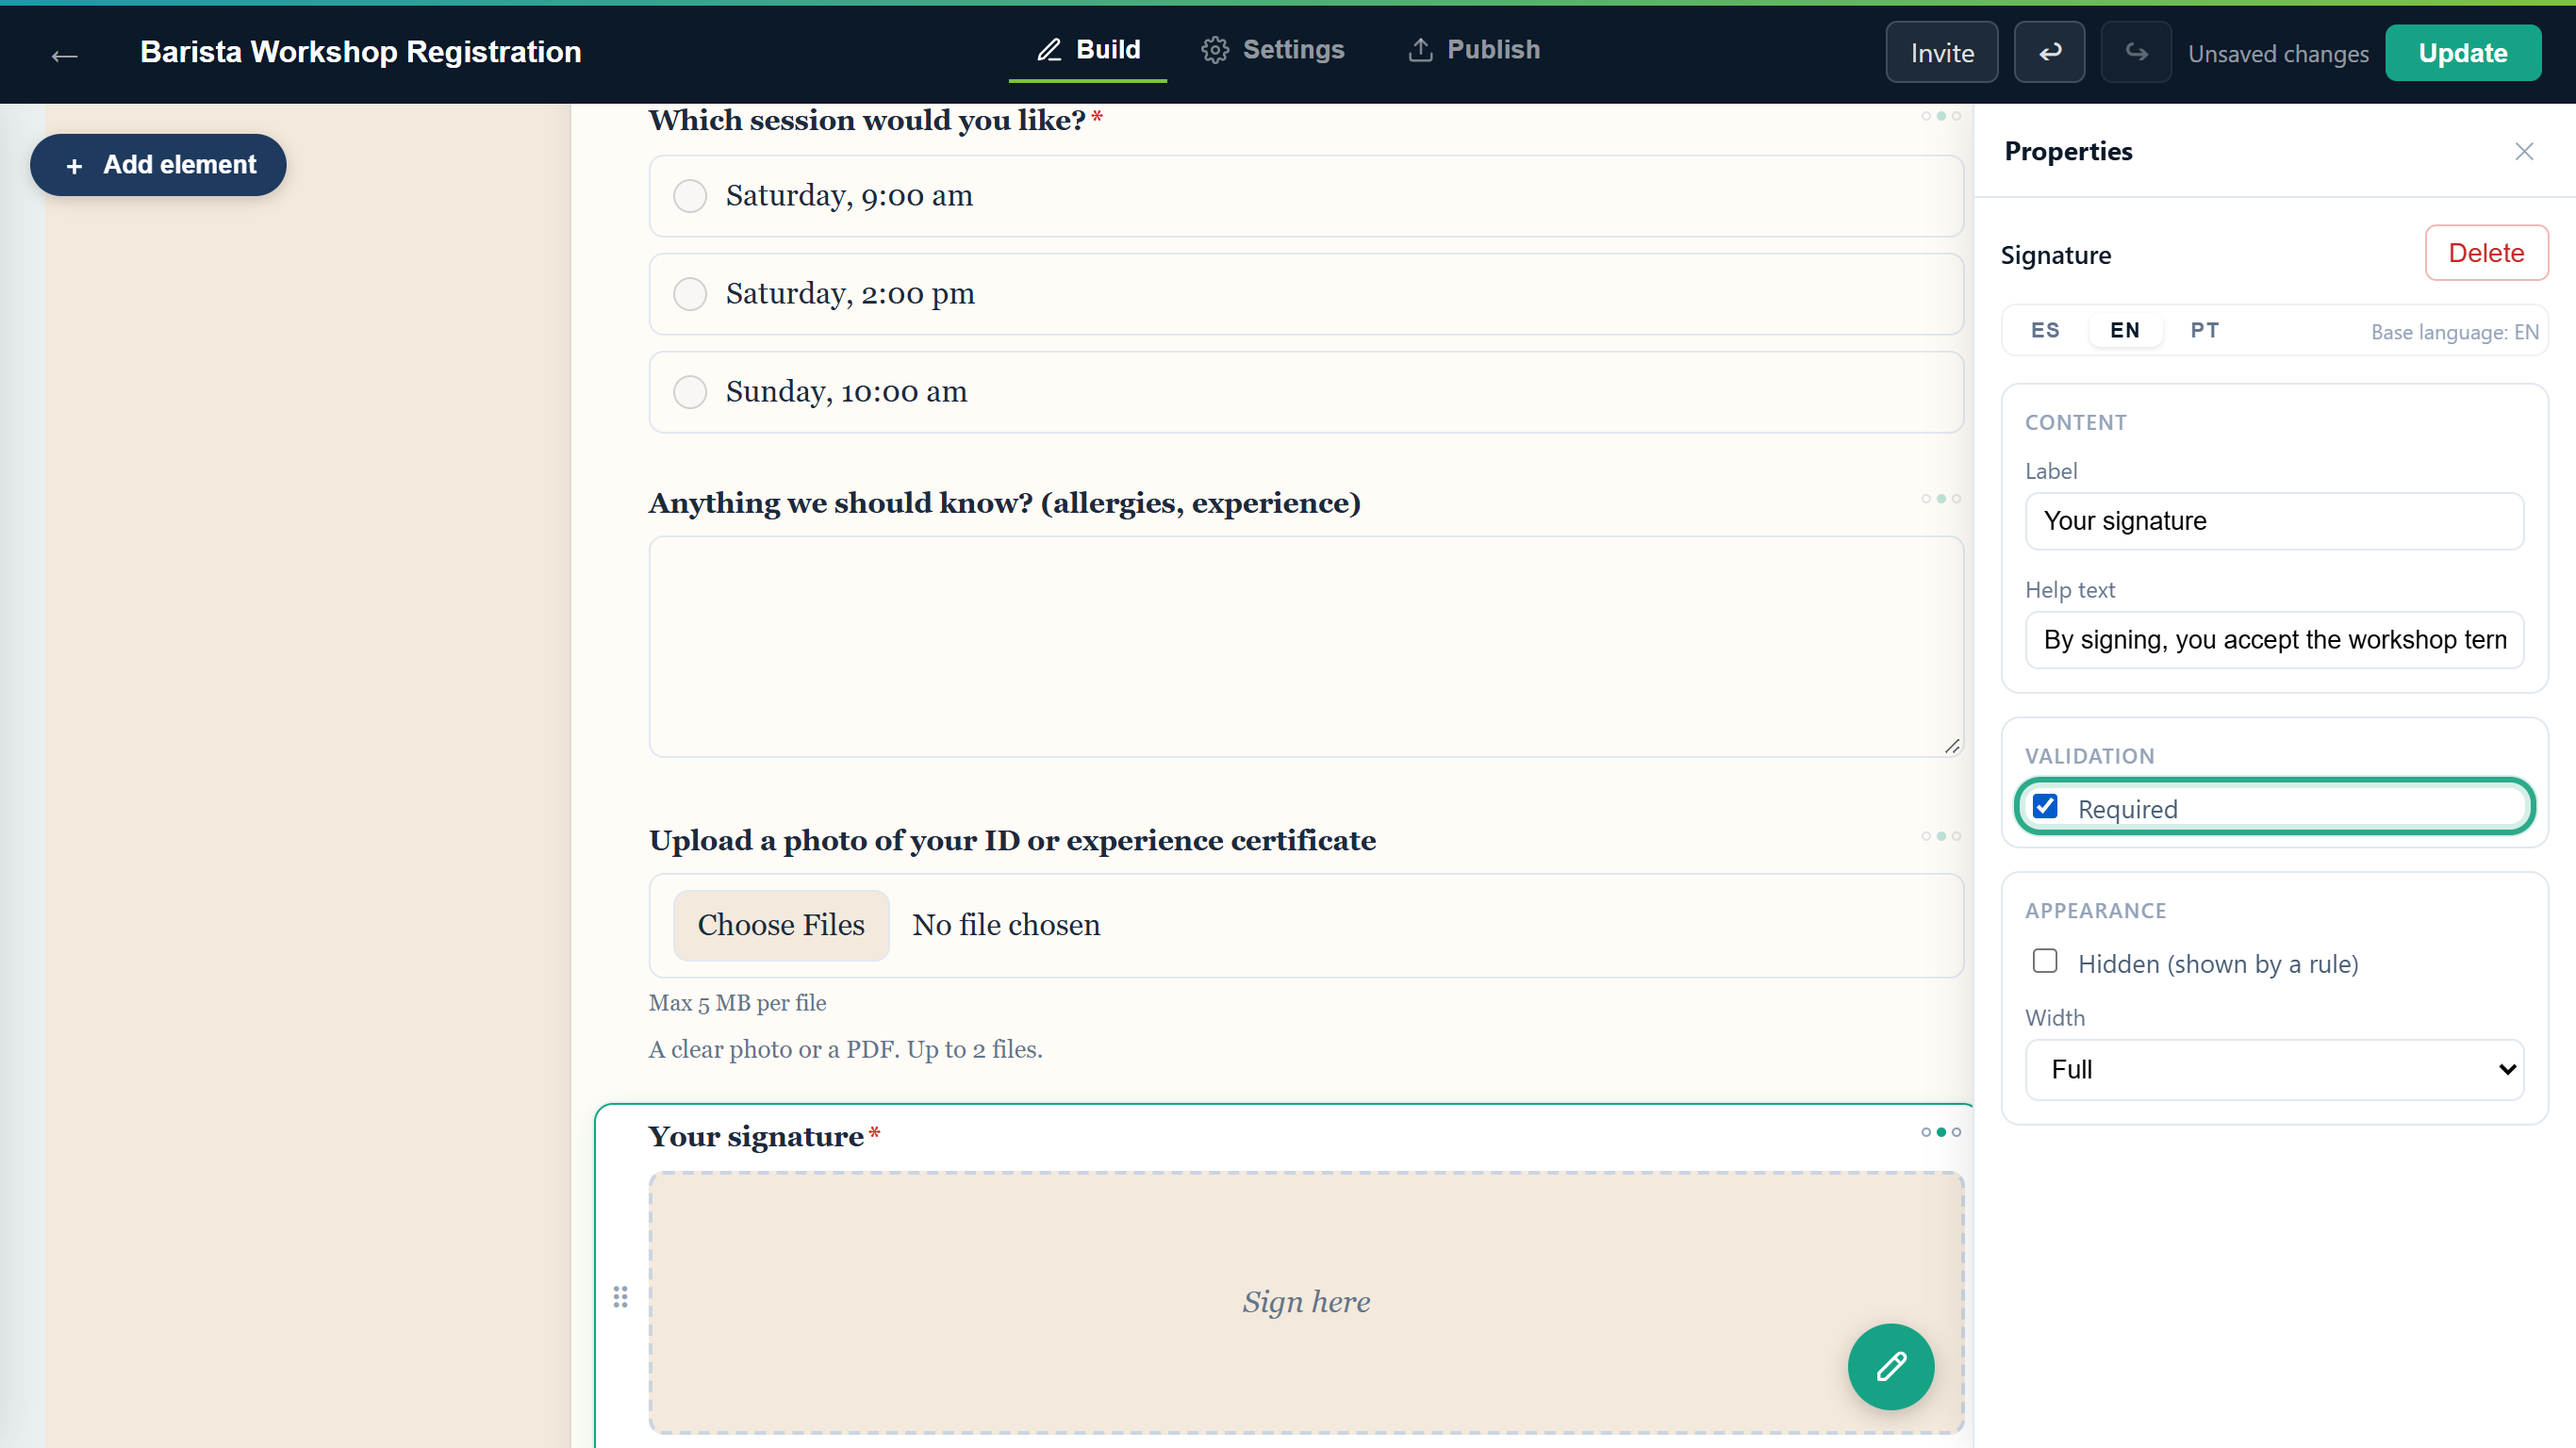 A signature has no other settings: Label, Help text, Required, Hidden (shown by a rule) and Width.
Click an empty part of the page. The field shows a pad marked Sign here, with a red asterisk because it's required.
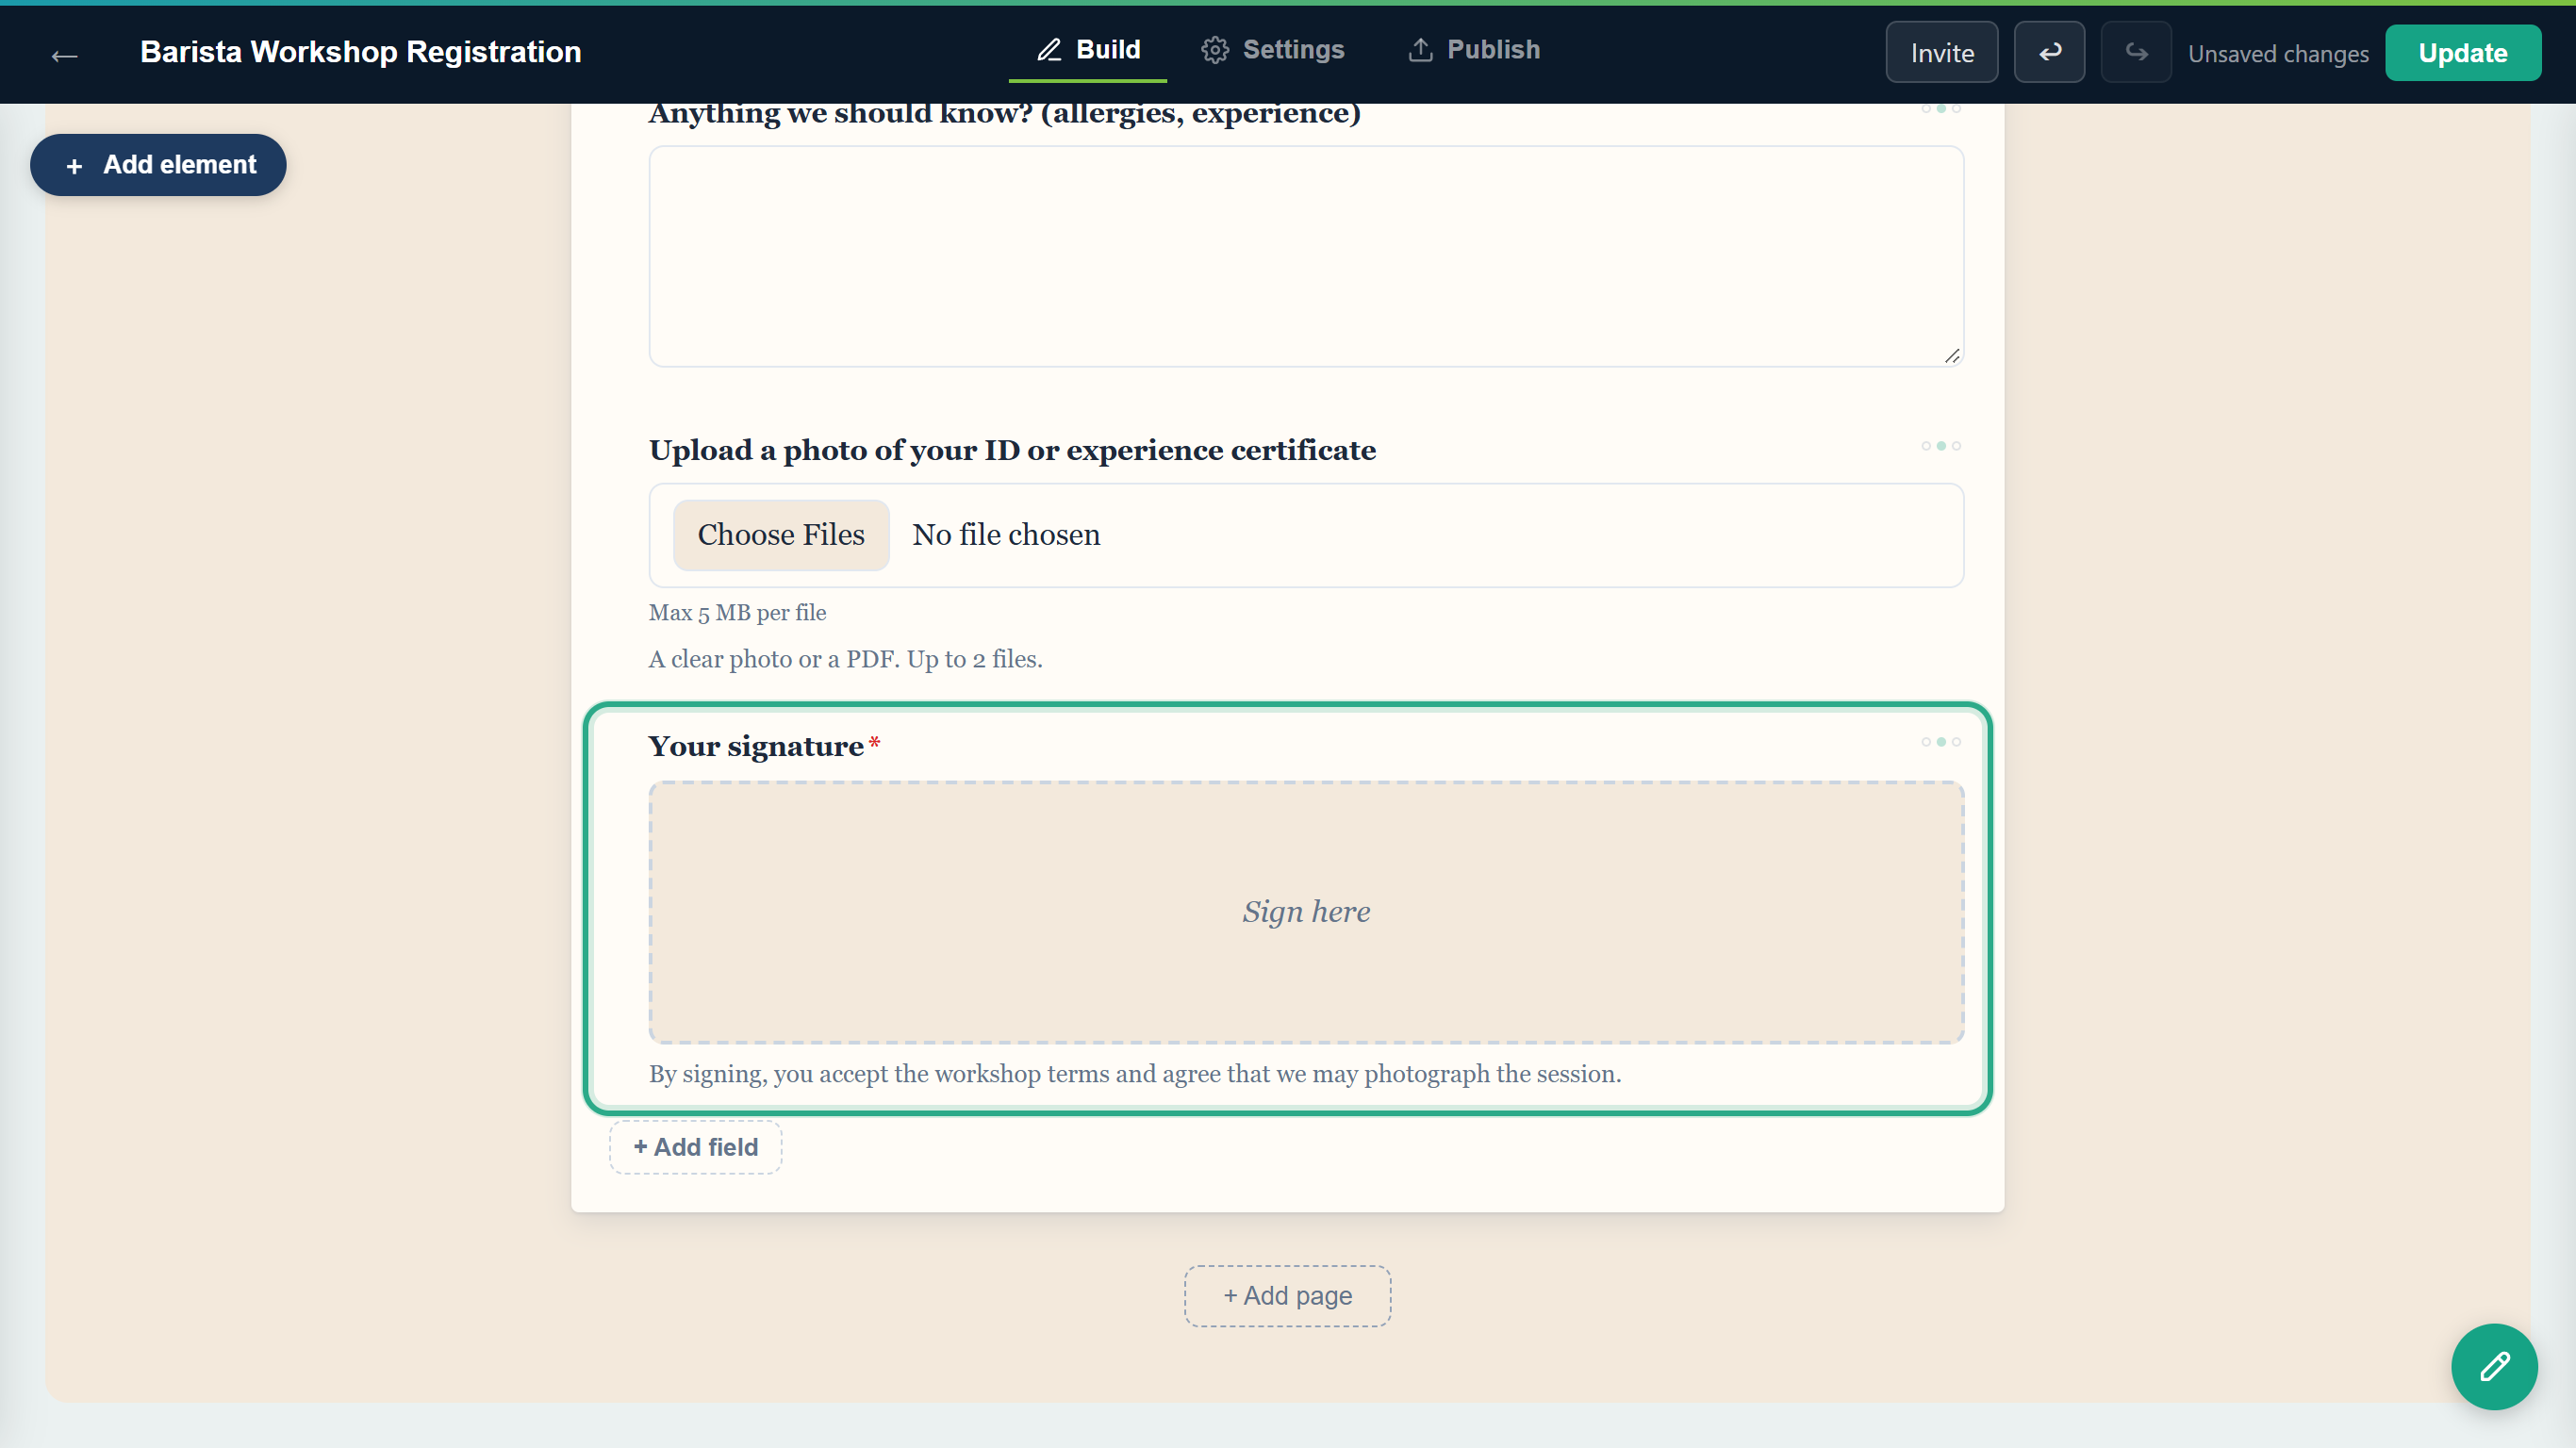 In the editor the pad is only a preview. You can't sign it here.
Result
The form ends with a required signature. Delete at the top of Properties removes a field you no longer need.
Task 3 — Publish the change
Step-by-step
Click Update in the top bar (Publish if the form has never been published). Until you do, visitors keep seeing the previous version of the form.
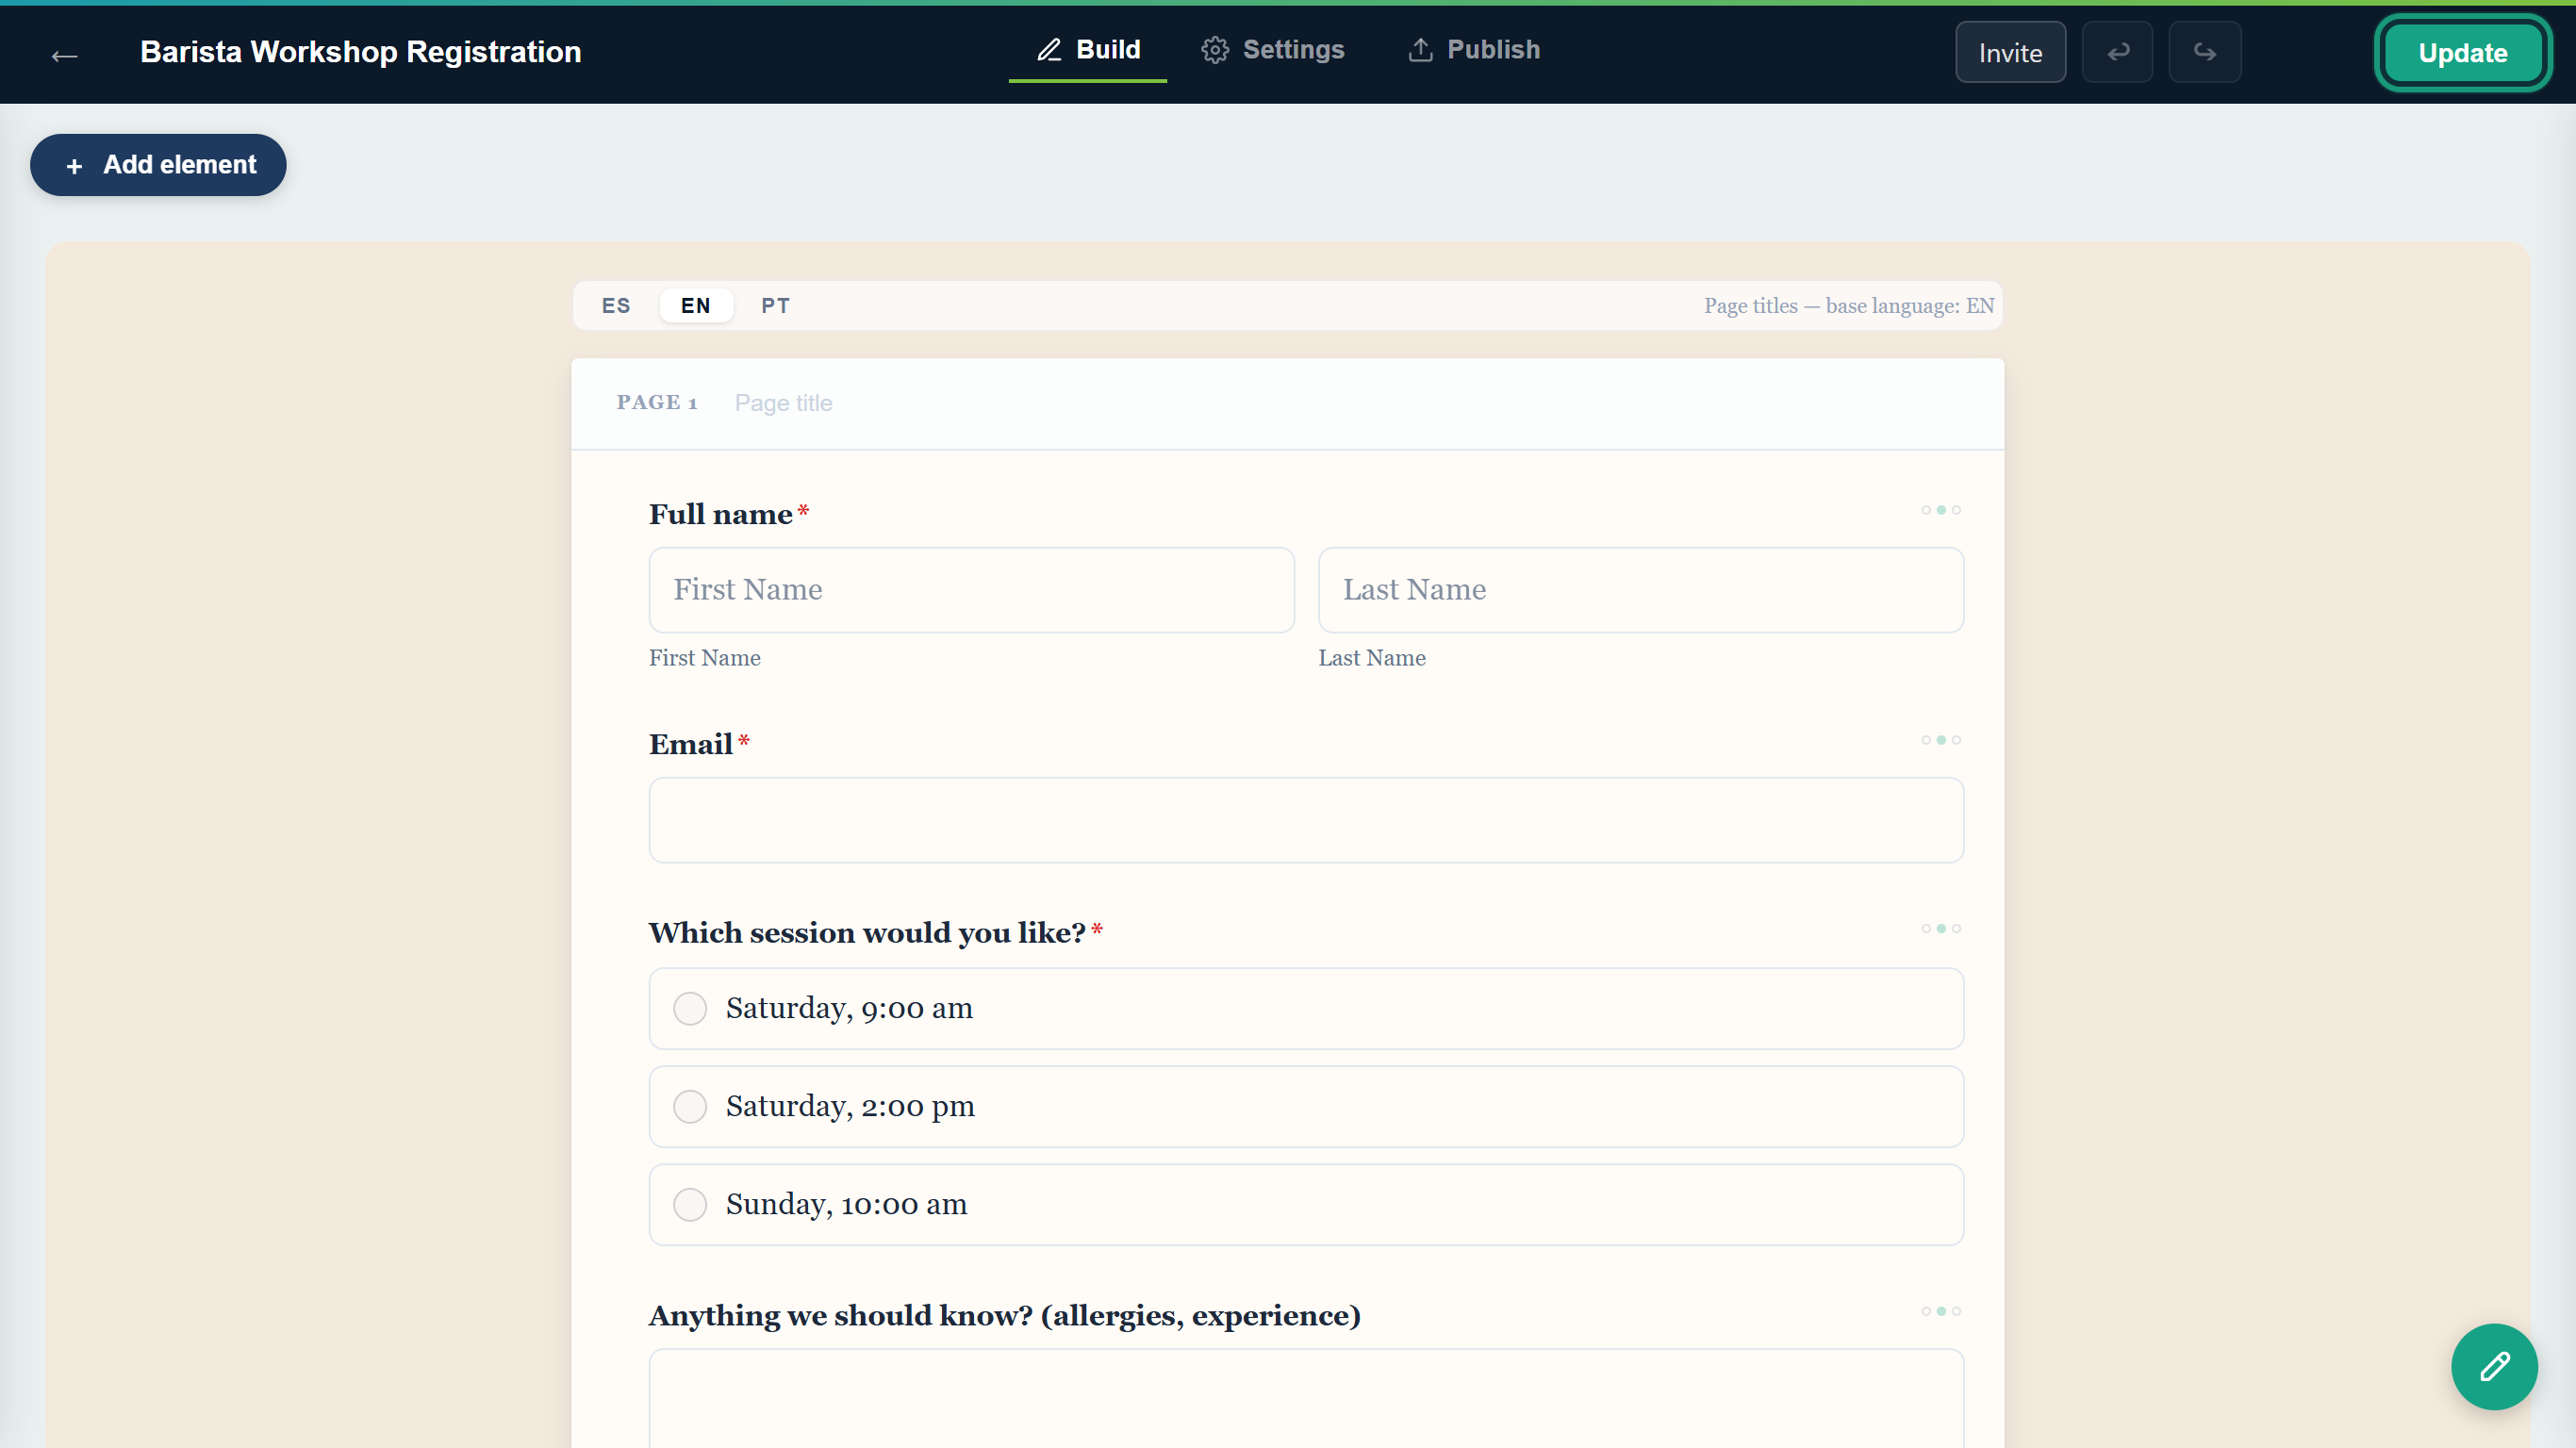 Update puts the new fields on the public form.
Result
The public form shows the new fields. See Publish and share for the link and other ways to share it.
Task 4 — Sign and upload as a visitor
This is what a respondent does on the public form. Here Valeria Castro registers for the Sunday session.
Step-by-step
After the other answers, sign in the Sign here area: hold down the mouse button (or put a finger on a touch screen) and draw. The hint disappears as soon as you start.
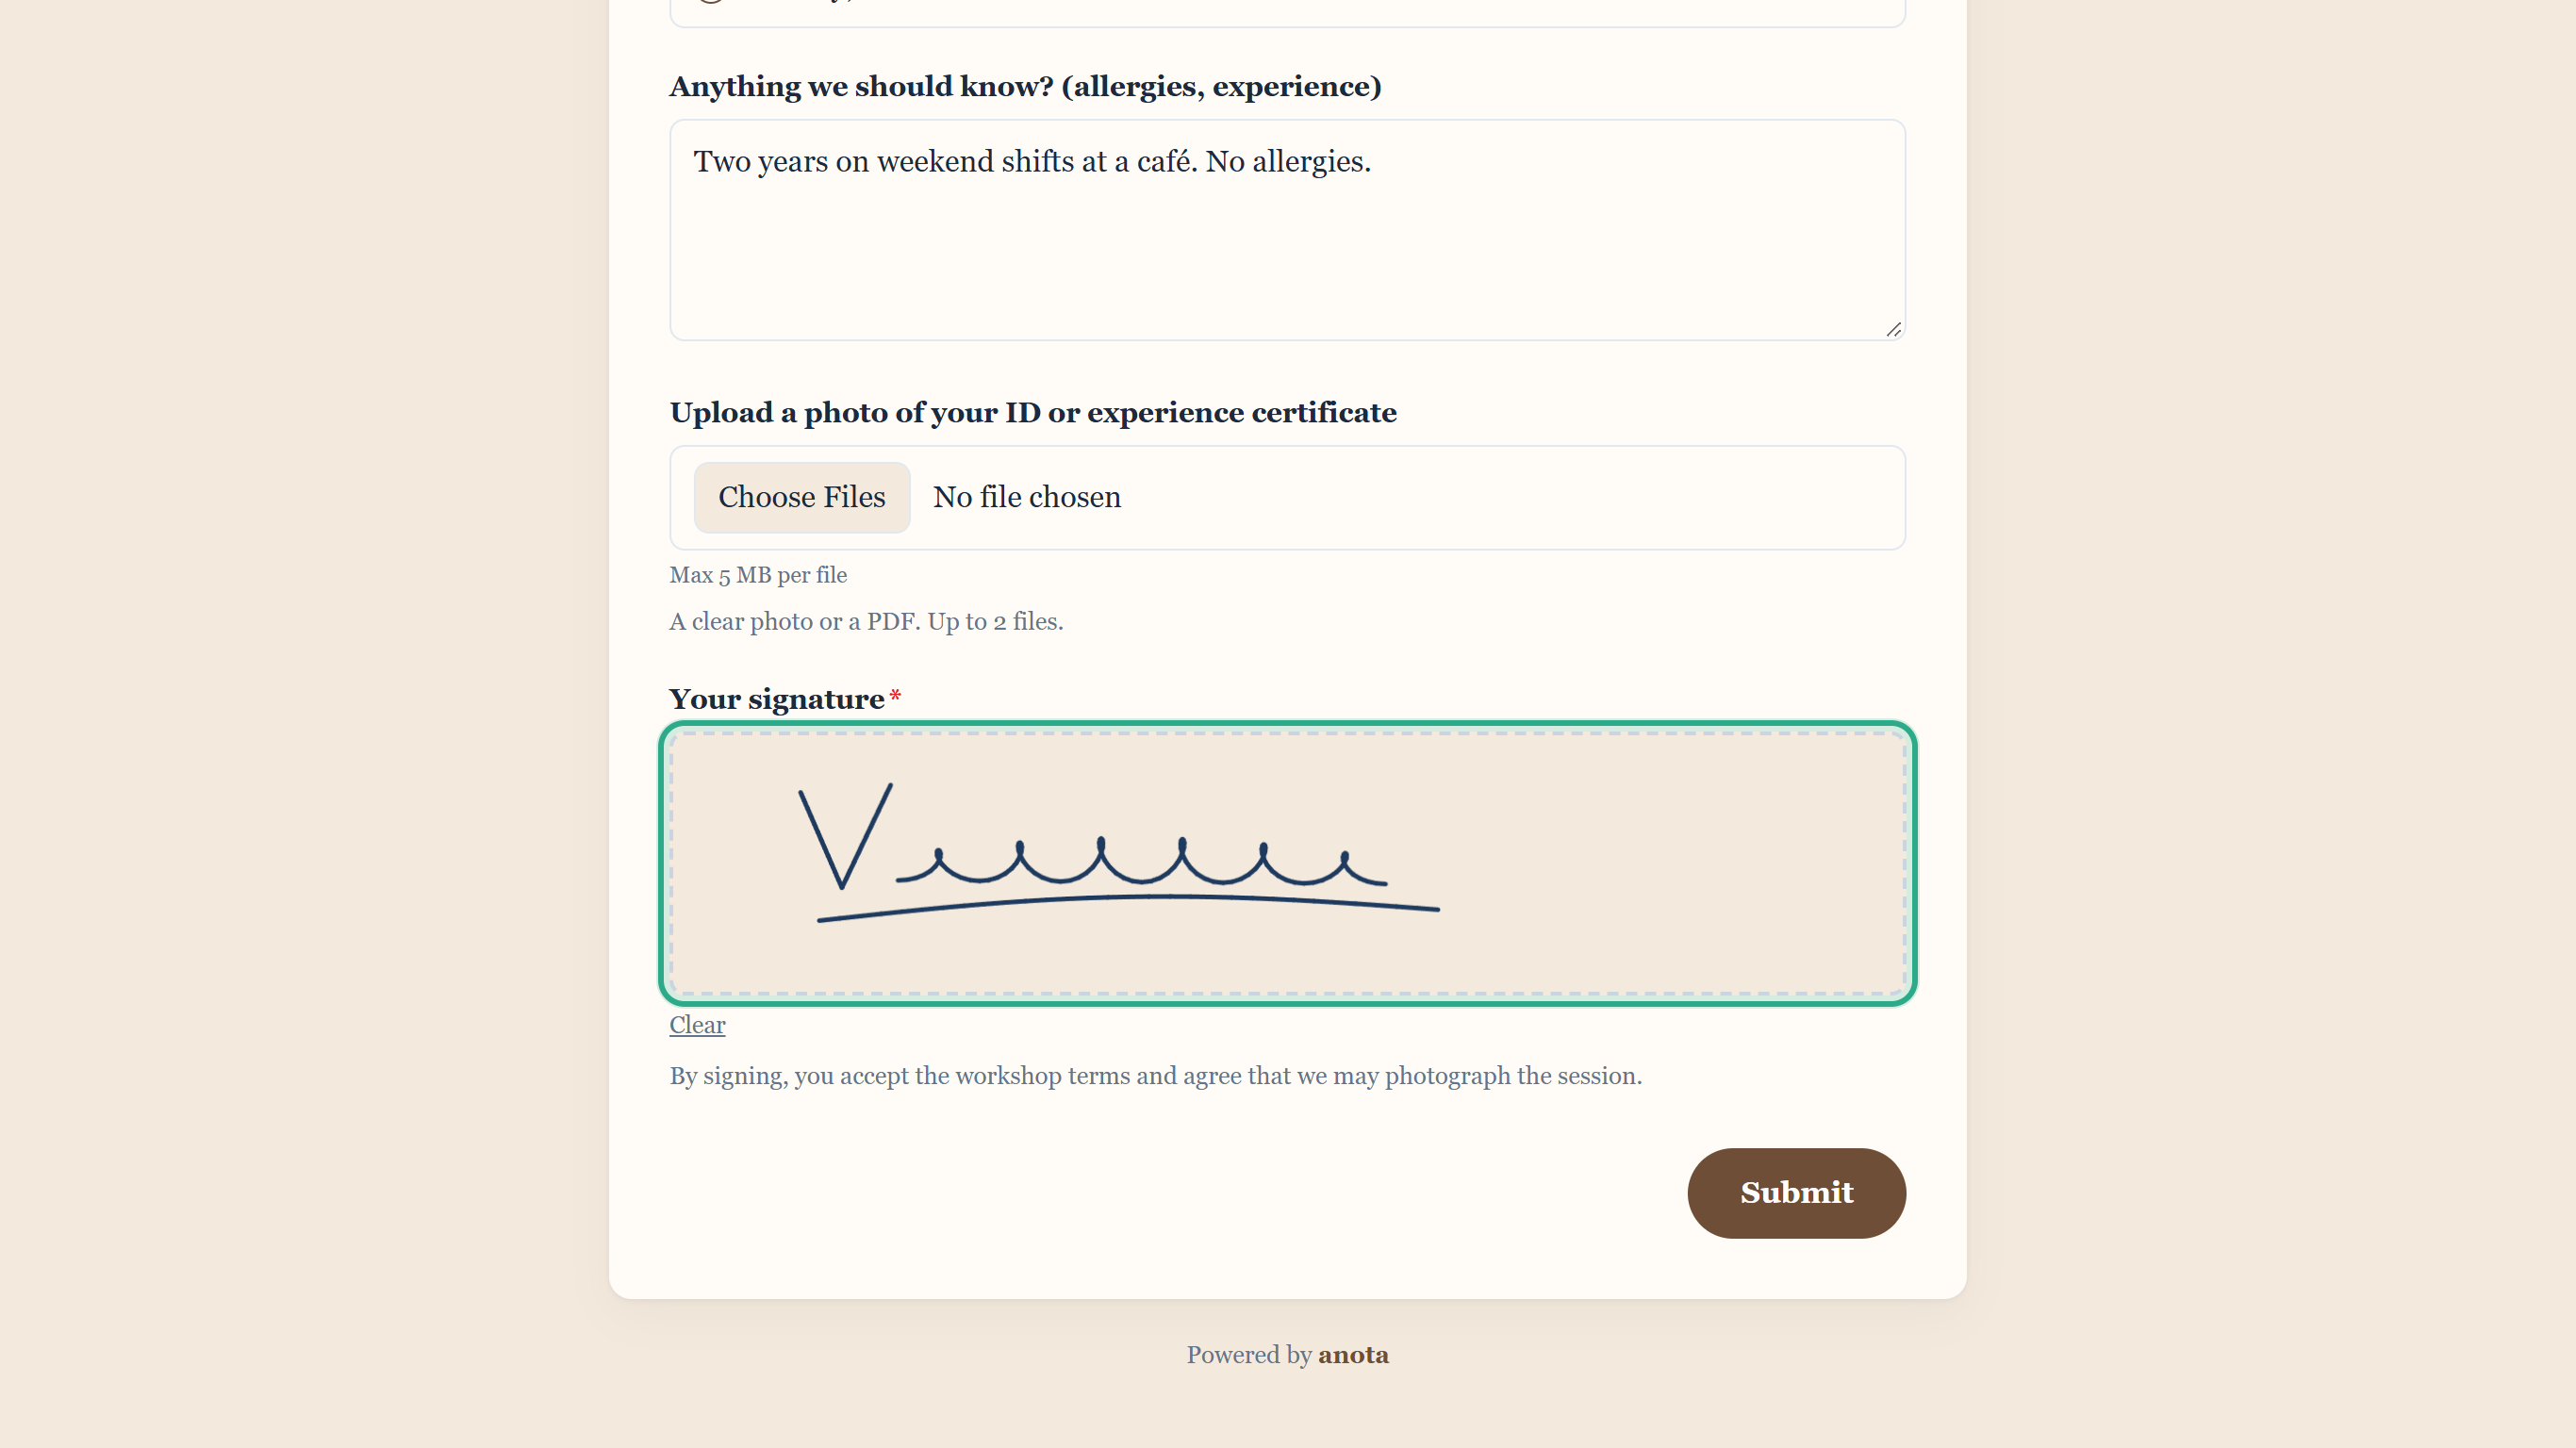 The pad works with a mouse, a trackpad, a pen or a finger.
Not happy with it? Click Clear under the pad to empty it, then sign again.
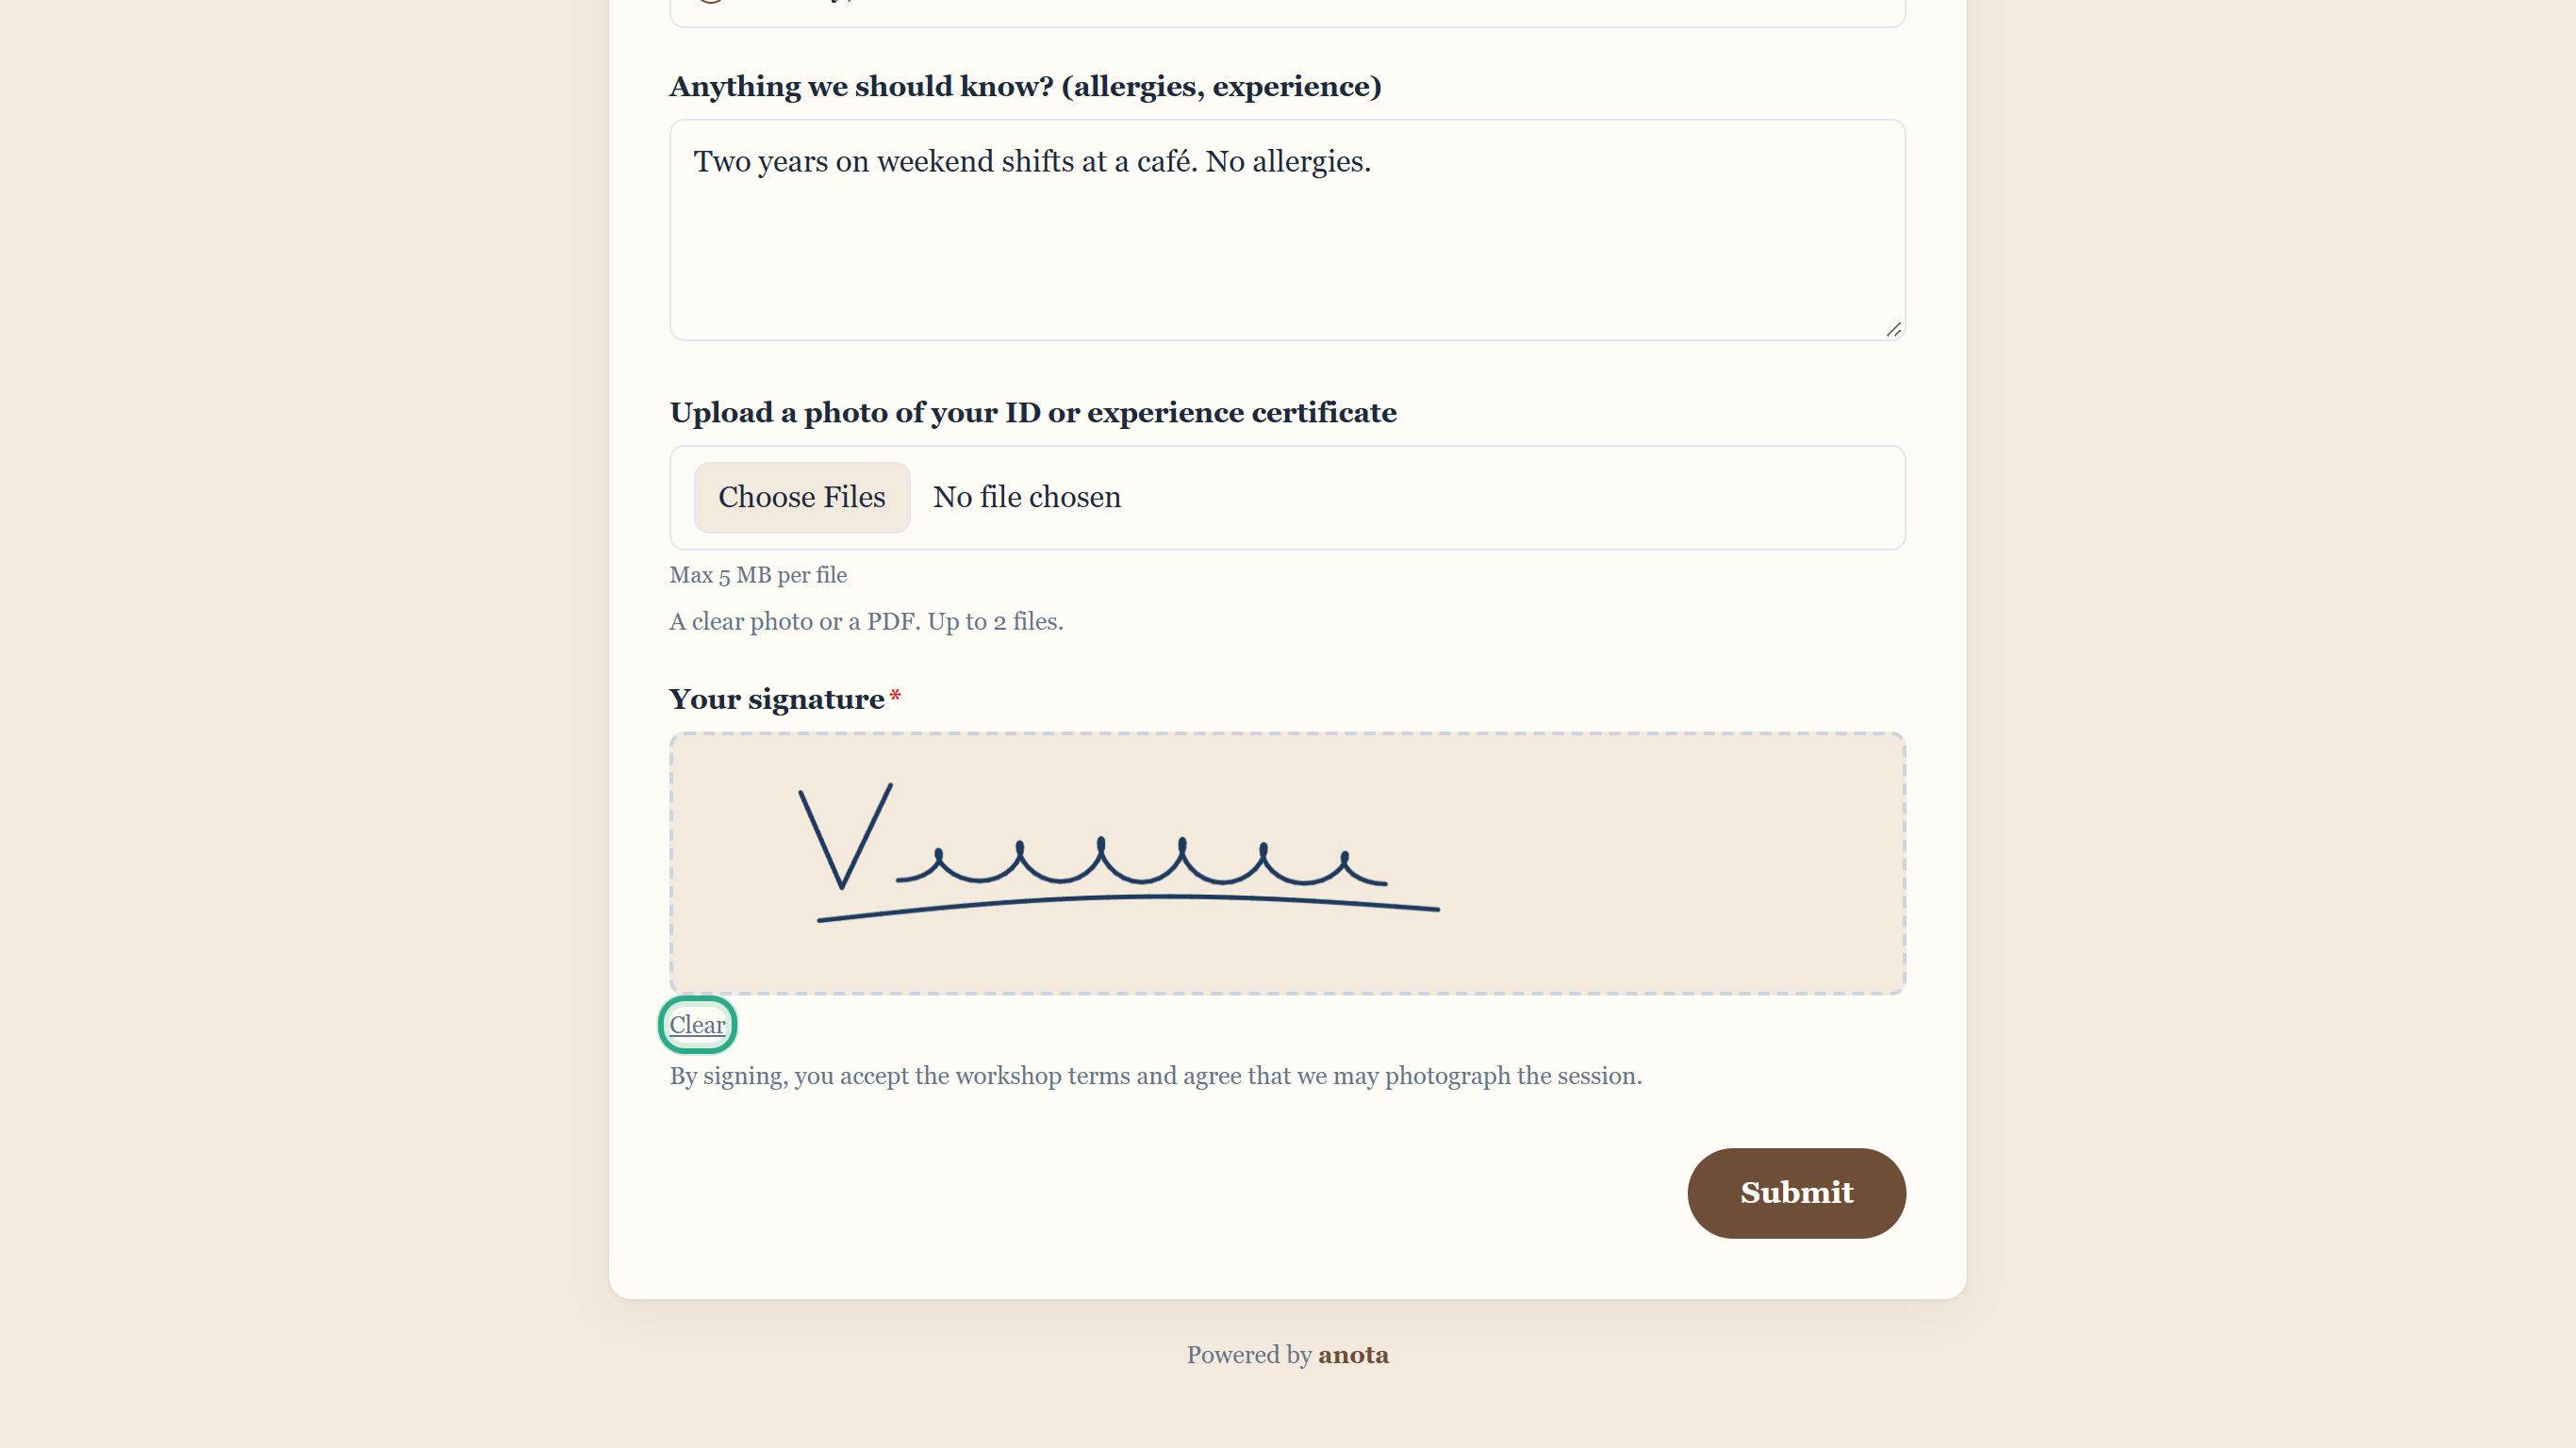 Clear empties the pad so you can start over.
In the file upload field, click Choose Files and pick the files (here a PNG photo of a certificate and a PDF). The browser shows how many you picked, for example 2 files. To pick several, select them together in the same window.
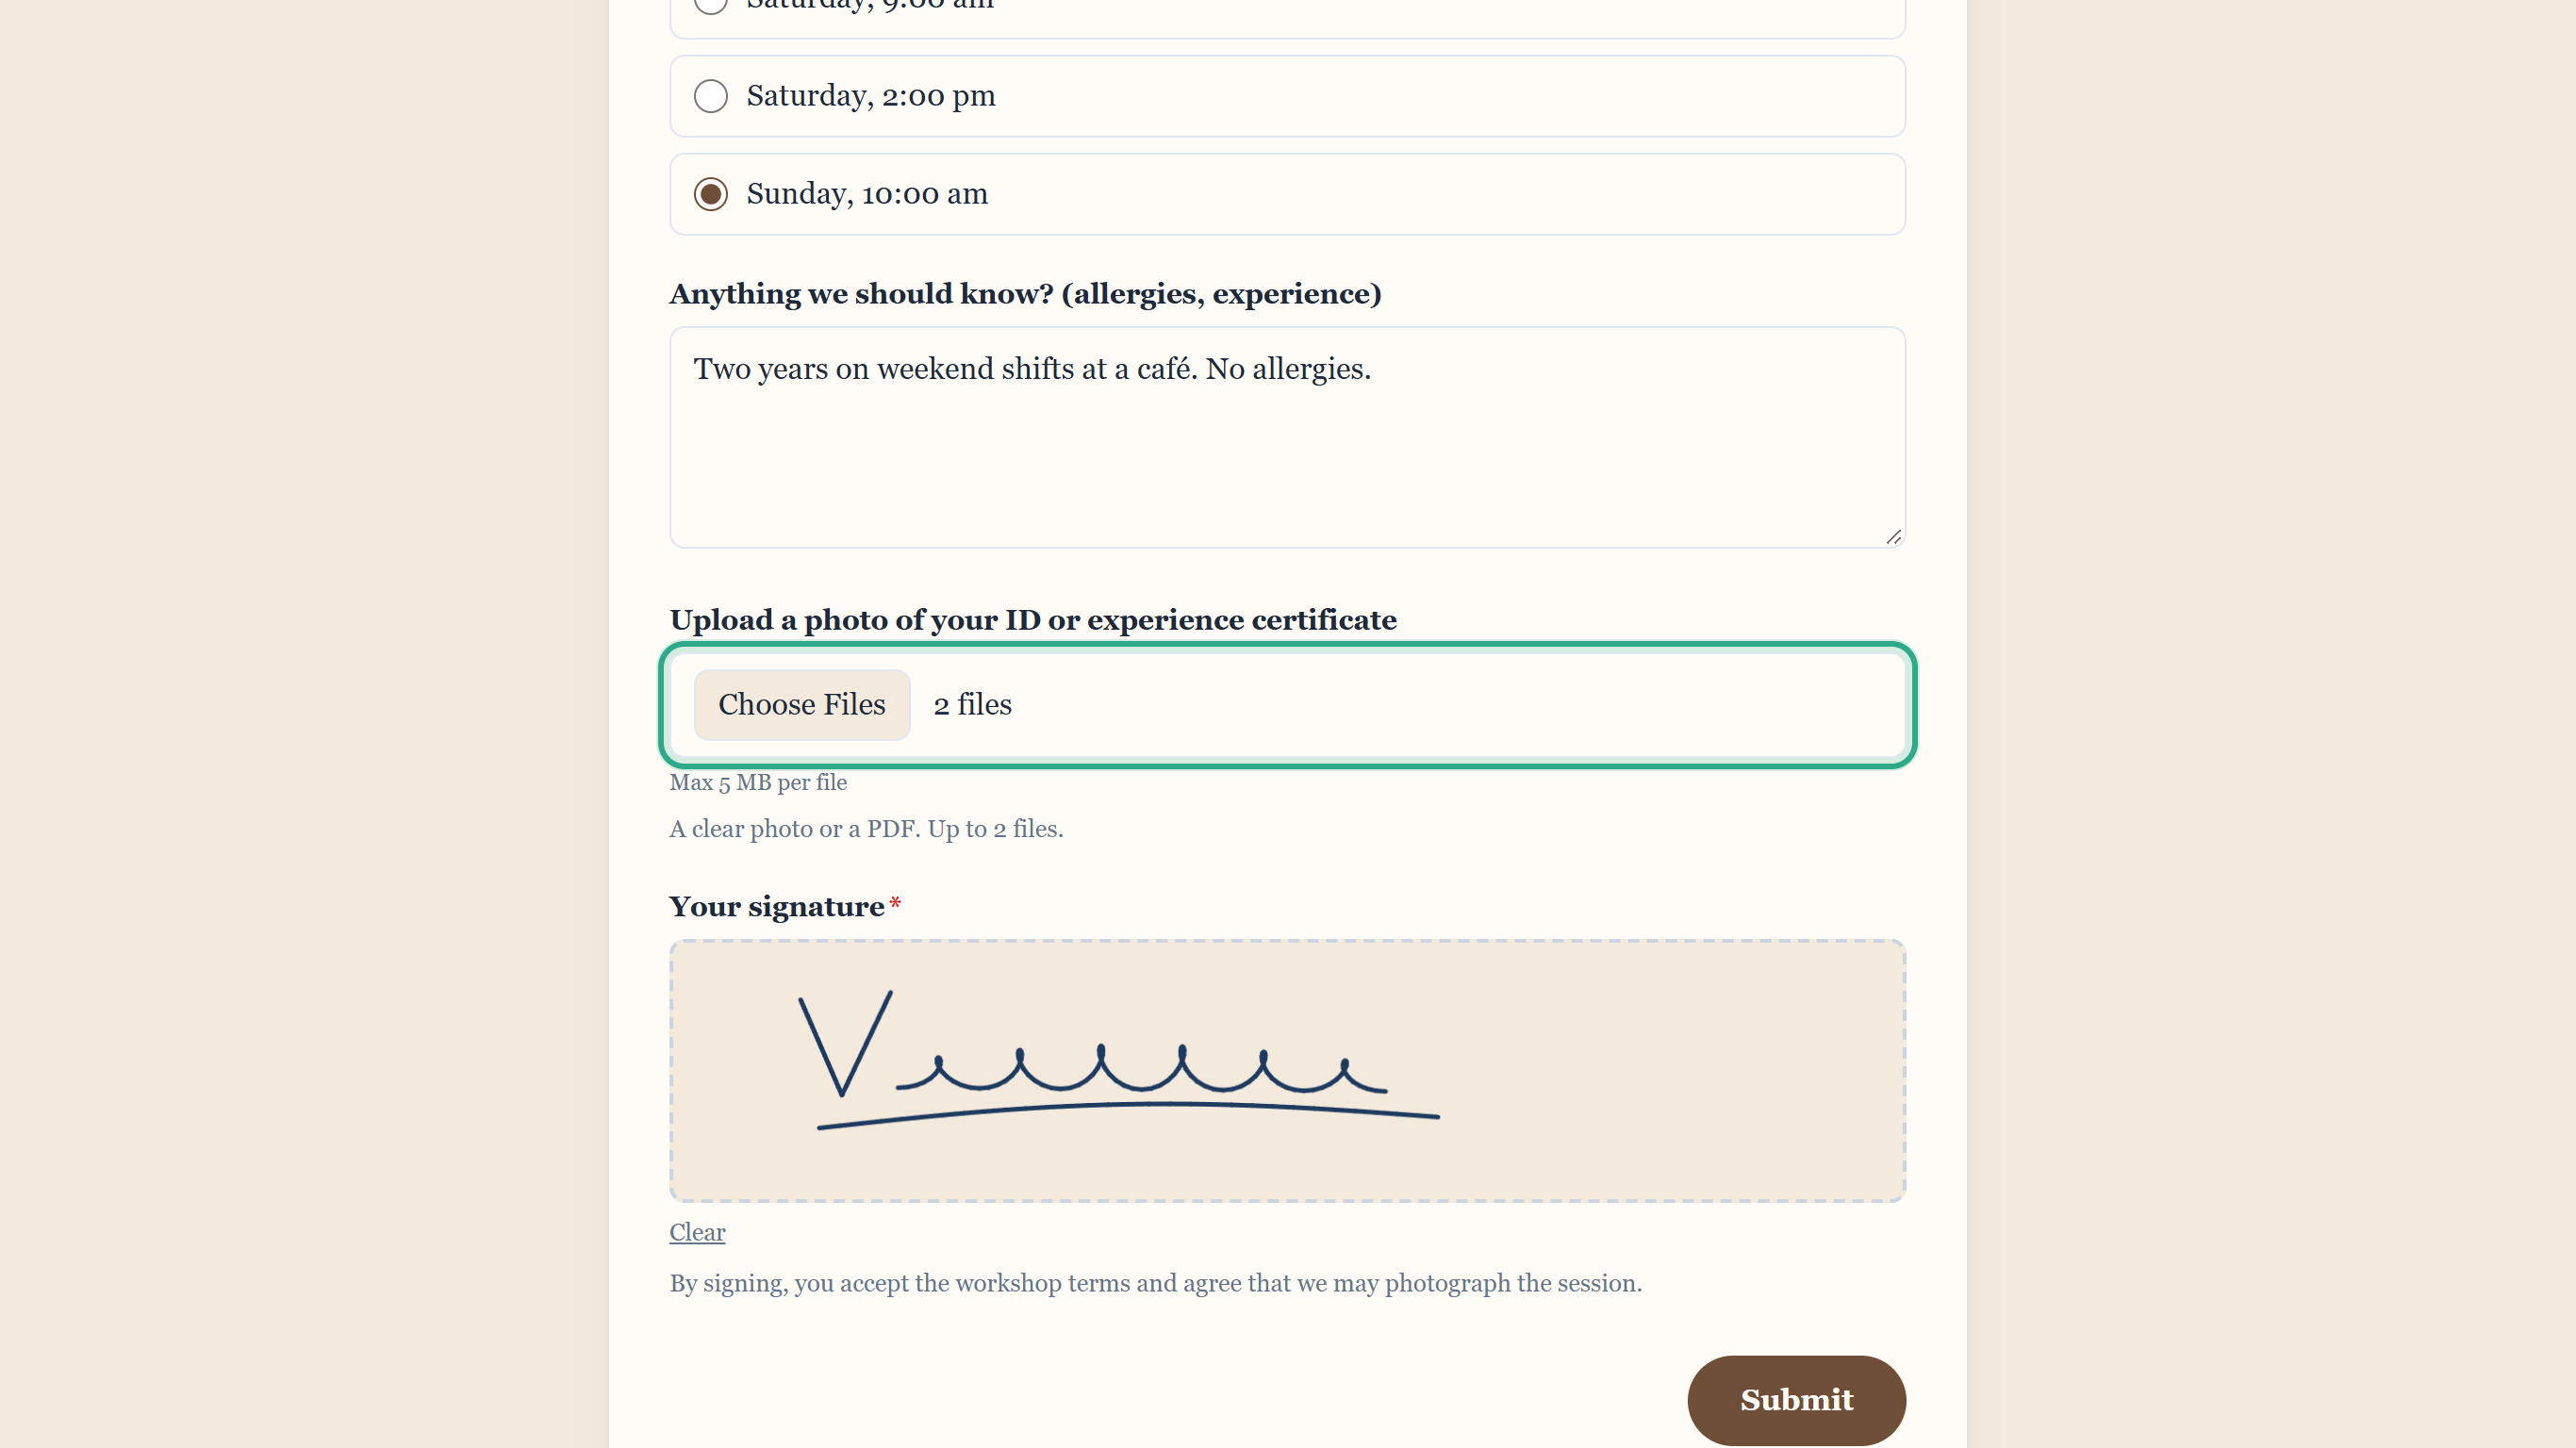 The files are checked and saved when the form is sent.
Click Submit (or the button text the form uses). On a multi-page form, files are checked when you click Next on their page.
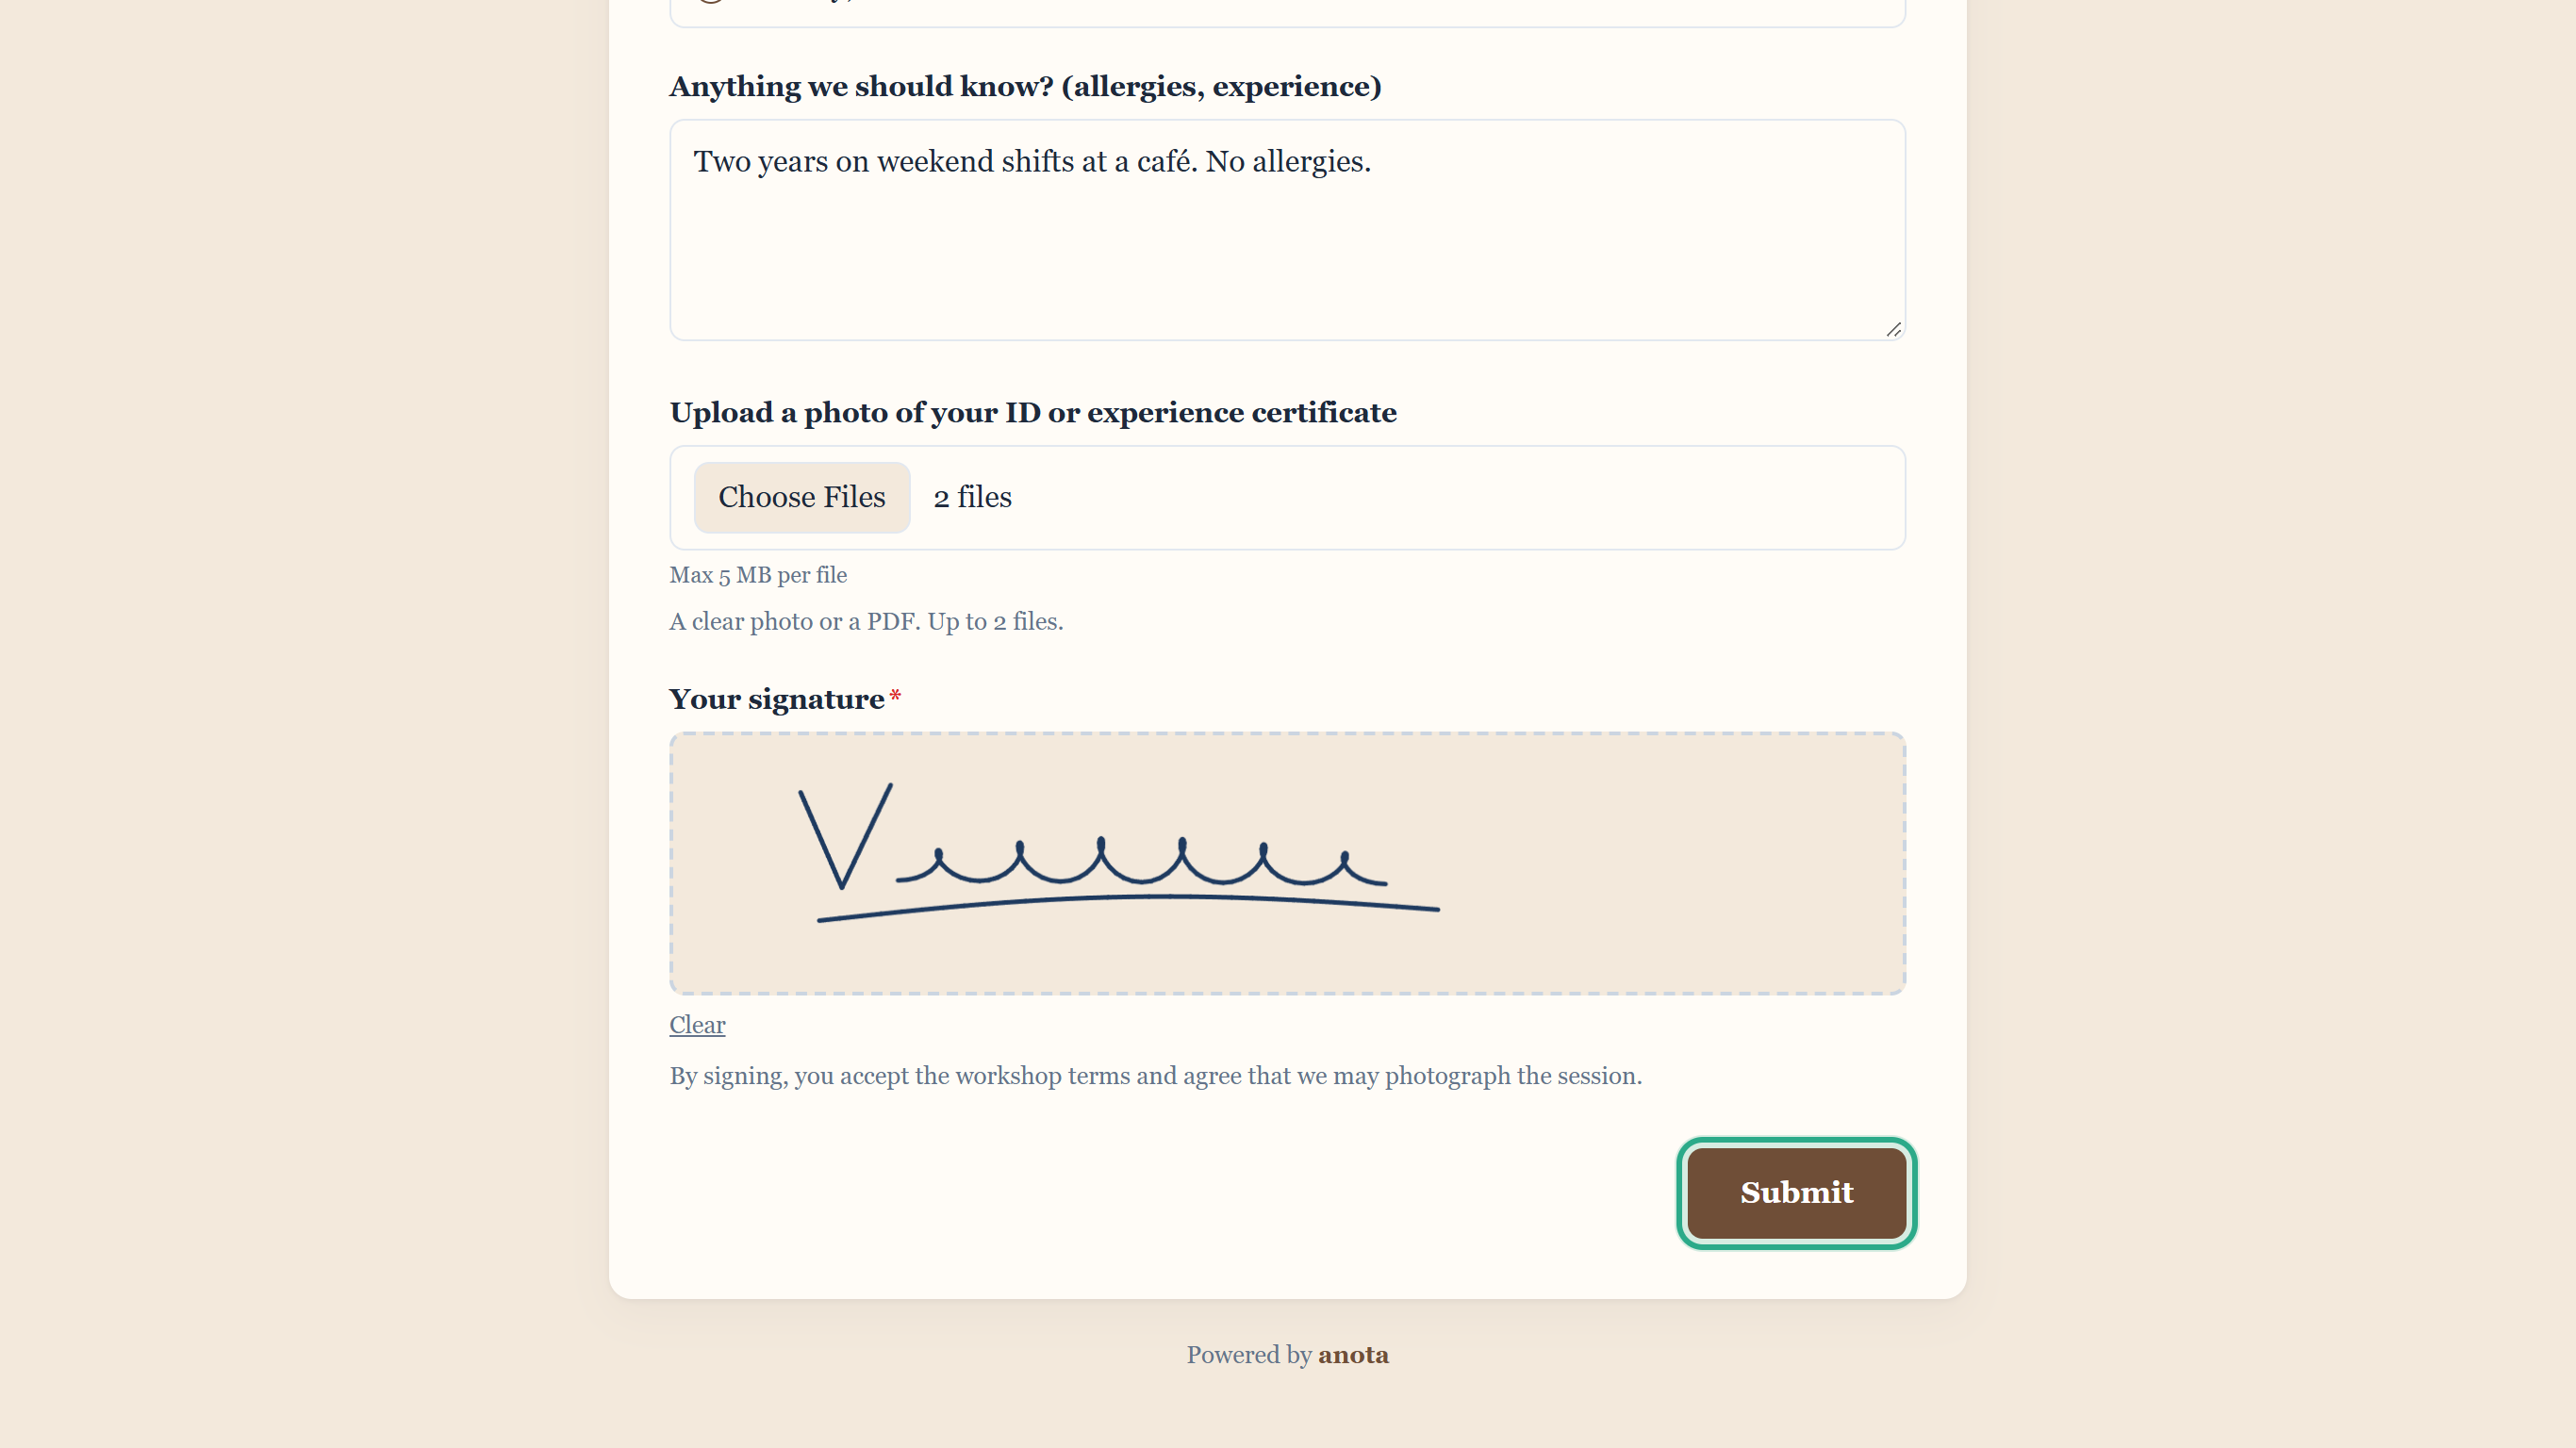 Submit sends the answers, the signature and the files together.
The thank-you screen confirms the registration. It shows the form's Thank-you message, or "Thank you! Your submission has been received." when none is set (see Theme and appearance).
 The response is saved with the signature and both files.
Result
The response reaches the Submissions inbox with the signature image and the two files. If the form sends Email notifications, they go out as usual (see Signatures and files in emails).
Task 5 — See what happens when something is wrong
anota checks the signature and every file when the visitor clicks Submit (or Next). If something is wrong, the form comes back with a red message under the field and keeps everything else the visitor entered, including the signature.
Step-by-step
No signature on a required field. Sending the form without signing shows Your signature is required. under the pad. Sign and click Submit again.
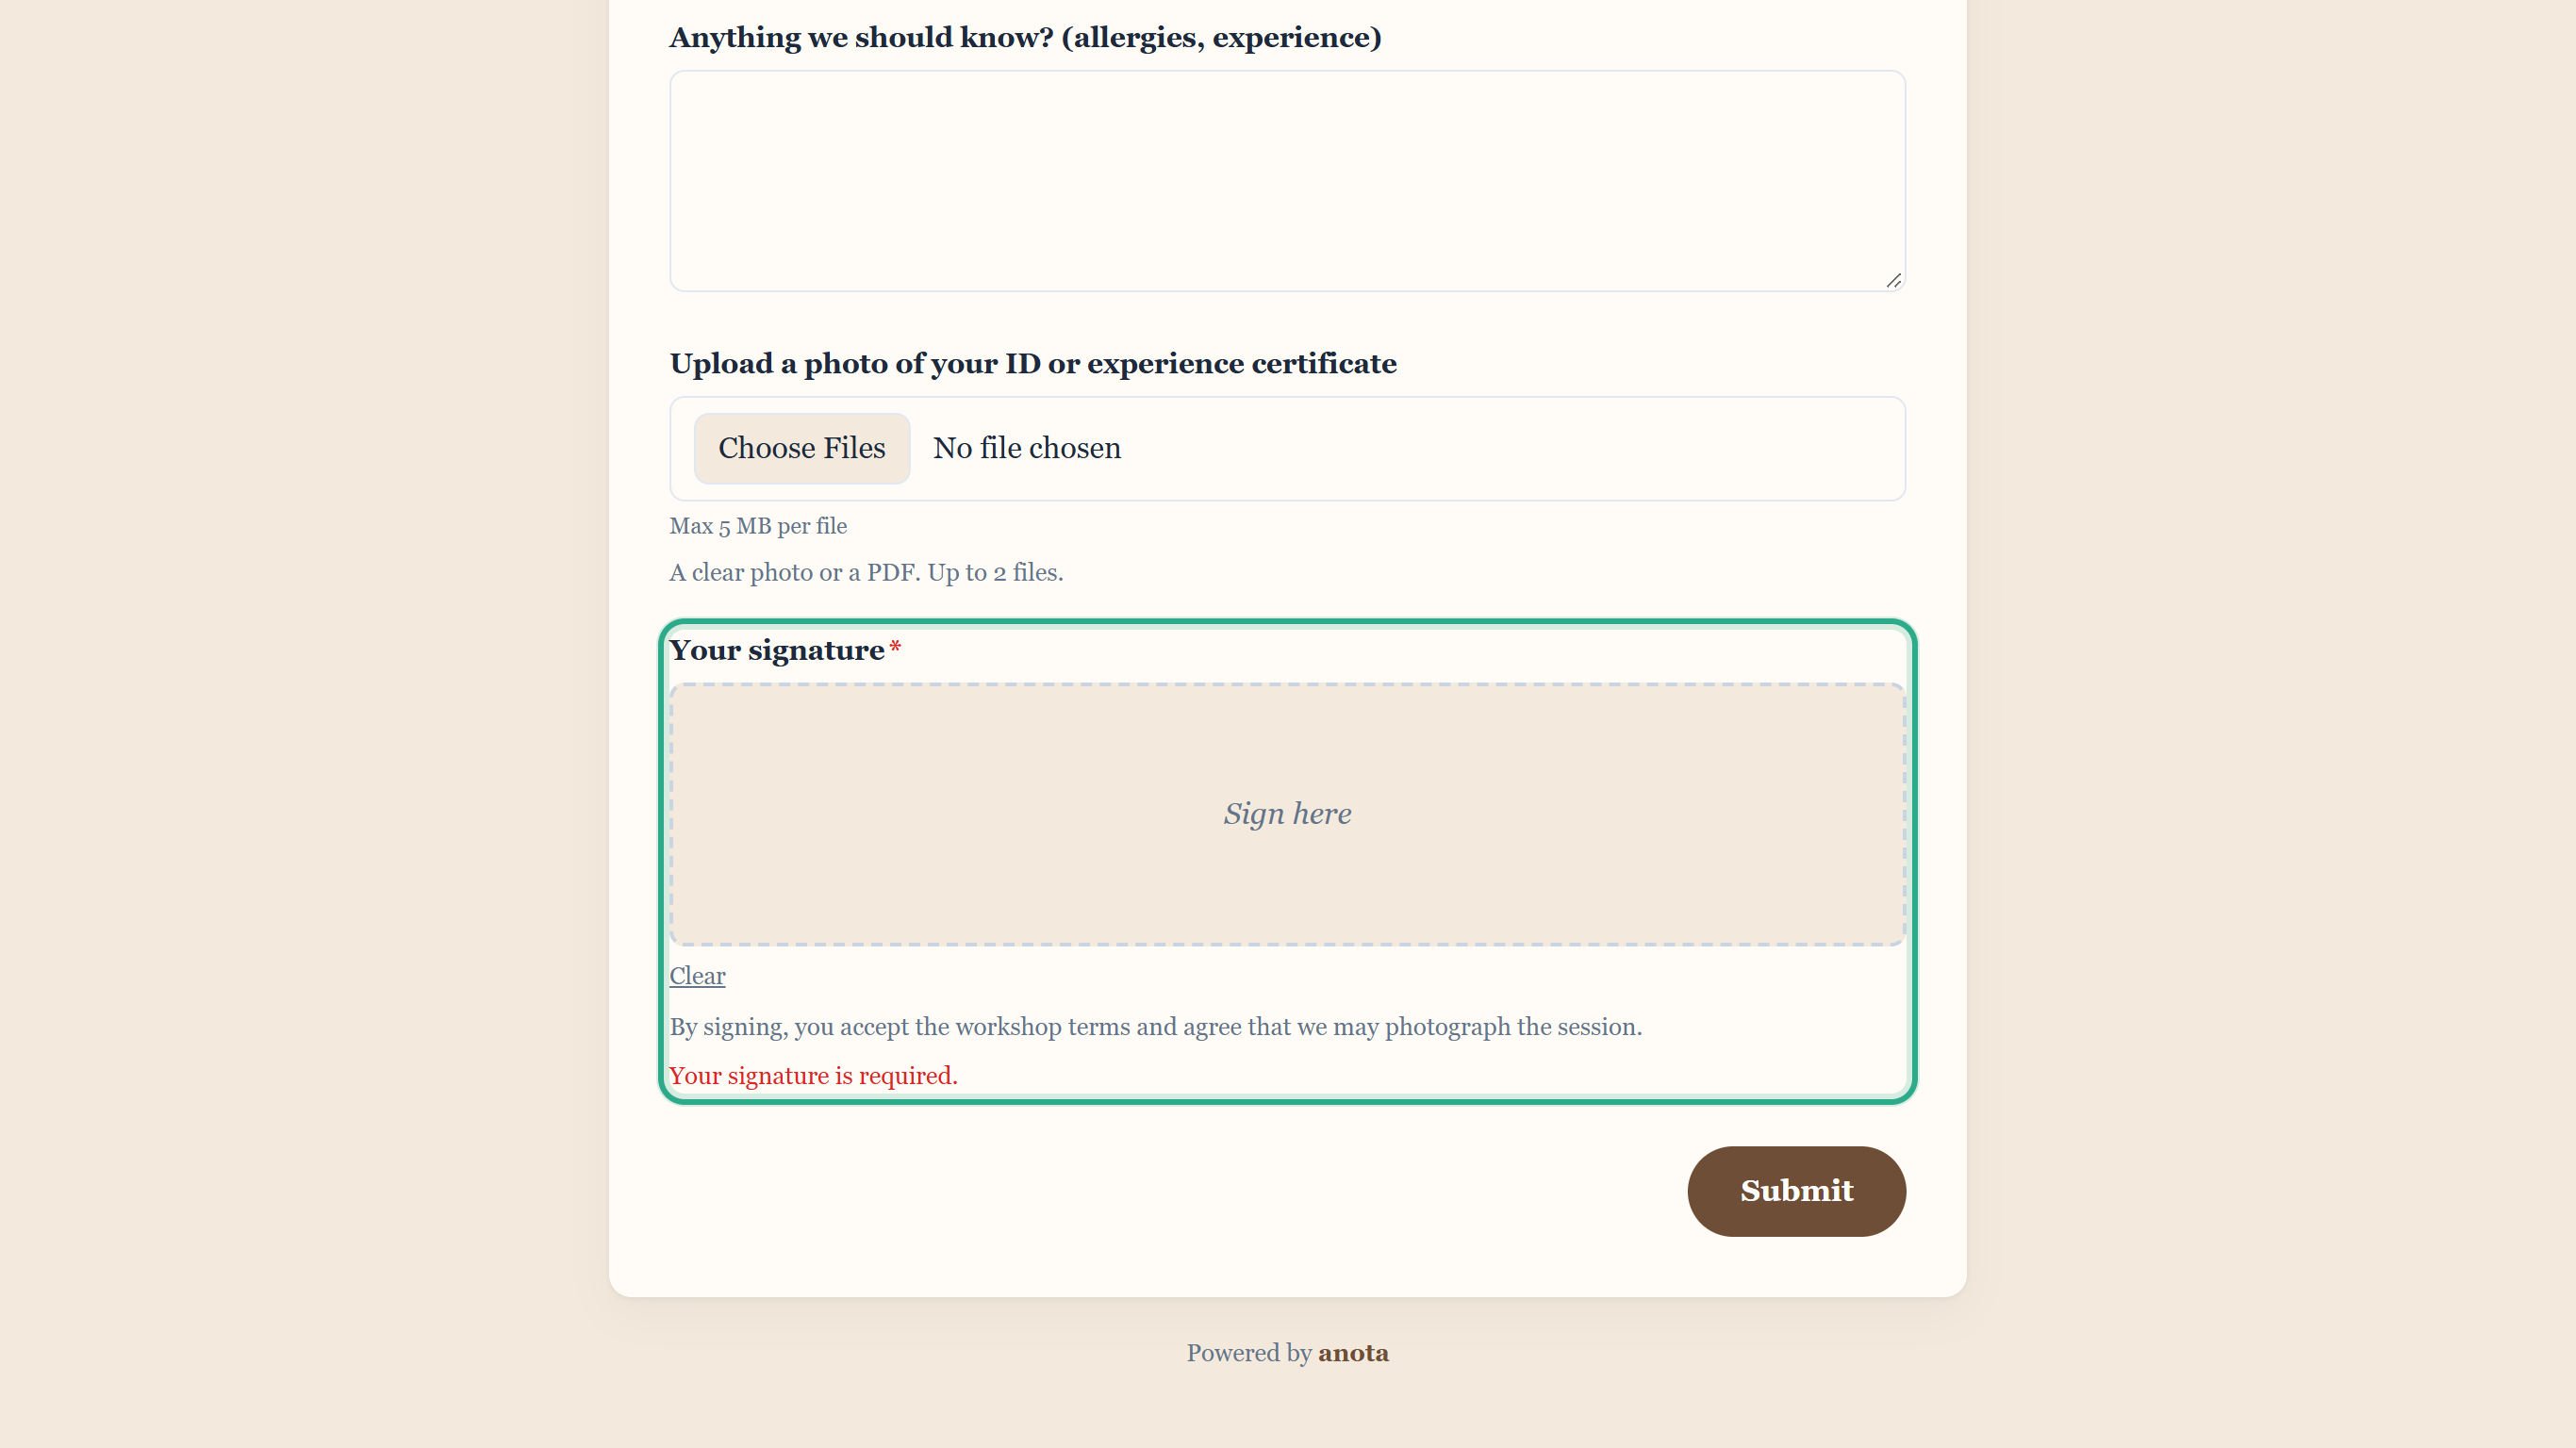 A required signature can't be skipped.
A file that's too big. Here the visitor attached a 11 KB PNG and a 12 MB PDF to a field with a 5 MB limit. The PDF is rejected with The file exceeds the 5 MB limit. The PNG, which passed, stays attached: it's listed above the picker with its size. To drop an attached file, tick Remove next to it; it's taken off the next time the visitor clicks Submit or Next. To add another file, choose it again with the picker.
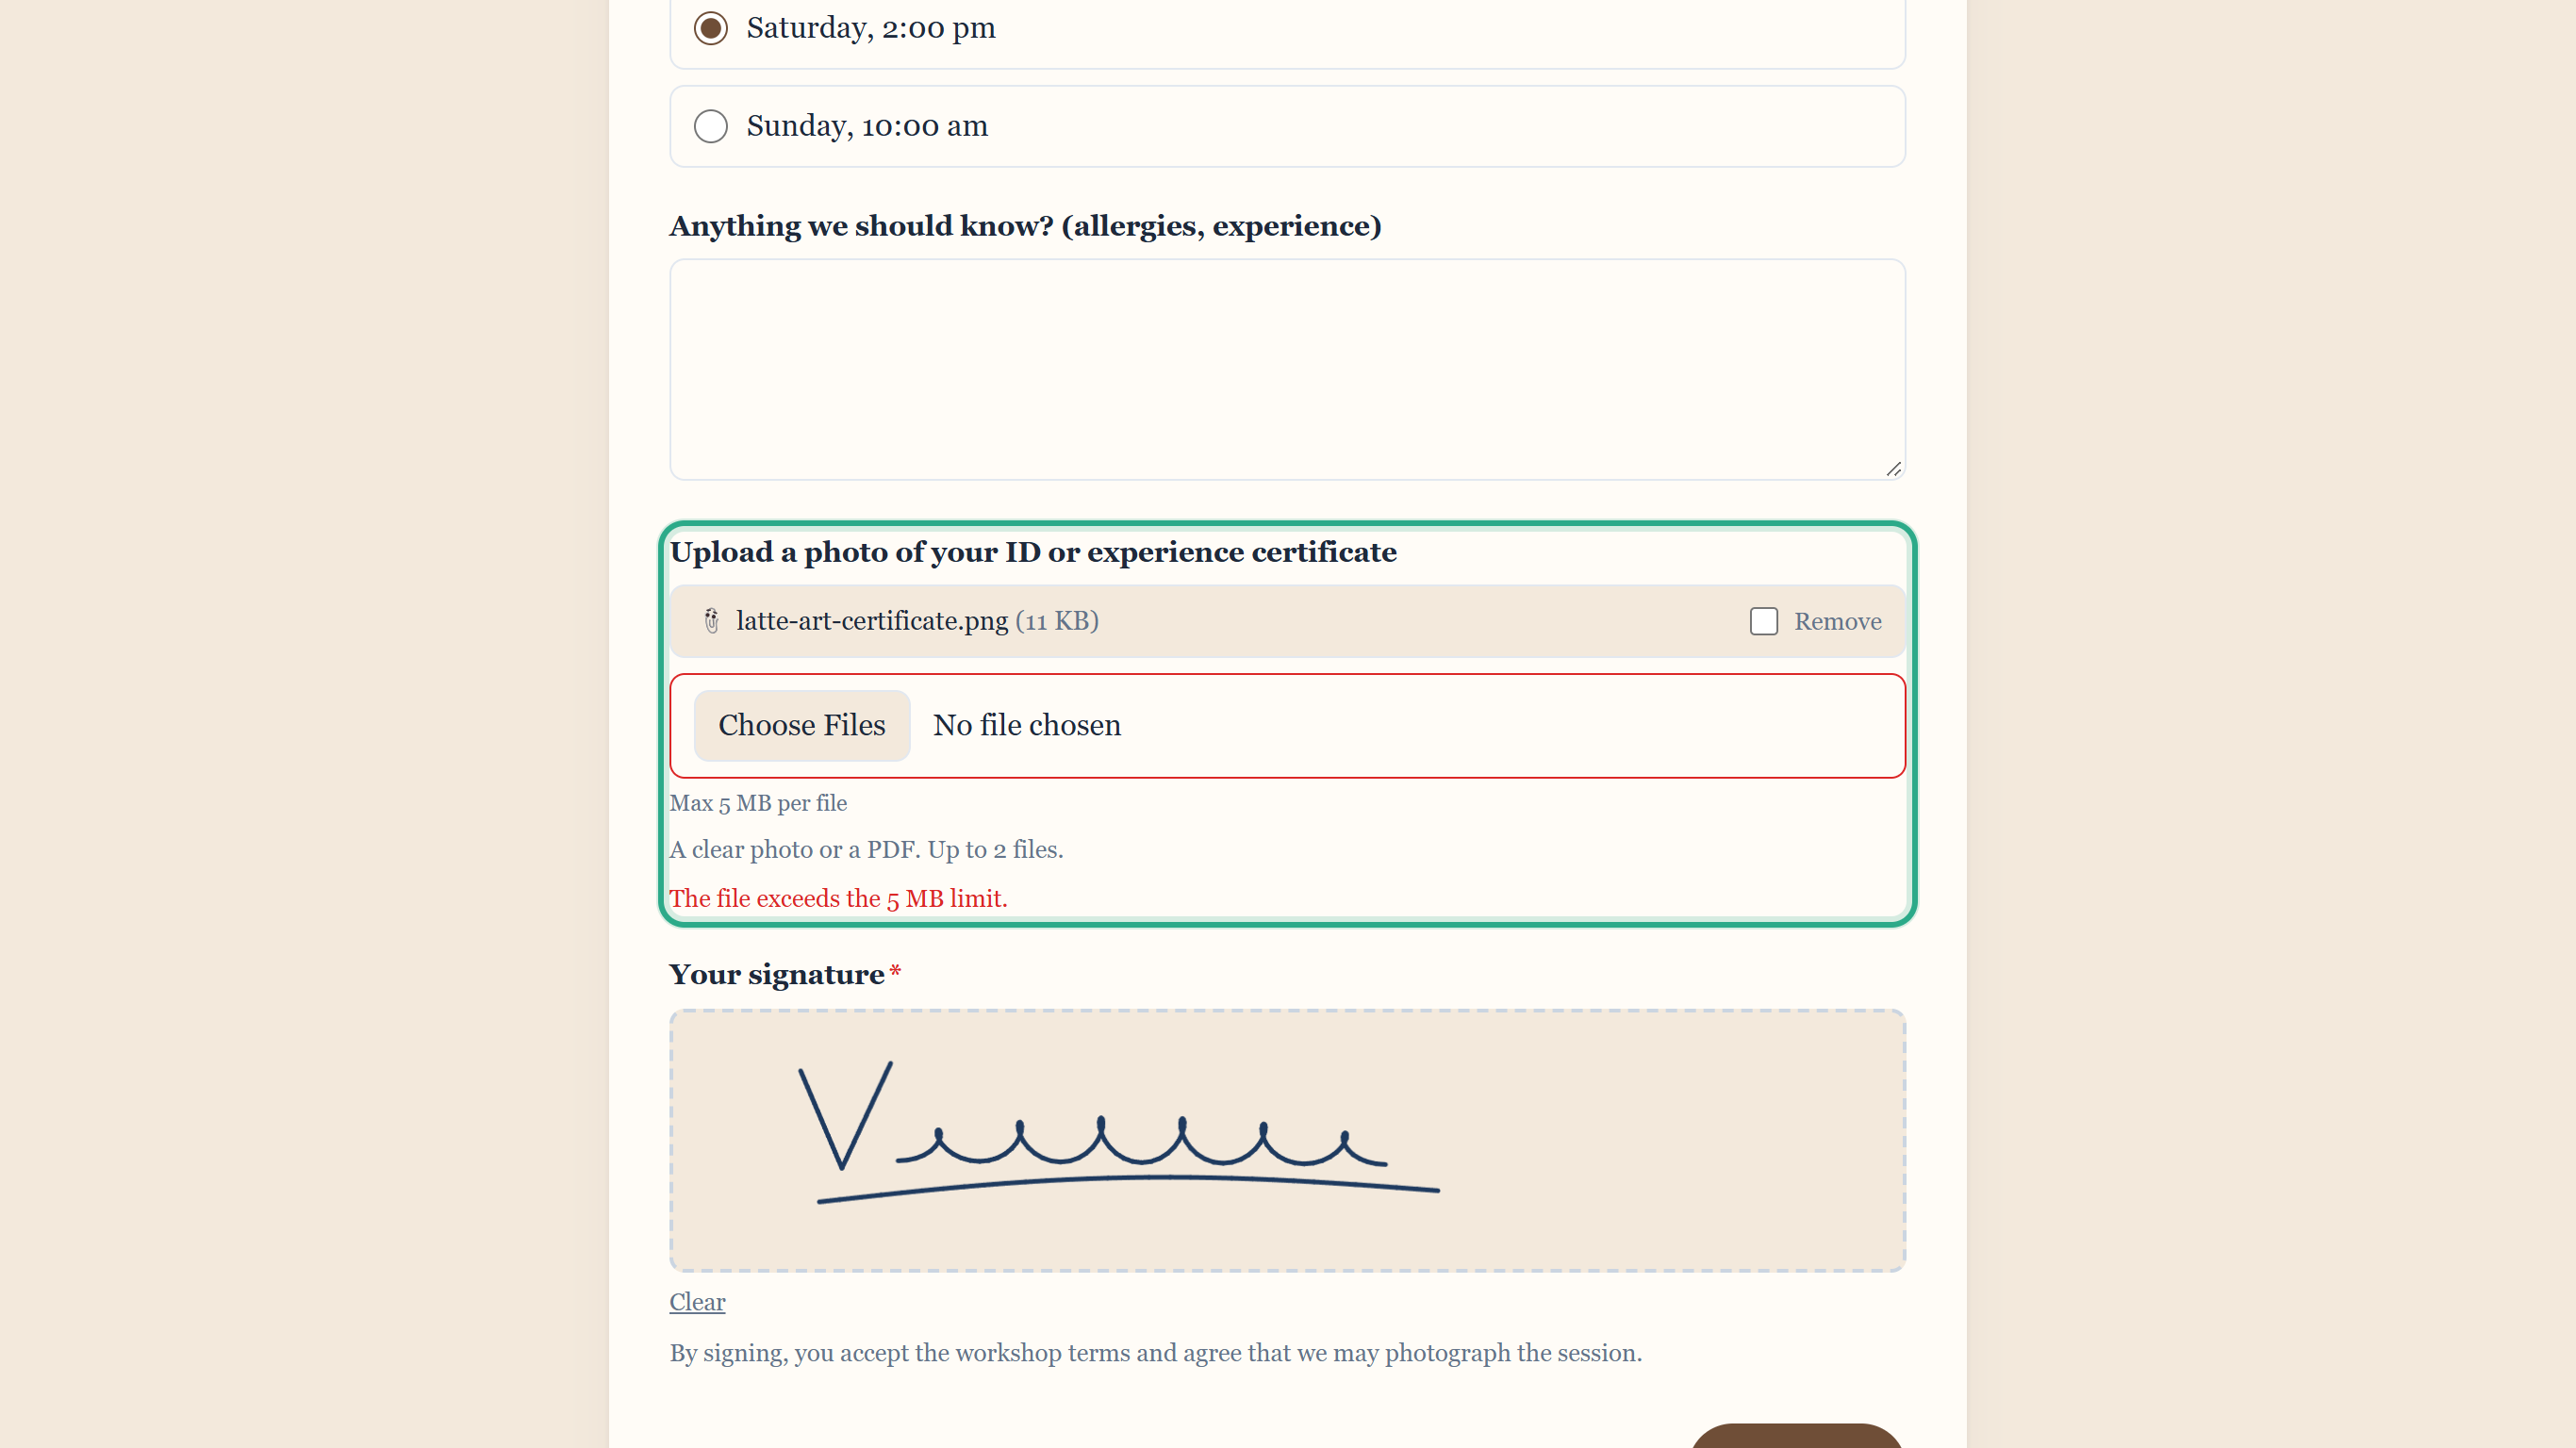 Files that pass stay attached; only the file that failed must be replaced.
A file type anota never accepts. An SVG image is refused with File type not allowed. Save the file in another format (for example PNG, JPG or PDF) and attach it again.
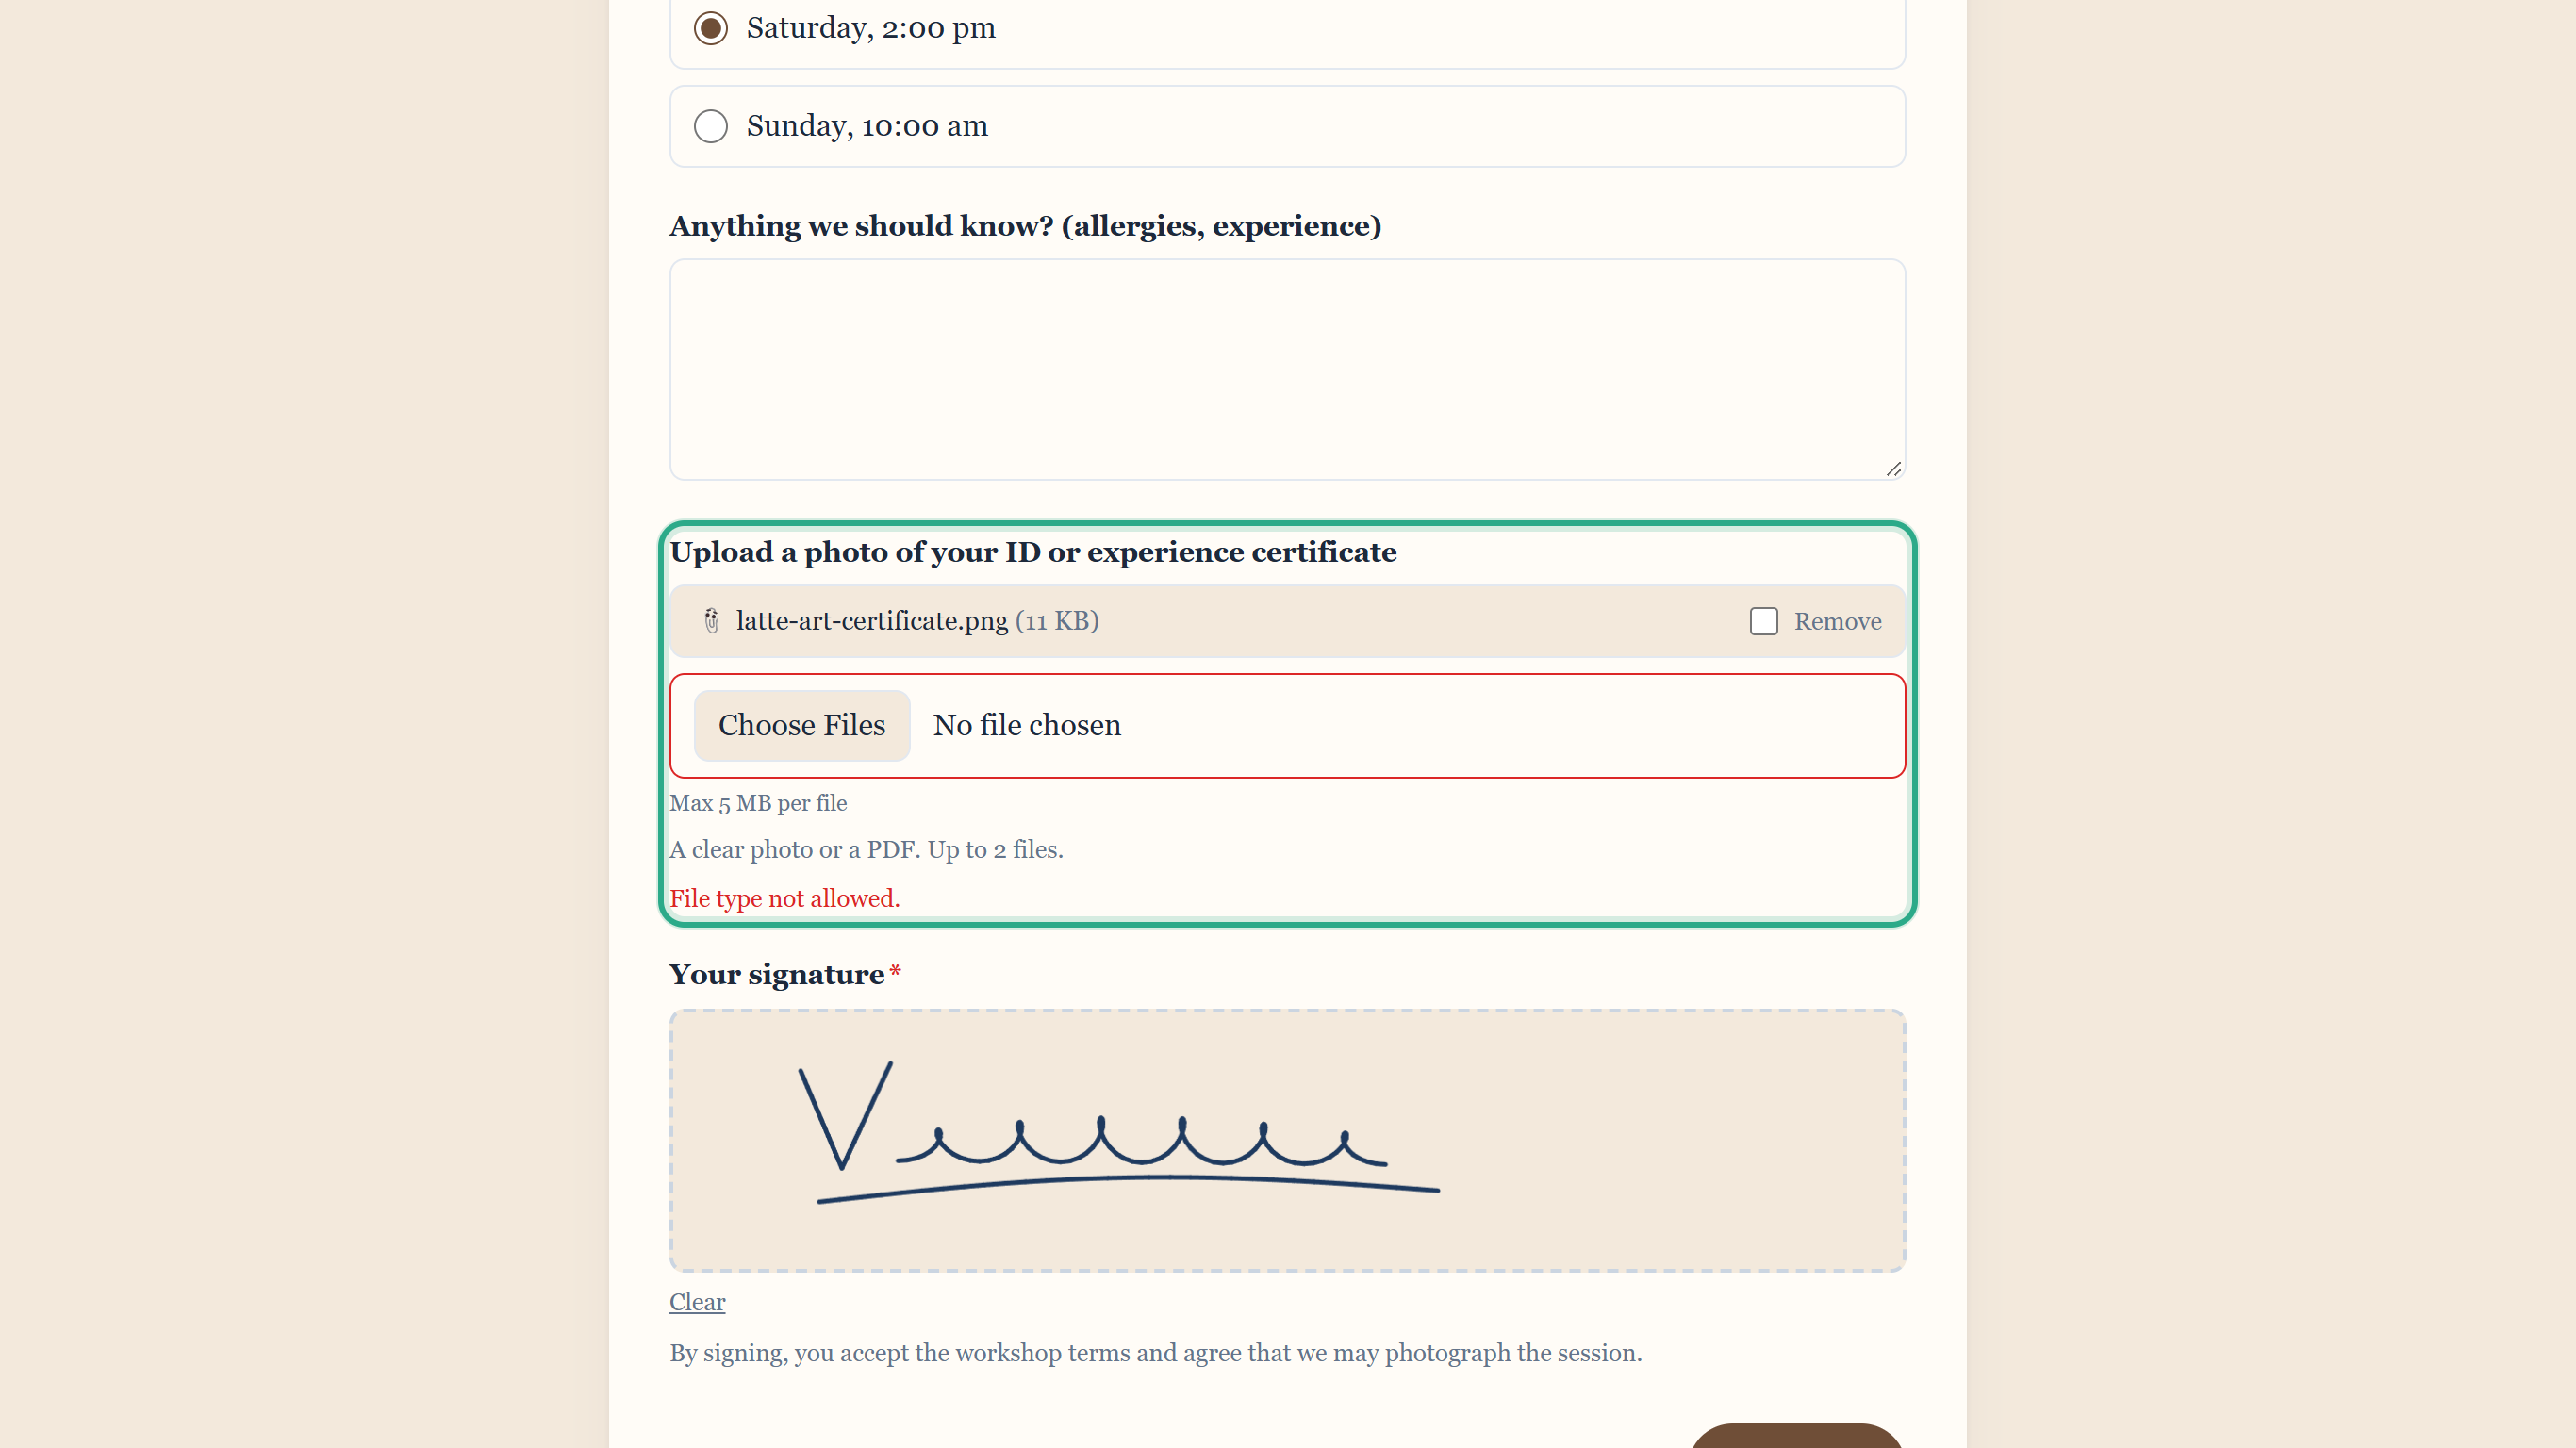 Programs, scripts, web pages, SVG images and disk images are always refused.
Result
The visitor knows exactly which field to fix. The full list of messages is under Troubleshooting.
Task 6 — View the signature and download the files in Submissions
Prerequisites
- A role of Viewer or above in the workspace.
Step-by-step
On Forms, click View submissions on the form's row, then click the response in the list. The signature appears as an image under its label (here Your signature).
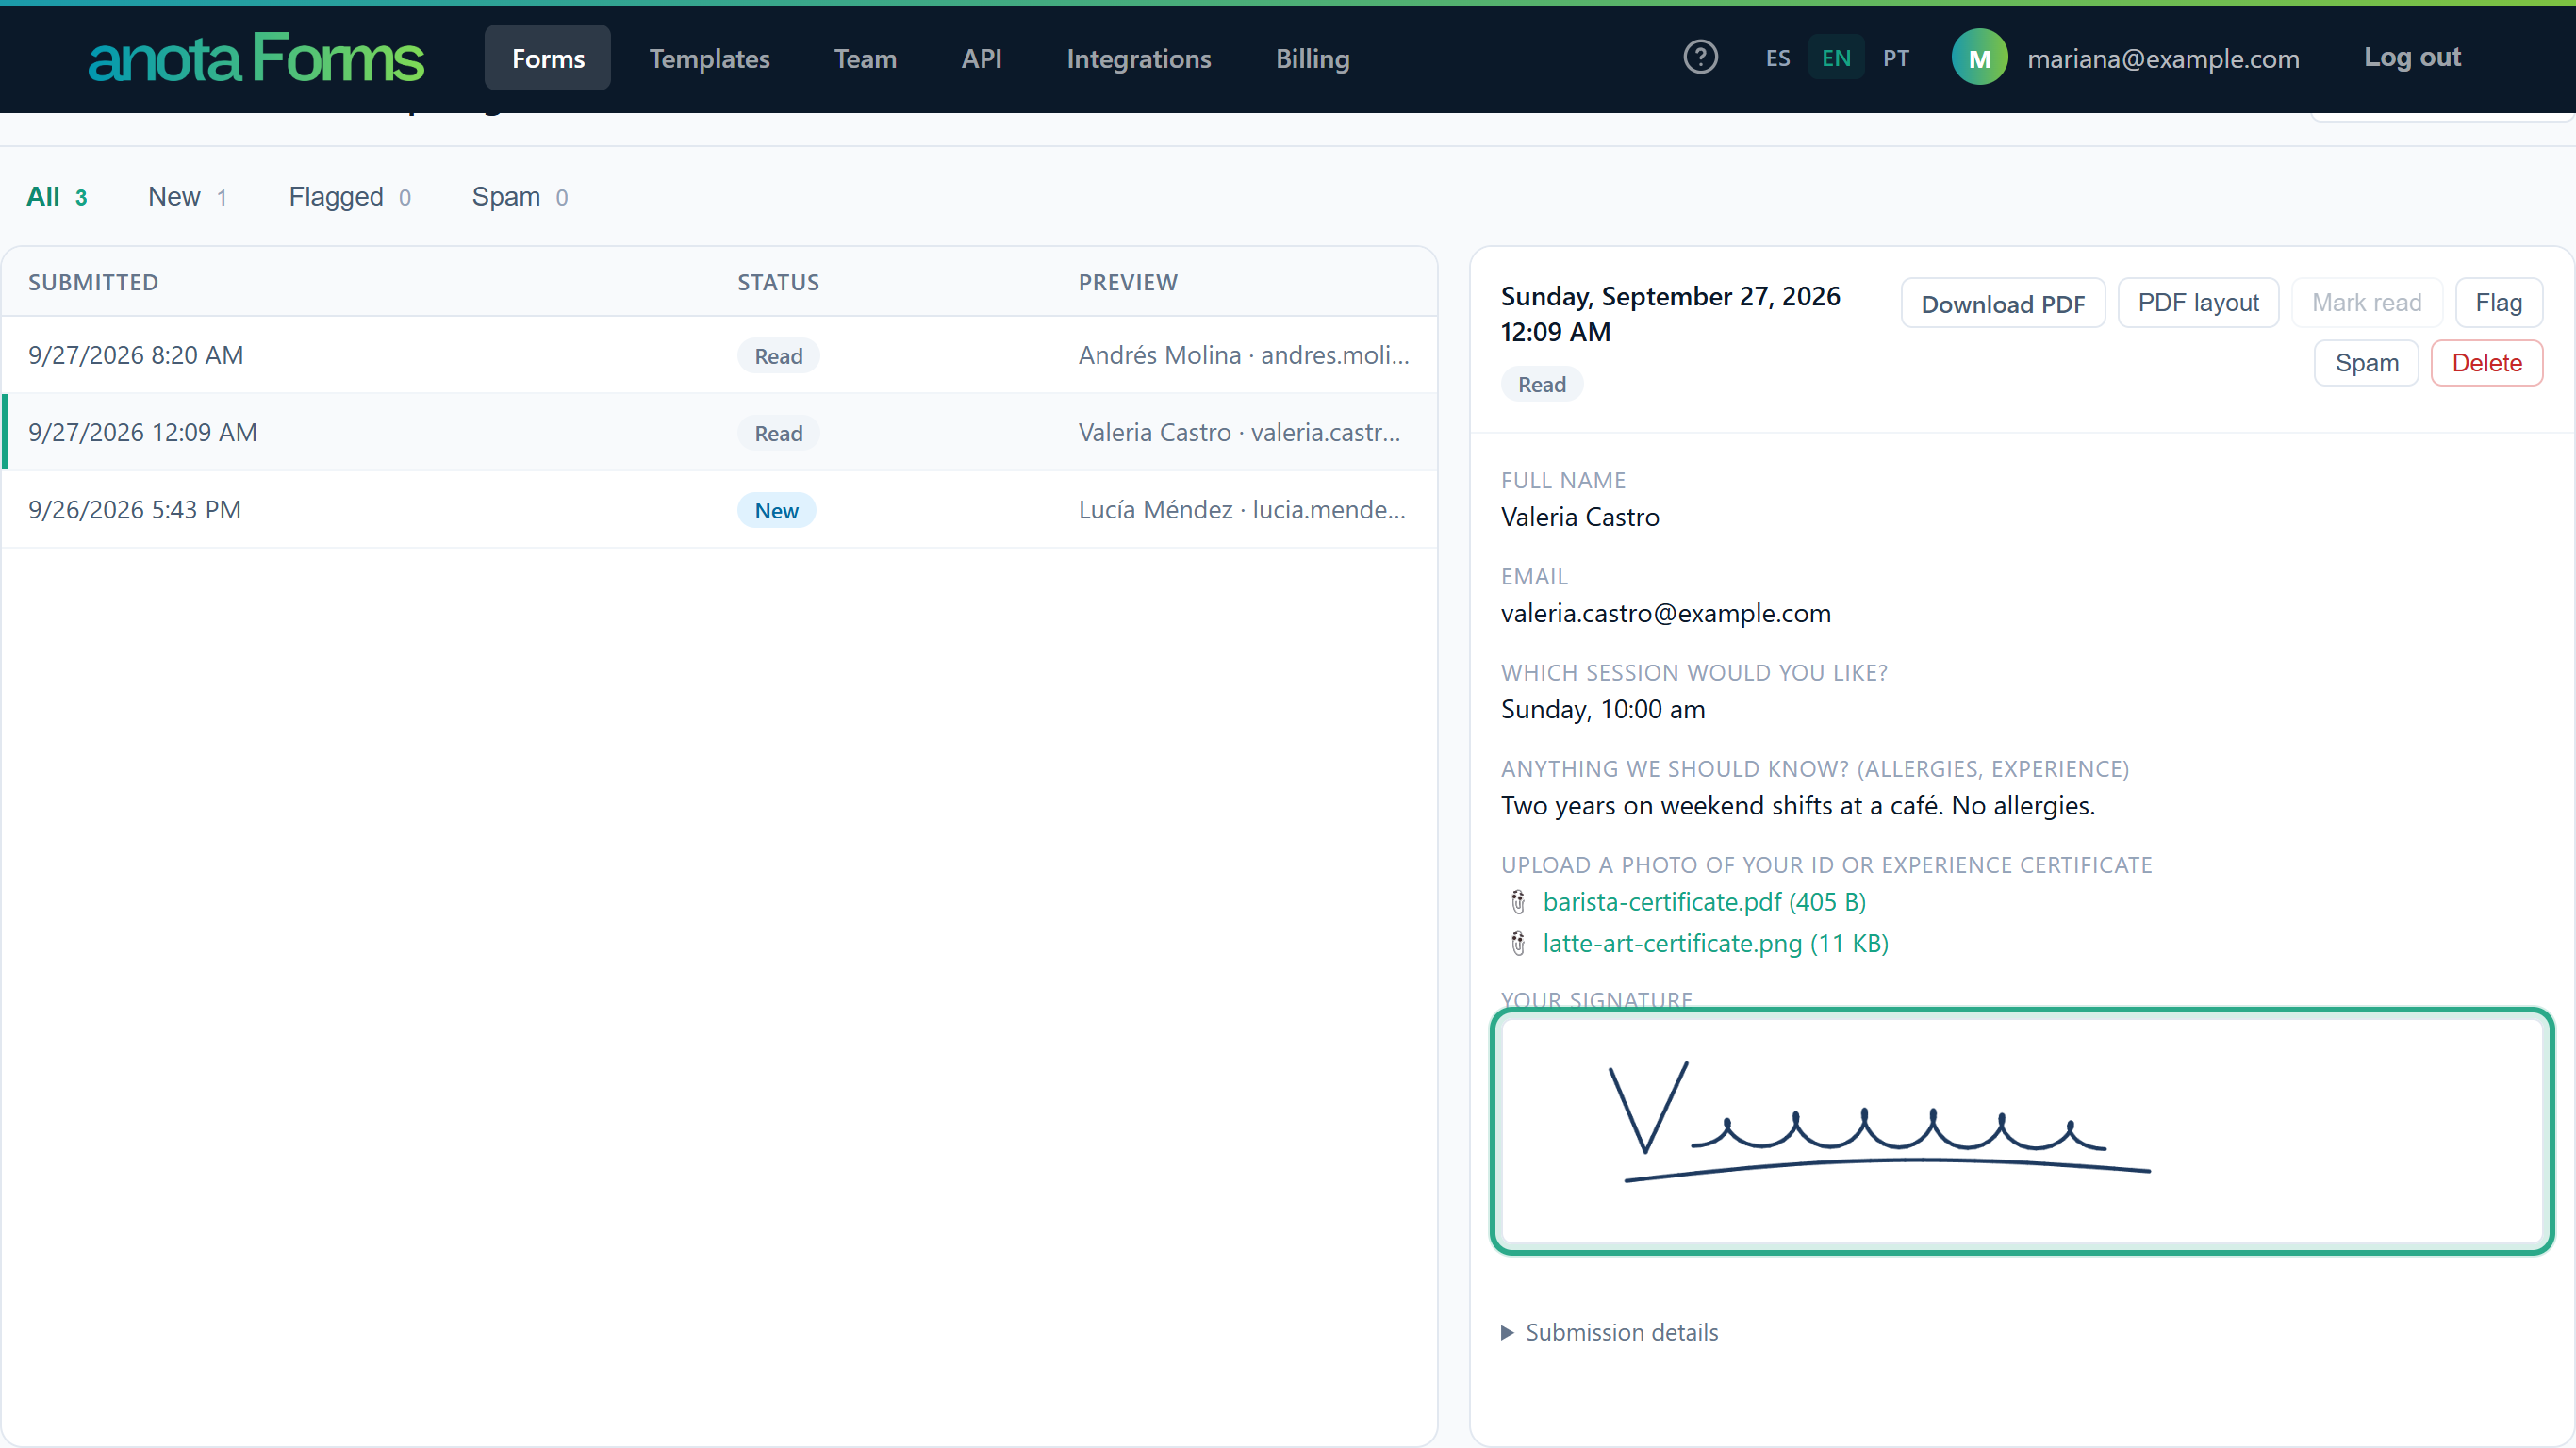 The signature is shown as the image the visitor drew.
Under the file upload question you see one link per file, with its name and size, for example 📎 latte-art-certificate.png (11 KB). Click a link to download that file.
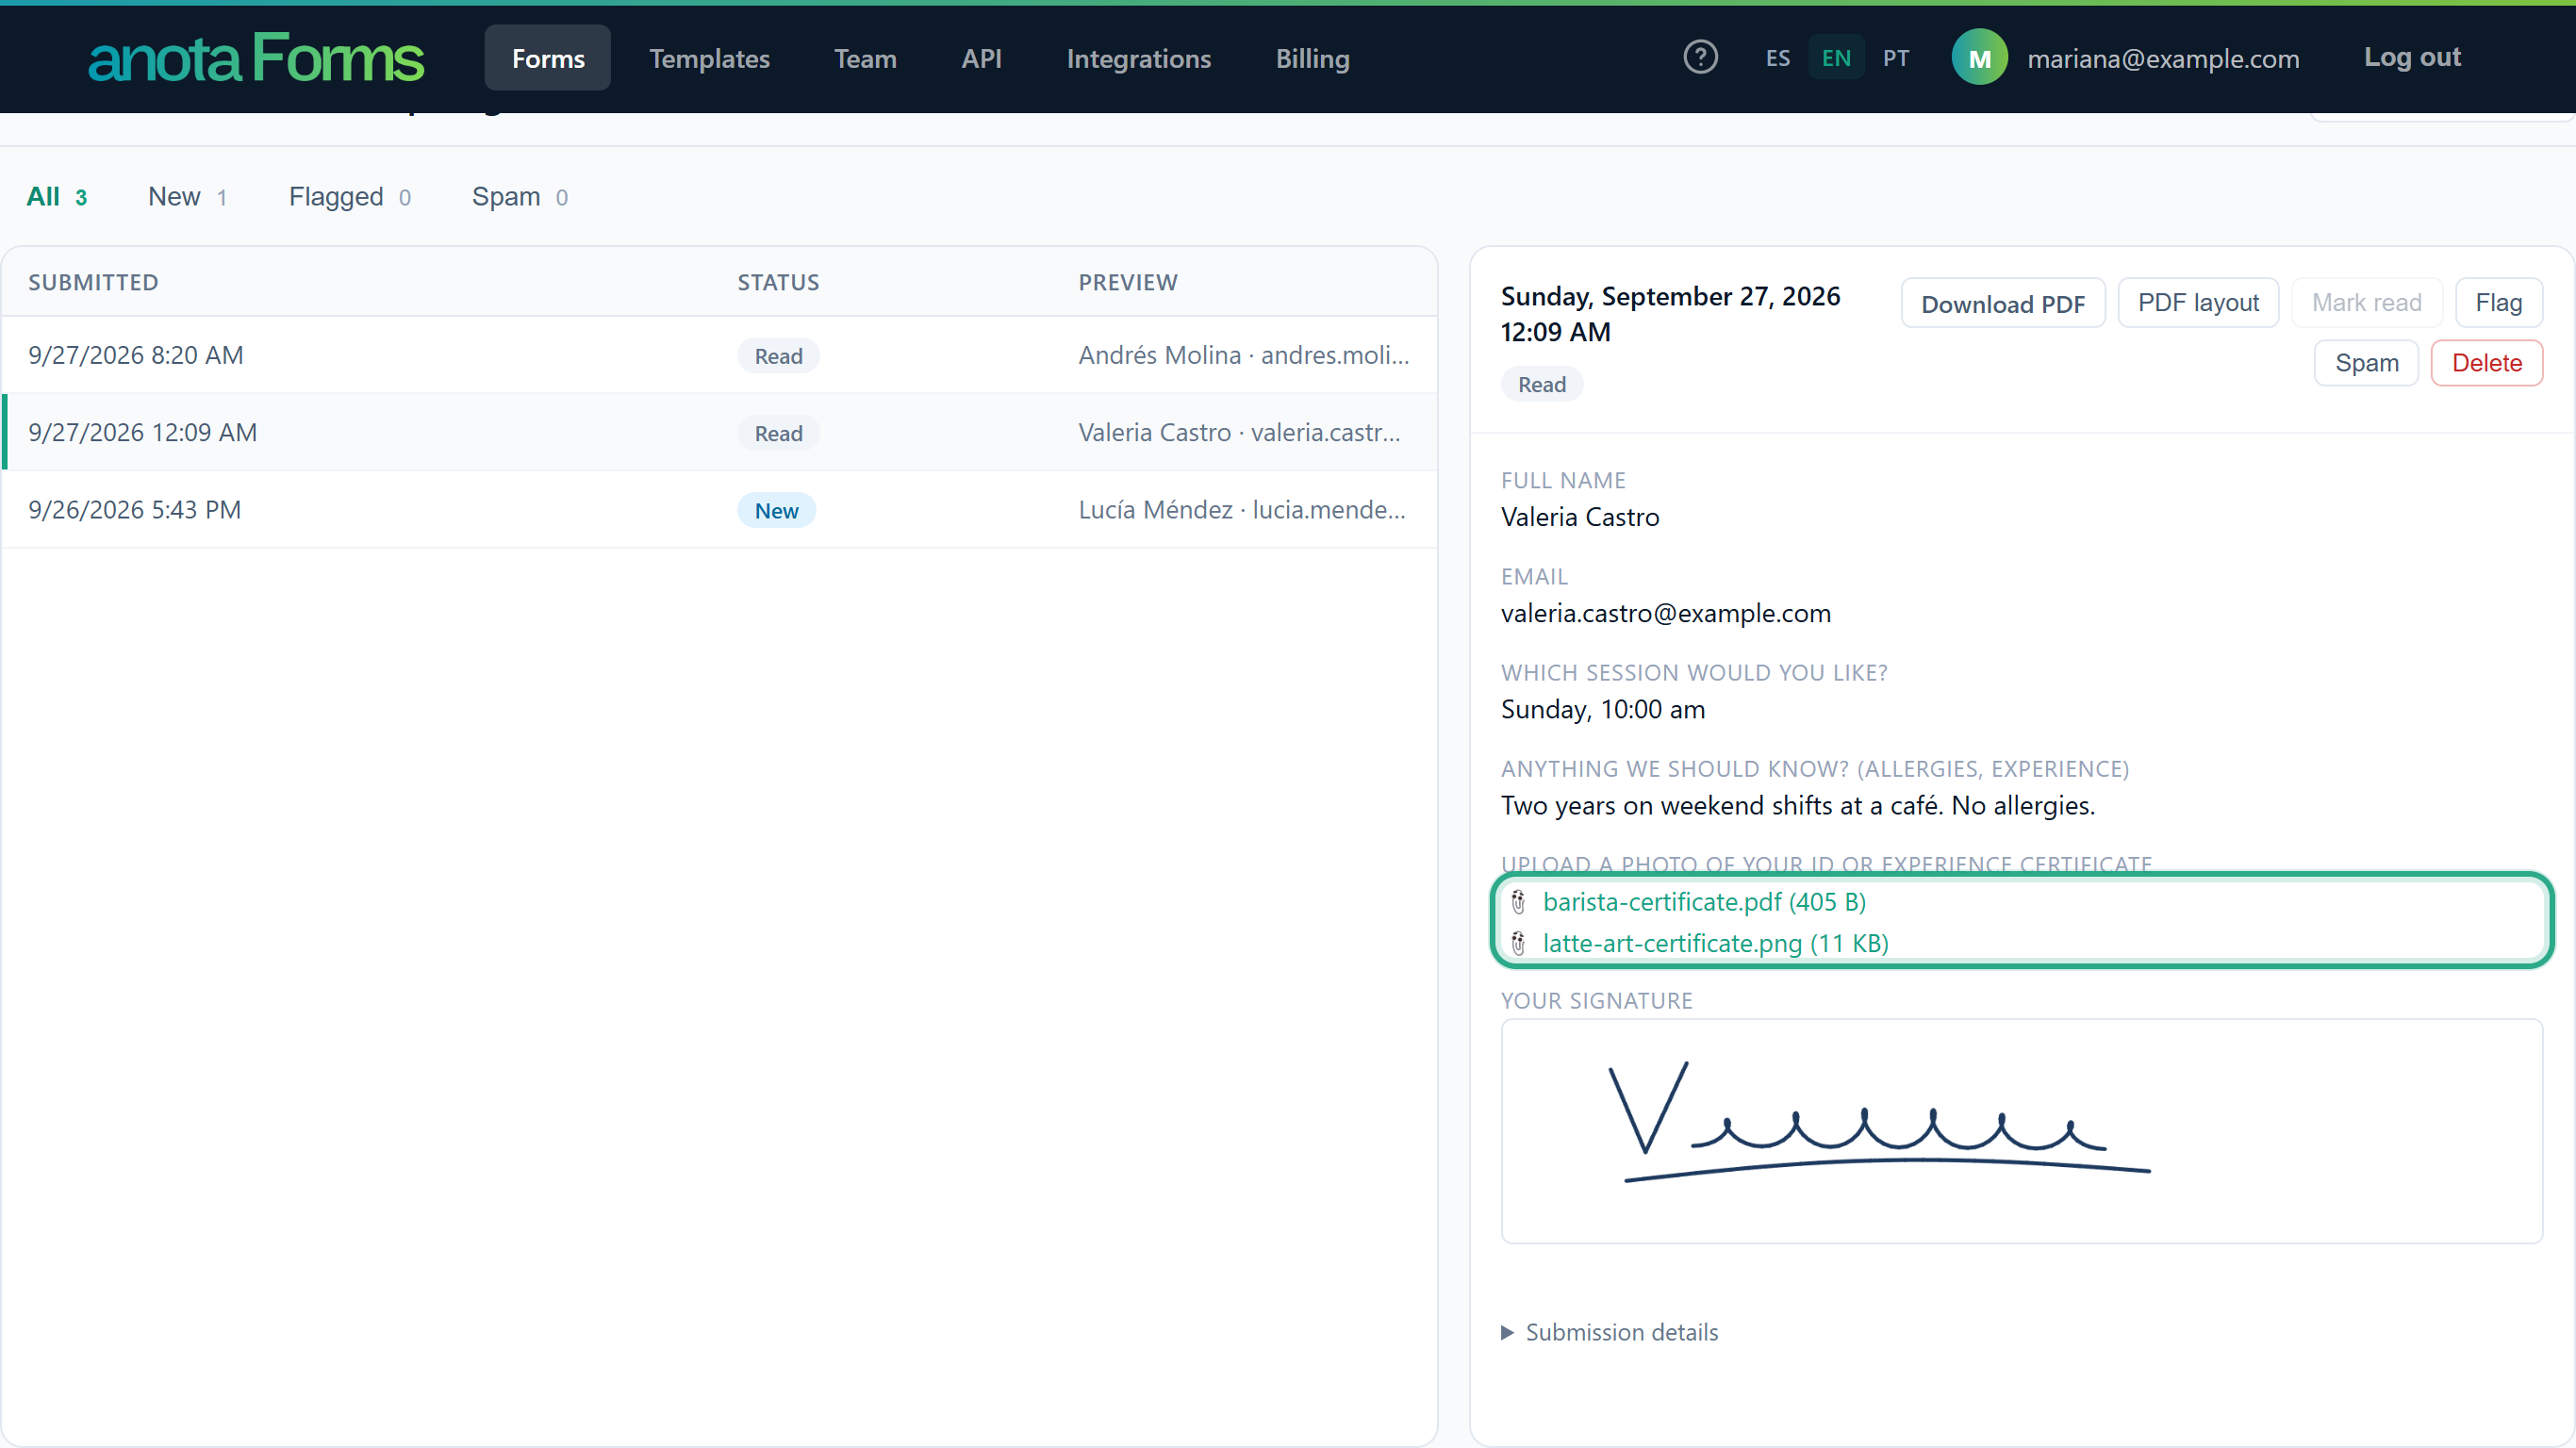 Files always download to your device; they never open inside anota.
Result
You have the signature and the original files. Only signed-in members of the workspace can download them. Deleting a response deletes its files too and frees the upload space they used.
Task 7 — See them in the PDF
Step-by-step
With the response open, click Download PDF at the top of the response. Members with Editor or above can change the layout with PDF layout first (see Export to PDF).
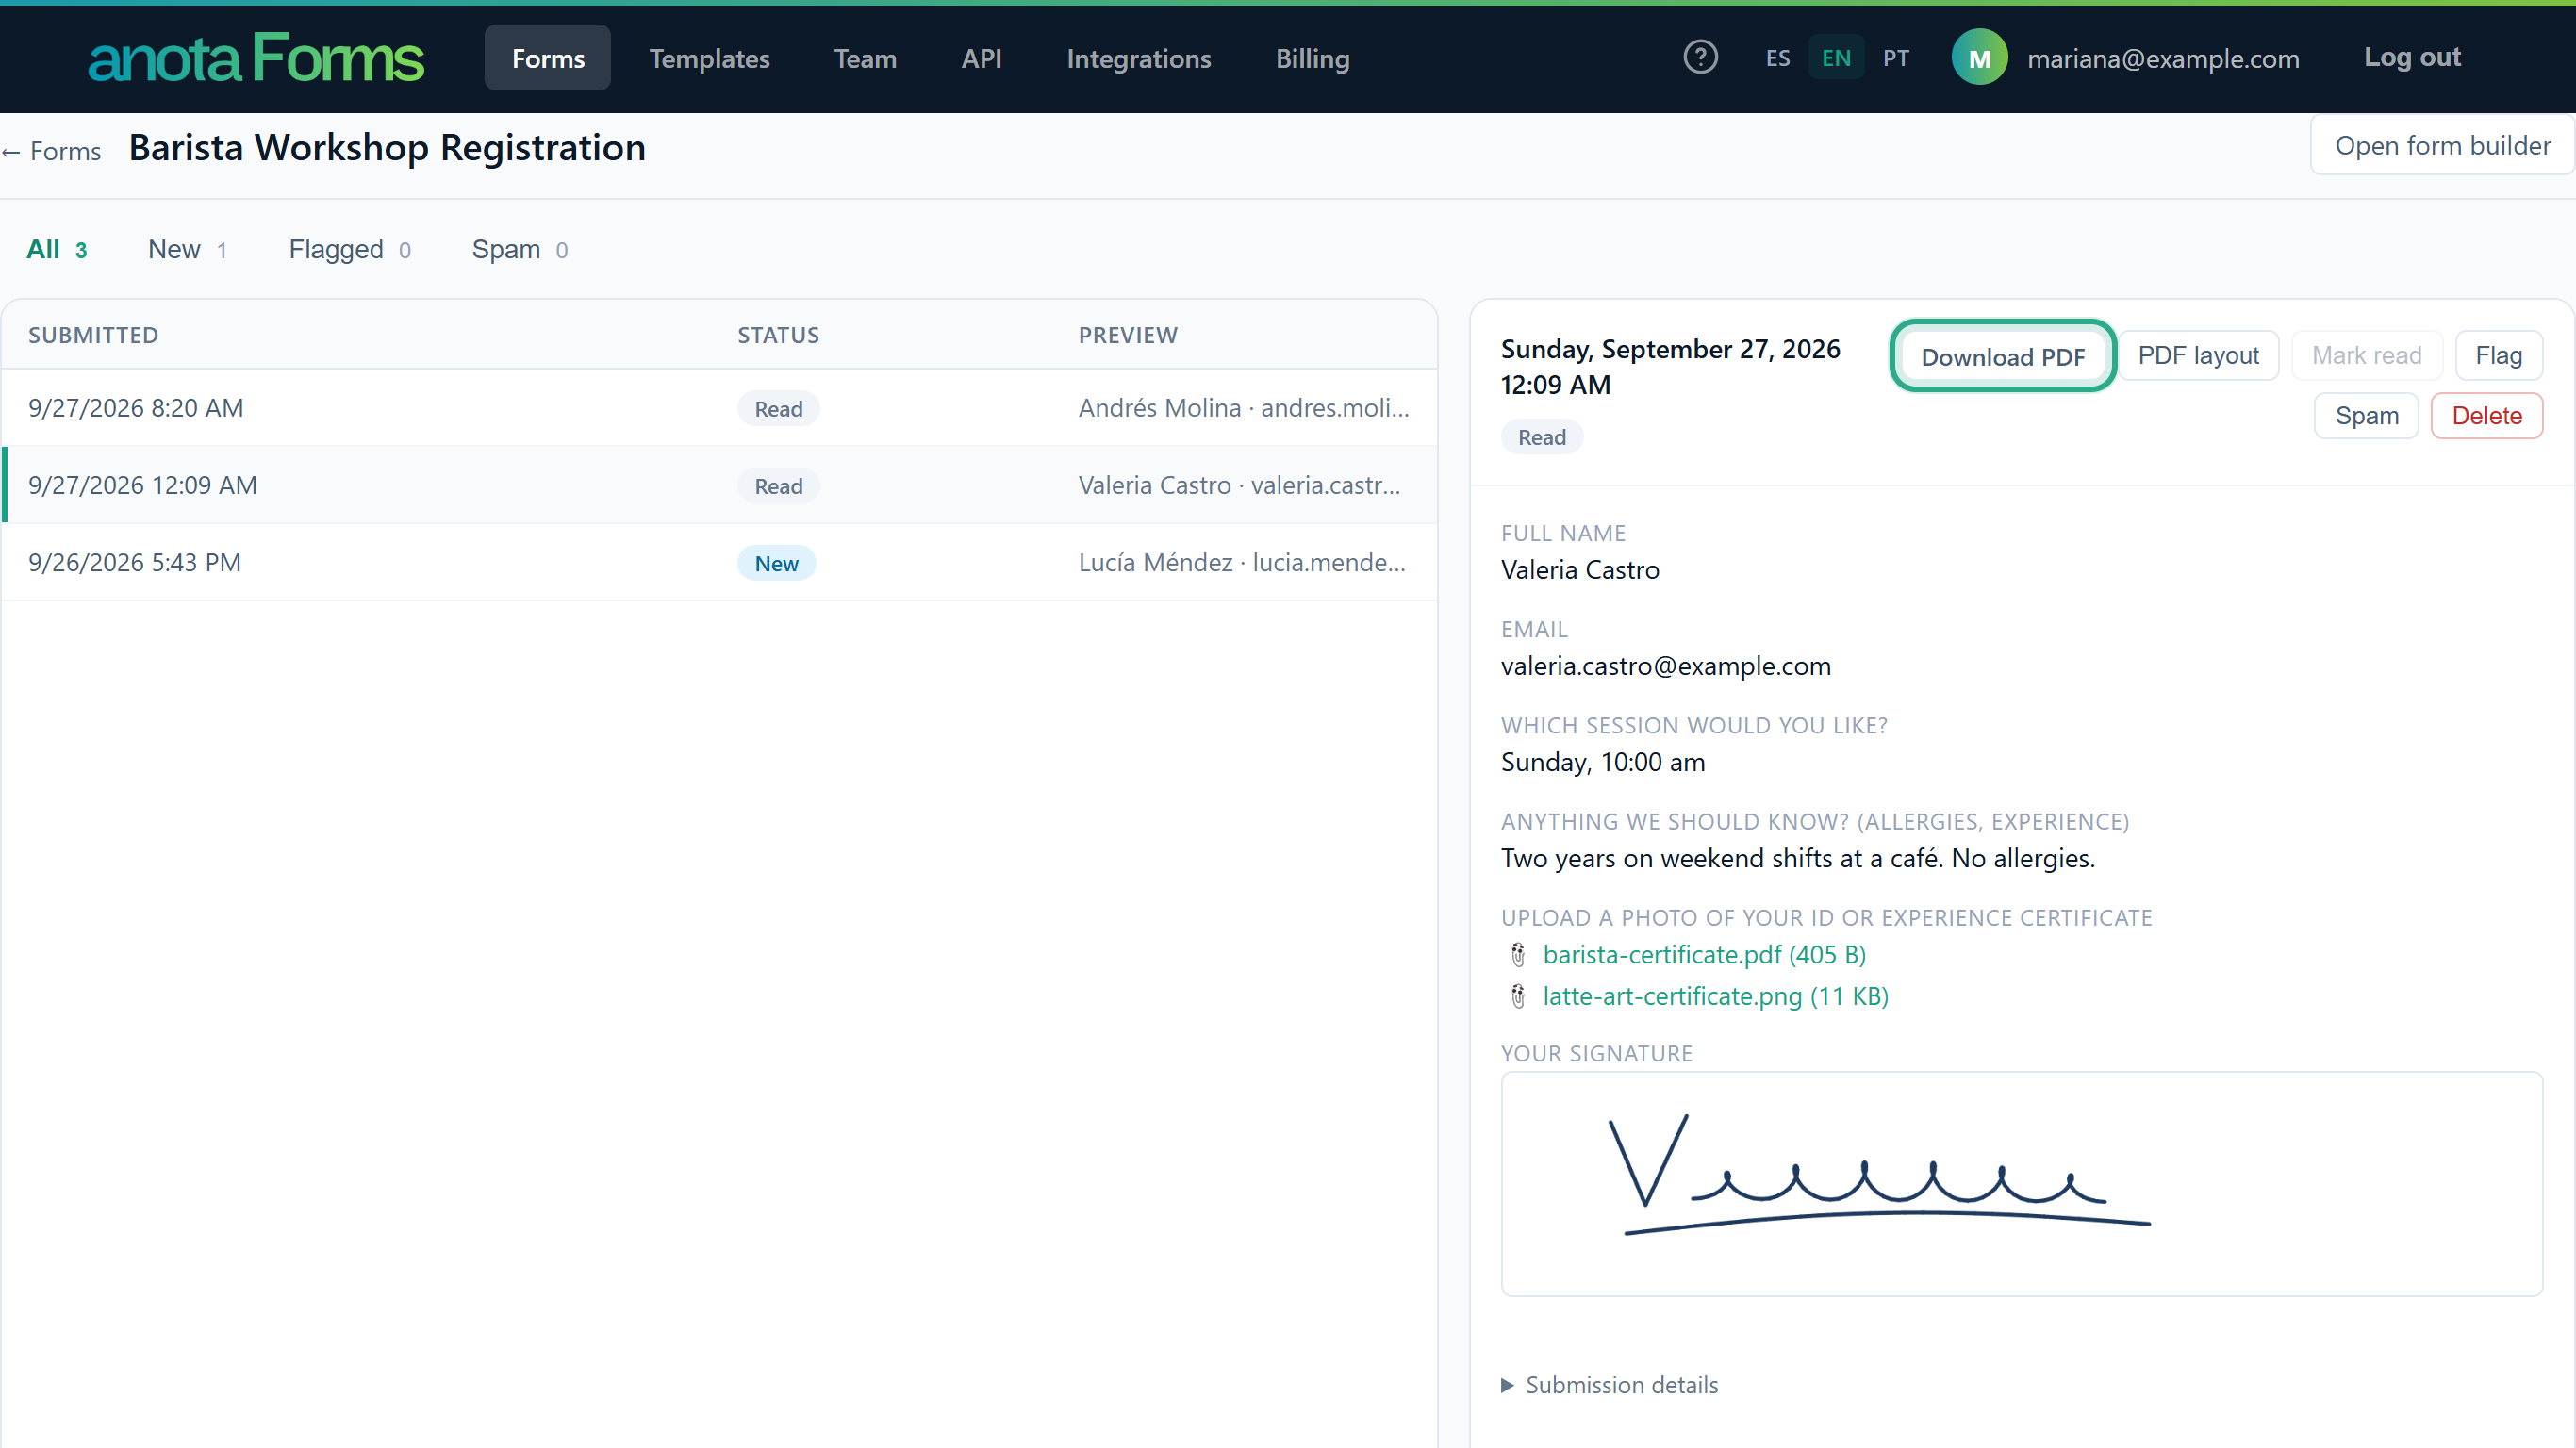 Download PDF saves this response as a PDF.
Open the downloaded file. The signature is printed as an image next to its label. The file upload answer lists the file names; the files themselves are not inside the PDF, so download them from Submissions.
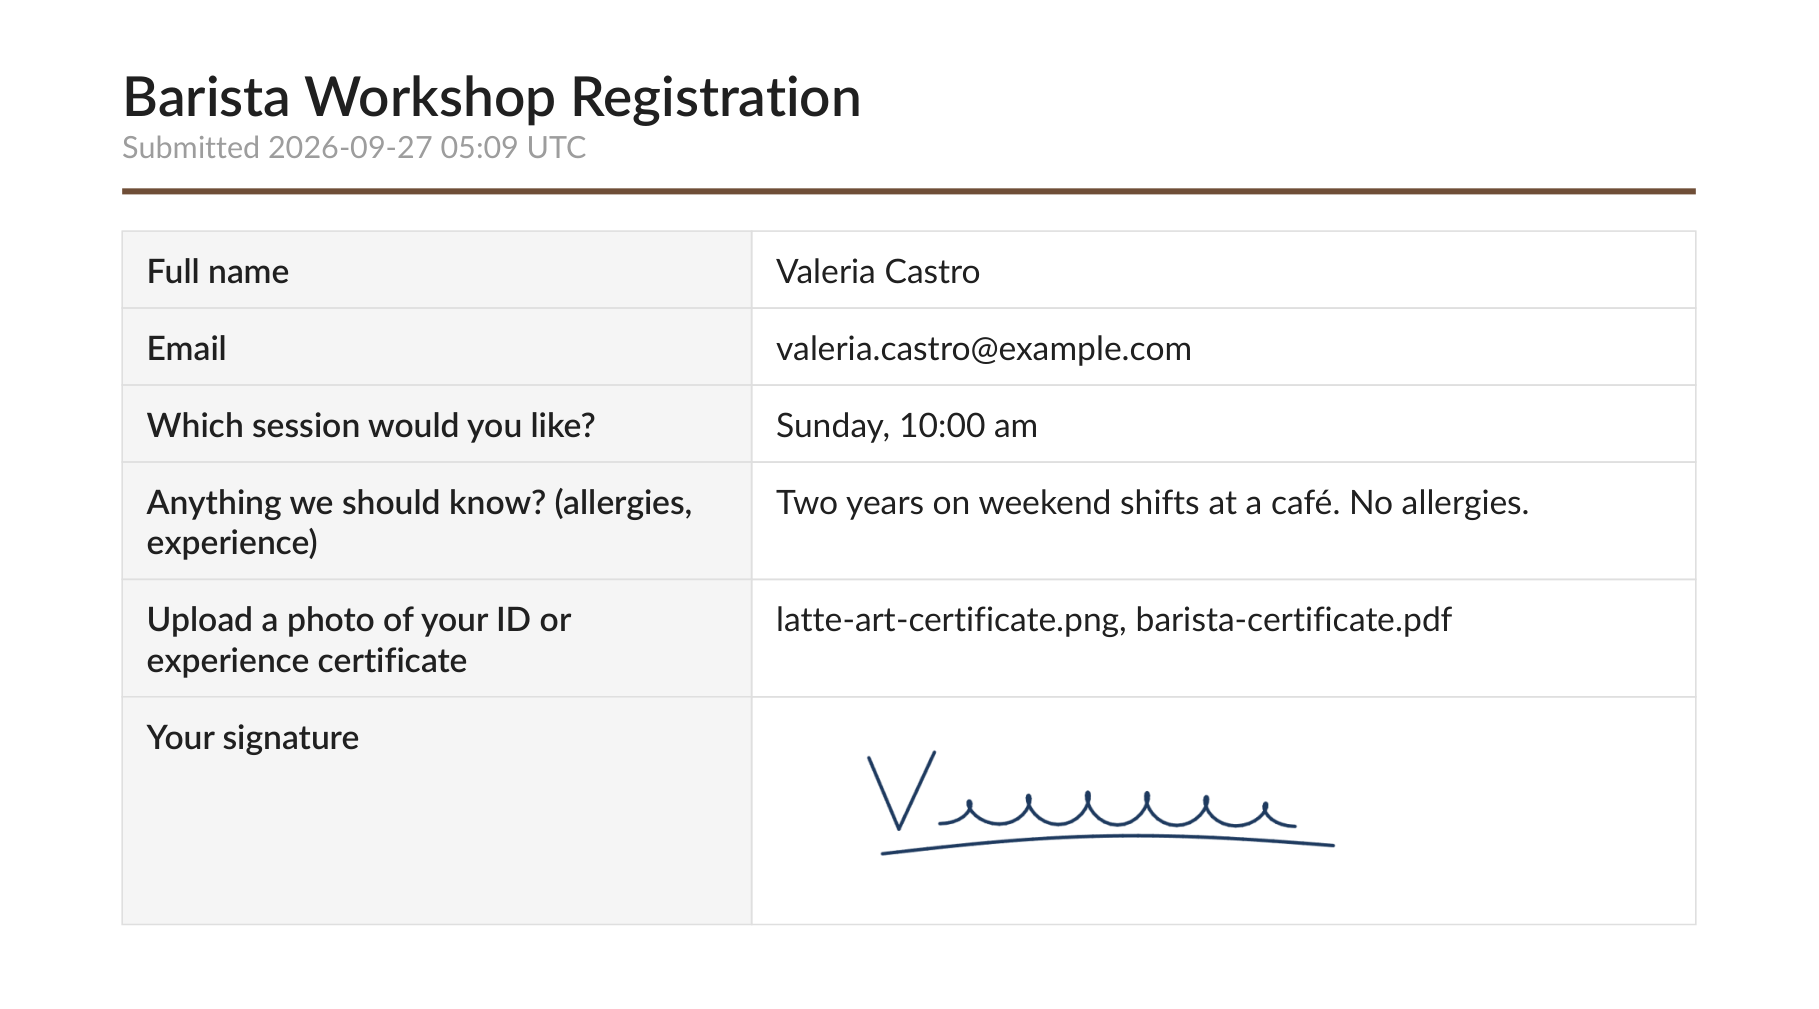 The signature travels with the PDF; attached files don't.
Result
You have a PDF with the signature, ready to file or share.
Which files are accepted
- Any file type is accepted unless it's on the always-blocked list below. Common documents, images and media all work: PDF, Word, Excel, PowerPoint, Keynote, ZIP, CSV, TXT, PNG, JPG, GIF, WebP, HEIC, MP4, MOV and so on.
- Always blocked, for safety: programs and installers (such as
.exe,.msi,.bat,.cmd,.apk,.jar), scripts (such as.js,.ps1,.vbs,.sh,.php), web pages (.htm,.html), SVG images, disk images (such as.iso,.vhd) and shortcuts (.lnk,.url). They get File type not allowed. - Content must match the name. For PNG, JPG, GIF, WebP, PDF, Office and ZIP files, and MP4, MOV and HEIC videos and photos, anota checks that the file really is what its extension says. A renamed file (for example, a program renamed to
.pdf) gets The file does not match its type. - Empty files are refused with The file is empty.
- Some templates limit a field to specific types. The picker then offers only those types, and they are listed after the size hint (for example "Max 10 MB per file · pdf, doc, docx"). This limit can't be changed in the editor.
Upload space and limits
- Files count toward your plan's upload space when the response is saved: Starter 100 MB, Bronze 1 GB, Silver 10 GB, Gold 100 GB (see Plans and billing).
- Deleting a response deletes its files and gives that space back.
- When the workspace has used all its space, visitors get Can't attach: the account that owns this form has reached its storage limit. and can't attach files until you free space or upgrade.
- Files attached to a form that is never sent are discarded after 24 hours. A visitor who comes back to that same unfinished form later gets The attached files expired. Please attach them again.
- To protect your form from abuse, anota also limits how many unsent files one visitor, and the form as a whole, can hold at once. Visitors who hit these limits see Too many attachments. Try again later. or This form is receiving too many files right now. Try again later.
Signatures and files in emails
- In notification and autoresponder emails (see Email notifications), a signature is shown as text, because email programs don't display the image: Signature captured (view in anota or the attached PDF) when the email carries the PDF, and Signature captured (view in anota) when it doesn't. Tick Attach the response as a PDF on the notification to send the signature as part of the PDF.
- A file upload answer shows the file names. The files themselves are never attached to emails; download them from Submissions.
Field reference
| Field | Where | Options | Notes |
|---|---|---|---|
| Signature | Uploads & more | Label, Help text, Required, Hidden (shown by a rule), Width | Saved as an image. Shown as an image in Submissions and in the PDF. |
| File upload | Uploads & more | Label, Help text, Required, Max files (1–10, default 1), Max size (MB) (1–50, default 10), Hidden (shown by a rule), Width | Each file is checked for size, type and content. Files download from Submissions. |
Roles and permissions
| Role | Add and set up the fields | See signatures and download files | Delete responses (and their files) |
|---|---|---|---|
| Owner, Admin, Editor | Yes | Yes | Yes |
| Viewer | No | Yes | No |
| Public respondent (no account) | No | No (they only fill in the form) | No |
Troubleshooting
| Symptom | Likely cause | Resolution |
|---|---|---|
| "Your signature is required." | The field is required and the pad is empty. | Sign in the pad, then send the form again. |
| "The file exceeds the 5 MB limit." (or another number) | The file is larger than the field's Max size (MB). | Attach a smaller file, or raise Max size (MB) (up to 50 MB) and click Update. |
| "File type not allowed." | The type is always blocked, or the field (from a template) only accepts certain types. | Save the file as PDF, JPG or PNG and attach it again. |
| "The file does not match its type." | The file's content doesn't match its extension, for example a renamed file. | Attach the original file without changing its extension. |
| "Maximum 2 file(s)." (or another number) | More files than Max files allows. | Tick Remove on a file you don't need, or raise Max files (up to 10). |
| "The file is empty." | The file has no content. | Attach the correct file. |
| "Can't attach: the account that owns this form has reached its storage limit." | The workspace has used its plan's upload space. | Delete old responses with files, or upgrade your plan. |
| "The attached files expired. Please attach them again." | The files were attached more than 24 hours before the form was sent. | Attach the files again and send the form. |
| "The signature is not valid." | The signature data didn't reach anota correctly. | Click Clear, sign again and send the form. |
| The picker lets me choose only one file | Max files is 1. | Raise Max files in Properties, then click Update. |
| The new fields don't show on the public form | The form hasn't been published since you added them. | Click Update in the editor. |
Related features
- The form editor: the field catalog and the Properties panel.
- Field types: every field available in the editor.
- Conditional logic: show a signature or upload only when it applies.
- Publish and share: publish changes to the public form.
- View and manage submissions: the inbox where signatures and files appear.
- Export to PDF: PDF layouts and downloads.
- Email notifications: notifications, autoresponders and the PDF attachment.
- Plans and billing: upload space per plan.
Was this page helpful?