Connect Claude and ChatGPT (MCP)
Connect Claude and ChatGPT to anota (MCP)
Applies to: anota, all plans (including the free plan) Roles required: any workspace member can connect Claude or ChatGPT with one-click sign-in (what the app can do depends on their role); Admin or above to create an API key Regulatory references: none
Overview
anota includes an MCP server (Model Context Protocol): a connector that lets Claude, ChatGPT and other AI assistants work inside your anota account. Once connected, you ask in plain language for what you need ("create a partner registration form", "summarize this week's submissions", "send a copy to compliance when someone answers Yes") and the assistant does it for you using anota's tools. You can build complete forms in seconds, adjust them, publish them and review submissions without opening the editor or the inbox.
This page explains how to connect, what you can ask for, and what the connector can't do. The technical details of each tool (parameters, logic actions and webhooks) are in Developers and API.
Navigation
- Your connected apps: click your name in the top-right corner (Account settings), then Connected apps (
/Account/Manage/ConnectedApps). - Create an API key: API in the top navigation bar, page API keys (
/api-keys). Admins and above only. - Quick-start guide: the
/claudepage. - MCP server address:
https://anota.cloud/mcp
Key concepts
- MCP (Model Context Protocol): an open standard that lets AI assistants such as Claude connect to applications. The anota connector exposes your forms as "tools" that the assistant calls during the conversation.
- Tool: one specific action the assistant can run in anota, for example
create_formorlist_submissions. anota offers 26. - One-click sign-in (OAuth): Claude or ChatGPT sends you to anota to sign in and approve the connection. You don't copy any key.
- Permissions: what the app can do in the workspace you chose. You pick them when you connect, and they never go beyond what your role allows.
- API key: a credential (
anota_sk_...) that identifies your workspace. It's used by Claude Code and other developer tools, sent on every request as a Bearer token. - Draft / Published: everything the assistant creates or changes goes into the form's draft. It only reaches the public page when the form is published (by you in the editor, or by the assistant with
publish_formif you ask it to).
Connect Claude or ChatGPT
Option A: Claude (claude.ai, desktop and mobile): one-click sign-in from the directory
anota is listed in Claude's connector directory, so you don't need to type any address.
Prerequisites
- An anota account that is a member of the workspace (any role).
- A Claude account.
Step by step
In Claude, open Settings → Connectors, choose the Discover tab, and type
anotain Search connectors. Click the Anota card.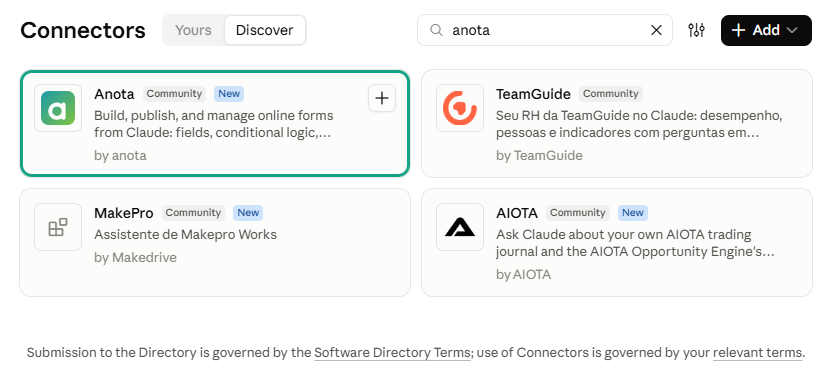 Search the directory for anota.
On the Anota page, click Connect to Claude.
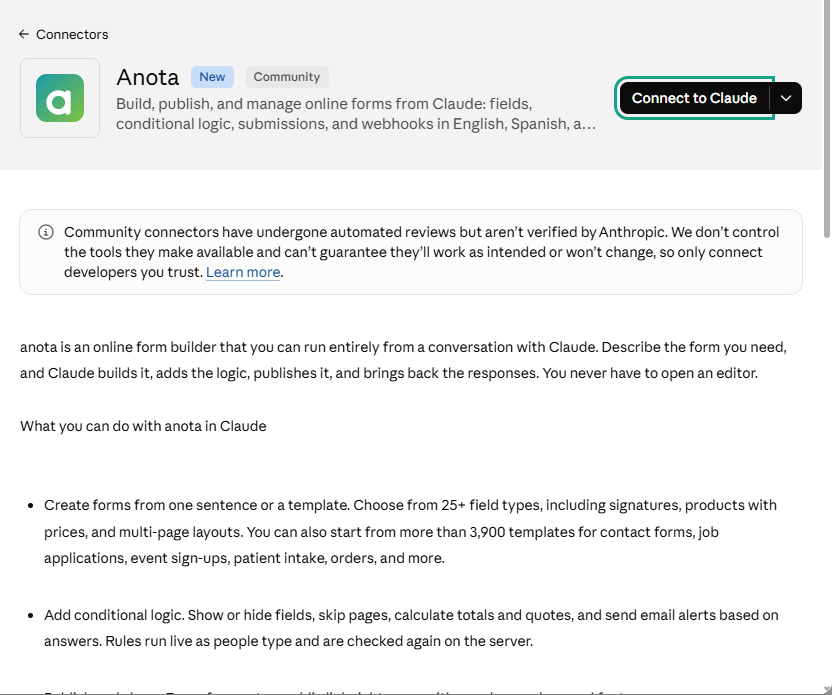 The Anota listing in Claude. The note about community connectors is Claude's own.
anota opens in the same window. Sign in if you aren't already (email and password, Continue with Google, or a passkey). On the Connect Claude to anota screen:
Workspace: choose the workspace Claude will have access to. Each entry shows the workspace name and your role in it. Each connection works with one workspace only.
Permissions: tick what Claude can do:
- View your forms and Templates
- View submissions
- Create, edit, publish and delete forms (Requires Editor or above)
- Create, update and delete submissions (Requires Editor or above)
- Manage webhooks and Email notifications (they send every submission to an external URL or email addresses) (Admins only · off by default)
Everything your role allows is ticked for you, except webhooks and Email notifications, which you have to opt into. Tick it if you want Claude to set up email notifications or webhooks. As the screen says, "Permissions are limited to your role in the chosen workspace: a Viewer only ever grants read access."
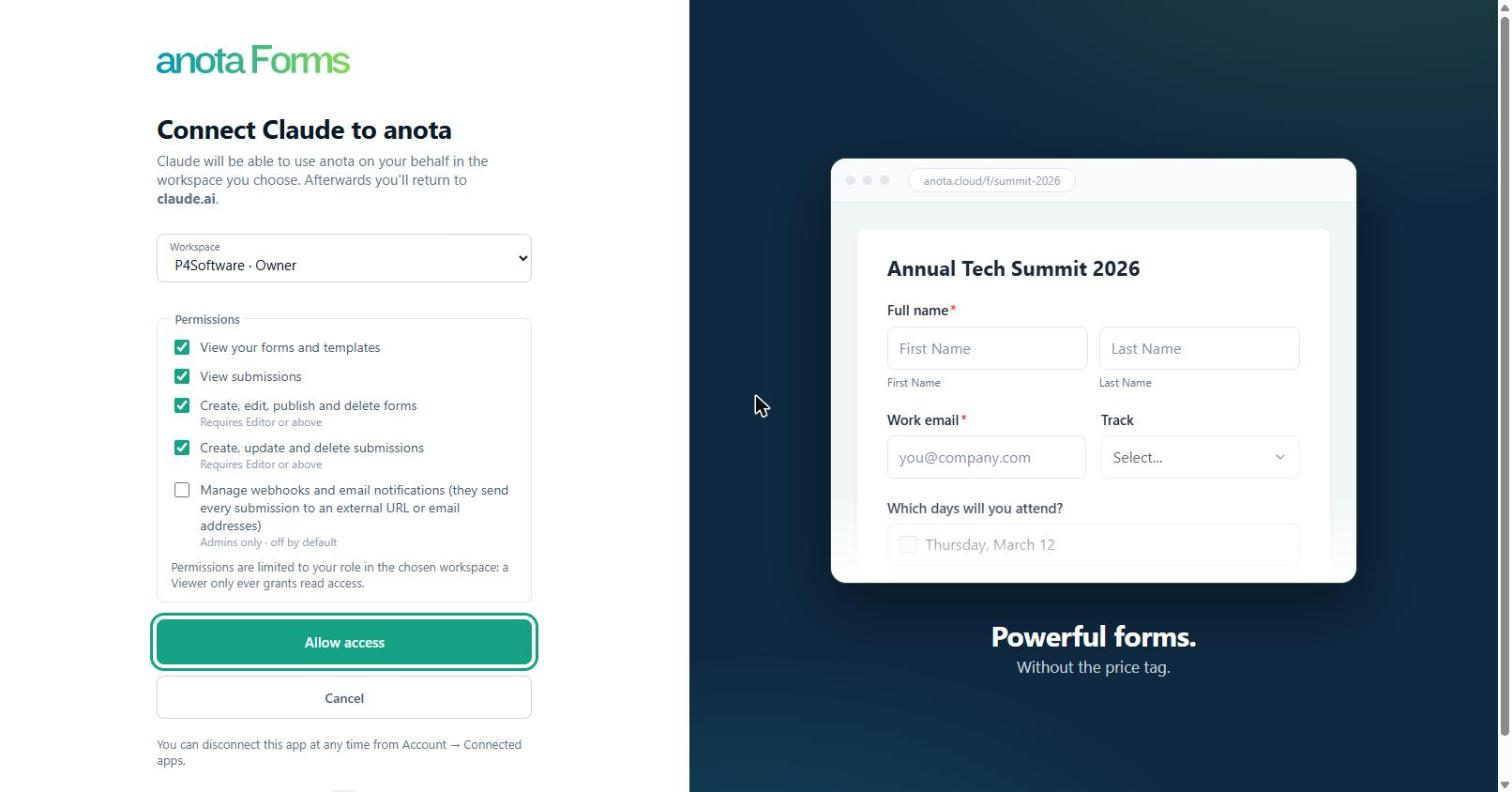 anota's consent screen. Cancel connects nothing.
Click Allow access. You go back to Claude, which shows Connected to Anota. and marks the connector Connected.
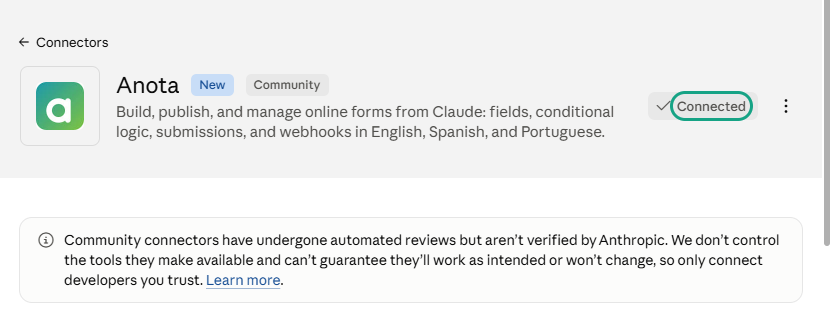 anota is connected.
Start a new chat and ask something, for example "List my anota forms". Claude calls anota and answers with your real forms.
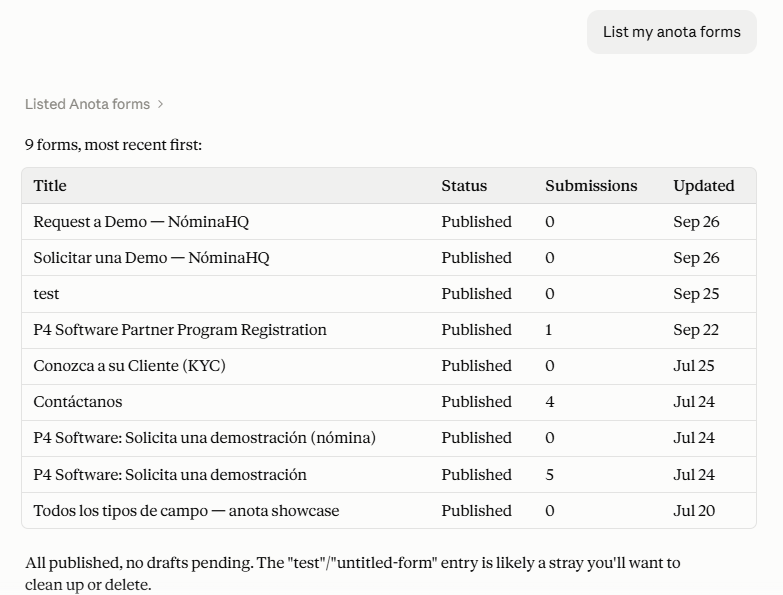 Claude reads your forms through the connector.
Result
Claude only sees the tools that match the permissions you granted. Under Settings → Connectors → Anota → Tool permissions you can choose, per tool, whether Claude may use it freely, must ask you first, or never uses it.
ChatGPT and other assistants: add a custom connector with the address https://anota.cloud/mcp. The sign-in and consent screens are the same as in steps 3 and 4. [TO VERIFY: exact menu path in ChatGPT; custom connectors may require developer mode or a specific ChatGPT plan]
Disconnect an app
You: go to Account settings → Connected apps and click Disconnect next to the app. The page lists each app with its workspace, permissions and the date it was connected. The app loses access immediately; to use it again, connect it again. The consent screen reminds you: "You can disconnect this app at any time from Account → Connected apps."
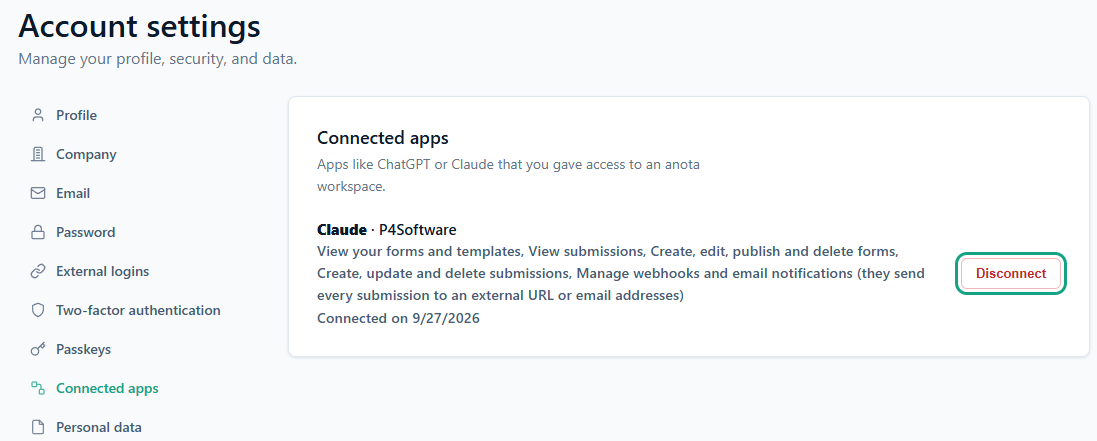 Your Connected apps page in anota. You can also disconnect from Claude, under Settings → Connectors → Anota → Disconnect.
Admins: the API keys page also has a Connected apps section listing every app members connected to the workspace, and admins can disconnect any of them.
If a member leaves the workspace, or the workspace is suspended, their connected apps stop working. If a member's role is lowered, their apps' permissions shrink to what the new role allows, right away.
Option B: Claude Code and developer tools: API key
Prerequisites
- Admin role or above in the workspace (to create the key).
Step 1: Create an API key
Click API in the top navigation bar to open API keys (
/api-keys).Under Create a new key, type a name that identifies it, for example
Claude.Click Create key and copy the full key right away. anota won't show it again.
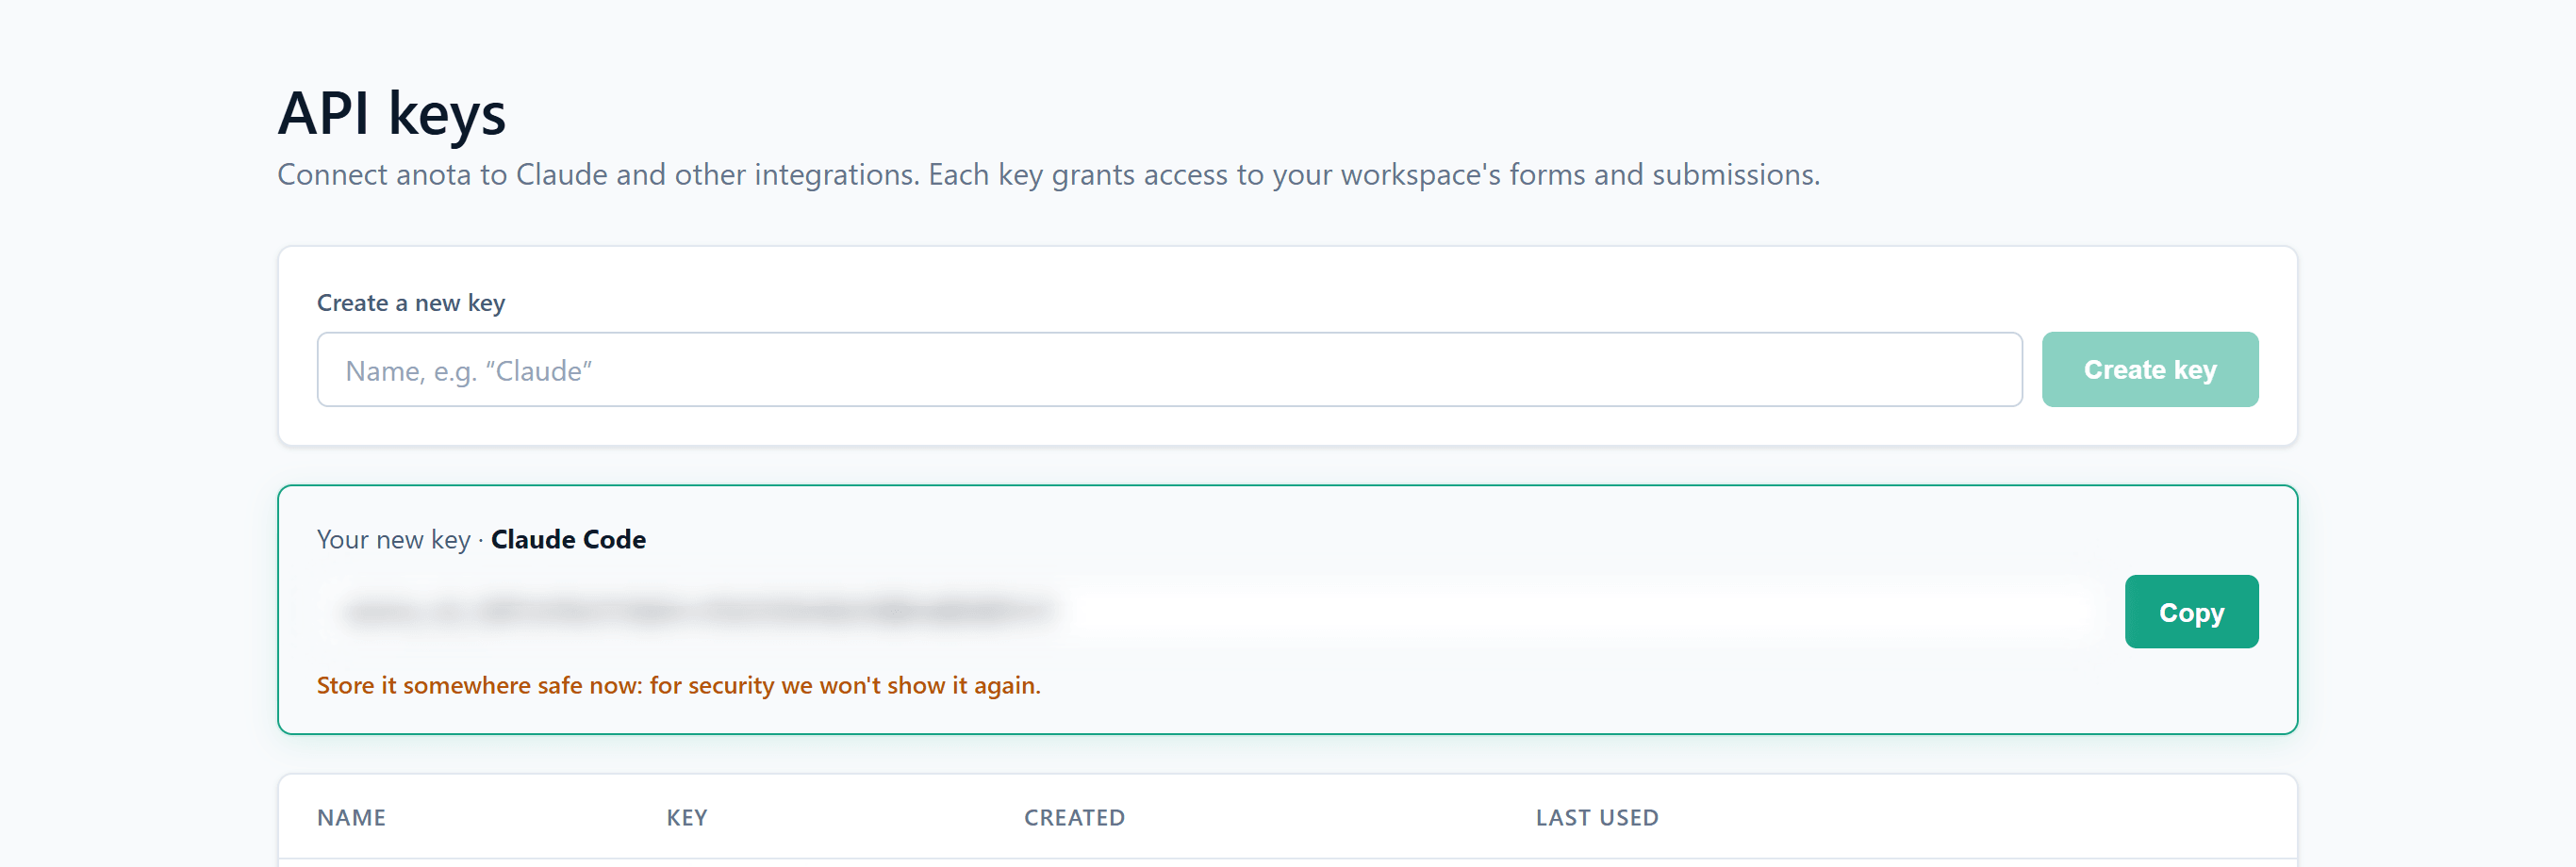 The Your new key panel appears once. The key is blurred in this screenshot.
The detailed steps are in Developers and API.
Step 2: Connect Claude Code
Run this in your terminal (replace the key with yours):
claude mcp add --transport http -s user anota https://anota.cloud/mcp --header "Authorization: Bearer anota_sk_..."
Then restart Claude Code or run /mcp to reconnect. claude mcp get anota should show Connected.
The key always goes in the Authorization header with the Bearer prefix. A header with any other name (for example apikey) is ignored and the connection is rejected.
Result
Claude Code shows the anota connector as connected and can use all 26 tools. Try it with "List my anota forms."
What you can ask for
Create and edit forms
- Create a form from scratch (
create_form): title, intro text and all the fields at once, on a single page. It supports the same Field types as the editor: text, text area, email, phone, number, spinner, full name, address, date, time, appointment, dropdown, single choice, checkboxes, rating, scale, matrix, file upload, signature, products, and layout elements (heading, paragraph, image, divider, section). See Field types. The assistant can add a products field, but you set up the product list itself in the editor. - Field widths: the assistant can place fields side by side with widths of 12 (full), 6 (half), 4 (third) or 3 (quarter) columns.
- Start from a template (
list_templates,create_form_from_template): search the templates catalog in Spanish, English or Portuguese and copy one into your workspace. - Add, edit or delete fields (
add_fields,edit_field,delete_field). - Rename, duplicate or delete forms (
rename_form,clone_form,delete_form). Deleting moves the form to the Trash; submissions are kept. - Review a form (
get_form,list_forms): see its full structure, its rules and its public URL. - Choose the PDF template (
set_pdf_template) used when exporting submissions to PDF. - Publish (
publish_form): make the form public, or push the draft's changes to the public version. Existing submissions are kept.
Conditional logic
With add_logic_rules, edit_logic_rule and delete_logic_rule, the assistant can create the same rules as the editor's Conditions panel (see Conditional logic):
- Show, hide, require, make optional, enable or disable a field based on answers.
- Skip to a page.
- Calculate a number field with a formula (for example, an order total).
- Copy one field's answer into another.
- Send a copy of the notification to a specific email address when the condition is met.
- Show a different thank-you message, or redirect to a URL after submit.
Rules can also be changed on forms that are already published; the changes stay in the draft until you publish again.
Submissions
- Read submissions (
list_submissions,get_submission): list a form's submissions (with a status filter and paging) and read any of them in full, with readable labels. - Statistics (
submission_stats): total submissions, count per status, submissions per day for the last 7 days, and paid/unpaid counts for payment forms. - Triage (
set_submission_status): mark as New, Read, Flagged or Spam. Only the label changes; answers are never modified. - Create a submission (
create_submission): record a submission on a published form, validated the same way as a respondent's (notifications and webhooks included). Useful for test data or for entering responses received some other way. - Delete a submission (
delete_submission): permanent, together with its files. It can't be undone.
Integrations (webhooks)
With add_webhook, list_webhooks and delete_webhook, the assistant can have every new submission of a form sent to an HTTPS URL on your system (a CRM, a spreadsheet, an automation flow). Each delivery is signed so your system can verify it came from anota. With one-click sign-in, this needs the Manage webhooks and Email notifications permission, which only Admins can grant. Details in Developers and API.
Email notifications
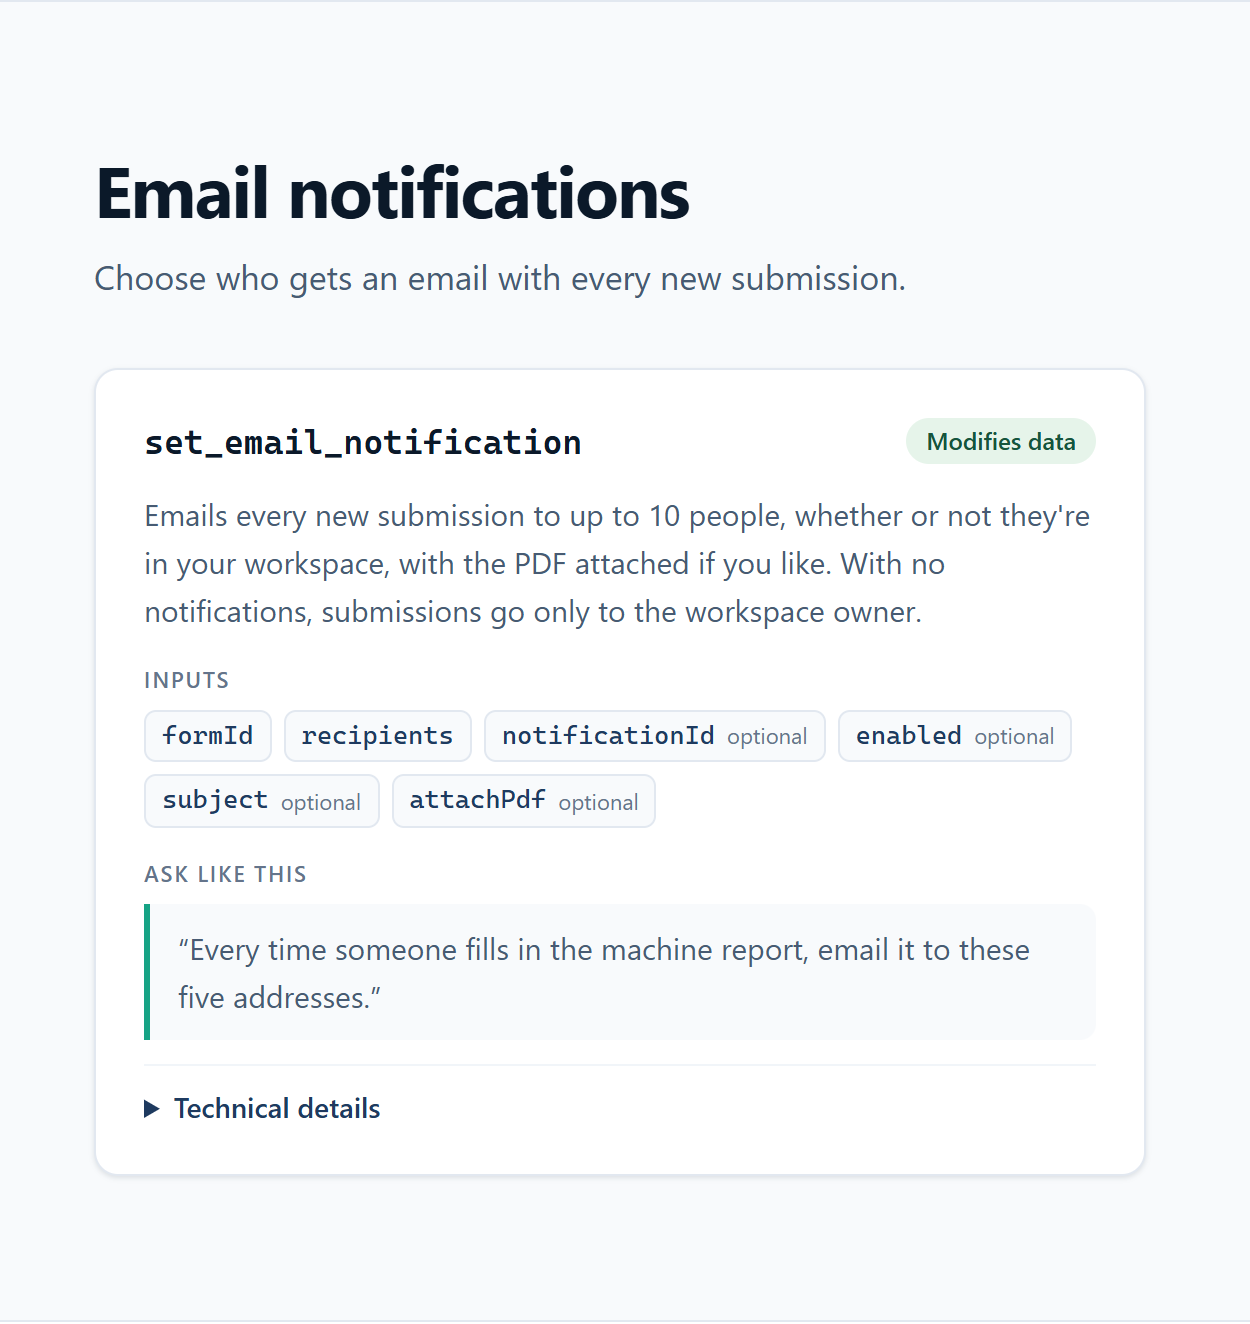
With set_email_notification, the assistant can create or update one of a form's email notifications: every new submission is emailed to the recipients you choose (1-10 addresses, any email address, not only workspace members), as a table of the answers, optionally with the submission PDF attached. Ask it to add a new notification, update an existing one (using the id from get_form), or pause one without losing its recipients. While a form has no enabled notification, anota emails the workspace owner by default; as soon as an enabled notification exists, include the owner in its recipients if they should keep getting the emails. Like webhooks, this needs the Manage webhooks and Email notifications permission, which only Admins can grant. The connector doesn't set up autoresponders (the email sent back to the respondent); those are still configured only in the editor.
 The
The set_email_notification tool as listed on anota's Claude tools page.
Ideas to get started
- "Create a registration form for partner program members with company details, contact, documents and a signed declaration."
- "In that form, if they answer Yes to the politically exposed person question, show the details field and make it required."
- "When someone answers Yes to sanctions, send a copy to compliance@mycompany.com."
- "Summarize this week's submissions and flag the ones that didn't attach documents."
- "Find a customer satisfaction survey template in English and copy it to my account."
- "Send every new submission of my order form to this webhook: https://..."
- "Email every submission of the machine report to these five addresses: safety@mycompany.com, ops@mycompany.com, quality@mycompany.com, plant-manager@mycompany.com and maintenance@mycompany.com."
What the connector can't do
Do these in the anota app:
- Create or revoke API keys, manage team members and roles, or change the plan and billing.
- Change the form's theme, colors or branding (Theme and appearance).
- Add translations to a multilingual form.
- Create new pages:
create_formcreates a single-page form andadd_fieldsadds fields to the end of the last page. Split the form into pages in the editor. - Restore a form from the Trash.
- Set up autoresponders, the email sent automatically back to the respondent (Email notifications). It can set up the form's Notifications (
set_email_notification) and add conditional email copies with logic.
Important rules
- Fields lock when you publish. After the first publish, the assistant can only add fields; it can't edit or delete existing ones. To change them, ask it to duplicate the form with
clone_form: the clone is a new draft with every field editable. See Developers and API. - Nothing publishes on its own. What the assistant creates stays a draft until you publish it, or the assistant does at your request.
- An API key gives full access to the workspace. Anyone with the key can use every tool on all of that workspace's forms and submissions. Don't share it; if it's exposed, revoke it on the API keys page and create a new one. With one-click sign-in, by contrast, the app only has the permissions you chose.
- Privacy. A connected app only receives the forms and submissions it requests, limited to the workspace and permissions you granted. What the app then does with that data is governed by its provider's privacy policy. See the "Connected apps, API keys, and webhooks" section of the anota privacy policy.
Roles and permissions
| Role | Connect with one-click sign-in | Maximum permissions when connecting | Create an API key |
|---|---|---|---|
| Owner / Admin | Yes | All, including webhooks and Email notifications (opt-in) | Yes |
| Editor | Yes | View and edit forms and submissions | No |
| Viewer | Yes | View forms and submissions only | No |
Troubleshooting
| Symptom | Likely cause | Resolution |
|---|---|---|
| Claude shows an error like "Couldn't register with Anota's sign-in service" | The connector URL isn't exactly https://anota.cloud/mcp |
Use exactly https://anota.cloud/mcp, with no trailing slash and no other subdomain. |
| The consent screen says "You don't belong to any active workspace, so there is nothing to connect." | Your account isn't a member of any active workspace | Ask a workspace admin to invite you, then connect again. |
| The consent screen says "Choose at least one permission your role allows in that workspace." | No permission was ticked, or only ones your role can't grant | Tick at least one permission your role allows and click Allow access again. |
| The app can't create or edit forms | You didn't tick that permission when connecting, or your role is Viewer | Disconnect the app under Connected apps and connect it again with the permission ticked. If you're a Viewer, ask an admin to change your role. |
| The assistant says it can't set up Email notifications | The Manage webhooks and Email notifications permission wasn't ticked when connecting, or your role isn't Admin or Owner | Disconnect the app under Connected apps and connect it again with that permission ticked. If your role is below Admin, ask an admin to do it or to raise your role. |
| The app suddenly stopped working | The connection was disconnected, you left the workspace, or the workspace is suspended | Connect the app again. |
| Connecting fails with a 400 error ("Error POSTing to endpoint") | The connector URL is wrong (for example /mcp-server) |
Use exactly https://anota.cloud/mcp. |
| Connecting fails with a 401 error | The key isn't in the Authorization: Bearer ... header (for example, an apikey header was used), or the key was revoked |
Send Authorization: Bearer anota_sk_.... If the error persists, the key no longer exists: create a new one on the API keys page. |
| The assistant doesn't see the forms you expected | The key, or the workspace you chose when connecting, belongs to another workspace | Create the key in the right workspace, or disconnect the app and connect it again choosing the right workspace. |
| The assistant can't edit or delete a field | The form has been published; its existing fields are locked | Ask it to add new fields, or to duplicate the form with clone_form and edit the clone. |
| The assistant rejects a field width | Only widths of 12, 6, 4 or 3 columns are supported | Ask for widths that add up to 12 per row, for example 6 + 6 or 4 + 4 + 4. |
| The assistant's changes don't show on the public page | Changes stay in the draft | Publish the form from the editor, or ask the assistant to publish it. |
Related features
- Developers and API: keys, REST API, technical tool reference and webhooks
- The form editor
- Conditional logic
- Templates
- View and manage submissions
- Publish and share
- Profile and security
Was this page helpful?