 P4 Software
/
logisticaHQ-en
P4 Software
/
logisticaHQ-en
P4 Software
/
logisticaHQ-en
P4 Software
/
logisticaHQ-en
3PL billing turns the work your warehouse does for each client into an invoice. You describe how a client is billed once, in a billing profile. LogisticaHQ then reads the client's storage and activity for a period, applies the profile's rules, and creates an invoice that you review, post, and send.
All 3PL billing screens are under Setup > 3PL: Clients, Billing profiles and Invoices.
A client is a company whose inventory you store and handle. Clients are kept under Setup > 3PL > Clients. The client record matters to billing in three ways:
The client screen has no billing settings of its own. A client is billed through the billing profiles that point to it.
A billing profile is the rate card for one client. It holds:
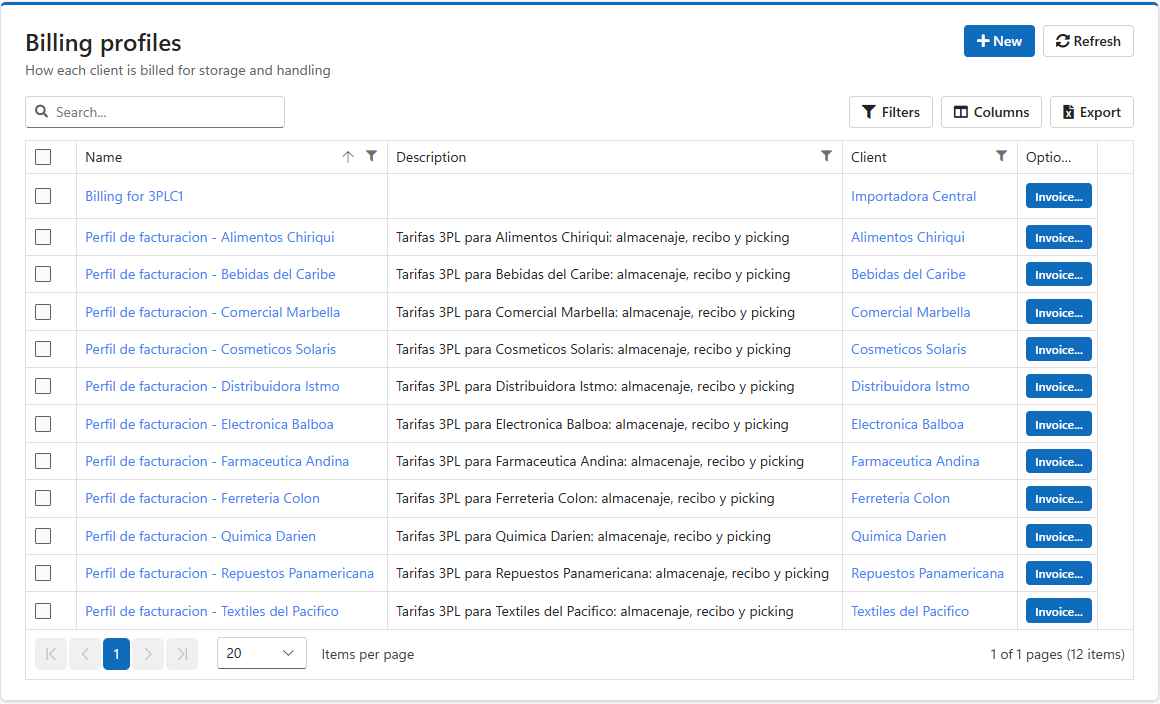
A client can have more than one profile, for example one for storage and one for transport. You can clone a profile, with all its rules, onto another client.
Each rule adds one or more lines to the invoice. Every line has an Item, a Description, a Rate and a Quantity, and its total is Rate × Quantity. There are three rule types.
| Type | What it bills | Lines produced |
| Flat | A fixed amount every invoice, such as a monthly account fee. | One line: the rule's name as Item, the rule's description, the rule's rate, and a quantity of 1. |
| Storage | Inventory held during the period, measured per day. | One line for the whole rule, or one line per bin, license plate (LPN) or SKU, depending on Break invoice lines. |
| Service | Anything you can count with a SQL query: receiving, picking, shipping, returns, value-added services, minimums and surcharges. Handling charges are built with Service rules. | One line for each row the query returns with a quantity greater than zero. |
Rules run in alphabetical order of their names, and the invoice lines follow that order.
A Storage rule measures inventory with one of these calculation methods. The rule's rate is charged per unit of the measure, per day.
| Calculation method | What is counted | Rate is per |
| Flat | One charge if the client had any stock in the selected zones during the period. | Period |
| Any bin | Days each bin held the client's stock. | Bin-day |
| Pickable bin | As Any bin, limited by default to zones that hold stock by product. | Bin-day |
| Overstock bin | As Any bin, limited by default to zones that hold stock by LPN. | Bin-day |
| Lpn | Days each license plate (pallet) held the client's stock. | LPN-day |
| Each | Units on hand, day by day. | Unit-day |
| Cube | Units on hand multiplied by each product's unit cube. | Cube-day |
| Weight | Units on hand multiplied by each product's unit weight. | Weight-day |
You can limit a Storage rule to certain zones and to all products, a product category, or a list of SKUs.
Additional charges are named percentages kept on the profile, for example ITBMS at 7%. A charge applies only to the lines that name it. Flat and Storage rules name their charges in the rule's Additional Charges field. Service rules name them in the query's AdditionalCharges column. A discount is entered the same way, with a negative percentage.
LogisticaHQ has no separate tax or currency field. Taxes such as the Panamanian ITBMS are set up as additional charges. Amounts are shown in the $ format.
The invoice totals work like this:
Every invoice covers a period from a start date up to, but not including, an end date. The end date is the first day of the next period. For example, the September 2026 invoice runs from 2026-09-01 to 2026-10-01.
A profile can generate invoices automatically on one of three cycles:
An invoice has one of two states:
Invoice numbers are the invoice number prefix followed by a seven-digit sequence, for example INV-0000027.
When an invoice is created, LogisticaHQ also saves a snapshot of the client's storage movements and service activity for the period. This snapshot is saved only if record capture is turned on (see Setting Up 3PL Billing). Storage rules and many Service rules read this snapshot. The PDF also prints it as an annex, so the client can see what was billed.
Client portal users with access to invoices see an Invoices page. It lists only Posted invoices, and they can open or download each one as PDF or Excel. Draft invoices are never shown in the portal.
Was this page helpful?