 P4 Software
/
logisticaHQ-en
P4 Software
/
logisticaHQ-en
P4 Software
/
logisticaHQ-en
P4 Software
/
logisticaHQ-en
Every label LogisticaHQ prints, from a bin label to a pallet label or a carton label, is drawn from a template: a design that says where each barcode, text and logo goes and which data fills it. LogisticaHQ comes with a ready-made set, and you can change them, add your own, and set up compliance labels that print automatically for particular customers.
Open Setup > Printing > Templates.
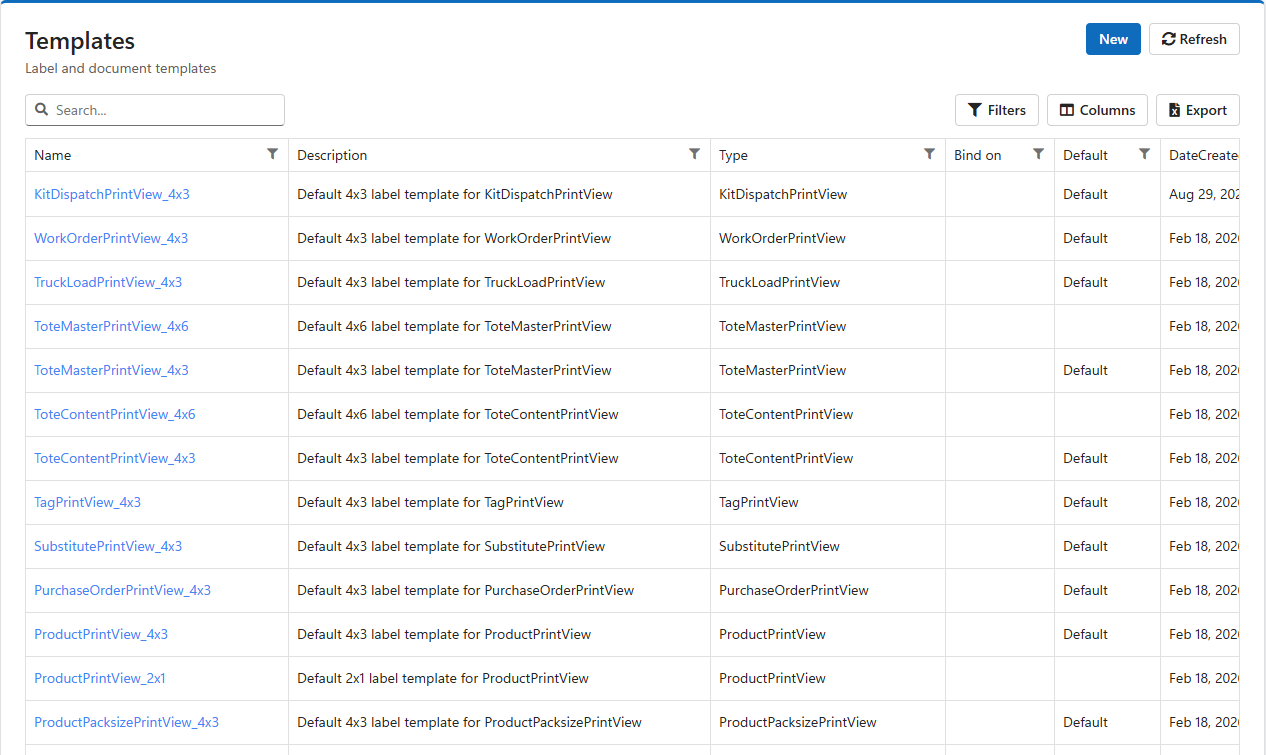
Every company starts with 31 templates, most in several sizes: 2×1, 4×3 and 4×6 inches. The name says which label and which size, for example BinPrintView_4x6. The 4×3 template of each type starts as its default.
| Label | Sizes |
| Bin, License plate (pallet LPN) | 2×1, 4×3, 4×6 |
| Product, Product pack size | 2×1, 4×3 |
| Dock door, Pallet, Tote master (carton), Tote content | 4×3, 4×6 |
| Extended product, Substitute, Tag, Print note | 4×3 |
| Purchase order, Customer return, Truck load | 4×3 |
| Letdown ticket, Pack size breakdown ticket, Work order, Production order, Production product | 4×3 |
| Kit dispatch (surgical trays) | 4×3 |
Each kind of label (the template's Type, the same list as the printer roles on the Printers screen) prints with the one template marked Default for that type. The other templates of the same type are kept but not used. To print bin labels at 4×6 instead of 4×3, make BinPrintView_4x6 the default.
If a type has no default template, printing that label fails with No default templates defined. Keep one default for every type you print.
Click a template's name to open it. Changes save as you type; there is no Save button.
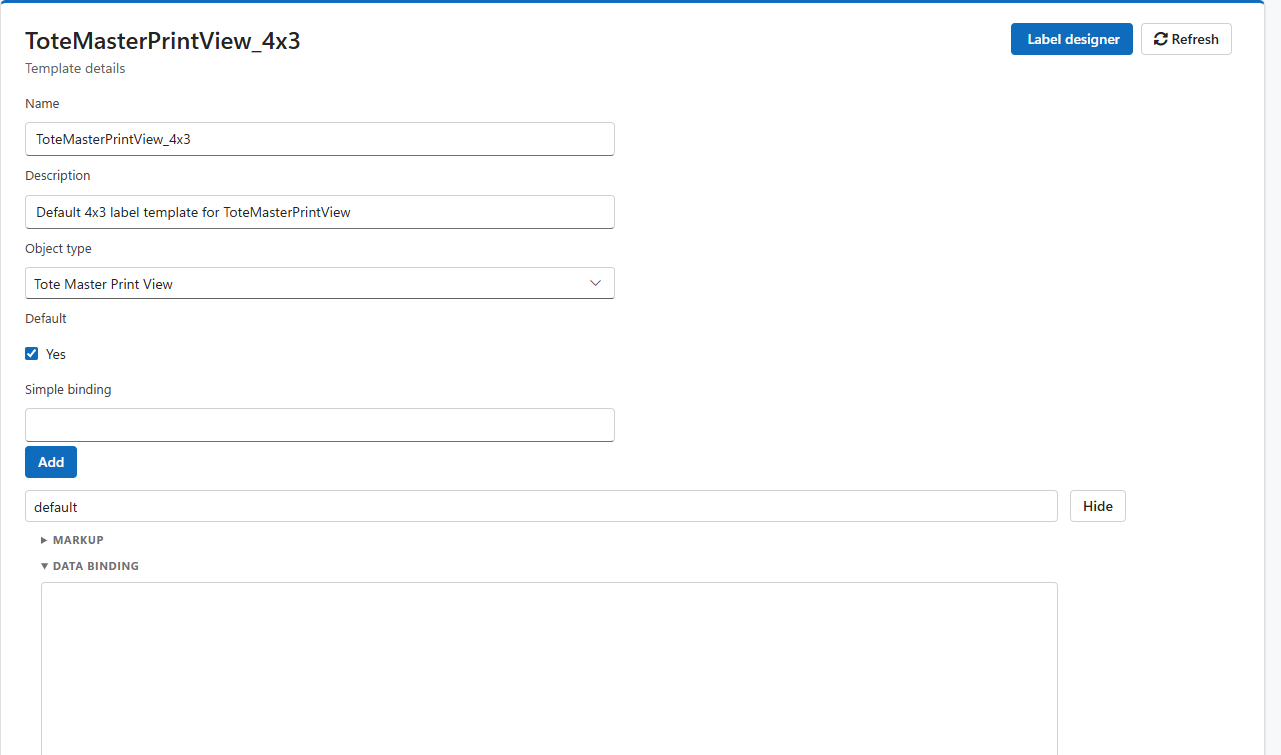
| Field | Meaning |
| Name, Description | How the template is listed. |
| Object type | Which kind of label it is. Fixed when the template is created. |
| Default | Ticked for the template that prints for this type. Ticking it clears Default on the type's other template. |
| Simple binding (Bind on) | Empty for an ordinary template. For compliance labels, the field of the label's data that decides which design prints (see below). |
A markup is one design of the label: the layout itself. A template has one markup, or several when it holds compliance designs. Each markup has:
default for the design used normally. For a compliance design, the values of the Bind on field it is for, separated by commas.@Id for the record being printed. Leave it empty to use the label's standard data.Large retailers often require their own carton or pallet label. LogisticaHQ picks the right design automatically, per label, without anyone choosing it:
default.When a carton label prints, LogisticaHQ reads the customer code from the label's data. If a markup lists that code, its design prints; otherwise the default design prints.
Administrators open the Label designer from a template's details. It is a visual editor: drag text, barcodes, lines, boxes and images onto the label, set each item's data field, font and size, and save.
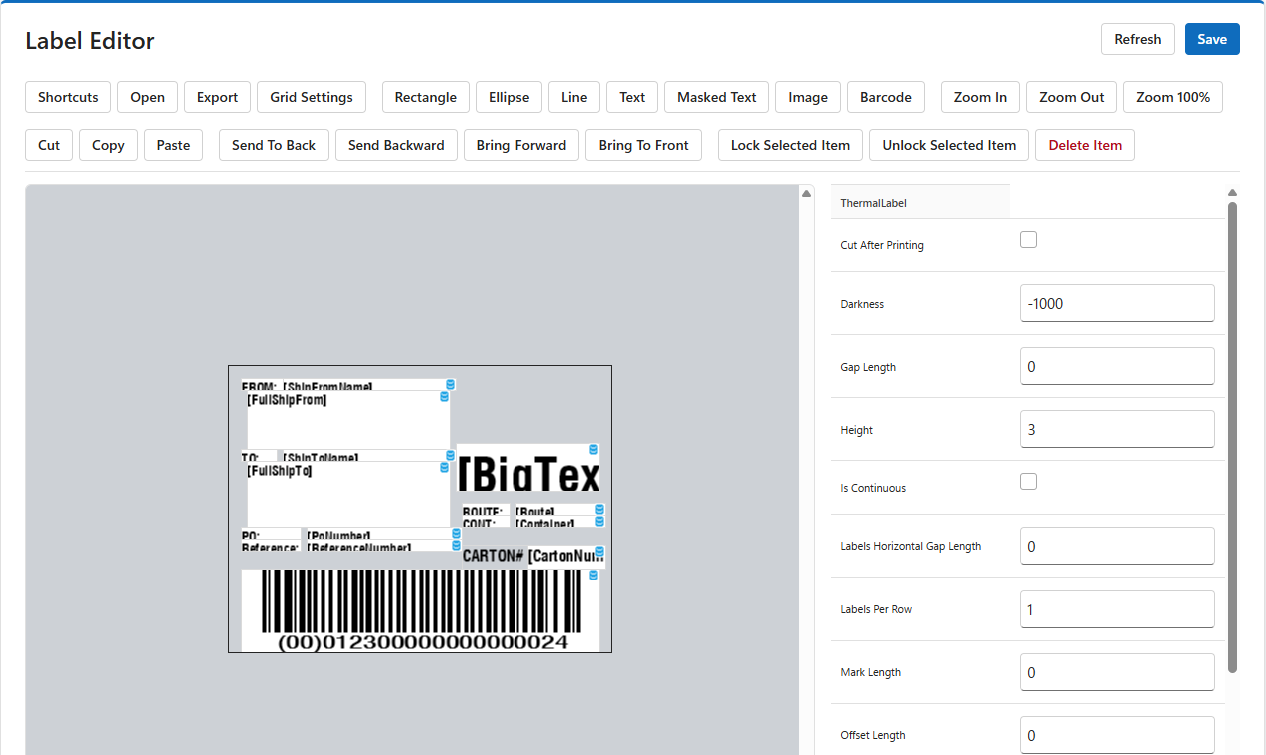
Your LogisticaHQ partner can design or adjust labels for you, including retailer compliance labels.
Was this page helpful?