 P4 Software
/
logisticaHQ-en
P4 Software
/
logisticaHQ-en
P4 Software
/
logisticaHQ-en
P4 Software
/
logisticaHQ-en
A module is a permission profile. It decides two things for every user it is assigned to: which menu they see, and which parts of LogisticaHQ they are allowed to use. You create one module per role, for example Receiver, Picker, Office or Handheld, and assign each user the module that fits their job.
Administrators are not limited by modules. A user whose type is Administrator always sees the full menu and may use every screen. Modules apply to every other office and handheld user. Client portal users and LogisticaHQ Field users have fixed permissions of their own and do not use modules.
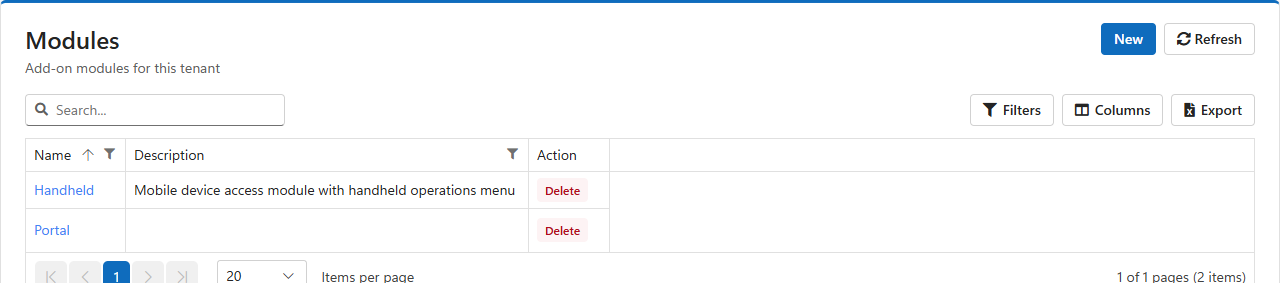
Open Setup > System > Modules. The list shows every module with its description. Click a module's name to open it, New to create one, or Delete on a row to remove one.
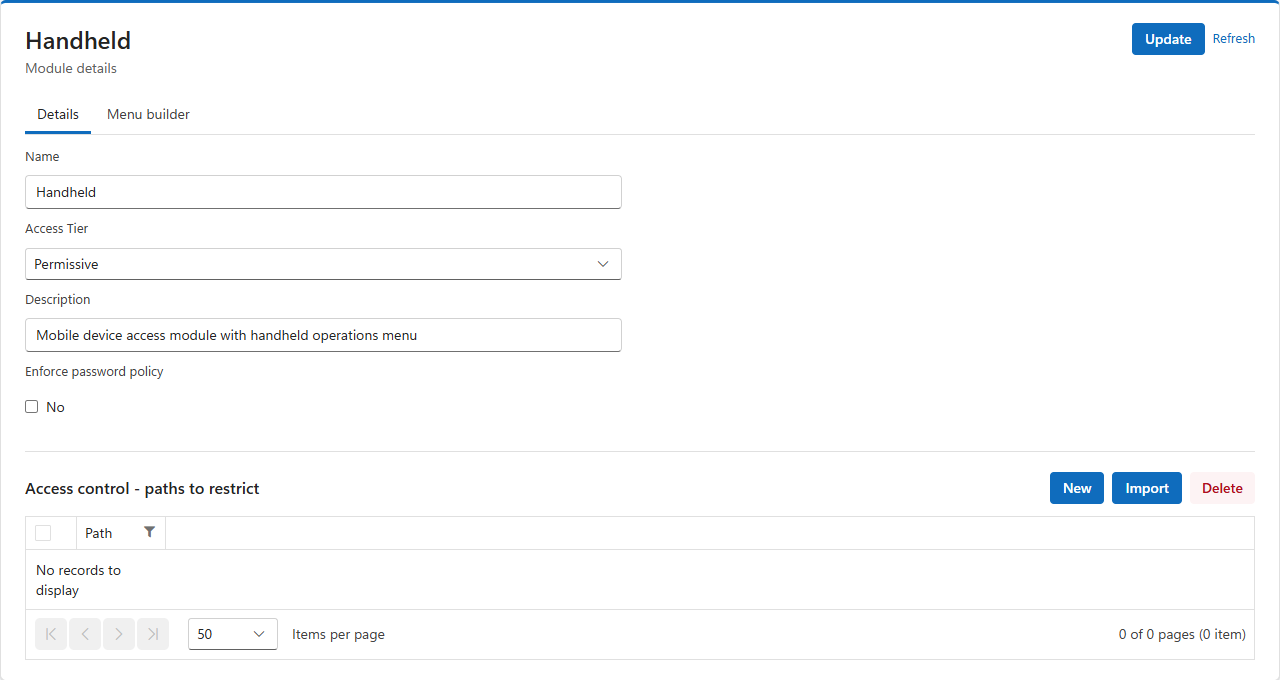
Under the details, a list of access control paths limits which parts of the system the module's users may reach, over and above what their menu shows. A path names a part of the LogisticaHQ server, for example /api/PickTicketApi/% for everything to do with pick tickets. The Access Tier decides how the list is read:
| Access Tier | The list is titled | Meaning |
| Permissive | Access control - paths to restrict | Users may use everything except the paths listed. An empty list restricts nothing. Use it for trusted roles where you only want to block a few areas, such as database backups or configuration. |
| Restrictive | Access control - paths to allow | Users may use only the paths listed, and are refused everything else. Use it for tightly limited roles, such as a handheld-only operator. |
Paths are matched the same way as lot patterns: % stands for any number of characters and _ for exactly one, and several paths can be separated with commas. When a user reaches a path their module does not allow, LogisticaHQ refuses the request with a message naming the path.
Paths are saved as soon as you add, import or delete them: they do not wait for Update.
Test a Restrictive module before you assign it. A Restrictive module refuses everything that is not listed, including screens its users need behind the scenes, such as looking up products or printing. Sign in as a test user with the module and run through the user's daily tasks before rolling it out.
The Menu builder tab has two trees. Available menu on the left is the full LogisticaHQ menu. Module menu on the right is the menu this module's users will see.
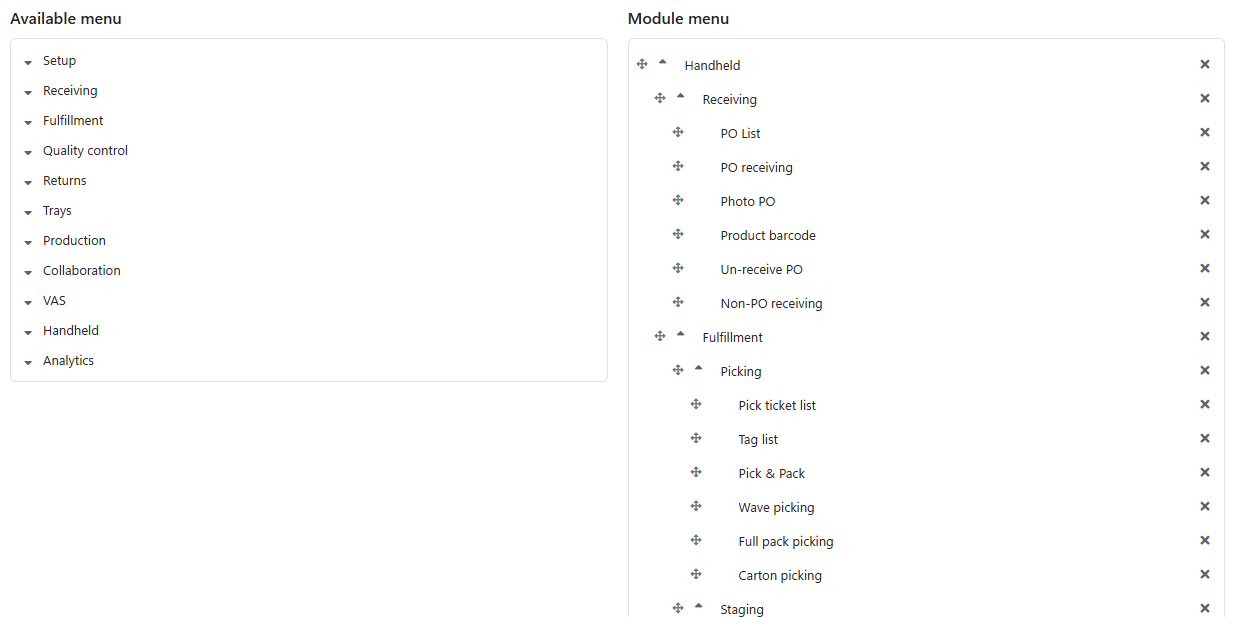
Click Update to save. Users see their new menu the next time they sign in.
The menu decides what users see. The access control paths decide what they may use. Hiding a screen from the menu does not stop someone who knows its address, so protect sensitive areas with paths as well.
Open the user in Setup > System > Users and switch on the module in the user's Modules list. See Users.
Was this page helpful?