 P4 Software
/
logisticaHQ-en
P4 Software
/
logisticaHQ-en
P4 Software
/
logisticaHQ-en
P4 Software
/
logisticaHQ-en
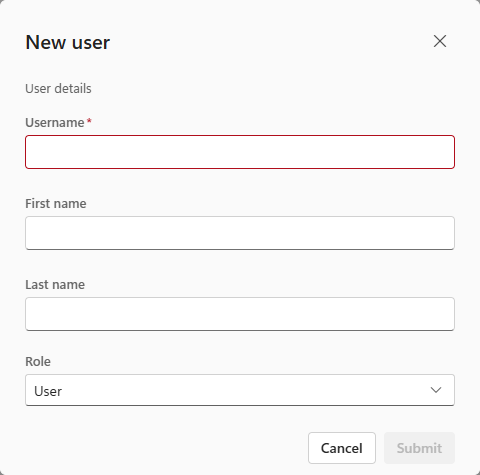
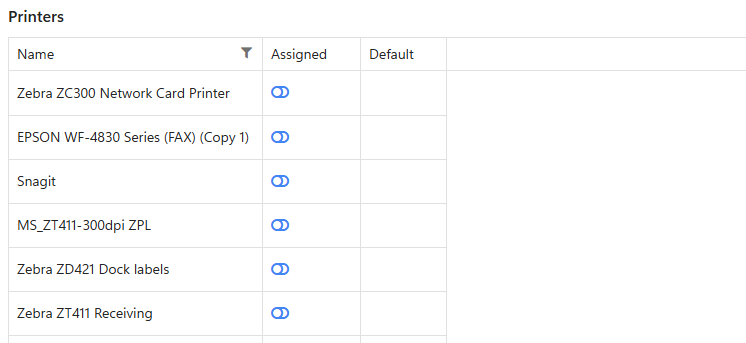
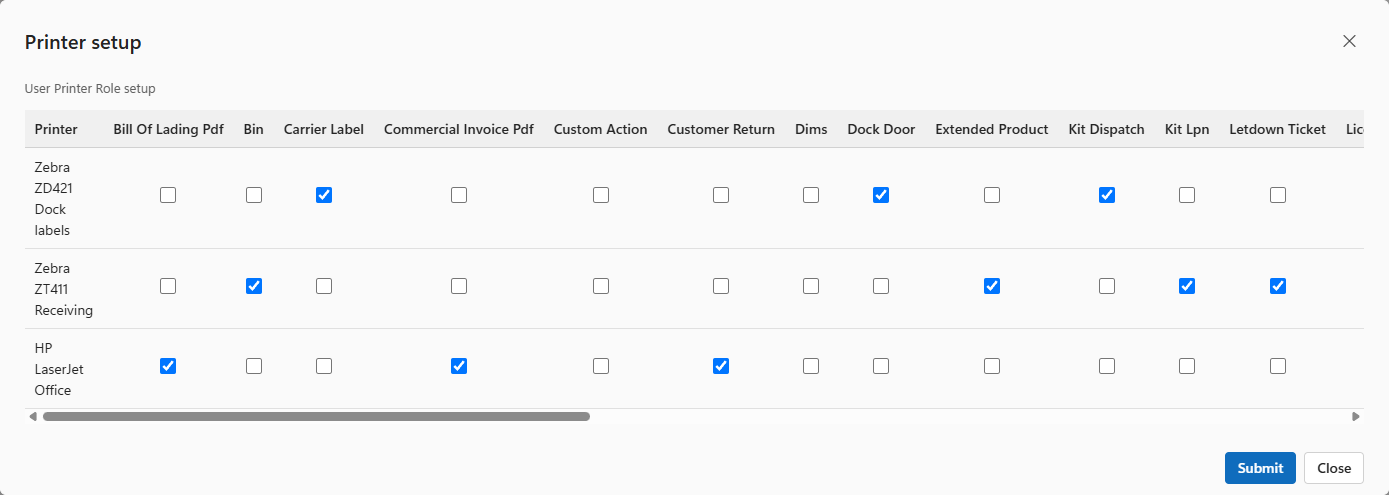
Everyone who works in LogisticaHQ, in the office or on the warehouse floor, signs in with their own user. A user decides what a person can see and do (their role and module), which clients' stock they work with, which zones they may handle, which printers print their labels, and their language and time zone. This page covers creating users and every setting on a user's profile.
| Role | Who it is for |
| Administrator | People who run the system. They see the full menu and every screen, whatever module they have, and can change settings, users and permissions. |
| User | Office and floor staff. What they see and may use is set by their module. See Modules and permission profiles. |
| PortalUser | People from a 3PL client who use the client portal to see their own stock, orders and invoices. Created from the client. See Clients. |
| FieldUser | People who use the LogisticaHQ Field phone app for surgical trays. They take no license seat and can only use the Field app. |
Your license sets how many users can be signed in at the same time. See Tenant. Each person can be signed in on one device at a time: signing in somewhere else ends their other session.
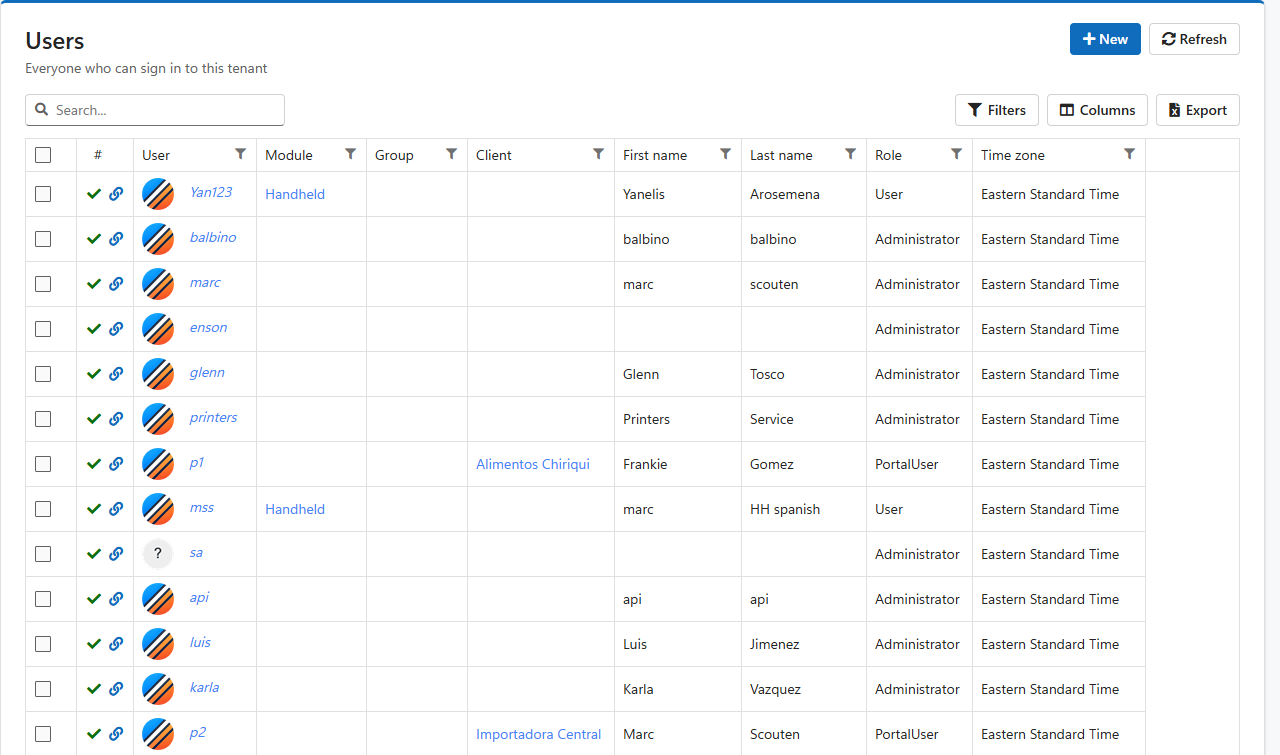
Open Setup > System > Users. The list shows every user with their module, group, client, name, role and time zone.
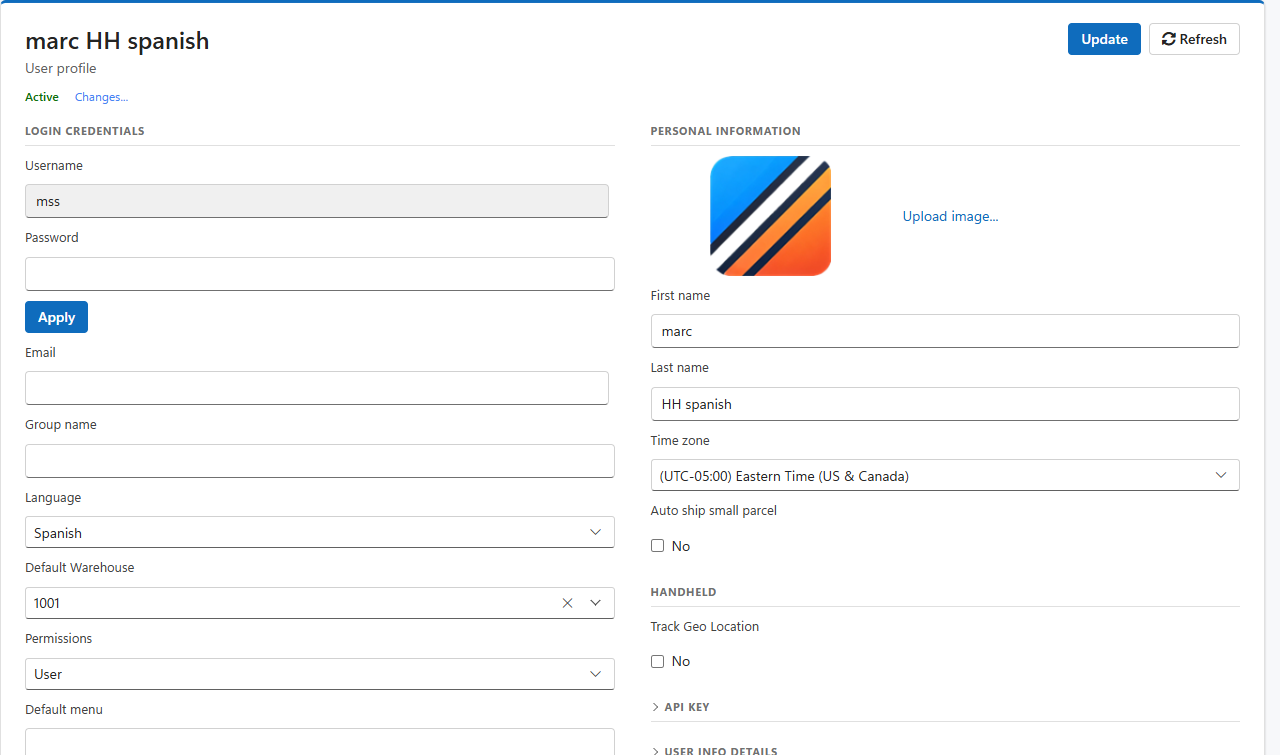
| Field | What it does |
| Username | The name the person signs in with. It cannot be changed once the user exists. |
| Password | Type a new password and click Apply to set it straight away. Or use Send password reset email, which emails the person a link to choose their own. The password must follow the password policy when their module enforces it. See Modules and permission profiles. |
| Where password resets and LogisticaHQ notifications for this person are sent. | |
| Group name | A label that groups users, for example a shift or a team. It appears in the user list and can be used to filter it. |
| Language | The language the person works in, on the web and on the handheld. Inherit uses the company language. |
| Default Warehouse | The warehouse the person works in by default. |
| Permissions | The role: Administrator or User. |
| Default menu | The screen the person lands on after signing in. Leave it empty to use the standard start screen. |
Open API KEY to give this user a key for connecting another system to LogisticaHQ through the REST API. The system then acts with this user's permissions. Generate new key creates one and shows it. Copy it right away. Clear API key revokes it. See REST API.
Free fields, User Info 1 to User Info 10, for anything your company wants to record about a user, such as an employee number.
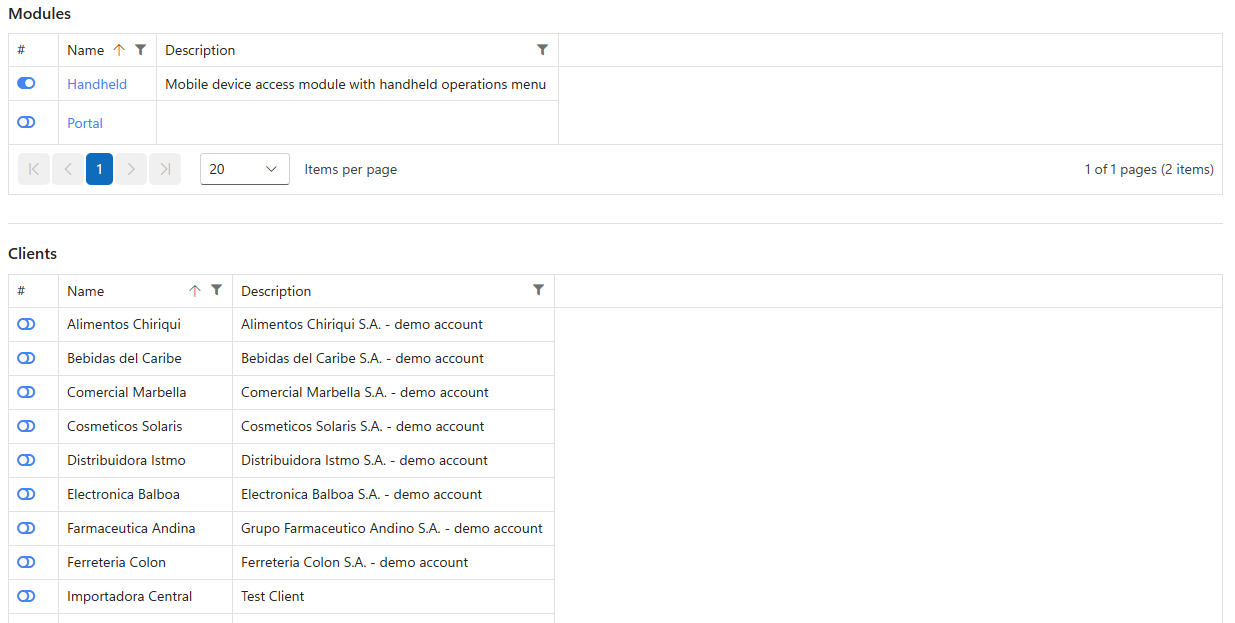
Switch on zones to limit where this person may handle stock. A person with zones assigned can move, pick and count stock only in those zones, and is refused anywhere else with a message naming the zone. A person with no zones assigned can work in every zone.
When someone leaves, deactivate their user instead of deleting it: their history, such as receipts, picks and counts, stays linked to their name, and they can no longer sign in. At the top of the profile, under the name, the word Active shows the user's state. Click it to switch the user to Inactive. The change is saved at once. Click Inactive to reactivate them. Changes beside it shows the history of changes to the user.
Was this page helpful?